Regardless of what they are riding, every cyclist has a love-hate relationship with the wind. The gusting atmosphere can have a significant affect on your forward progress either to the positive or the negative, and often both across the course of a given ride. If you ride into the colder seasons, it can also provide a biting chill that you have to bundle against to keep your extremities safe. Out here on the northern Illinois open prairie we have that wind in abundance year round, but particularly in the winter and spring months.
One of the benefits a recumbent trike has over a standard upright is that it provides a more favorable profile to that wind. I realized fairly early on, when comparing my first trike - a Catrike Pocket - to riding our upright Schwinn Mountain Bike in the snow and cold, that when the wind was blowing and cold, it was just better to be lower down and out of the wind.
But while they are indisputably better in terms of aerodynamics, they are not perfect. A strong enough wind can still push a recumbent trike around, and in the winter your feet, for example, are out in front of you, right at the front end of the wind you are creating with your own movement. But there are ways to further enhance the aerodynamic profile of one’s Human Powered Vehicle.
Enter: The Fairing
In simplest terms, a fairing is essentially a windshield built to improve the aerodynamic profile of a machine - human powered or otherwise. You’ve probably seen them on motorcycles (but may have just thought of them as windshields - I know that I did), and they’ve been applied to all sorts of other machines, including recumbent bikes and trikes.
In addition to the potential aerodynamic benefits - improving speed, or at least decreasing the effort needed to work against the atmosphere - they also provide some weather protection. Moving the wind around you in the winter means less wind chill effect on your body, and in rain and snow, being at least partially covered means less moistening from the elements. All of which is to say that getting one for my Catrike Expedition has been on my mental list for some time.
The Search
I’d started looking for a fairing in earnest in the winter of 2020-2021, but it didn’t work out financially (this is not an impulse-buy level of accessory). This winter proved to be more amenable, and I decided to go ahead and pull the trigger.
…and what I quickly realized is that my decision to move forward wasn’t going to be the only factor in this scenario. The ongoing supply chain issues and the Great Resignation that we are experiencing appears to have had an affect on the availability of fairings in general. As best I can tell there are currently two main makers for these items for recumbent trikes in the US, and contact with both found that they were currently not available.
This past summer I ran into a similar issue when I wanted to get a chain gobbler for MLW’s Pocket - I had money in hand, but they were listed as out of stock on the manufacturer’s websites. Back then I put in a request to be notified when it came back into stock, and after waiting several weeks, it occurred to me to check with some of the bike shops that sell recumbent trikes to see if they might have them in stock. That worked - the Hostel Shoppe in Stevens Point Wisconsin did, in fact, have one. I ordered it up, and had it a few days later.
Given that success then, I decided to try it again, and found that both Utah Trikes and the Hostel Shoppe (again) had them in stock. I’ve had good luck with both companies, but I decided to go with the Hostel Shoppe simply due to proximity. Stevens Point is a few hours to my north, while Springville, UT, is half a country away - I was hoping it being closer would get it to me sooner.
Windwrap WINTR Fairing
There are a couple of different types of fairings. Some of them are small affairs that mount out on the front of the machine and direct wind away from your feet - which would provide some decreased chill in the winter. But I wanted a more full-body fairing, to provide a greater aerodynamic benefit and to get some additional weather protection. Both bike shops had only one option available that met this description, and that was the Windwrap WINTR fairing by TerraCycle.
Now, TerraCycle makes some great products, a couple of which I already own, including the aforementioned chain gobbler as well as their Adjustomatic Bottle Mount. So, while it would have been nice to have some additional options, being “stuck” with one of their products was hardly a hardship.
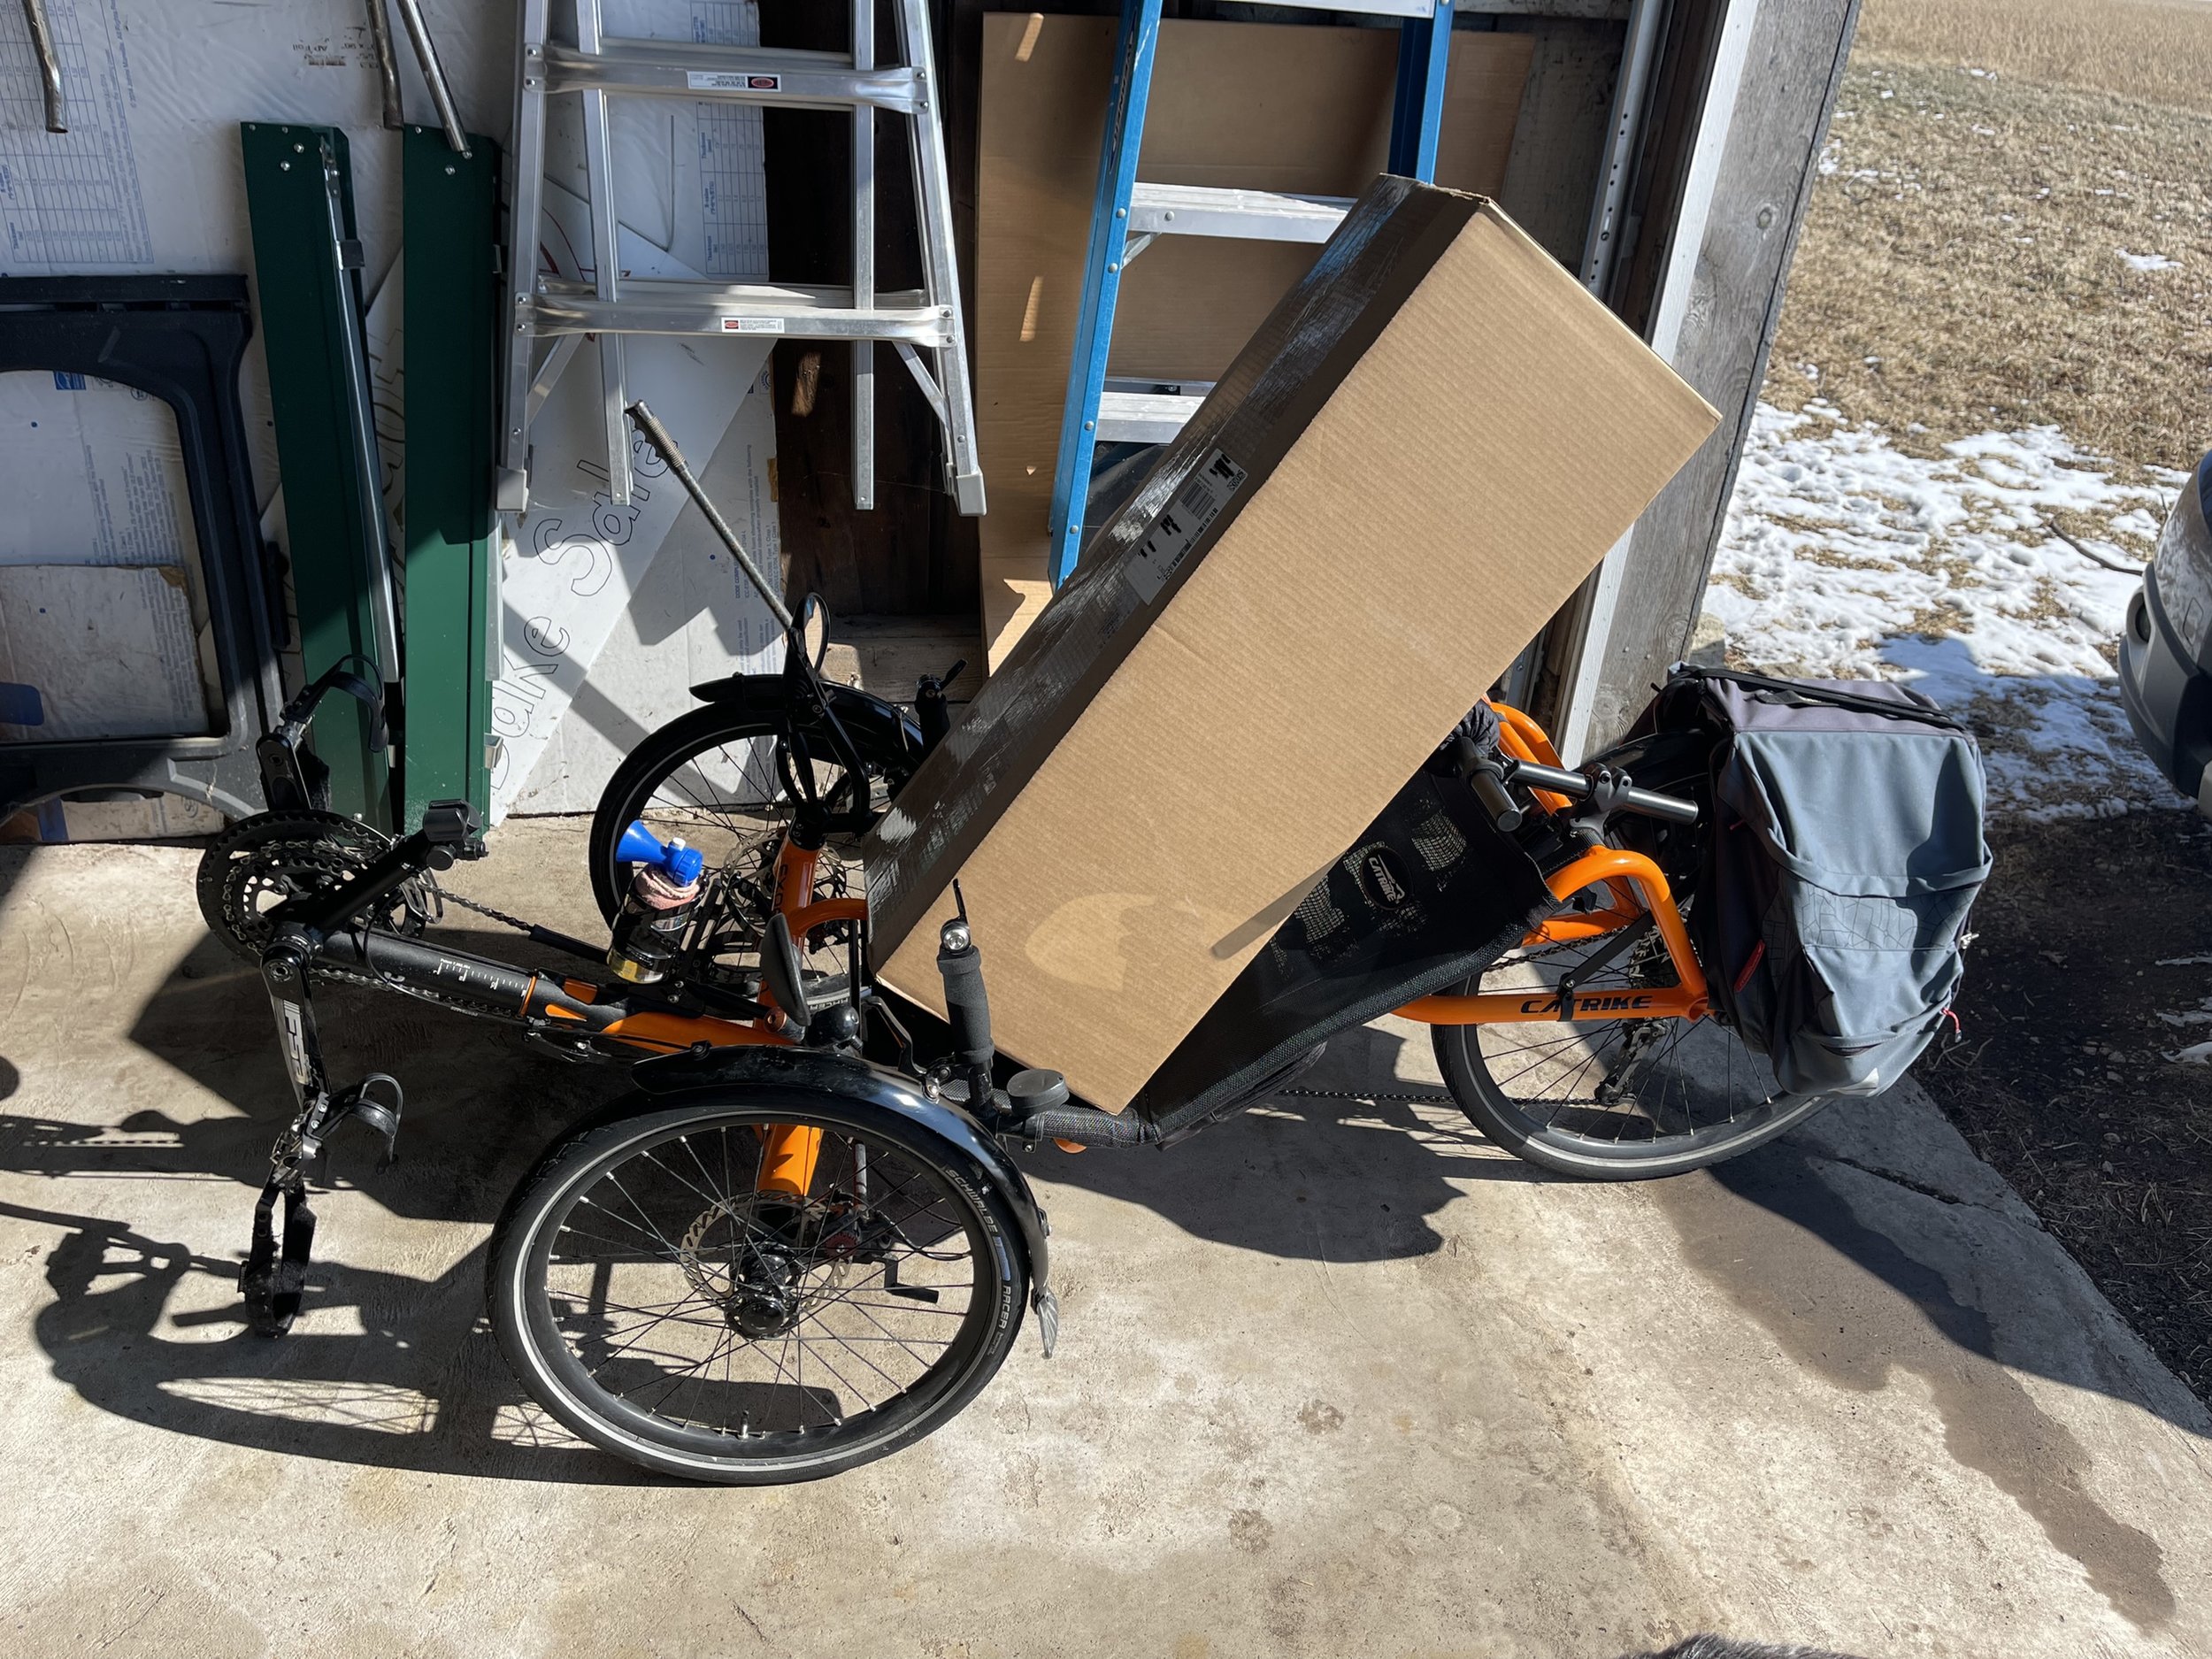
It arrived in a box that is a little smaller than I expected, and lighter than it looked:
Valencia checking out her new outfit
Getting it On
As is sometimes the case, it arrived a couple of days before I could find the time to actually install it. But once I did, things went relatively smoothly. I had my helper crew ready to go, and opening up the boxes found, among other things, more boxes and lots of packing paper:

The crew at the opening ceremonies
(You know, they always join me for these projects, but every time I actually try to get them to offer actual assistance they demure, offering up some lame excuse about not having thumbs…)
Enjoying this post? Check out our Cycling page for links to other cycling articles on Applied Life
One of the things that quickly became clear as I started pulling things out of the box is that you wanted to check the packing paper carefully - several of the parts were wrapped up in the paper. I actually have held on to the boxes and the paper for the short term to make sure I don’t discover a piece missing only to have inadvertently thrown it away.
Once it’s all out you see that there are multiple pieces, each nicely packaged:
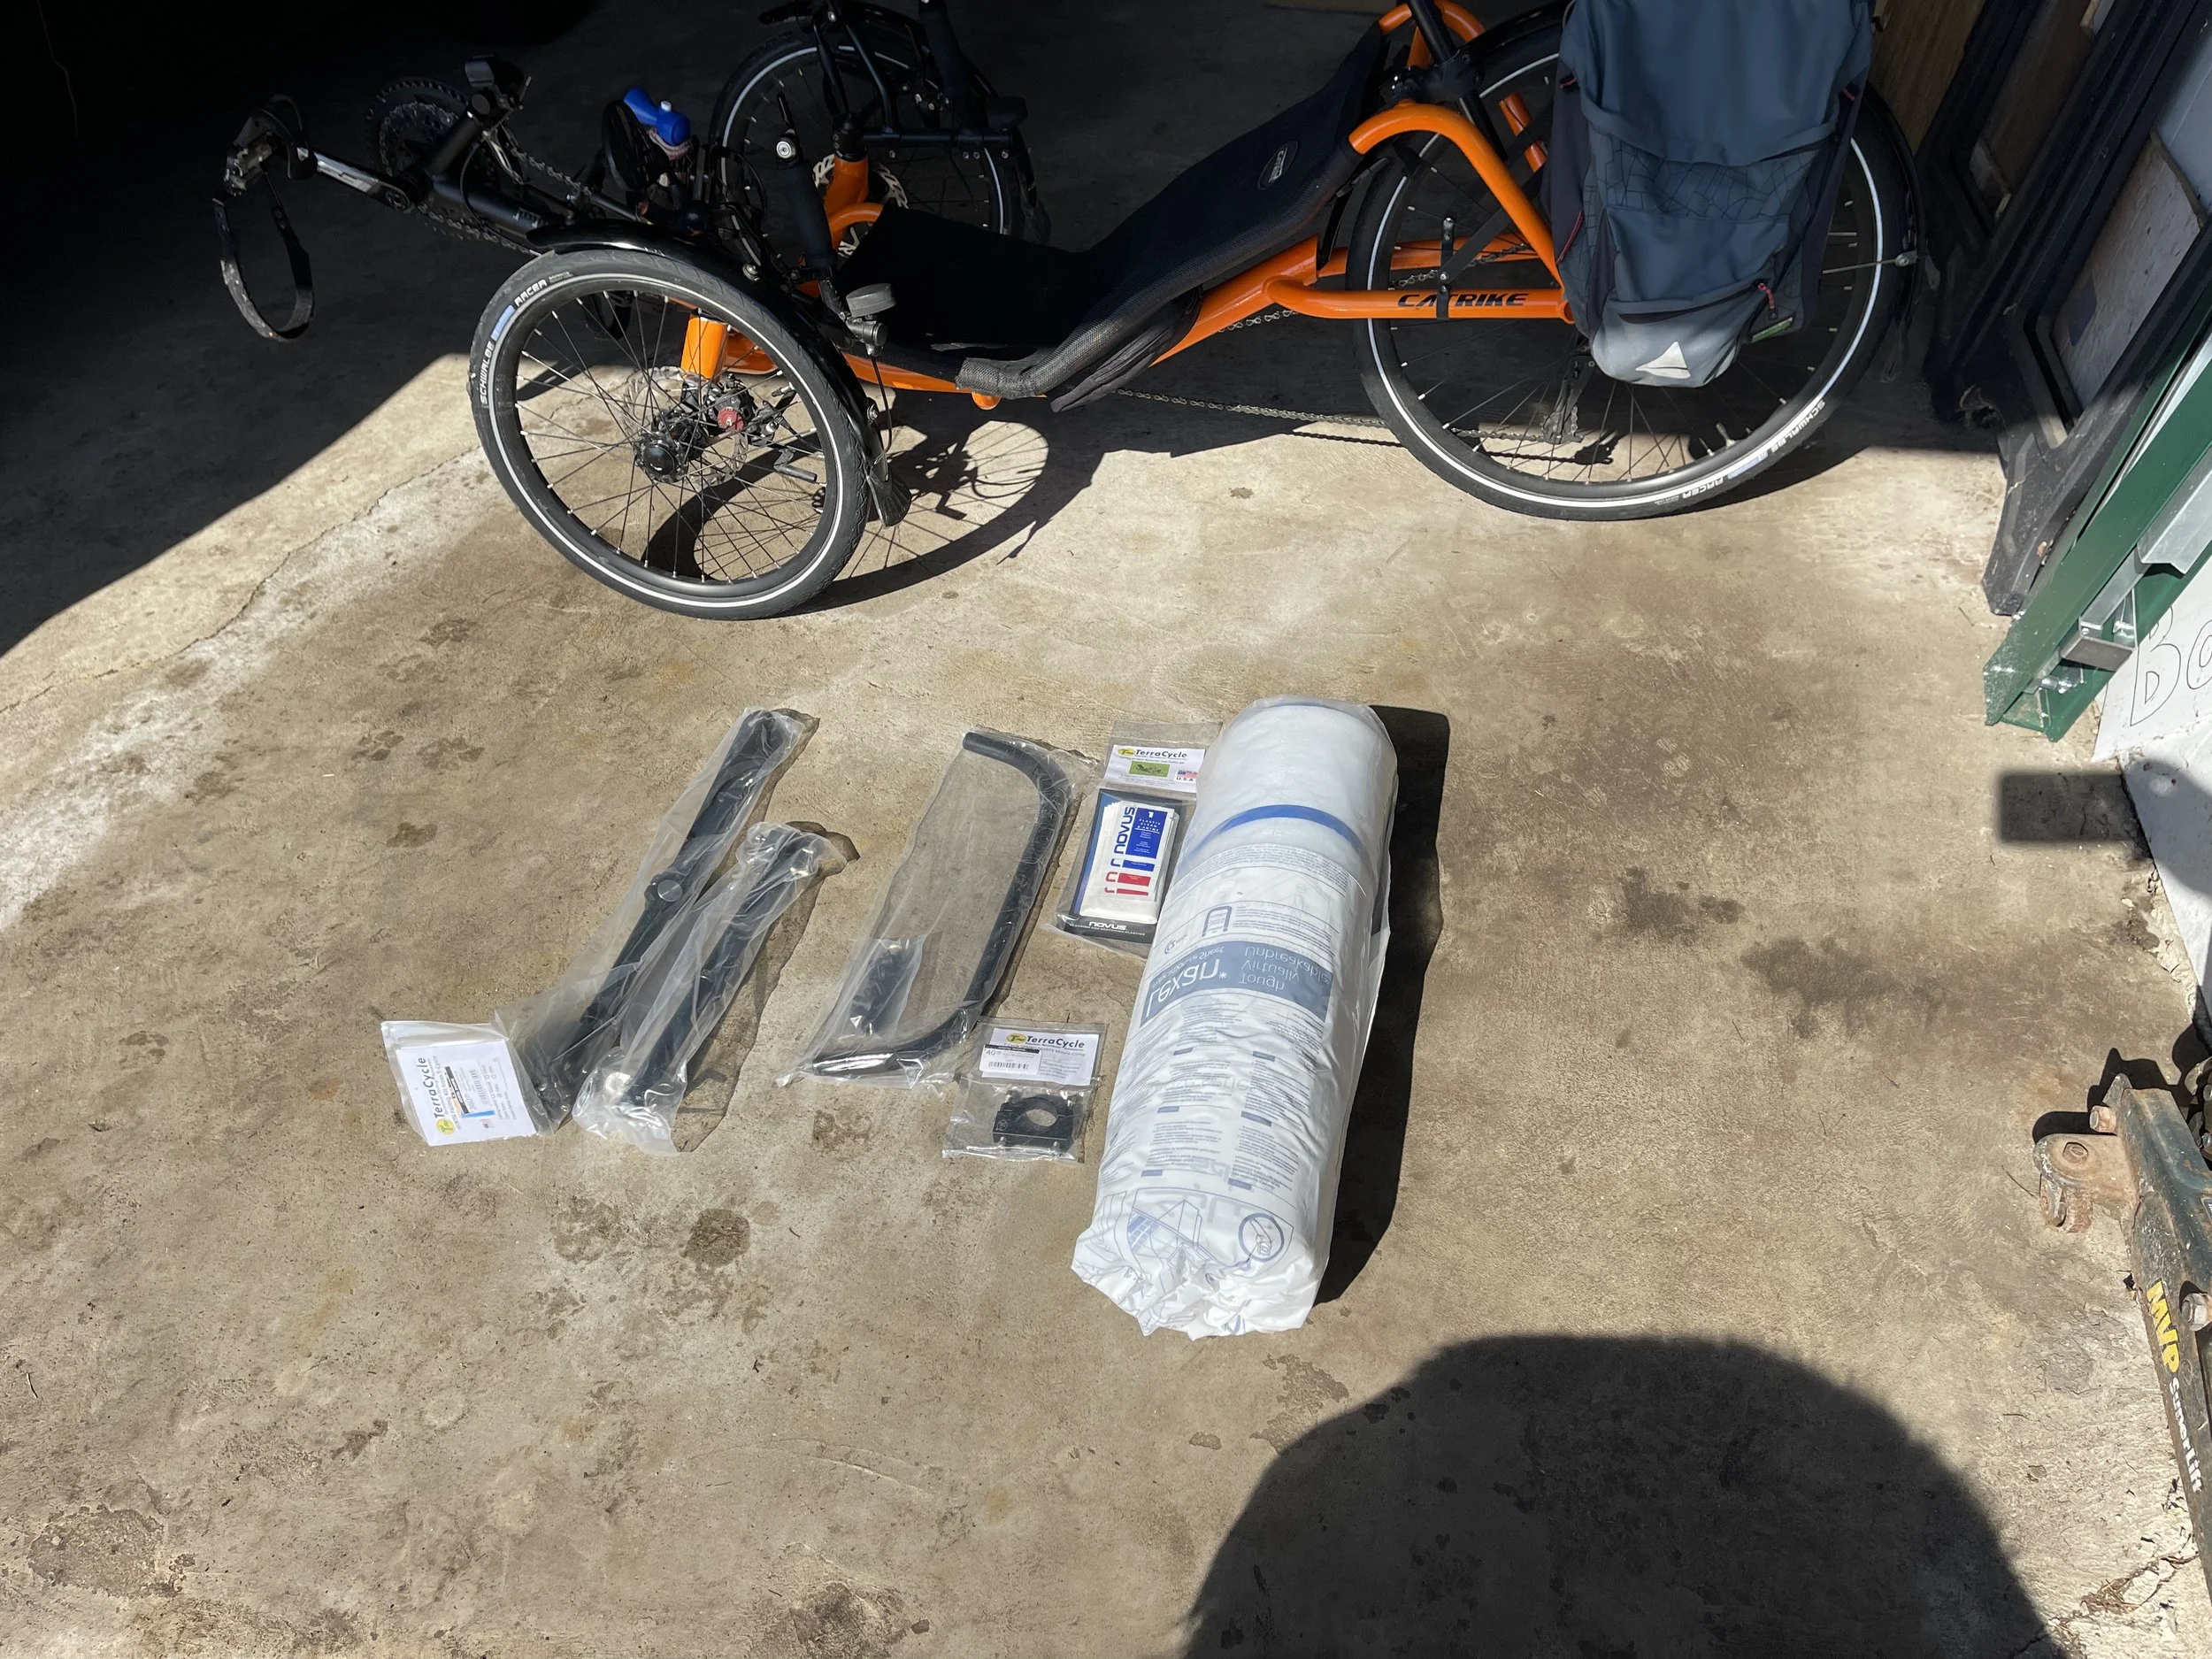
A fairly nice job of packaging
The rolled up item you see is the fairing - it’s made of Lexan, and is quite flexible. The rest of it are the items that make up the frame and the mounting points.
Terracycle makes a very handy installation video for the Windwrap WINTR fairing. I watched this section by section as I installed it - which is to say that I watched them install the first piece on the video, then put that piece on, then repeated with each section. I will sometimes watch an installation video all the way thru first, but there were only a few pieces to work with, so this seemed a reasonable strategy.
Long story short, this essentially involves putting a mounting clamp on to the boom, and then mounting the different pieces of the frame to that clamp in a given order. This went relatively quick:

All framed up
In the video, when the put the frame together, they mention that you want to do your best to center the upper crossbar when you attach it. A very nice touch is that TerraCycle has explicitly identified the center point on the bar for you:

I am feeling very centered
From there the next step was to unroll the fairing itself and mount it to the frame.
Wrapped up in itself
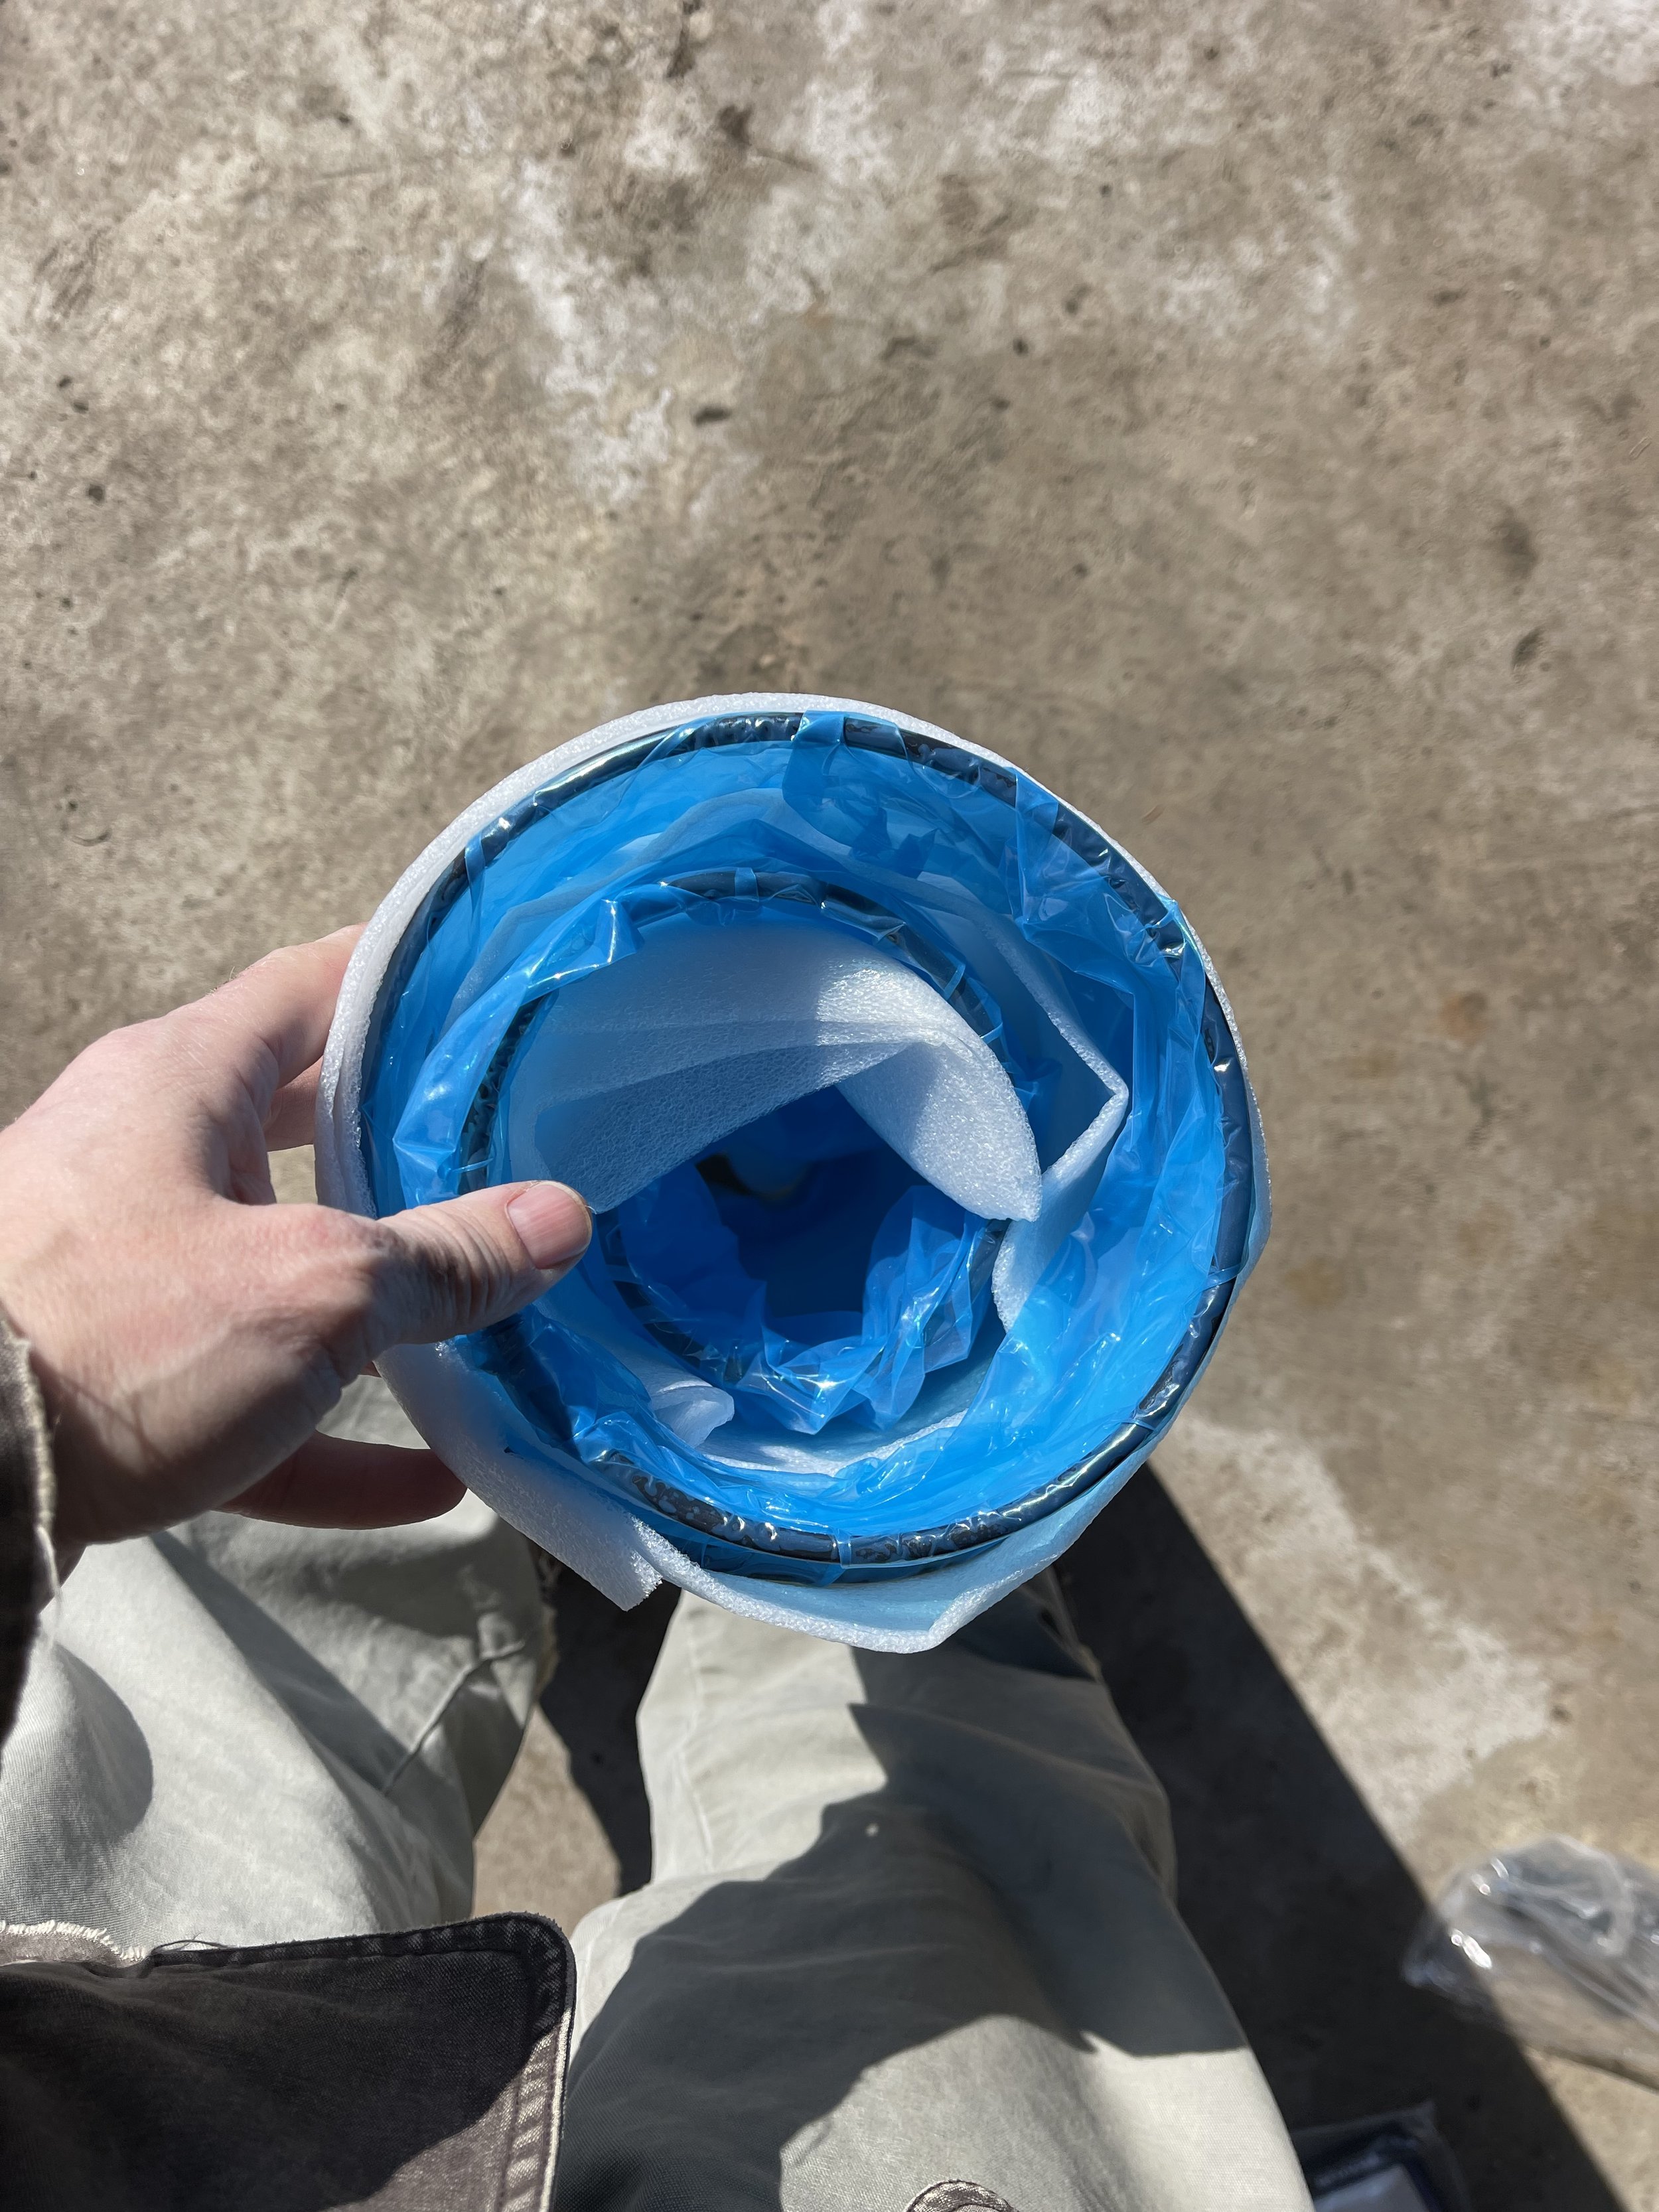
Probably the single most challenging part of the process was getting the protective blue film off of the fairing:

I’m so blue…
The fairing attaches to the frame with rubber expanding nuts that “mushroom” around the opening they are inserted into in order to hold it tight. These are designed to be hand tightened and easily loosened for removing the fairing.
It’s a Wrap
With that it was all mounted on the trike:

My Faired Lady
And if you are (understandably) looking at this picture and wondering “how are you supposed to get into that thing?”…

It knows yoga
…it is designed to fold forward for just such an occasion.
There are multiple small adjustments to be made to ensure that your feet and knees clear the fairing when pedaling. I’ve found these to be a multiple step process - first measuring things out as described on the video, but then making a handful of adjustments out on the first ride as well. These were simple and required only the Allen wrenches on the multi-tool I always carry on the trike. I also had to move around my phone mount, as my (big-ass) iPhone was now in conflict with the edge of the fairing.
One of the other things I’ve wondered about is transporting the trike with the fairing. I typically both haul and store my Expedition in my Mobile Trike Garage (my Subaru Outback). To get it into the Outback I have to lower my neckrest already, and the trike pretty much fills the available length of the back of the car. The fairing adds both some height and some length to the trike, so I wasn’t sure how well it would fit.
And: it doesn’t.

This one is too big
Or, at least it doesn’t with the fairing on the frame. As noted above, the fairing is designed to be easily removable by hand, and with it off, the frame does fit under the roofline.

If I fits, I sits
The frame itself still adds length to the trike. I usually store the trike in the back of the car in a diagonal orientation, which allows me to have some view out of the inside rear-view mirror. It won’t fit that way with the frame on, but does fit with the rear wheel sitting dead center, between the front seats:

Dead center
This is workable, at least for the time being, tho it wouldn't be comfortable for longer trips. Fortunately, removing the frame is a two-bolt job with an Allen wrench, which I can do in those situations. I wouldn’t want to do it every time - removing and replacing both the frame and the fairing each time I go out for a ride would start to be more futzing than I want to engage in - but seems a fairly low effort set of tasks for traveling with the trike. And frankly, my day-to-day solution for the first week of having the fairing on the trike has simply been to leave the car outside, with the trike in its spot in the garage, fairing in place. This is actually a fairly common arrangement for me in general, particularly in the warmer months, as it lets me get out and ride at a moment’s notice.
I’ll be keeping track, over the next few weeks, of what the impact is from having the fairing in place, both in terms of comfort and speed. And I’m fortunate - in a way - that I was able to get it now, as we roll into spring, which is our windiest time of year here in northern Illinois.
So - more to come…