Cycling

Will a Recumbent Trike Fit in a Tesla Model Y? by Erin Wade

When I decided I wanted to go electric for my work vehicle, one of the top items on my list was having a vehicle that my Catrike Expedition would fit inside of. Often, when I travel for work, the end of the work day provides opportunity to ride in places that I wouldn't otherwise, so I needed my work car to facilitate that.

To sort this out I spent some time online trying to find the cargo dimensions for the (5 seat) Model Y. The challenge is that most sites that report this information give you some variation of cubic dimensions - cubic inches, feet, liters, etc. Some of them cleverly use things like suitcases or beer boxes. Oddly, none of them list how many Catrike Expeditions you can carry…

The thing is that knowing the cargo area is 68 cubic feet doesn’t tell me anything about the shape of the cargo area or the size of the opening. If you can’t get the trike into the cargo area, it doesn’t matter whether it’s big enough otherwise.

Fortunately I found the Tesmanian site, which handily provides pretty much all the dimensions - in inches and centimeters - that you could ask for, including the height of the hatch opening. In sum, with the rear seats down, the dimension are:

  • Length: 78.7” (200cm)
  • Width at narrowest point: 37” (94cm)
  • Opening Height: 27.6” (70cm)

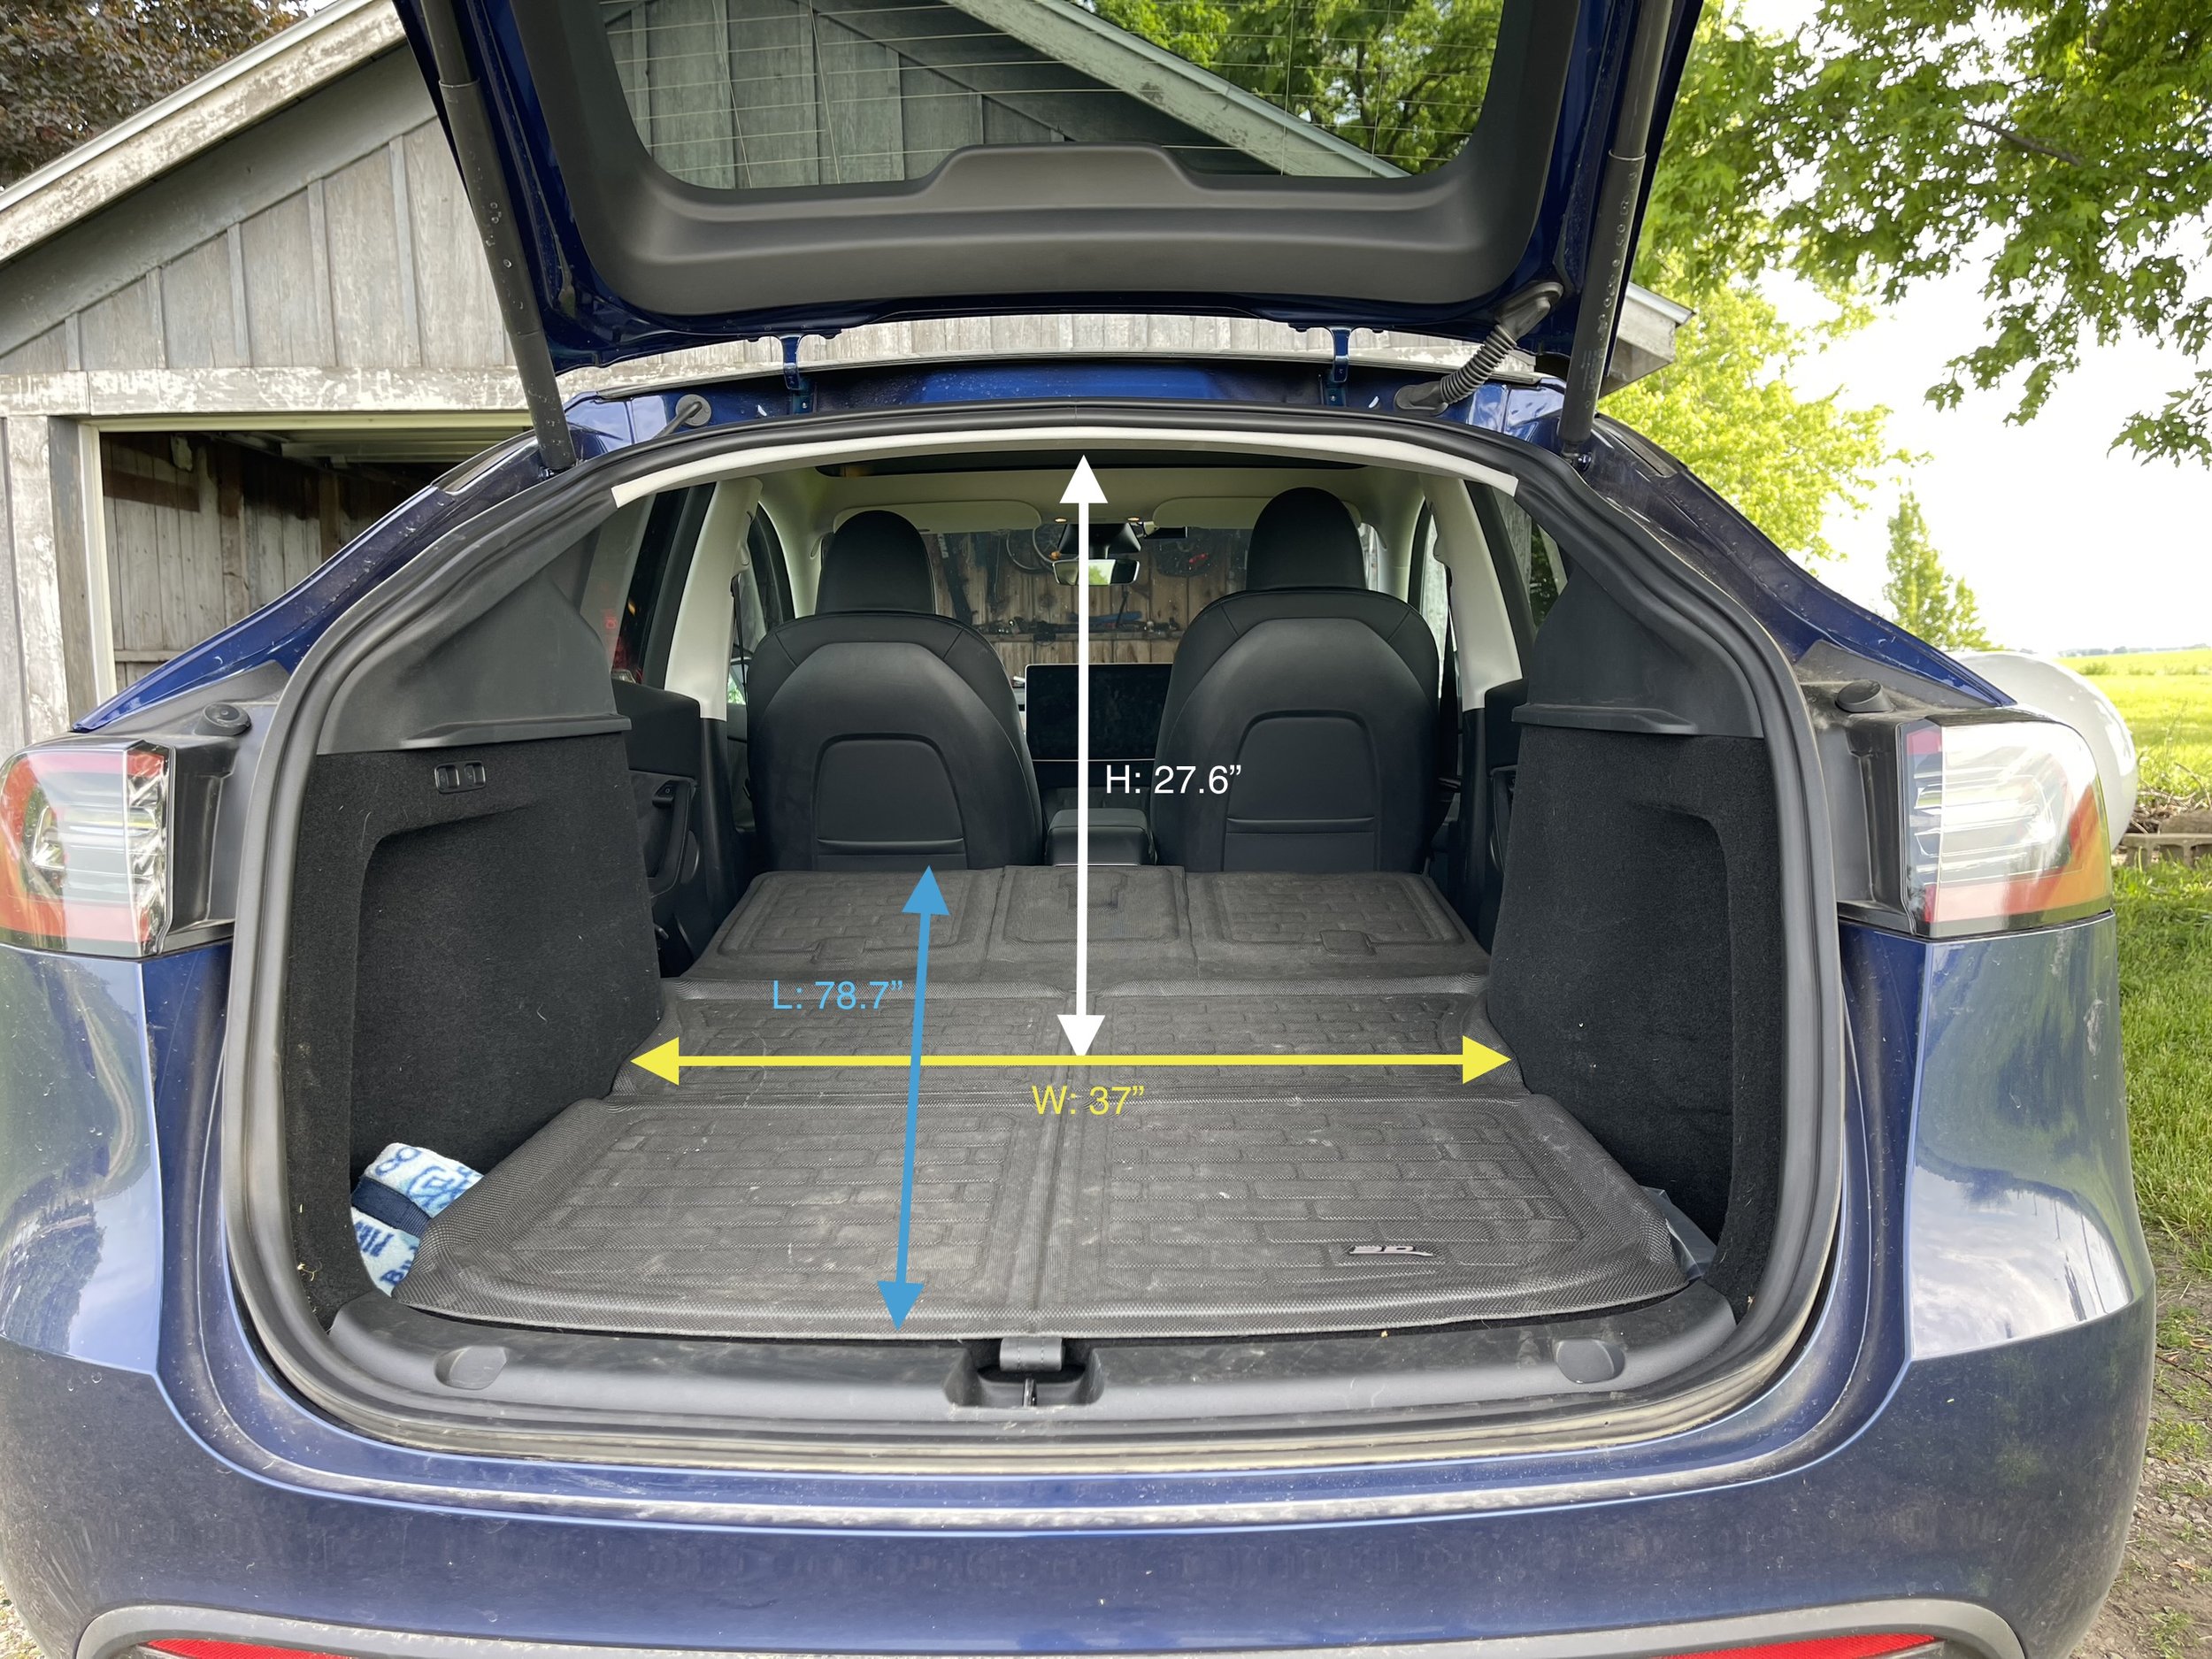
2023 Tesla Model Y Cargo Area Dimensions

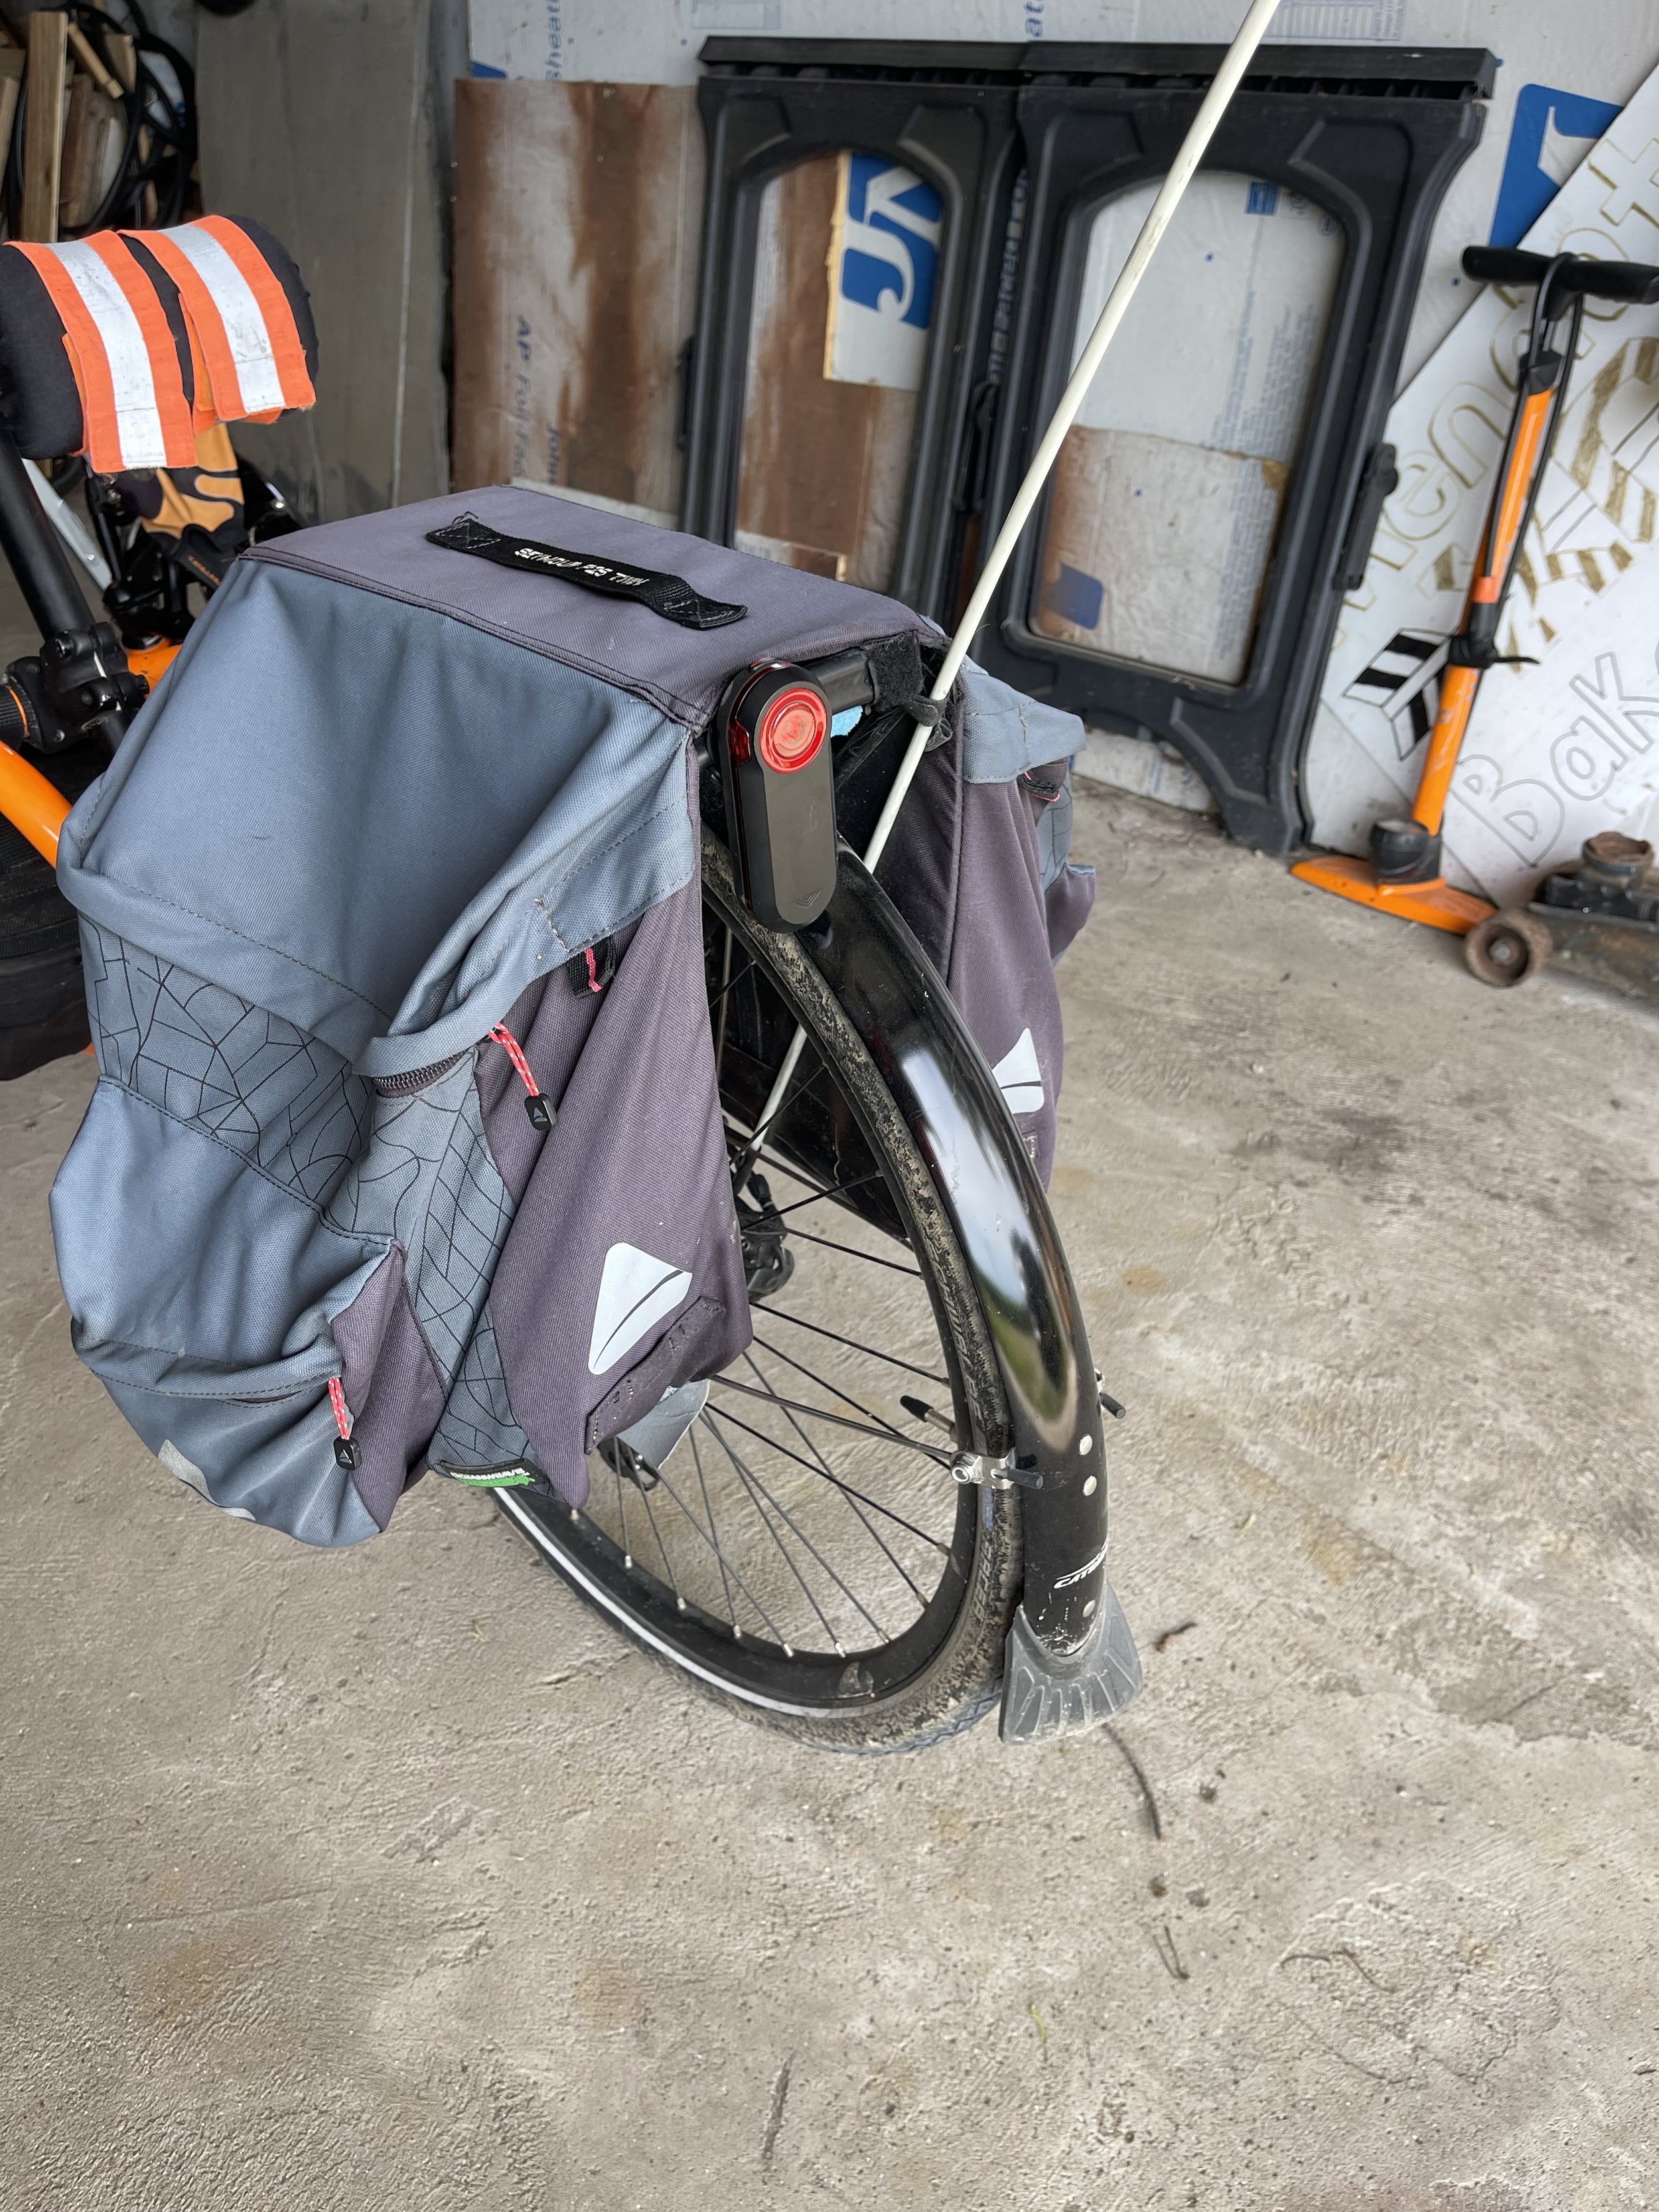
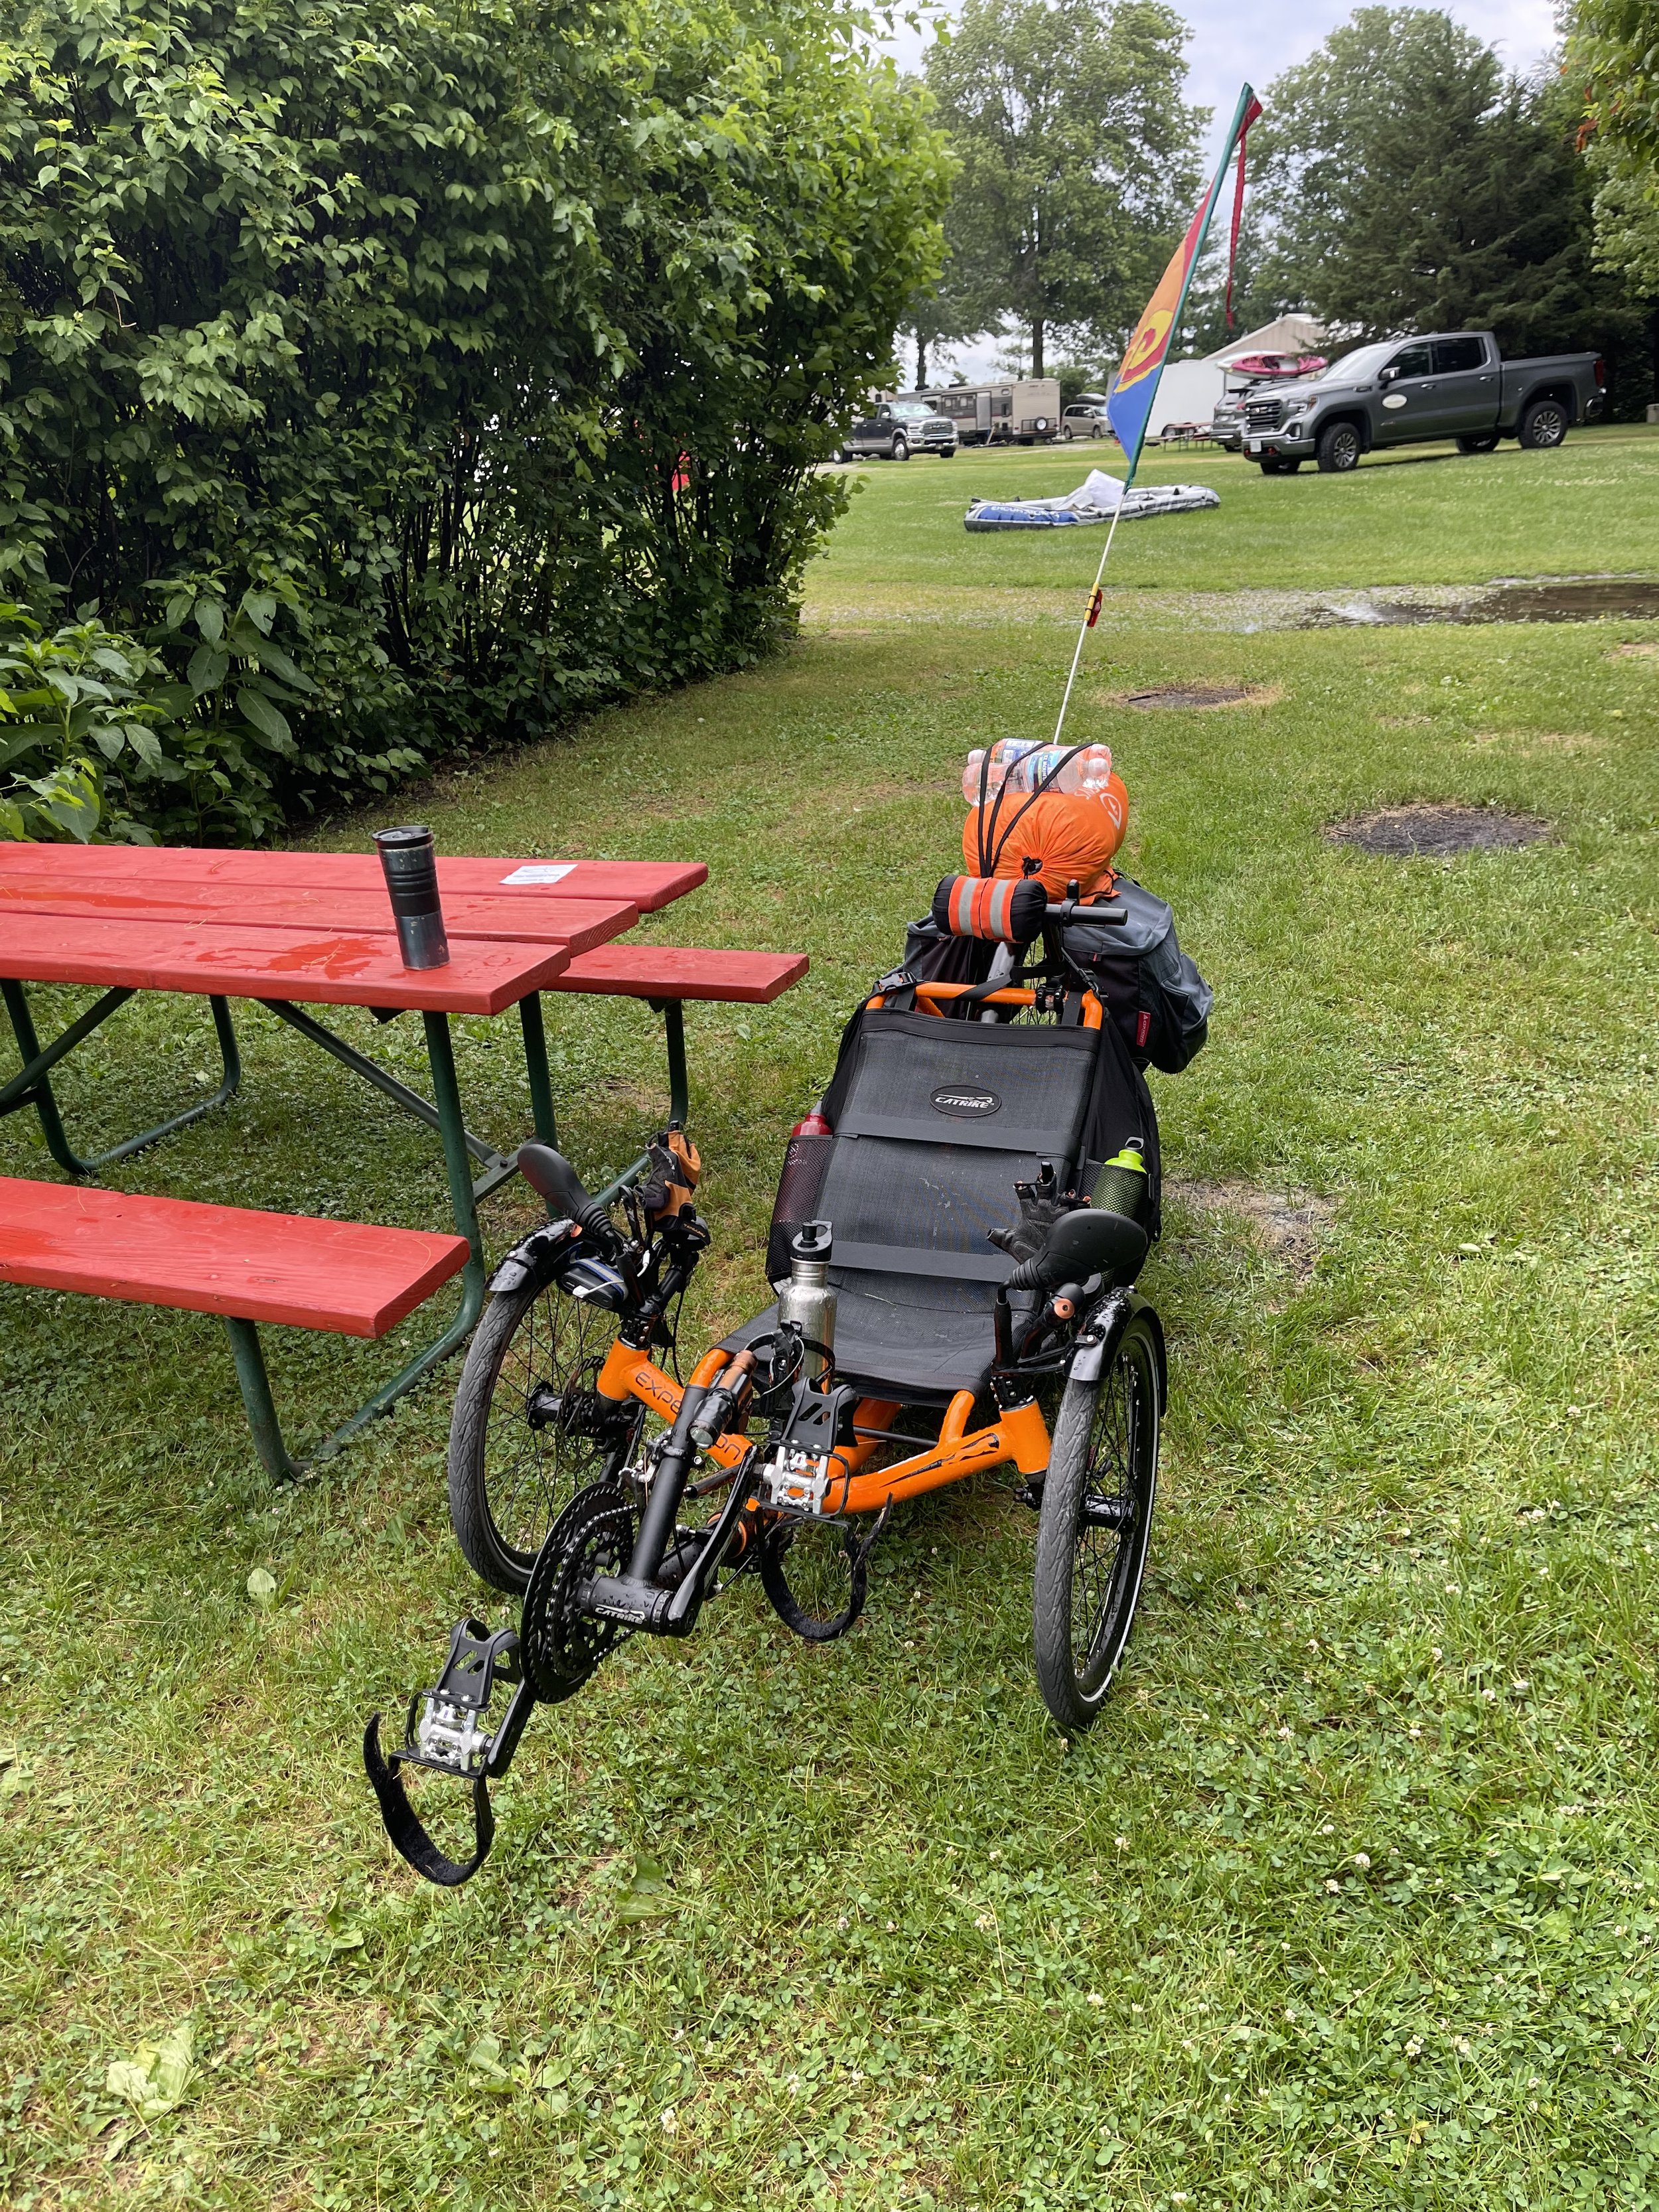
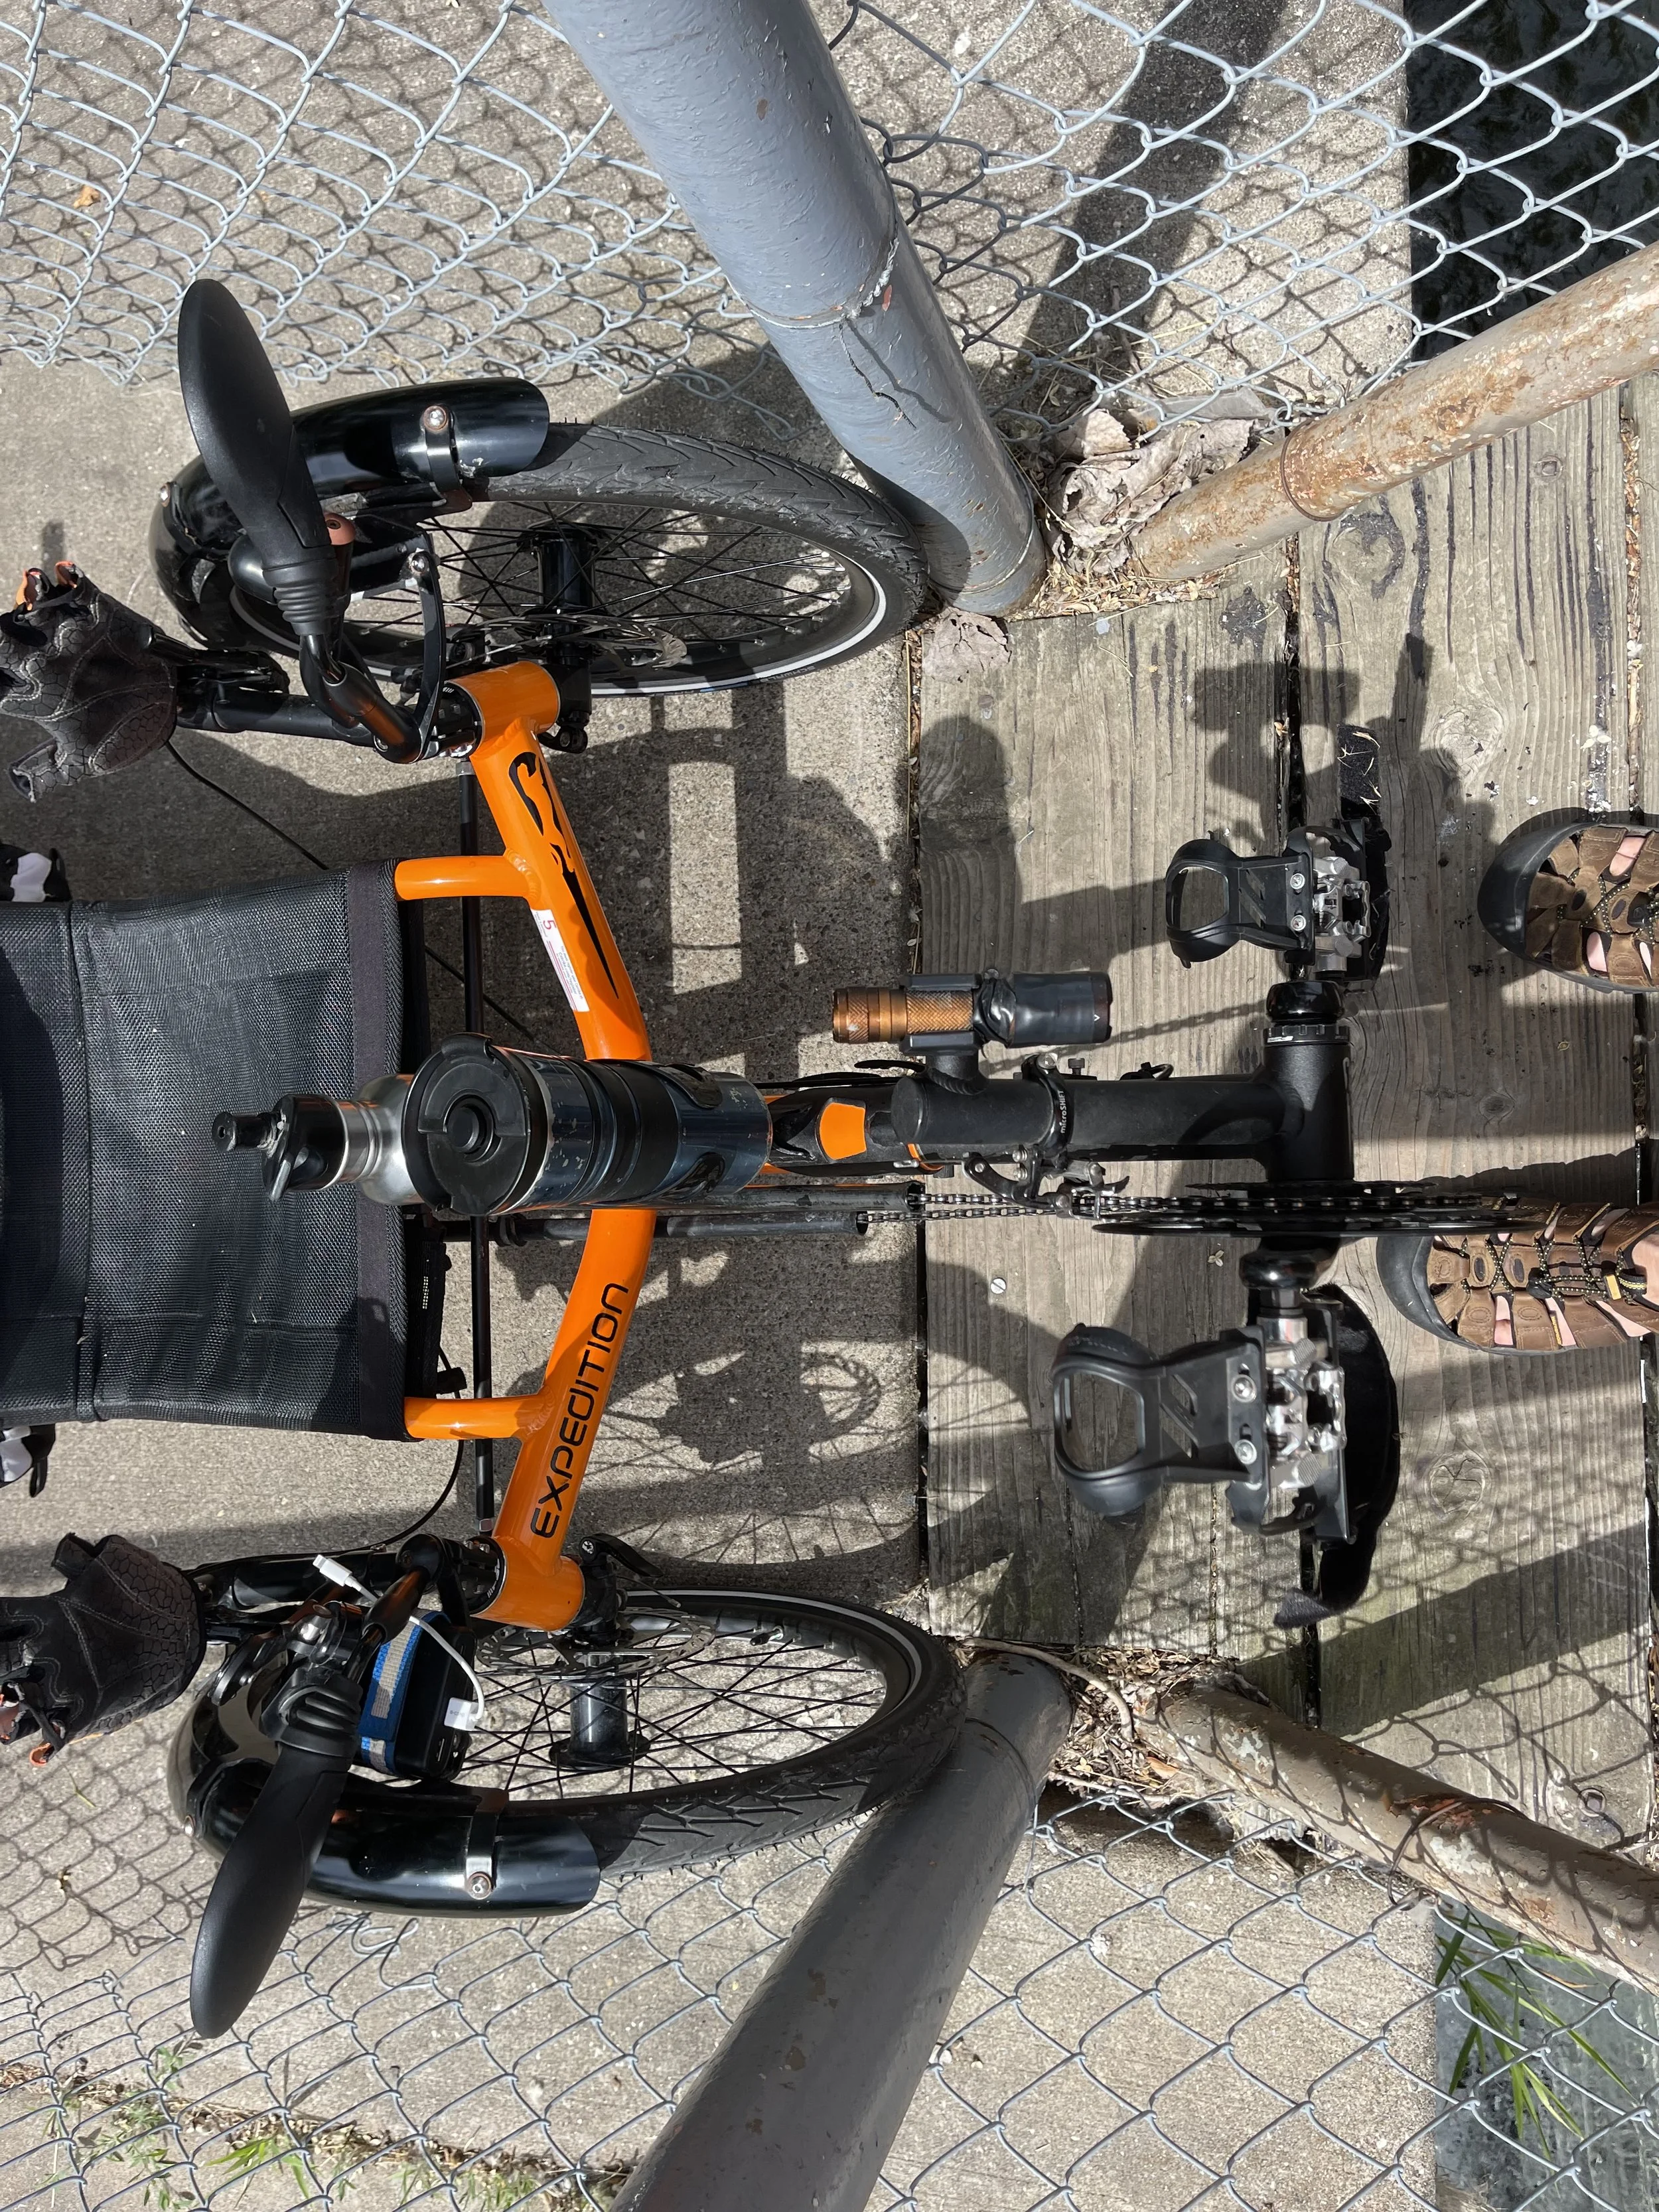
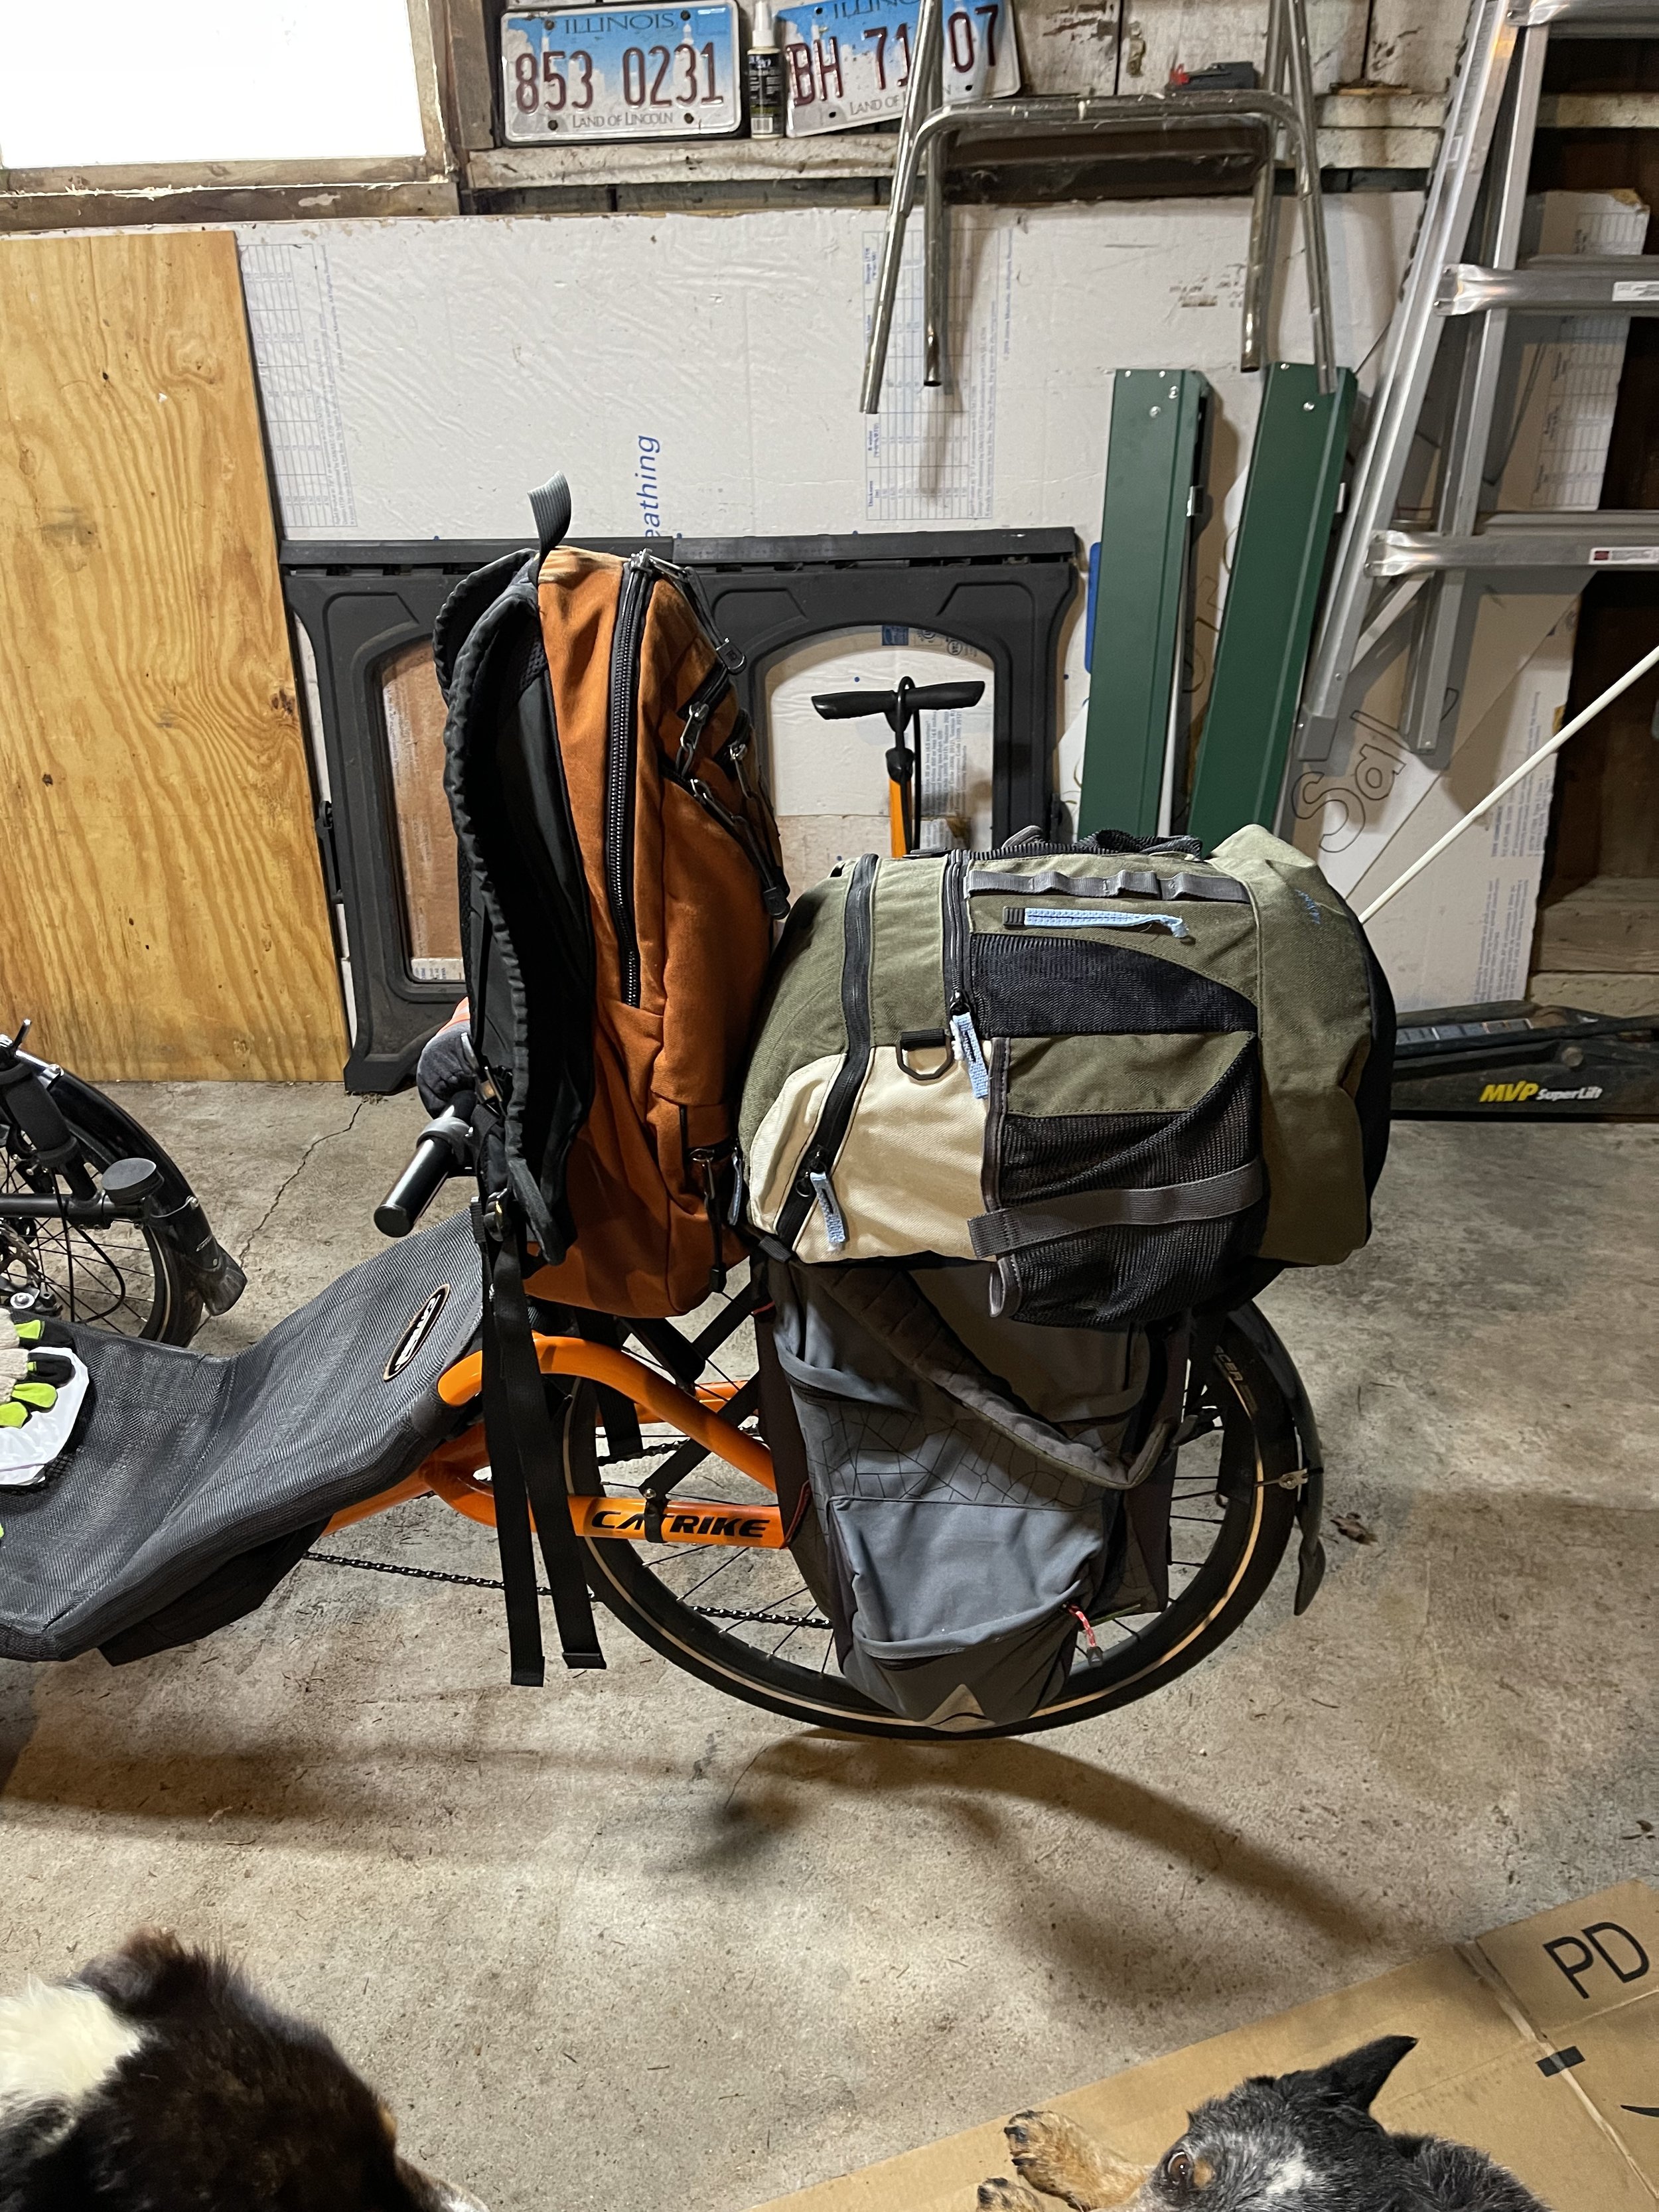
My Catrike Expedition’s measurements, when set up for me are:

  • Length: 80” (203.2cm)
  • Width: 31” (78.74cm)
  • Height: 26.5” (67.31cm) at the top of the rear rack

2019 Catrike Expedition Width (and yes, it needs to be washed)

2019 Catrike Expedition Lenght and Height

So, by measurements alone, I knew it should fit, with the expectation that the rear wheel would come between the front seats, and that I would fold the neckrest down (I have to do that in my Outback as well). And I’d seen someone post a picture of their trike in the back of a Model Y on a Facebook group some time ago, though I don’t recall where it was and I wasn’t able to turn it up again with a search.

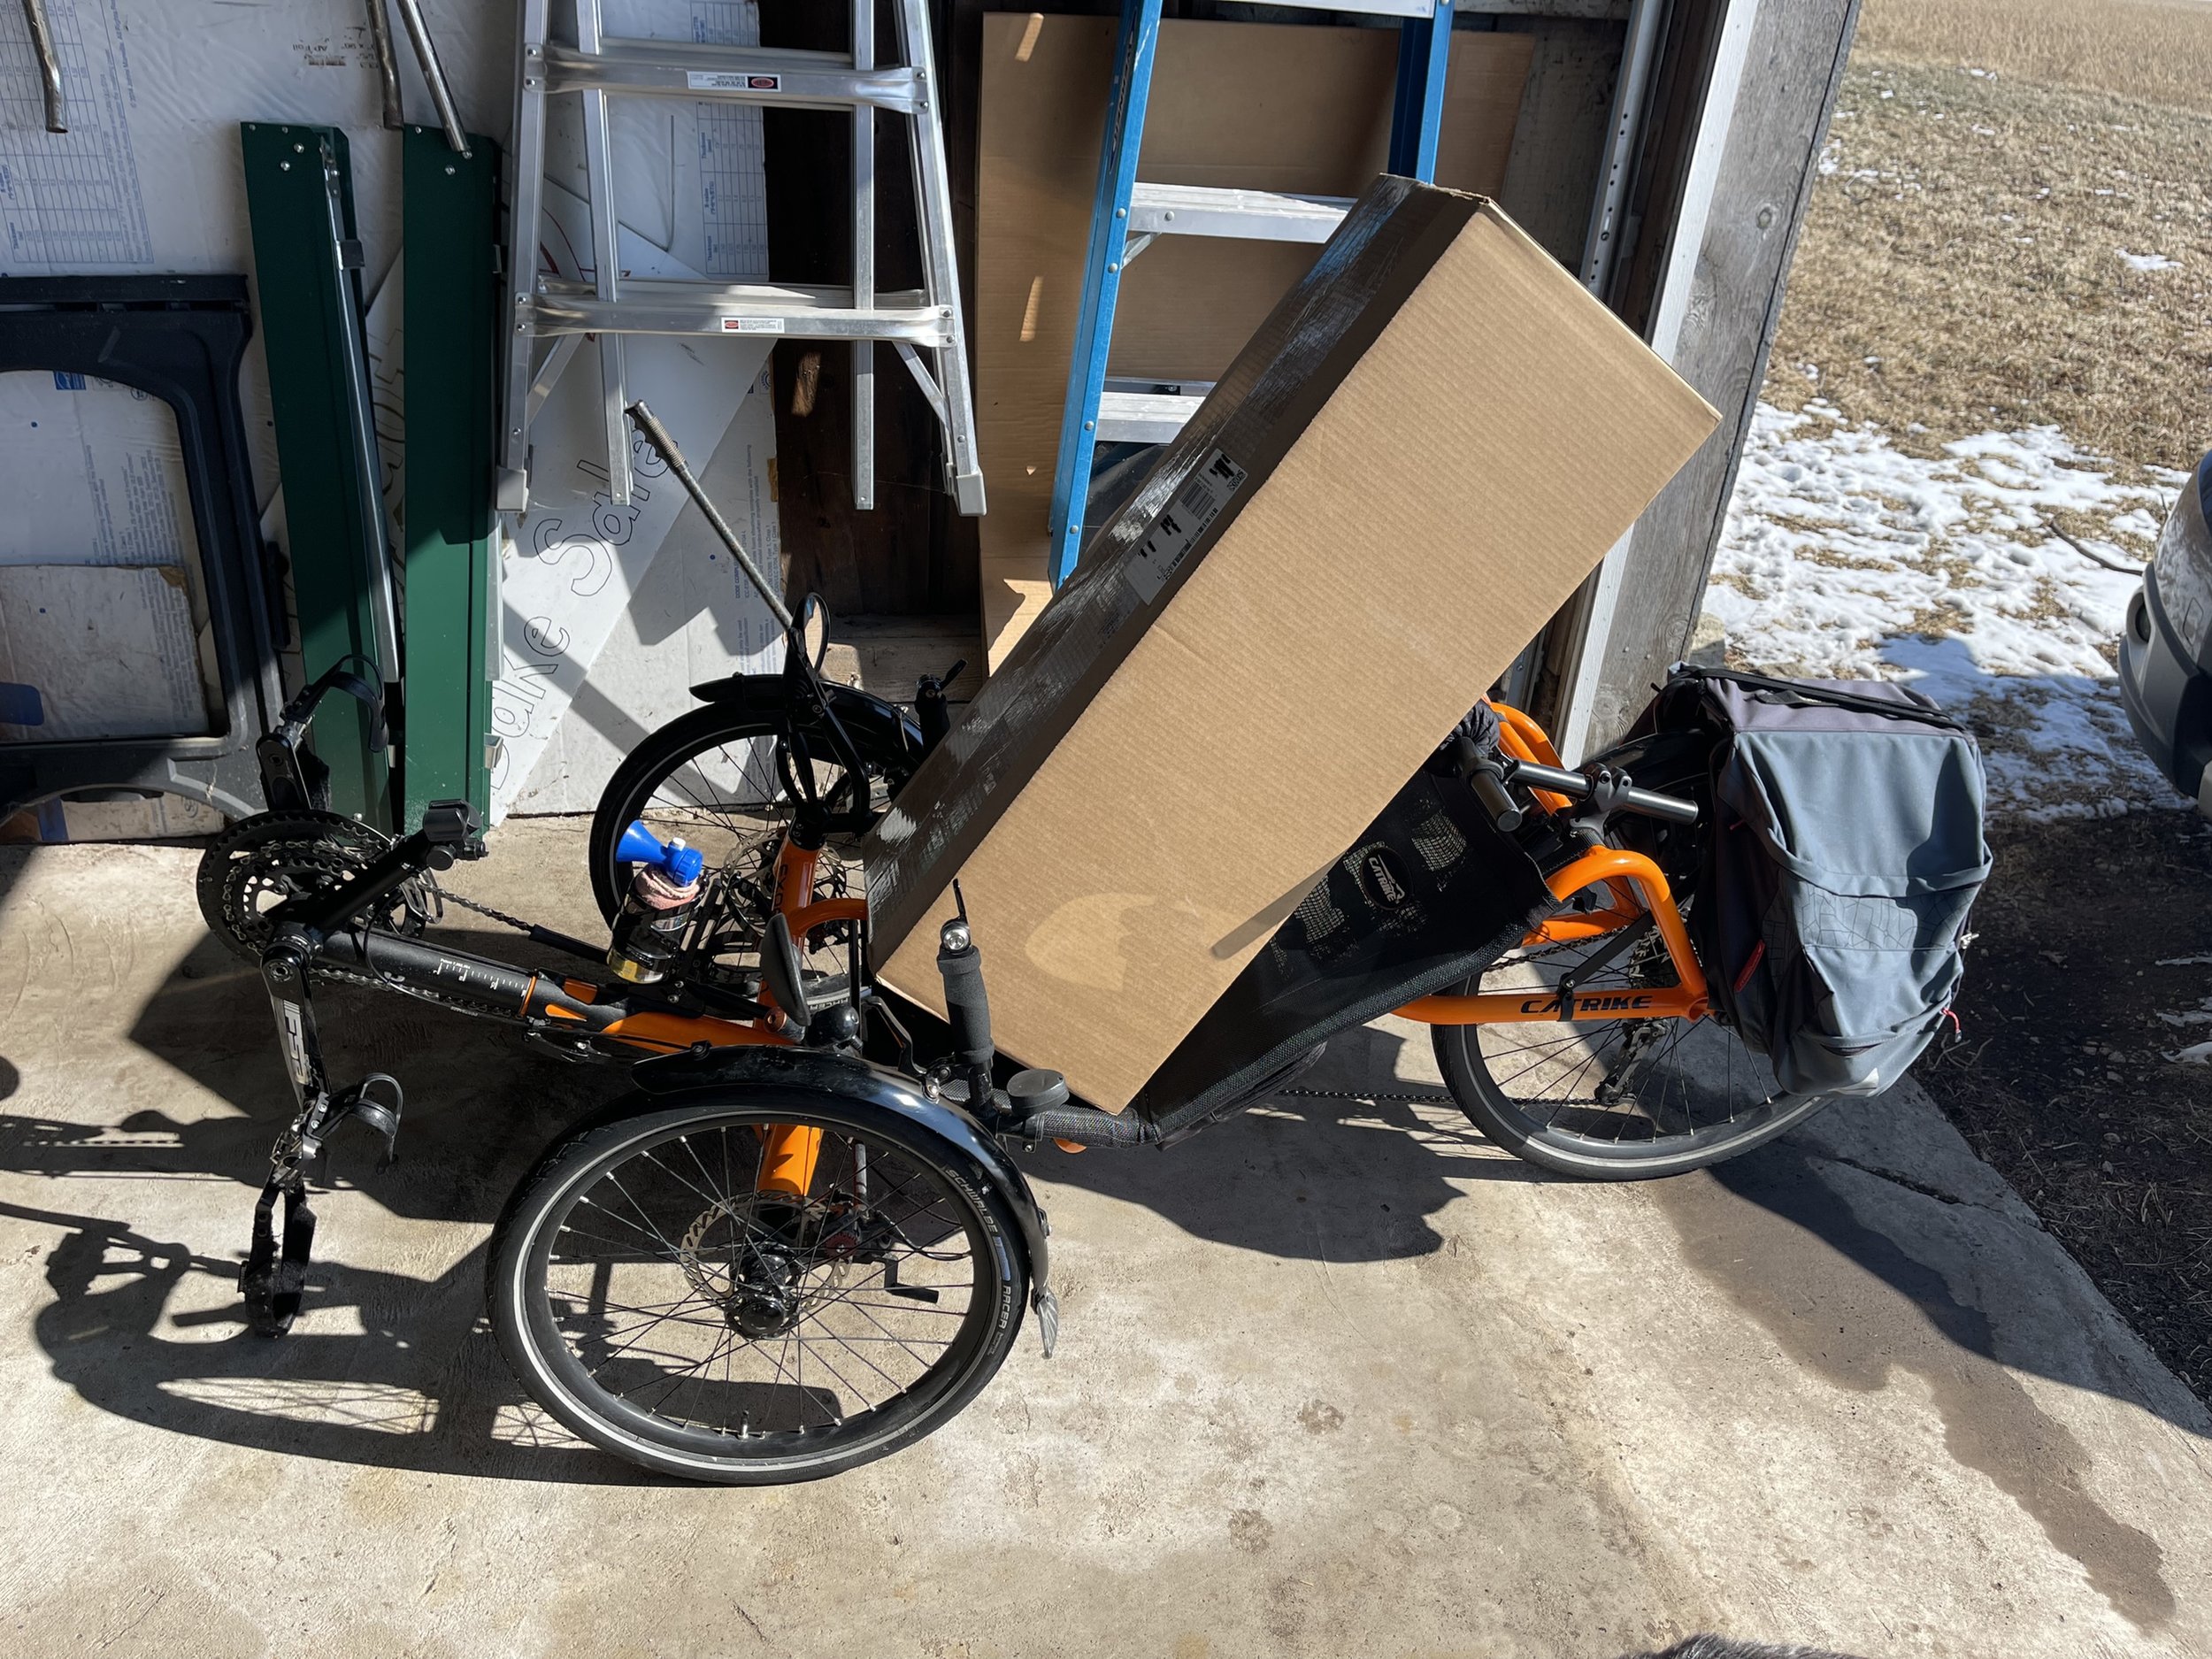
For some reason I did not take the trike along with me when I went for my test drive of the Model Y. I did do that when I got my Mobile Trike Garage (2011 Subaru Outback), and it was great because then I knew without a doubt that it would fit.

Fortunately, it does:

Catrike Expedition on board - Trike in Tesla Model Y

Although the Model Y and the Subaru Outback are of similar exterior dimensions, the Model Y is narrower in the cargo area. The Model Y also has a sloping back end, while the Outback, true to its station wagon nature, has a roofline that runs parallel to the ground nearly all the way back to the hatch. So I was a little concerned as to how well the trike would manage with the hatch closed:

Close the pod bay doors, Hal…
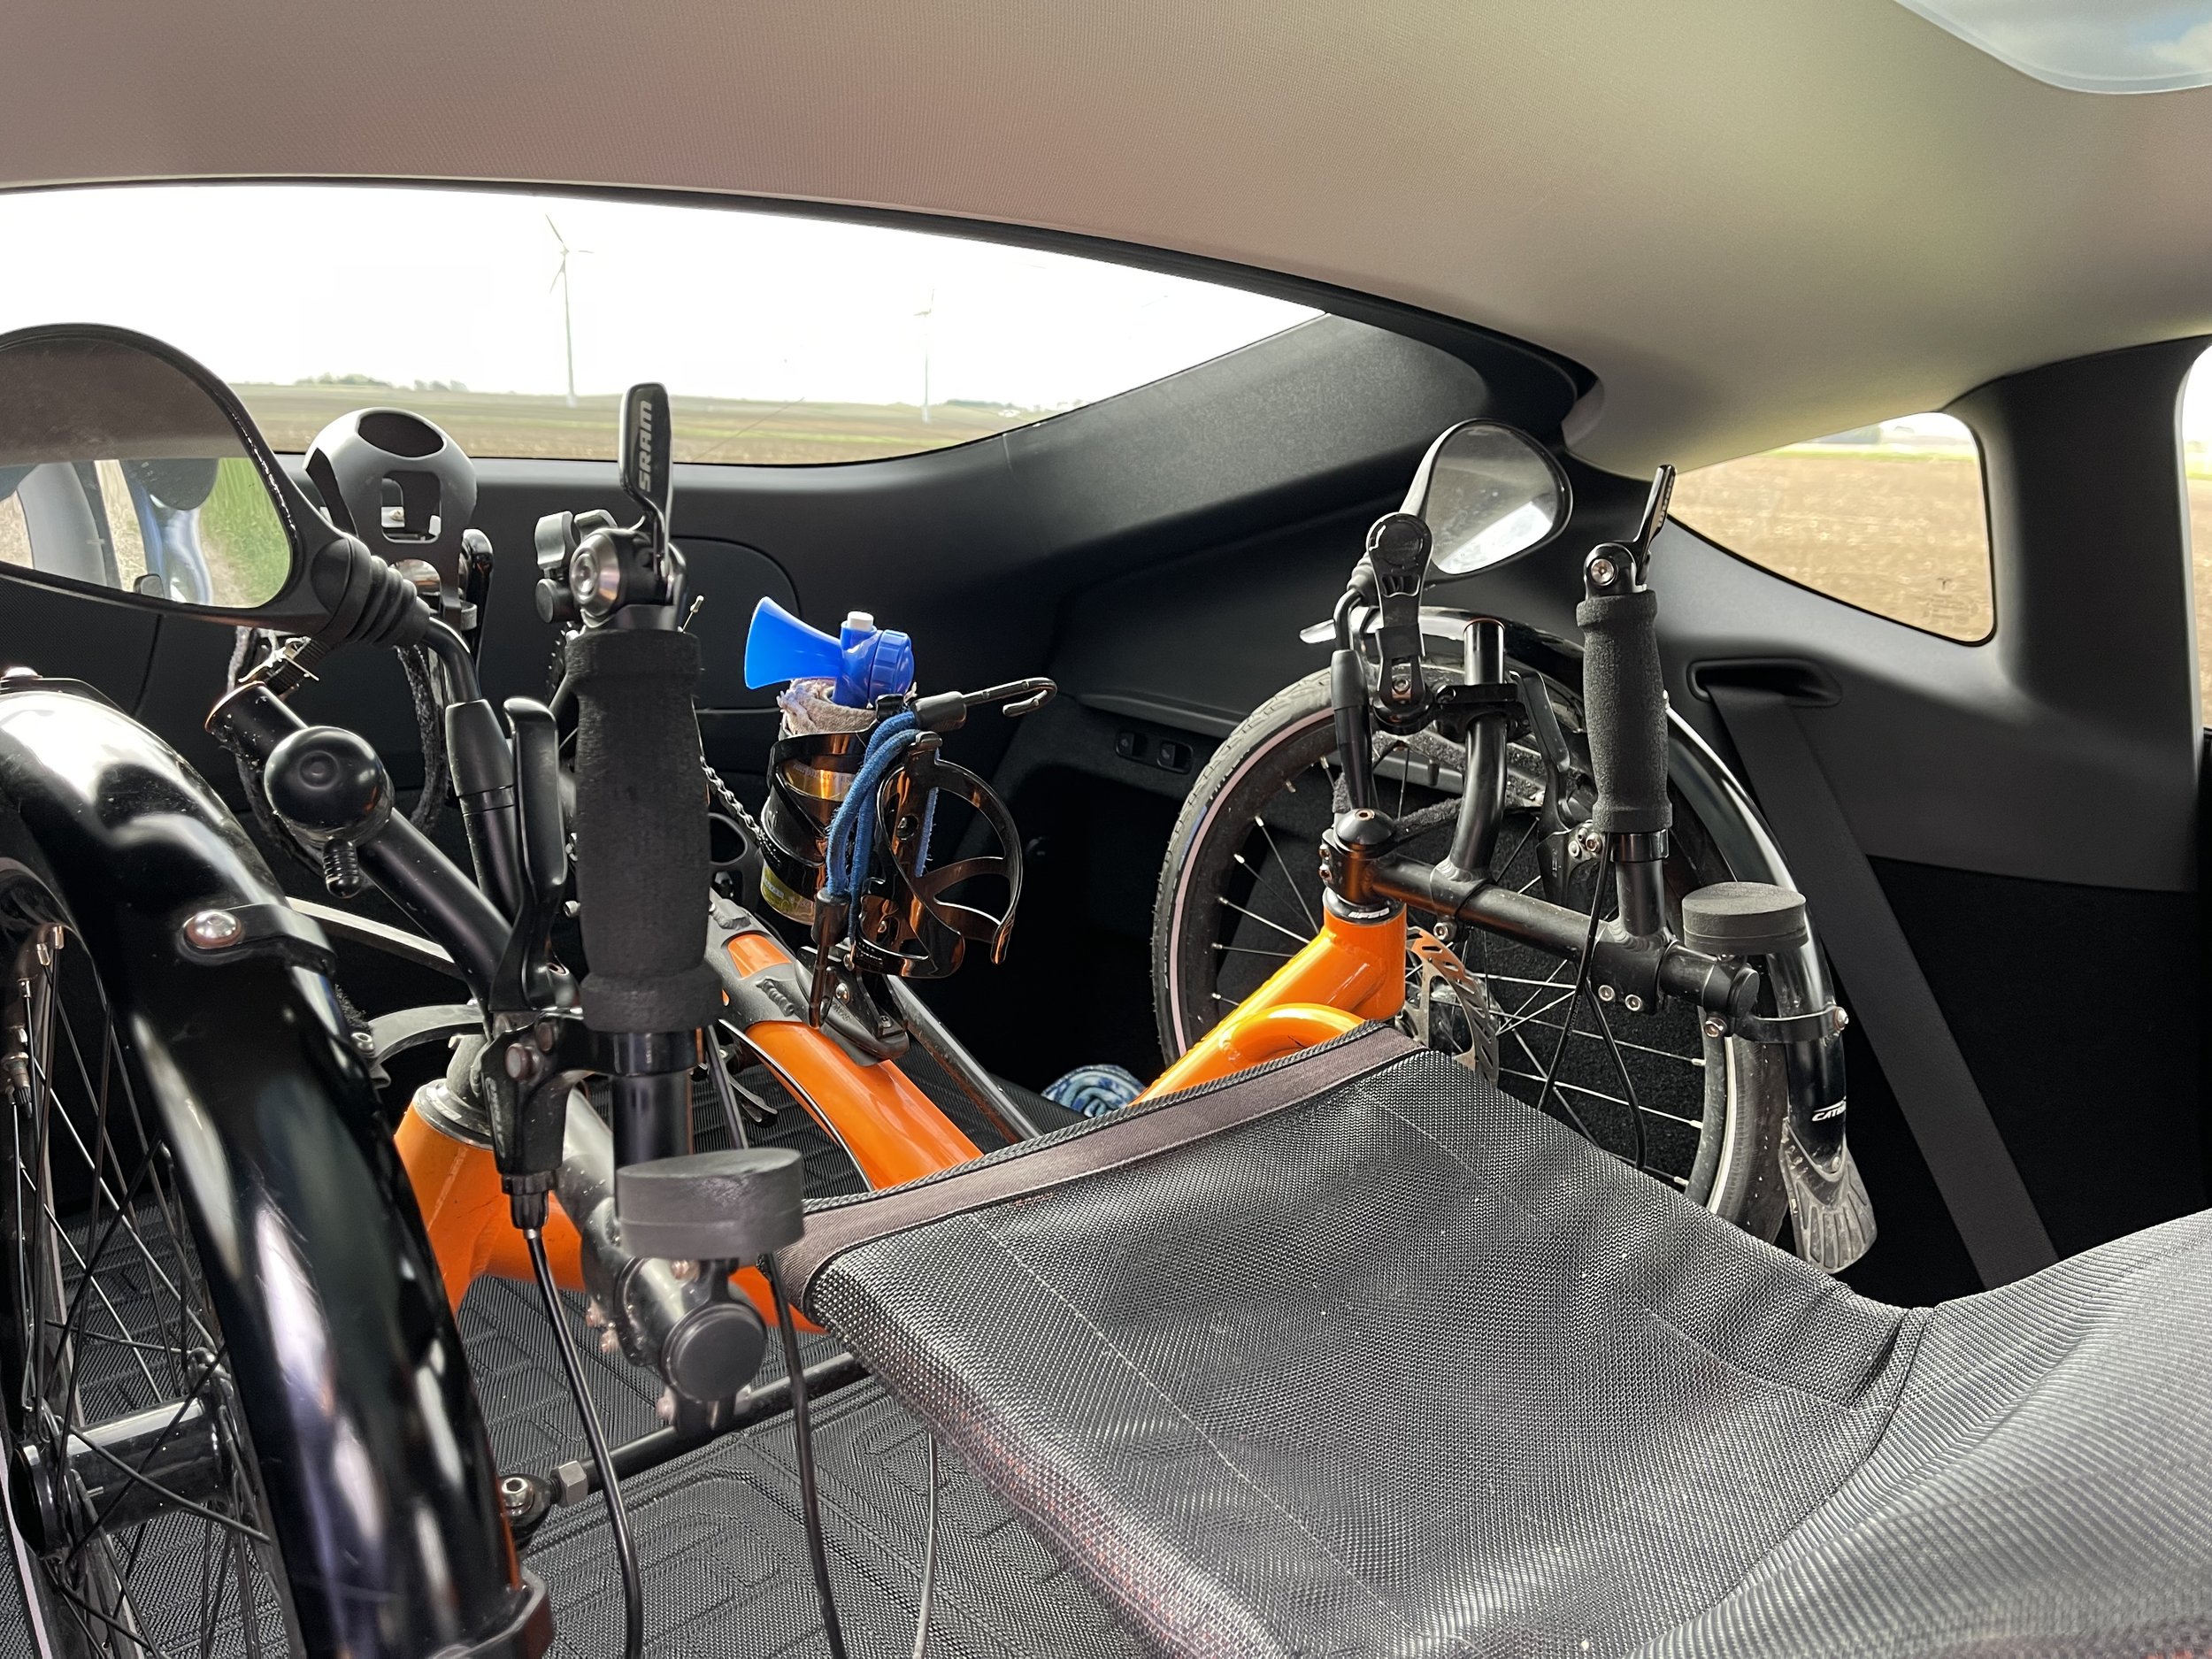
Plenty of room

It fits just fine. Tesla uses large expanse of glass along the roof and hatch (which is why you see sky at the top of the picture). It’s visually dramatic, of course, but it also adds for considerably more vertical interior space than you would get in the same car with a traditional headliner.

And as I’m showing it here, the rear wheel does come up in-between the seats just a bit:

Well, hello up there…

It isn’t far enough into the cabin to be very physically intrusive. The main downside is that the rear cargo bags completely block the view out the rear view mirror. However, the view out the back is really just a slit anyway - that sloped hatch glass is so steep that it only provides a tiny opening. But the car has back up cameras on the rear hatch and the sides, so this is largely a non-issue.

In my Outback I deal with the rear view issue by putting the Expedition in at an angle, horizontally speaking - essentially, putting the rear wheel in between the back of the front seat and the door. I hadn’t given that a try yet, so I went ahead and gave it a shot.

And it works. I could not get it to fit in and safely close the hatch with it angled to the driver’s seat in my driving position, but I could do it with the passenger seat moved up a bit:

Wearing my Catrike at a jaunty angle

Passenger side rear door

Angled on the inside.

Up close in the hatch area

And that gives back the tiny view out the rear:

You get the rear view back with the trike at an angle. And we also learn that I cannot figure out how to get the phone to focus on the image to the rear…

I’d prefer it behind the driver’s seat because then it doesn’t obscure the view out the passenger rear windows - e.g. where you look when you finish passing someone on the left. But again, the Model Y has side-view/blind spot cameras to help with that. And the front seat is not too far forward - at 5’8” I can sit in it comfortably, and the only likely passengers with me and the trike in the car at the same time are My Lovely Wife or my offspring, and both are shorter than I am (we are not tall people). And with the trike at an angle there’s a little more usable cargo space in the back as well.

So - long story short: It fits! Any trike the same size as the Catrike Expedition or smaller should be able to fit as well - for example, I’m certain MLW’s Catrike Pocket will fit also.

A couple of things to note here - the cargo measurements are without the aftermarket cargo area protective cover shown in the car here. The cover does eat up a bit of vertical space, but the trike still fits. And I will note that I’m reporting the length from the Tesmanian website above, but I don’t know how they decide where the end of the cargo area is at the front end - my trusty Stanley tape measure makes it seem a little longer, and obviously the front seat positions will make a difference as well.

FINALLY! by Erin Wade

This was the view as I prepped for a Sunday ride:

White Horizon

When I got up this morning I’d been surprised by the blanket of white that covered the landscape. The winters here in northern Illinois have been notable for decreased snowfall and fewer cold periods for some time now - a change in weather patterns that caused me to switch from cross country skiing to winter cycling nearly a decade ago - and this winter has been particularly recalcitrant (two days of recreationally useless “bomb cyclone” aside), with little snow and high temperatures hovering above freezing for most of January. If it seems odd to complain about a winter season that is too warm, I will admit that I’ve absolutely taken advantage of the additional riding opportunities the unusual temperatures have allowed. But still, as a year-round cyclist, one looks forward to actual winter riding.

All of which is why, when I looked out the window and saw the coating of white, what ran through my head was: FINALLY!

I did a quick check of the forecast and saw that, while I was looking at snow out my window then, the high temperature for the day promised to be at least 33°F. This meant my window for a real snowy ride was limited. I’d have to get out ahead of the warmer afternoon hours, and ideally ahead of the snow plows (I try not to share the road with them). So I geared up and headed out.

I took a route I call Rocks 8 - an eight mile loop, half of which is gravel. This would ensure that, at least half of the time I would be unlikely to share the road with much of anyone, much less a plow. It also had this benefit:

Where are the rocks?

That’s the first section of gravel road, there in the picture. If you are looking at it and thinking that it’s hard to tell that it’s gravel, well that’s pretty much the entire point. A good snowfall has the delightful effect of smoothing over the rocky surface, making it much more pleasant to ride with my road-oriented Catrike Expedition. I pretty much only ride this route when the roads are covered in snow.

Because I got out early, the snow was still falling, and the temperature was still abo freezing, but not by a lot, which means that it sticks to pretty much everything…

Snowy trike

Snowy dude, snowy eyebrows

But it all means that I get the opportunity to see roads that I don’t typically travel down any time of year…

But it all means that I get the opportunity to see roads that I don’t typically travel down any time of year…

And ever-so briefly leave my somewhat unique footprint in the ephemeral snow.

Lines of three

Great Sauk State Trail - Sauk City to Devil’s Lake State Park, Wisconsin by Erin Wade

It’s a personal tradition to take a Black Friday ride each year. It just seems like the right thing to do to work off the caloric debauchery of the Thanksgiving Day. And, most years, we are spending our holiday with family in the Driftless Area of southwestern Wisconsin, so it’s also an opportunity to spend time in one of the most beautiful landscapes the Midwestern US has to offer… I landed on the Great Sauk State Trail, which has its trailhead in Sauk City, and travels northward from there up along the Wisconsin river, then thru woods and prairie to the edge of Devil’s Lake State Park. All told it’s about 10 miles in one direction, making for a nice 20-mile round trip.

And - vital for Wisconsin for this time of year - it’s paved from end to end…

Read More

Garmin Varia RTL515 - Mounting and Using on a Recumbent Trike by Erin Wade

Garmin offers a small group of radar products under the name Varia for cycling that are designed to detect approaching vehicles from behind. These range from the simple Varia RVR315, which is just a radar sensor, to the RTL 515, which adds a rear taillight along with the radar sensor, and then to the RCT 715, which has the light and a camera to record road incidents.

I’ve been interested in this product line since the original device - the RVR315 - first came out. The overwhelming majority of my riding is done on rural roadways here in northern Illinois, so I routinely share the road with a variety of vehicles - from motorcycles and tractors to 18-wheel grain trucks and combines. While people out here are generally polite and give room when they pass, I still spend a lot of time watching my mirrors. Politeness aside, it pays to know when something is coming up behind you.

Having a good set of mirrors goes a long way towards helping with this. Still, with the mirrors and vigilance, there are still those rare occasions where I find myself being startled by a vehicle as it passes me. This is what drove that interest in the Varia.

So I ordered one up this spring - I went with the middle ground and got the RTL 515, with the light but with no camera - and I was excited to start using it. Unfortunately, one of the immediate challenges was sorting out how to mount it on my Catrike Expedition.

On their website, Garmin says:

It’s small, it’s easy to mount, and it works with just about any bike.

It is built to use Garmin’s specific quarter-turn mounting system, which in and of itself is a pretty cool setup. But what comes in the box is an seat-post mount with an array of adapters for different sizes of seat post:

Garmin Seat Post Mounts

Of course, recumbent trikes don’t have seat posts. So - When Garmin says “just about any bike”, it would appear recumbent trikes aren’t in that immediate mix.

So I set about sorting out how to get the mounts to work for my trike. And there are some additional requirements for the device that enter into the process. It is designed to be mounted vertically - the lengthwise aspect going up and down - and perpendicular to the road. And it is supposed to be between 250mm and 1200mm (9.84” to 47.24”) above the ground.

Oh - and also - buried in the product safety materials is an indication that it should be operated at least 5cm (2”) away from your body.

Long story short, there are no surfaces on my Expedition that will work with the included mounts and still meet these requirements. The rear frame arms coming down to hold the rear wheels are at too steep an angle to allow you to mount the Varia there, and my pannier bags would have been in the way of it anyway. Mounting it to either my PowerOn Cycling headrest (where I have another light mounted) or the rear rack would have been feasible, but the seat post mounts would have had to have gone on sideways, which would have mounted the unit sideways as well - horizontally rather than vertically.

My initial approach was to dig into my batch of bike accessories and to repurpose an accessory mount that I had previously used on my Catrike Pocket. On the Pocket I’d attached it to the accessory mount to get my front light a little higher, and leave room for my phone mount. Here, however, I figured I could use it to approximate a seat post off the back of the rear rack. It took some finagling, but I was actually pretty pleased with the results:

Varia on a faux seat post

I liked that it got it all the way to the back of the trike - well beyond that 5 cm threshold, and much further back than it would have been on an upright bike. And I liked that the articulated arm allowed me to center it over the rear wheel…

Varia centered over the rear wheel

But the proof, as they say, is in the pudding (tho I don’t know why they would put it there - isn’t that kind of messy?). In practice, what I found was that bumps and vibrations would rotate the Varia around the post, causing it to be “looking” off to one side or the other. Sometimes I’d notice this at breaks in riding, but at other times I caught it because it was alerting to things that were not directly behind me, while missing approaching cars.

I did try using tighter rubber bands with it, but the issue persisted. I also found a couple of adhesive items to stick to the tube alongside the mount, but it managed to move around them as well. It just wasn’t working.

So it was off to YouTube to search for solutions - I figured someone else might have come across this issue. I… didn’t find much, initially. But I did find Monty at Sportive Cyclist with this video that described how to mount it to the flap on a cargo bag. I don’t have the seat bag he shows in the video, but my panniers do have similar flaps at the back.

Rear pannier flaps

They are lower than I’d like, but do sit above the lower limit for the device. I set that aside as a fallback while it tried the other solutions I described above.

When they failed, I came back to Monty’s video, watched it again, and went out to try it on my panniers. The fabric flaps on my panniers are horizontal to the ground, as is the one in the video, but try as I might - and this at various times involved pliers and invariably a fair amount of swearing - I could not find any way to get the seat post mount to attach for a vertical orientation with the rubber bands going thru the flap.


Enjoying this post? Check out our Cycling page for links to other cycling articles on Applied Life


So I went back and watched the video again. Looking closely this time at the quarter-turn mount he attached to the bag, what became clear is that it wasn’t the seat post mount.

Now, I found Monty to be delightful in this video, but at no point did he mention that the mount he was using was not the one that comes with the Varia (I watched it again as part of writing this to make sure and nope - it’s not in there). It is possible, I suppose, that people who use a lot of Garmin products just have these other types of mounts laying about. The Varia is the first and only Garmin product I’ve ever owned, so this was non-obvious to me.

First I looked thru the box to make sure they did not include this mount with the device, and it was not to be found. So it was off to Amazon where, sure enough, they were readily available under the name Garmin Bike Mount, Quick Release, Quarter Turn.

Garmin Bike Mount, Quick Release, Quarter Turn

Once they came in and I looked at them I realized that they were much more flexible than the seat post mount, and that I had options now besides the very low-sitting flaps on the back of the pannier. And, in fact, I was able to set the light on my rack in a similar position to what I’d gotten with the accessory mount:

Mount attached to the rack

Garmin Varia in Place

It’s not centered over the rear wheel, so I lose some of that symmetry, but sitting to the left side of the trike actually puts it a tiny bit further out into the lane of travel.

I like this position because it puts it up at a reasonable height for the radar to pick up oncoming vehicles, and to make the light visible. And it actually puts it nearly an entire wheel further back on the trike than it would be on a diamond frame’s seat post so, hypothetically speaking, I should be getting alerts a little sooner than the upright riders are. The package from Amazon had two mounts, so I can easily transfer the Varia to my Pocket when I’m using that, and I can still use the seat post mount for my Cannondale if I ever ride it again (my poor, neglected Cannondale).

Now, this is a popular product, so there are a ton of reviews out there explaining how it works and so on, so I won’t trouble you with a lot of detail on that here. But I can offer a few tidbits on how it works for me in my usage.

First - as I said, I own no other Garmin products. I use Cyclemeter on my iPhone as a bike computer. For this setup there is a Garmin app that you must use to pair to the Varia via Bluetooth, and if you use the app it will give you visual alerts in addition to audio alerts for oncoming traffic. Unfortunately, to see those alerts you must have the Garmin app active on the screen, which precludes seeing the information on Cyclemeter. There are some apps that work with the Garmin - Ride with GPS among them - and add the visual alerts in those apps. Cyclemeter does not offer integration with it at this time.

However, once you open the app to connect the phone to the Varia, the app continues to run in the background and give audible alerts. I find this works very well for me, because the audio alert automatically cues me to check my mirrors. This is going to offer more real-world information than looking at the phone in that moment. And I generally ride with one earbud in (right ear, away from traffic), so the audio alerts are loud and clear for me.

In terms of protection, I find that the majority of the time I see the vehicles in my mirrors before the Varia detects them. This is due both to a long-developed habit of frequently looking in the mirrors, and abetted by living in the relatively flat territory of Illinois - there aren’t a ton of hills to block the view. But it has largely eliminated any moments of being surprised as I’m being passed, and the device has a separate auditory alert for vehicles which are approaching very quickly, which is a nice cue as well.

So - it works just about perfectly for my application. I did have it in place - albeit on the accessory mount that I later replaced - during my Hennepin Canal Trail ride. I didn’t really use it for the ride out and home, which was virtually entirely on the trail. But for the second part of day two I spent a fair amount of time on unfamiliar, heavily traveled roadways. In areas with a medium level of traffic it worked fairly well, but on busy roads it essentially alerted all the time. In that situation the light flashing on it was probably a benefit, but the alerts were not. But then again, in that sort of a scenario you are watching your mirrors the entire time as well (and trying to get out of the situation as soon as possible).

All-in-all, it works well. It can be mounted on a recumbent trike, and arguably further back, extended the radar range further behind the machine. But for most trikes you are probably going to need to order the additional mounts as well. They aren’t terribly expensive - less than $10 before tax - but for the price of these devices, I frankly think Garmin should include one or two of them in with the box along with the seat post mounts. But now at least I have a way to use it on all our rides - even the one I don’t ride any more.

Hennepin Canal Trail End to End - Lessons Learned by Erin Wade

At the end of June of this year I took a ride along the Hennepin Canal Trail from the trailhead at Bureau Junction to the western end - or what I thought was the western end (more on that a little further down) - of the Hennepin Canal Trail and back.

This three day, 150+ mile ride, involving two overnight stays at Geneseo Campground in Geneseo, and took me across the Mississippi into downtown Davenport, Iowa, was my first real foray into trikepacking. The closest I’d come to it before this was car camping for the overnight stay at the Hilly Hundred last year, but that didn’t require me to carry everything on my ride. All in all I think I was fairly well prepared for the trip, but there were definitely a few things to learn from it as well.

Distances

As those who are clever with the maths will already have sorted out, my ride was set at about 50 miles per day. Or at least that was the average across the three. It was a little lopsided in practice, with 48-mile distances on days 1 and 3, and 58 miles on day two.

I’ve taken many 50~ish mile rides over the past few years, and I’ve gotten to the point at which, while it still feels like a long ride, this type of distance isn’t daunting. And those distances usually take me around four and a half hours, including a couple of breaks for snacks and to get up off the trike and move around.

I knew the canal trail would be slower - it always is. The softer surfaces over the first two-thirds of it just make for lower speeds. I thought I’d mentally compensated for that.

But I went into the ride planning to take my time, to stop and take pictures, pose the trike strategically…

Valencia on the Canal

…because this was supposed to be fun and relaxing. But I didn’t account for the amount of time this would add. So - when I got just past the halfway point on day one and realized that I was going to be running out of daylight for setting up my tent at the campground, what had been a very enjoyable ride up to that point now became one where I felt I had to push and make distance. What had been fun rapidly became more like being at work, which was the opposite of what I’d intended.

So - for future overnight rides, I think I’ll set the distances in relation to travel time a little shorter to account for that, especially on any day where I have to set up camp at the end of the day. Better, it seems, to have a little extra down time at camp than to be pushing to get there ahead of sunset.

Equipment

Overall, I have to say that the equipment that I put together for my trip performed flawlessly. Everything worked exactly as designed.

The Peak meals were all good, and with one exception - Chicken Teriyaki and Rice - I would actually qualify them as excellent. I will be bringing them along on future trips, cycling or otherwise.

The little Jetboil camp stove worked as designed, rapidly heating up water for those meals and for coffee, making for multiple satisfying camp meals. It was also efficient - I made four meals and two travel mugs worth of coffee across the three days, and did not even use up the first fuel cell.

I brought along three portable batteries to charge devices, as well as cables to charge the devices and the batteries themselves. This was overkill. Because my campsite had electricity I was able to charge my battery, and one turned out to be more than enough. I could have saved a little weight in that area. Otherwise I used nearly everything I added for the trip.

MLW bought me a clothesline, which was great for hanging clothes that I’d rinsed out from day one, and a little battery fan with a light on it which did an excellent job of moving air in my single-person tent. This was a good thing too, because I ended up spending a lot more time than I planned in the tent on the morning of day three.

Which brings me to the only equipment concern that I encountered - the tent.

One single-person bright orange tent - check!

I say “concern” here, because the tent also performed nearly flawlessly. It held me and had enough room to provide protection for some of my things that I wanted in out of the weather. Paired with the lightweight inflatable pad I brought along it was comfortable - the all mesh top, paired with the little fan allowed for airflow and star gazing in the night, and the separate rain fly provided cover and protection from the elements when it was needed. It did develop a small leak during the heavy storms, but nothing unmanageable, and which probably could be resolved with a little seam sealer (which one might argue I should have applied before packing it anyway). It worked well, it worked as designed.

It’s the design itself that I’m having second thoughts about. It protected me well, even during storms. But it was clearly designed just for you to sleep in. Having to spend several waking hours inside it because of the rain pointed out to me that you cannot sit up in it. This resulted in a lot of time leaning on one elbow and then the next, swapping when the pain was finally too much to bear. For future overnight rides I may need to invest in something slightly larger to allow for the option of sitting upright.

The Trike

My ride for this adventure was my 2019 Catrike Expedition. Back when I bought it in the summer of 2019 I’d ordered it with this sort of riding in mind. That meant including a rear rack and a set of pannier bags, and I’ve routinely been riding it in that fashion since it arrived. But for this trip I needed more cargo capabilities. I considered pulling a trailer, and then did some experimentation with stacking items on the back of the rack. However, the post about that experiment led some folks to suggest a couple of different options of supplemental bags that hang across the back of the trike’s seat, bringing the weight down lower for a more advantageous center of gravity. I went with the Radical Designs Banana Racers, which the Hostel Shoppe in Steven’s Point, Wisconsin special-ordered for me in Orange (naturally).

These worked perfectly - in combination with the pannier bags they swallowed everything I was carrying with the lone exception of my sleeping bag (which I strapped to the top of the rack). And, as described, they put the weight of the cargo down low, exactly where you want it. Plus, the bottle carriers on the top of each bag keeps your extra fluids right in reach. It’s an extremely well thought out design. And - because they essentially lay across the back of the seat, easy enough to remove when you get home and aren’t in need of the extra capacity.


Enjoying this post? Check out our Cycling page for links to other cycling articles on Applied Life


As for the trike itself - it’s right there in the name. She was built for expeditions, and handled all of the weight without issue. This ride covered multiple surfaces - from dirt and sand trail to asphalt and cement roadways. I knew the weight was there whenever I tried to move the trike by hand - on a regular day, when it’s not fully laden and I need to move it somewhere I typically grab it either by the back of the rack or by the handle on the neck rest and lift it a bit to steer it where I want it to go. The first time I tried this it was clear I wouldn't be just lifting it and tossing it about. But once I was underway the weight was barely noticeable.

And - in further testament to the design, two thirds of this ride was thru the middle of nowhere, with (as far as I’m aware) nothing resembling a bike shop anywhere nearby. I had my tools with me, and I’ve gotten a lot of practice making adjustments and repairs over the past few years, but there were no mechanical issues - not even a flat tire - for the entire trip. I had a similar experience last year during the Hilly Hundred, where I rode past many a person on the side of the road, making repairs to their very fancy road bikes, while I had nary an issue. These machines are built to live up to their name.

Do your Homework

Part of the established objective for this ride was to:

Recapitulate the original purpose of the Hennepin Canal - connecting the Illinois River to the Mississippi at the Quad Cities…

In looking at this, after my entry about the second part of day two, one gentleman online asked why I was riding into the Quad Cities and across the Mississippi when there was still Hennepin Canal trial to ride up to the Mississippi.

And… he was right. I thought the canal trail ended at Timbrook Field, where it empties into the Rock River - this is the way it looks on the map. I even made a joke about how frustrating it must have been to have only 29 locks instead of rounding it up to 30…

There is one final lock at the end of the canal - Lock 29 (you just know that somewhere in the mix there had to be that one guy who was just looking for a way to add one more lock to the system to get a round number at the end…)

I felt very clever…

For the record, there are 31 locks on the canal (also, distressingly, not a round number - but I digress). The canal stops at Timbrook field, but picks up again several miles down the Rock River and follows it till it empties in the Mississippi.

I’m going to openly admit I did not know about this last portion of the canal trail. But when I first started considering and laying out this trip, I did initially look for a way to follow the Rock River into the Mississippi. The thing is, while there are bike trails that start to appear as you get to the western end of the Rock River, much of what’s between Timbrook Field and the Mississippi along that route is major roadways and what appears to be commercially zoned territory. It did not look inviting for cycling, nor did it appear to offer anything like the very nice lunch opportunity that I found in Davenport.

In fact, it doesn’t offer a bikeable bridge across the Mississippi at that location at all, so I’d have had to backtrack and ride through the Quad Cities one way or the other to nearly the same spot to get across in either case. And I wanted to cross the Mississippi specifically at the Arsenal Bridge (also known as “Government Bridge”) because that’s supposed to be where The Great American Rail Trail marks its crossing from Illinois into Iowa.

Speaking of which…

The Great American Rail Trail

I love the concept of The Great American Rail Trail (GART) - a coast-to-coast cycling trail across the country. I love it so much that I can even set aside, and not even comment on the fact that the overwhelming majority of the trail in Illinois is based on two canal trails - the Hennepin and I & M Canal trails - and so aren’t rail trails at all.

See how I’m letting that go without even mentioning it?

The route I followed from Timbrook Field doesn’t exactly mirror, but does closely follow the planned route the GART (I used Google’s cycling directions for my route).

GART Route

I wanted to get an idea of what this route was like now, an on-the-ground impression of what was still needed.

And there are absolutely improvements needed.

To their credit, Rails to Trails has done an analysis of this gap in their conceptual trail, and they pretty much peg the biggest problem correctly:

Most of the streets that are planned to be on-street signed routes are low-volume, low-speed roads, though the route is currently proposed to cross the Rock River on state Route 84/Colona Road, a major arterial road. A physically separated alternative should be explored in this section. (Emphasis added)

Yup - that section of Route 84 is four lanes of traffic and represents what appears to be the only bikeable bridge across the Rock River for miles in either direction. It is what Google identifies as their bike route across the river, and it does have a very wide shoulder. It’s only a mile of the trip in each direction, but it’s a butt-puckering mile. A separated cycling bridge is desperately needed there, along with an overpass to cross the highway where needed.

Also - for anyone looking at this route for themselves, I’d follow the course thru the towns of Carbon Cliff and Silvis laid out by the GART proposed map over the Google cycling directions. I’m generally comfortable riding on roads, and everyone was respectful of my space on my trip, but Google puts far too much of it on busy roadways.

It all leaves me wondering about the likely success of the GART, at least here in Illinois. There are only 28.8 miles of gap in Illinois, which seems like a small number. But much of that gap is between areas that are in rural and marginal land - along the Illinois river, for example. And the canal trails themselves are in need of resurfacing and ongoing maintenance attention if the intention is for the GART is meant as a realistic coast-to-coast byway.

But that depends on whether that’s really the intention. It is the concept, but if that’s meant just to drive an expansion of trails nationwide, then maybe its already doing its job. Still, I am a little distressed to see that, when they highlight the eight-of-twelve states who “will have added new trail segments since the route was initially developed” Illinois is not one of the eight.

Overall

Overall I enjoyed the trip! I was pleased to find that I still enjoy camping, and three consecutive days on the trike, with two of them deep in natural solitude was definitely a positive for me. If that sort of activity is your thing, the backdrop of the Hennepin Canal is a wonderful thing, with lots of nature available, intermittently punctuated by examples of human ingenuity in the form of the locks and lift bridges.

The things that I’ve learned in preparation for this trip, as well as by taking it, should allow me to improve and extend my enjoyment for the next time out. Shorter distances, in particular on those days where I’d need to set up camp at the end, would go a long way towards making the ride a little more relaxing.

So now I’ll be looking for additional opportunities. I’m not sure if I’ll be able to fit anything else in this summer - multiple day rides are hard to fit around a work schedule, and we are starting to run out of season. But I’ll definitely be working out something for next year, if not this fall.

Hennepin Canal Trail East to West and Back Again - Day Three by Erin Wade

The Idea: Recapitulate the original purpose of the Hennepin Canal - connecting the Illinois River to the Mississippi at the Quad Cities - by riding it from its eastern end in Bureau Junction to where it empties into the Rock River at the western end at Timbrook Field in East Moline, and continue on from there to the Mississippi River and across into Iowa. And then, of course, turn around and reverse the trip back to Bureau Junction.

6/25/2022 - Geneseo Campground to Lock 2 in Bureau Junction - 48 Miles

Rain.

I felt the first drops sometime around 4:30 AM. I was sleeping with the rain fly open, so the mesh top of the tent was open to the sky; and hence, to the rain. Fortunately, those first few drops were light - enough to wake me, but not to drench or wash me out. I unzipped the mesh and pulled the rain fly down, zipped it all back up, and went back to sleep.

The tent did it’s job - I was dry and comfortable until I woke up in earnest around 6:30 or so. This wasn’t due to an alarm, or issues with the weather, just my natural wake cycle.

But while I was awake - and still dry - the world outside my tent was decidedly not. Those light drops of rain had precipitated a storm system that was still diligently pounding down on my campsite, moving along a easterly track, essentially scouring ahead on the path I was planning to follow that day.

I had planned to be on the trail by about 8:30 or so, if not earlier, trying to apply the lessons I’d learned about departure time from day one. Instead I found myself laying there, watching the radar on my phone, looking for openings in the rainfall.

About an hour later - around 7:30 or so - it opened up enough to allow me to get out of the tent, take care of personal sundries, and get some breakfast - Peak Refuel Breakfast Skillet (very yummy!) - and coffee made. But only just. As I was getting that all put together the storm started to roll in again, so I gathered up my food and coffee and ducked back into the tent.

I love the idea of this tent:

My tent

It’s a lightweight, single-person tent clearly designed primarily to provide cover and protection for its occupant and a few personal items overnight on a trip very much like this one. And it works great at all of that - I was kept safe from the elements aside from one tiny drip (which I can address with some seam sealer). It was comfortable, and had room for the little battery fan MLW cleverly got for me, which effectively moved the air in the tent while everything was closed up. It performed as designed.

What it did not do - could not do, by design - was allow me to sit up. This hadn’t been a consideration for me, since the only thing I was planning to do in it was sleep. But I hadn’t considered this situation.

I ducked back into the tent probably around 8-8:15-ish. It continued to storm until about quarter after 10. And when I say storm here, I mean wind, rain, thunder and lightning (I’ll ride in rain, but I’m a-skeerd of lightning). So I spent about two hours alternating between being propped up on one arm and laying on my back. I ate my food, drank some coffee, and did some work; and spent much of that time trying to decide at what point the pain in my arm and shoulder was simply too much and I needed to lay back down.

I still love the idea of this tent, but for the next trip I think I might need to do a search for a lightweight tent that is more upright. Or, alternately, see if there is some sort of lightweight tarp system I could bring along to allow me to get out of the tent in the rain. It would have been nice to have that in any case, since the trike - with my cargo bags - was out in the weather the entire time. But I’m pretty sure anything with open sides would have left me damp during the storm.

As the rain cleared I got out and started to get things ready. Although the trike and bags were out in the rain, pretty much anything that I was worried about keeping dry was either in waterproof bags, or in the tent with me. So mostly it was now a matter of emptying the bags out to get the water out of them, and then repacking them and taking down camp. I was ready to hit the trail just after 10:30:

Val is ready to go

This was, of course, two hours later than I’d planned. But then, they say that men planning is what makes God laugh, so at least I’d contributed to someone’s entertainment for the day.

While I wasn’t able to apply all my lessons from day one and get on to the trail as early as I wanted, I did have the two additional bottles of water along for the ride so I wouldn't run out on the way back.

And I knew the ride back was going to be slower than the ride up because the unpaved portions of the trail - the portions like this…

Dirt with a side order of sand

…would be softer - and soft is slow. But while I’d mentally accounted for the surfaces, the storm rolling along the trail ahead of me provided other obstacles. One was fairly predictable:

But… but… it’s a Catrike, not a Ford…

Fortunately, while the water was over the path, it wasn’t very deep. Most importantly, it was below the level of the seat, which meant I wasn’t dragging my backside through it. Several years ago, riding the Feeder Canal, I discovered that it was possible to hold yourself up above the seat by pressing your back against it and lifting up at the handles (though you don’t want to have to do this for very long), but that wasn’t necessary here.

The others I hadn’t expected, though I probably should have:

This is not the kind of windfall I was hoping for…

There were three of these along the way. This one was the first that I encountered, and in this case I dismounted and cleared it out of the way:

That’s more better!

The second one I did not get a picture of, but it was branches laying across the trail around my standing chest height. There was no way to get to them that allowed me to move them out of the way, but the trike is much lower than my standing height, so I was able to pick my way under those with the trike. And the last one showed up towards the end of the ride:

Man down!

Maybe, if I hadn’t been riding for hours, I would have had the gusto to pick it up and move it, but I doubt it. A brief attempt found that it was resolute in its intention to lay across the trail, and I suspect it will take a person who is equipped with a chainsaw to get it gone. So here I just shook my head and carried the trike over it.

But having the storm proceed me along the trail wasn’t all bad. The rain knocked down the tall grass on the early portions of the trail…

Take that, tall grass!

…so I was able to proceed along this time without becoming a grass seed collector, like I had on day one. Not as good for my future artisanal grass seed business, but it kept me from having to pick seeds out of… well… everywhere.

One might think that day three is simply a reversal of day one, and to some degree I suppose that’s true. And given that riding along the canal puts you out in nature, albeit man-made nature, all day, which means you spend a lot of time with views like this…

So the frogs don’t really sit on top of the lily pads that much - Kermit and cartoons lied to me…

…and encountering fellows like this…

Soft shell turtle

…it’s hard to think of that as being a bad a thing.

But coming at things from the other direction does mean that you are seeing things from the other side. And so when I came across this, I realized I hadn’t seen it on the way up:

Water plume

Water plume

As you can see from the water mark on the concrete, the water is coming up under pressure in bursts. I have no idea why - I don’t know if this is a feed from a tiling system, or where the additional water would be coming from. But it was oddly soothing to see and listen to, a little like waves crashing on the shore, I suppose. I ended up sitting there and watching it for a little while before I moved on.

And it would have been behind me on day one, as well as being more towards the later part of that ride, where I was trying to get to camp, so I didn’t notice it at all. And, because of that dynamic, I was now able to spend some time on things that I did notice, but had to simply ride past because I needed to be somewhere. Most notably, this lift bridge.

Bridge to… Terabithia?

Unlike most of the locks, the gates and hardware are still present at this site:

Gates

Hardware

Hardware

Hardware

The other thing that is different going from west to east is that the trail mileage markers are counting down. Since it was the last day, and I was on my way back, it gave a real feel for where I was at on the ride, and how much progress I was making. And as I got into the last hour or so, I was in much more familiar territory; I was on the parts of the trail I’d ridden several times before. So a lot of it was simply enjoying the nature and counting things down on the markers as I pedaled along.

But while I was enjoying my ride, I was still glad to see the end when it arrived:

The End… of the trail

As I’d expected, it was slow - both in terms of riding speed, which came out to an an average of 8.15mph for this portion of the trip - and in terms of total time. I arrived at the end of the trail at a little after six in the evening. All told, between the soft surfaces and obstacles, the ride back took me over 7 1/2 hours to complete.

Of course, that’s 7 1/2 hours of nearly complete solitude, in nature, so taking a little more time is hardly a bad thing.

Hennepin Canal Trail East to West and Back Again - Day Two, Part Two by Erin Wade

The Idea: Recapitulate the original purpose of the Hennepin Canal - connecting the Illinois River to the Mississippi at the Quad Cities - by riding it from its eastern end in Bureau Junction to where it empties into the Rock River at the western end at Timbrook Field in East Moline, and continue on from there to the Mississippi River and across into Iowa. And then, of course, turn around and reverse the trip back to Bureau Junction.

6/24/2022 - Timbrook Field in East Moline IL to Davenport Iowa via the Arsenal Bridge, then back to Geneseo Campground - 44 Miles

I’d gotten to Lock 29 at Timbrook Field on the Rock River, but that was only the first part of the trip planned for day two. The next stage is planned was to ride from there up to the Mississippi Riverway Trail, and cross the Arsenal Bridge to get to Iowa.

On The Road

The first part of this was the section in which I was least confident. Using the cycling directions in Google Maps I’d laid out a course to get from Timbrook Field to the Riverway Trail:

Googling it

This would put me on public roadways and take me thru towns I’d never heard of before - Carbon Cliff and Silvis - despite a lifetime in Illinois. I routinely ride on the road, so that didn’t bother me in and of itself, but two segments of Google’s route put me on four-lane sections of road, with no clear alternative around them.

The first portion of this came up quickly - about a mile of Illinois Route 84 offering the only clear means to cross the Rock River. This was a four-lane, 55 mph roadway that I was not excited about using, even for the single mile that I would be on it. And I am a staunch proponent of the idea of taking your lane under most circumstances. In this case, however, I was honestly relieved to see that it had a very wide shoulder, and despite my usual predilections, I took to that shoulder and stayed to the far right side of it, watching my mirrors and my radar readings closely all the way across.

Safely across, the rest of the ride took me thru Carbon Cliff, which Wikipedia says is named for the coal mines that appeared on a bluff on the west side of the town. This is actually what I would have expected - Illinois was and is a coal-rich state, and you can still see the slag piles outside of some of the towns, odd conical mountains looking out of place on the prairie. But as I distantly recall from high school, much of it is especially dirty burning, even for coal, so the industry fell out of favor quite some time ago. Carbon Cliff is also apparently notable for being associated with the somewhat ironically named musician Jude Cole.

You remember Jude Cole right?

Neither did I, really, but Apple Music did offer up a couple of songs that sounded familiar, and the guy has some connections - Keifer Sutherland among them - and appears to have done fairly well for himself for a guy from a tiny town. Of course, his biography says he was born in Moline rather than Carbon Cliff, but odds are good that Moline was where the closest hospital was back in 1960 (and probably now, too).

I learned all of this later, of course. In the moment I was too busy watching the road, my mirrors, and the radar to take in much by way of the sights. Once I was off the four-lane section, though, things got better. The roadway widened again to allow access to I-92, but that was a brief interlude that was, thankfully, not too busy.

From Carbon Cliff the directions took me thru Silvis and into East Moline, home of the John Deere Harvester Works.

This is where they make the big guys.

In fact, the course that Google gave me took me right alongside the plant. It was a little like begin back home, as two separate combines pulled on to the roadway behind me as I worked my way along Harvest Way. I assume this was some sort of test drive for them after coming off the line.

Great River Trail

Once past the Harvester Plant I quickly found the cycling path that would hook me up to the Great River Trail. I missed the first access point, and ended up following the trail to Beacon Harbor Park, adding a little bit of distance to the ride. But once I was there, the Mississippi was finally in view:

Val and the Mighty Mississippi

It’s a big river

I’ve seen the Mississippi many times, but it never fails to impress - it’s a big river, even this far north. And, as one might expect, it is a constant companion for much of the ride along the Great River Trail. The trail flows through multiple parks along the way…

…and heading westward along it offers increasingly larger views of the new I-74 bridge, which apparently was just formally opened this past December.

Bridge

I wasn’t aware of that at the time, but it is a visual draw nonetheless. The path I was taking also took me far enough along to see where they were taking the old bridge down:

What goes up…

And of course, you see rivery sorts of things along the ways, like riverboats…

Celebration Belle

…and tugboats:

Tugboats!

Growing up we would often see the tugs and barges on the Illinois river. Then, as now, I find myself idly wondering why they are called “tug” boats when they clearly push the barges from behind. Maybe just no one liked called them “push boats”… ? (Though apparently they sometimes are called just that).

Getting across to Iowa via trike is a two step process, at least along the route that I took. First, you have to cross to Arsenal Island, via this bridge, apparently sponsored by the Quad Cities Bicycle Club, which appears to be an active group, with a calendar full of group rides and events.

QCBC Bridgr

Arsenal Island

This bridge gets you on to Arsenal Island itself, which is aptly named:

Rock Island US Army Arsenal

Well, it’s aptly named now, given that it is the largest government owned weapons manufacturing arsenal in the United States.

Preceding the current Arsenal was Fort Armstrong, which was established after the War of 1812 as a set of western frontier defenses. There is a marker for the site directly along the path:

Fort Armstrong Site

But despite the current and former military features, the island’s history shows it as former native land, and the army seizure of it involves it as part of the disputed territory resulting in the Black Hawk War. On the island, and it’s occupation but the army, Black Hawk was quoted as saying:

This [island] was the best one on the Mississippi, and had long been the resort of our young people during the summer. It was our garden, like the white people have near their big villages, which supplied us with strawberries, blackberries, gooseberries, plums, apples and nuts of different kinds. Being situated at the foot of the rapids, its waters supplied us with the finest fish. In my early life I spent many happy days on this island. A good spirit had charge of it, which lived in a cave in the rocks immediately under the place where the fort now stands. This guardian spirit has often been seen by our people. It was white, with large wings like a swan's, but ten times larger. We were particular not to make much noise in that part of the island which it inhabited, for fear of disturbing it. But the noise at the fort has since driven it away, and no doubt a bad spirit has taken its place. - Black Hawk

Realizing that much of this occurred around and during the presidency of Andrew Jackson, he of the Trail of Tears, makes it all unsurprising, but no less sad. Incidentally, fans of US History will be well served by following that link for the Black Hawk War. It’s a long article, but the war, which I suspect is little known outside of northern Illinois, involves a vast array of names that you’ll recognize from later history, including such minor historical figures as Abraham Lincoln and Jefferson Davis, among others.


Arsenal Bridge/Government Bridge

Not far past the Fort Armstrong site you will come to the bridge crossing from Arsenal Island into Iowa. This bridge is known both as the Arsenal Bridge and - perhaps more widely as Government Bridge.

Government Bridge

It’s an impressive steel structure, over 100 years old, serving multiple paths, with rail at the top, automotive traffic below, and foot and cycling to the side. This is the crossing that Rails to Trails originally identified as its crossing point between the Illinois and Iowa sections of the Great American Rail Trail. The current map has been updated, however, to include both the Government Bridge and the new I-74 bridge discussed above, since that also has a pedestrian and cycling bridge on it.

Even though it’s not the only way to cross any more, it’s still an interesting way to get there, and this history buff prefers the 100+ year-old option:

Davenport

Davenport is one half of the Iowa pair of the Quad Cities (Moline and Rock Island are the two on the Illinois side. Wikipedia also describes East Moline as part of the Quad Cities, but wouldn't it then be the Quint Cities? But I digress…).

I had originally planned to stay for only a few short minutes on the Iowa side and then turn around, with a goal of writing about how the air on that side of the Mississippi just seemed heavier, more oppressive than the air in my fine state of Illinois. I have family who live over there in Iowa, and this is a fond refrain that I will use with them if the opportunity presents. It’s never not funny (to me).

But the reality was that I had planned to have my lunch somewhere along the Mississippi River, and while Google Maps had suggested that there were several restaurants available, looking for them while riding found that they mostly seemed to be a block or two away from the river as opposed to begin right along it like I’d hoped. It’s absolutely possible that I’d missed something along the way, but since I was pausing on the Iowa side I thought I’d take a gander at downtown Davenport on the map to see what was available, and it appeared there were multiple options within a short distance of the trail.

I settled on The Barrel House:

Val at the Barrel House

The menu was exactly what I was looking for, burgers and beer being prominent components. And as a bonus, there was outdoor seating, which I always prefer in general in the summer, but it was especially nice because I could keep my ride in sight while I quaffed:

Bent River Wheat with Val in the distance

I enjoyed their variation on a blue cheeseburger, along with a Bent River Island Time Wheat, an excellent local beer I’d never had before. In fact, there may have been two of those cross my table. And, again trying to learn from day one, I sat back and relaxed for a while.

So, for better or worse, Davenport was just too pleasant and accommodating for me to make my joke about the oppressive nature of being in Iowa. But don’t let the Iowa members of the fam know, okay?

Heading Back

I’d stopped for lunch around two in the afternoon, and while I was taking my time, I wanted to be sure to get back on the trail early enough to be ahead of the area’s Friday rush hour before I got back onto the road portion of the return trip.

I succeeded in this, but only just. I did find the direct route off of the Great River Trail that I had missed on the way in, which helped. Still, things were definitely getting busier as I re-approached I-92, and I found myself spending a lot more time than usual (which is saying something) watching my mirrors. Fortunately, it was uneventful.

I did stop at a Casey’s in Carbon Cliff on the way back to buy a couple of bottles of water. Again, trying to learn from before, I wanted to be sure I had enough water for both the return trip to Geneseo Campground and I planned to fill them to bolster my supply for the trip home the following day.

And, once I got there, it was nice to be on the trail itself again:

Back on the trail

Once I was back at the campground, it was all a simple case of making up some food with the JetBoil - Chicken Teriyaki and Rice this time, which turned out to be the only mediocre meal of the bunch, with the chicken coming out just a bit dry. But I suppose it’s possible that I didn’t use enough water.

The Vintage RV folks appeared to have hired either a band or a DJ, which played a little past the 10pm quiet time, though that seemed reasonable enough for a Friday night. I gave thought to going up to listen for a bit, but, well, I didn’t want to. I’m a solitary person by nature, and when I spend time alone - as I am on this trip - instead of becoming satiated I tend to get progressively better at being alone. So instead I fired up the iPad, where I’d downloaded Doctor Strange and The Multiverse of Madness ahead of the trip for just such an occasion, popped in my AirPods, and packed it in for the night.

Hennepin Canal Trail East to West and Back Again - Day Two, Part One by Erin Wade

The Idea: Recapitulate the original purpose of the Hennepin Canal - connecting the Illinois River to the Mississippi at the Quad Cities - by riding it from its eastern end in Bureau Junction to where it empties into the Rock River at the western end at Timbrook Field in East Moline, and continue on from there to the Mississippi River and across into Iowa. And then, of course, turn around and reverse the trip back to Bureau Junction.

6/24/2022 - Geneseo Campground to canal end at Timbrook Field in East Moline IL - 13 Miles

I woke the morning of day two surprisingly well rested. It’s been years since I’ve actually been camping, so I was a little concerned that I might find that sleeping in a tent was no longer something that worked for my middle-aged body. But the combination of the shower the night before, and liberal application of ibuprofen seems to have done the trick.

I started the day with Biscuits and Gravy by Peak Refuel, paired with a large mug of French Press.

Fueling up for the day

As with the Beef Pasta Marinara I’d had the night before, it was excellent. After years of picking charcoal and grit out of campfire-prepared bacon and eggs, the freeze-dried foods seem like quite a luxury.

The Campground

It just so happened that I had planned my ride over the same weekend that a vintage camper group had reserved space at the campground. I’d been made aware of this when I checked in the night before, but I’d rolled in later than I’d hoped, so my focus was on getting cleaned up and getting my campsite up for the evening. But the morning of the second day I took a look around on my way to and from the bathroom. There were an array of vintage campers - the Aerostreams and similar that you’d expect…

Campers

Campers

…to these massive trailers…

Big old campers

…and a couple of folks really threw themselves into the theme, adding vintage tow vehicles to the mix as well:

Old Trucks

Old Trucks - tho I’m almost old enough myself not to think of that Ford as “old’…

On the Trail

I managed to get everything put together and get out on the trail by about 9:30 in the morning. The entrance to the trail is literally just off the main drive into the campground, which made it very convenient. The trike was a bit lighter for this segment - I left the tent, sleeping bag, and inflatable pad behind at the campsite - and I could feel the difference. This had been part of the plan, since day two was the longest distance of the three. All of which meant things were moving a little faster as I rolled out onto the asphalt of the trail outside the campground.

I knew that I was moving towards a more populated area of the canal trail. It’s not urban, per se - I don’t think you can use that term to apply to any part of the trail. But as you move westward from Geneseo you see houses, side by side, on the opposite side of the canal, and you get less of a sense of isolation.

Which is why I was a little surprised when, a half-hour after leaving the campground, I came across this:

Huh!

You could call it gravel, I suppose - there are stones on the path - but it would be a generous description. But while it was an unexpected surface - and maybe, given the rest of the Canal Trail, it shouldn't have been that surprising - it was a fair trade-off for the view:

Sudden Prairie

Purple Coneflowers

Other purple flowers

The purple coneflowers give the impression that there has been an active effort to put in native prairie plants in this area. It was definitely making the pollinators happy, but for some reason I wasn’t able to convince any of them to stay still long enough to pose for a portrait.

A few miles after the prairie plot, however, the “gravel” gives way to relatively well maintained asphalt. And, in fact, from that point westward, solid surfaces are the rule - either asphalt or concrete, depending upon where you are at.

As this starts, the trail also starts to arc in a northwesterly direction, bringing you up towards, and eventually across the Green River:

Rolling up on the bridge

This is actually the second of two meeting points between the Hennepin Canal and the Green River. The first is a little more than 28 miles to the East, where the Hennepin’s feeder canal is carried over the Green River via a massive cement aqueduct. I was at that spot a few years ago - it’s something to see, with one body of water essentially floating overtop another. It is a decidedly unnatural thing. Unfortunately, the Aqueduct at this point is lost to time, replaced by a piping system that runs under the river to maintain the flow of the canal.

As far as being unnatural goes, this is a feature that the Canal and the Green River have in common. The Green River is largely a made made waterway itself, coming to life around the turning of the 19th century as part of a project to drain the former Inlet Swamp almost sixty miles to the east of this point. This project was undertaken to gain additional usable farmland, and, astonishingly enough, even back in the late 1800’s there was debate over whether the swamp should be maintained as a recreational wetland instead. I’m a little reluctant to admit that I have an ancestor - one Benjamin Franklin (yes) Johnson - who was, at one time, the commissioner of the Inlet Swamp Drainage District.

…So I guess it’s easy enough to determine where the family fell in the recreational wetland vs farmland debate.

But all that being the case, there are still wetland areas in the region, as is ably demonstrated a short distance further down the trail:

They didn’t drain this swamp

So many different shades of green

And in this area, as well as in others along the way, the canal has also taken a turn towards something more along the lines of a wetland:

Lillies

But not long after this point things get - and remain - decidedly more civilized:

Solid Asphalt

As I worked my way towards the end of the trail I was definitely in “town”, with settlement all around me. And not far from the end I encountered this:

Hennepin Hundred

It says that this is the finish line, but I was pretty sure that didn’t apply to me. I had places to be at the time, but I looked it up later on. The Hennepin Hundred is “Illinois’ only point-to-point, all-trail ultramarathon”.

I didn’t know this was even a thing, but that’s not surprising. I love cycling, but I’d sooner have my eyes gouged out with hot pokers than go for a jog. The event doesn’t occur until October, which is fortunate for me - if I’d selected an autumn date for this ride I might have ended up pedaling along with a pack of runners.

It was shortly after that sign that I came across the only underpass on the trip that I wasn’t willing to brave:

Yer gonna get wet. Real wet.

All of them have their own idiosyncrasies - uneven floors, sometimes a bit muddy at the start and end, a puddle right in the middle where it’s too dark to see - but this looked a little more… damp than I wanted to contend with. I rode up over the top.

It was a short distance from that point to the end of the canal trail. The trail itself signals that you have no choice but to turn around:

Loop-de-loop

There is one final lock at the end of the canal - Lock 29 (you just know that somewhere in the mix there had to be that one guy who was just looking for a way to add one more lock to the system to get a round number at the end…):

Resting at Lock 29

Me and my Val

And from here, the canal empties into the Rock River:

Canal’s End

At this point I wanted to be sure I took my lesson from Day One. I stopped, sat down on a bench, ate an apple, relaxed, and enjoyed the location, which included the rushing water from one last man-made waterfall:

The last man made waterfall

And I contemplated moving across to the other side of the lock - which the map indicates is the trailhead. But the bridge across the canal had other ideas…

She’s not gonna fit

Nope

I can sort of imagine the discussion that led up to the presence of this bridge:

Bob: “Uh, Bill, the plan says that we need a bridge across Lock 29.”

Bill: “We’ve got about 50 feet of metal left, and maybe five bucks worth of scrap lumber. Will that do?”

Bob: “Its good enough for government work!”

I would hear my Dad say that last phrase often when I was a kid, usually at the point where he had decided he’d worked long enough on something that might not be a finished as it could be. It was only later in life - when I see a huge sign on the highway that says “bump”, or a bridge like this, that I fully appreciated what he meant.

The completist in me briefly considered carrying the trike across, but the realist immediately imagined dropping it into the canal and told the completist to shut his pie hole.

From this point the Rock River follows a somewhat winding course for another 13 miles before it empties into the Mississippi. When I had started thinking through this ride, my initial idea was to follow the Rock from that point, fully recapitulating the course from the Illinois to the Mississippi. Unfortunately, I couldn't find a way to make that work that looked at all attractive from a riding perspective. While there are streets that get you there, large portions of the roadways looked to be major highways or at least heavily traveled, and in commercial areas. So I laid out a different path to get to the mighty Mississippi.

Once I’d had my fill of fruit, and I was rested and relaxed, I headed out to reach - and cross - the Mississippi.

Hennepin Canal Trip - Working Thru the Checklist by Erin Wade

I’m now a little less than two weeks out from my start-to-finish and back trip along the Hennepin Canal Trail. Given that, I’m making preparations and reviewing my checklist to make sure I have everything put together.

Making a list, checking it twice…

In many ways this has been an adventure in discovering the world of products designed for lightweight, outdoors travel. As a younger person I went camping periodically and I still have a fair amount of equipment from that era. However, pretty much all of it assumed that one was going to be piloting some sort of automobile either directly up to the campsite, or at least very close to it. I love my old green Coleman camp stove, but lightweight it is not.

Several weeks ago I ordered a lightweight tent and air mattress, and I already had a sleeping bag that I’d purchased for car camping at the Hilly Hundred last year. So I’m good in that department, but I still need to get practice setting it up and taking it down so I’m not learning that in the moment. I’ll plan to do that over the next few evenings.

When discussing what to do about food with My Lovely Wife she first suggested looking into whether MRE’s are something that can be ordered from Amazon.

It turns out that they can, but that search also opened the door to freeze-dried meals designed for backpacking (and hence, suitable for trikepacking). There are a variety of these available, and with no experience with them I decided to order one and give it a try. I went with Peak Refuel - they have good reviews on Amazon - and specifically tried the breakfast scramble. It was easy to make - just add the specified amount of boiling water, stir, and wait - and surprisingly good. I was a little afraid it would suffer from the Turkey Bacon Problem, but I was happy to be proven wrong. I suppose this is due, in part, to the fact that it is made of the real, expected ingredients.

Obviously I am not just going to eat breakfast skillet for every meal, so I ordered up a batch of these to cover breakfast and supper:

Future fuel

It would have been rather costly to try each of these in advance, so I picked some things I was pretty sure I would like with the hope that the breakfast skillet meal is a fair representation of the overall product. We shall see.

For lunch on day one and three I’m planning on bringing along granola bars and/or trail mix. This has been my strategy for longer day rides and it’s worked well for me. Lunch on day two will be at a restaurant in the Quad Cities. I haven’t picked one yet, but I’m planning on eating somewhere along the Mississippi. And I may just leave that up to spontaneity and serendipity. Tho, honestly, that is not my way, so I may break down and plan something…

To prepare those freeze dried meals, and more importantly, to be able to make coffee on my ride, I also need to be able to heat up some water. As mentioned before, it was clear my old Coleman camp stove was not going to do. There are a number of single-burner camp stoves that incorporate the fuel tank into the stand. I landed on the Jetboil Flash.

Jetboil Flash

There’s a lot to like about this product for trikepacking. In addition to being lightweight, it’s relatively small, and entirely self-contained when it is packed. Literally everything you need fits inside it:

Packed

Unpacked

As the name implies, it heats water to boiling very quickly. I should be able to get my breakfast started and then heat up a second pot for coffee well before the food is ready to eat. It has a couple of other neat features as well. The lid is also a drink cover - you could make soup in it, for example, and simply drink it out of the Jetboil pot. The protective plastic cover on the bottom is also a measuring cup and can be used as a bowl. And there is also this:

Heat Indicator

The side changes color as it heats up as a temperature indicator. It’s clearly a thoughtful design, and it seems sturdy. We’ll see how it stands up on the ride, but I’m optimistic based on my experience with it so far.

I do have a handful of remaining items to obtain. This morning I ordered a first aid kit and a fresh batch of tube patches. Obviously I hope not to need either, but I can just about guarantee that I will need them if I don’t have them.

I’ve debated about ordering a solar panel for charging battery packs. It’s on my list, but I have three or four battery packs I can bring along, and my camping site is supposed to have electric access, so it may not be necessary.

I also need to sort out how much water to carry. I should be able to get water at the campsite in the afternoon/evening of day one and two, and there will be spots to buy it during the day on day two. That would suggest I’ll be fine if I bring along enough to cover the ride in on day one, and fill those bottles again for the ride out on day three.

I am getting a little concerned that my side cargo bags - the Radical Design Banana Racers that I ordered - may not come in on time for the ride. They were supposed to come in the last week of May, but when I checked on it earlier this week I was told that it was still in transit from The Netherlands. If they are not in by the end of this week I’ll have to pivot - either use the backpacks stacked up like I tried earlier, or maybe break down and get the bags in a non-orange color (the horror!).

And finally, this weekend and next I’ll be working in extended rides - in the 40-50 mile range - to build up conditioning a bit for the trip. And now it’s time to check that item off my list for today…

Tagvault: Bike by Elevation Lab by Erin Wade

As I’ve been preparing for my upcoming Hennepin Canal Trip, one of the things that has been on my mind is security for my Catrike Expedition. With a few exceptions, most of my riding takes place starting and ending from my driveway. Still, when I do have the opportunity to use my trike as transport and I have a situation where the trike is going to be out of my eyesight, I always lock it up. But those situations are few and far between, and they are situations where the Expedition is only out of view for a few minutes.

For my upcoming trip, however, I’ll have a couple of nights where I’ll be asleep with the trike in a more or less public view, and I’m hoping for at least an opportunity to stop somewhere in the Quad Cities to get some lunch. I’ll lock it up, of course, but these situations made me start thinking about a means to find my machine if it were to “walk off” on its own.

I’m largely an Apple guy when it comes to technological solutions, so when the AirTags came out it was a natural fit for this type of need. Not only does the AirTag allow you to track a device that is missing, but it also has a “Notify When Left Behind” feature. This gives an alert on the phone if you are moving away from an item that is expected to be within a certain proximity of yourself. Or - more importantly - if that item is moving away from you. This feature has saved my AirPods Pro from disappearing on more than one occasion, and you can picture the application here - you’ll be notified if your machine is unexpectedly moving away from you.

The challenge was finding a way to hide or attach the AirTag to the trike without it being easily found and removed.

Enter the TagVault: Bike by Elevation Lab. Elevation lab is a Portland, Oregon, based company that makes a variety of accessories, mostly (but not exclusively) for Apple products, and that includes products designed to securely contain AirTags. In addition to the bike mount, they have them for your keychain, wallet, and even for your fine, furry companions.

The TagVault: Bike is designed to hide in plain sight by sandwiching between the bottle mount and the bottle cage. Elevation Lab indicates that it is lightweight (26 grams) and waterproof. It came out towards the end of February this year, just around the time I started to think about this trip, so when the company sent the promotional email it hit my inbox at just the right time. I ordered up two - one for my Expedition, and one for My Lovely Wife’s Catrike Pocket.

I ordered them not long after they came out, but it’s taken me a little while to get around to installation. It comes with pretty much everything you need to get it put into place:

TagVault and ancillary parts

What you see here is the TagVault itself, plus the two titanium torx mounting screws, and a torx driver, along with the envelope they came in. It also comes with a second set of shorter mounting screws, which are not shown here.

The AirTag is not included, of course. You’ll have to order that separately, either directly from Apple or a third party like Amazon (you’ll probably find them slightly cheaper thru the third party options).

Installation is pretty straightforward. The black TagVault: Bike separates lengthwise, which exposes the holding center for the AirTag. Once you place the AirTag inside you can close it up and line it up on the bottle mount.

AirTag in the TagVault. And like so many Apple products, the AirTag is a pretty thing, but immediately takes on fingerprints…

I placed the first one on my Expedition, which currently has the Terracycle Adjustomatic Bottle Mount in place. This is what it looked like before:

Pre-TagVault

I pulled the mount off and lined the TagVault up with the mounting points:

It’s naked!

Lining it up

Lining it up

Then I returned the Adjustomatic Bottle Mount on top of it (I had to take the bottle cages off so I could get to the screws to remove it - that’s an Adjustomatic thing, not a TagVault thing).

Adjustomatic in place

Adjustomatic from the top

Once it was all lined up I screwed in the new screws using the included torx driver. The screws are longer than standard to compensate for the additional distance the TagVault adds to the arrangement. Then I added the cages back on:

Back in place

For easier comparison, here is the before and after, top to bottom:

Before

After

I think it’s relatively unobtrusive - it raises the bottle mount about a quarter of an inch, but I don’t think that’s going to be noticeable in day to day use. I like that the screws are titanium, and I would note that they are a different size of torx drive than the size on the Park multi-tool that I carry in my pannier bags. Because of that, for just a second I almost added the driver to my kit, but then I realized I probably did not want to have it with me - otherwise the prospective trike thief would have a tool at hand to remove it. As noted before, the company heralds it as being waterproof, and it doesn’t add much weight to the trike. They also describe it as being “aerodynamic”, which is, perhaps, why it is rounded along the sides.

I’ve used a number of products from elevation lab in the past. They’ve always been high-quality, and this device also fits that bill. If there is any critique to give, it would just be that they have “ELEVATION LAB” carved into the top of it. I understand being justifiably proud of your product, but part of the point to this is that it’s supposed to be something you don’t really notice

But some of that is an artifact of using the Adjustomatic Bottle Mount. One a more standard mount the bottle cage covers the TagVault more completely, as you can see on the Pocket:

Catrike Pocket - Before TagVault

Catrike Pocket - After TagVault- From the side

Catrike Pocket - After TagVault - From above

The TagVault:Bike is $19.99 thru Elevation Lab’s website, with free ground shipping. It’s also available thru Amazon, but it’s oddly a little more expensive there. The AirTags run $29 each, and you can usually get a bit of a discount if you buy them in a four pack. Overall, it seems to me a pretty good deal for some added security.

The Dollar Bill Trick by Erin Wade

It’s been coming for a while - I’ve been expecting it.

The tread on the front wheels of my Catrike Expedition has failed to be visibly present for some time now, resembling in texture something more like what you might see on the rear of a top fuel dragster. But those with experience know that there are a lot of miles yet to be had, even as the wheel starts to get smooth.

For a while, a year or two ago, I struggled with an excessive amount of tire wear. It turned out that my front wheels were not in proper alignment - one of the hidden joys of riding a recumbent trike is that you have to maintain alignment between the front wheels in a fashion not dissimilar to that of an automobile. But I’d resolved that issue, and I’d gotten upwards of 4800 miles out of the current tires. They just kept on going. And going.

Until they didn’t. Of course.

I noticed it about three miles into a ride. As I was rolling along I suddenly got a repeated “thump-thump-thump” coming from my right wheel. I briefly thought it might be an imperfection in the pavement, so I moved into another part of the lane to see if it went away.

“Thump-thump-thump”

It was hot out - almost freakishly so for this time of year. Here in the upper Midwest we went from the low 60’s to the low 90’s (F) in a day. Given that, I thought (well, hoped, if I’m being honest) maybe I’d just picked up a chunk of tar. So I pulled off to the side.

I… I… I’m just so tired…

Nope. Not tar.

That wear pattern was not on the tire the last time I rode it. Because they were far along in their rubbery lives I check them fairly regularly. I’d like to say that I checked it before heading out for this ride, but I did not. But in either case, I suspect the heat may have accelerated its inevitable demise.

I actually have spare tires - I ordered them a while back. Given the wear they were showing, and the supply chain issues of our current era it just seemed better to go ahead and get them. I did not, however, have the foresight to keep them on the trike. This essentially meant my ride would need to be cut short.

I texted my support crew (My Lovely Wife) to put her on alert, but I figured I would try to limp home. I was only about 3 1/2 miles out, and the tire had not yet failed, so it seemed like it was worth a shot, taking things very slowly.

I made it another mile. What’s more, although I knew it was imminent, I still screamed like a child when the tube popped.

I could have given up then and texted for MLW to come get me, and I did consider it. But, while I didn’t have spare tires with me on the trike, I did have tubes (always). So I could swap out the tube and try to make it the rest of the way home. But I knew that, if I just put another tube inside that damaged tire it would almost certainly pop again, the worn spot not providing sufficient protection from the road.

I’ve seen the idea of the dollar bill trick described and discussed multiple times on social media. In general the idea is that our “paper” money is actually made of a durable combination of cotton and linen, the better to help it survive all of that folding and re-folding, and so can function as a temporary tire patch to get you home.

I was certain that I had some denomination of paper currency with me, but I wasn’t sure how well the bill itself would come thru the adventure (I wasn’t excited about trying, say, the twenty dollar bill trick…), so I did spend a few minutes casting about for other options by digging into my panniers. I did have a roll of rim tape in there, and I made a brief, abortive attempt to fashion a patch using that. It was very quickly clear that the tape was not going to do the trick, so I started sifting thru my cash. As luck would have it George Washington was in fact present and ready for duty.

George is on the job!

I folded the bill in half and inserted it into the tire over the hole, between it and the tube. I rotated the wheel so that the patch fell towards the bottom of its arc to better keep it in place. Then I used my Kool Stop Tire Bead Jack (seriously one of my best purchases ever) to get the tire seated on the wheel, and headed out. Slowly.

It worked - I made it home without further incident. While I was riding, I noticed that the thrumming had stopped. Apparently the dollar bill was evening things out enough that the tire was behaving more normally. And when I arrived home, George was definitely a little more worn for the wear, but still in good enough condition to return to his more… typical service.

Made it thru with minimal wear and tear

My trip back on the dollar bill was about three miles, and it’s clear that I probably could have gone a little further. It’s also clear that what I should have done is gone forward with the dollar bill trick when I first noticed the thrumming and saw the damaged spot. Then I probably could have saved the tube that was already in place. Hopefully I’ll remember that the next time around.

Trike Packing - Storage Options by Erin Wade

A couple of weeks ago I spent some time testing out how well the rack on my Catrike Expedition would manage the weight and mass of the materials that I would be taking on my Hennepin Canal Trip by filling my existing panniers and stacking the additional items up in backpacks on the top of the rack. Then I went out for a ride.

Aside from a bit of swaying back and forth, the trike handled the cargo just fine. This meant that I wouldn't need to purchase a new trailer or bear the burden of my existing, perfectly functional but somewhat less than svelte, DIY flatbed trailer.

That post, however, got several comments from folks suggesting that I look at a different type of cargo bag specifically designed for recumbents. Essentially, there are bags that take advantage of the laid back position of the trike seat and use that as the support frame, laying straps saddlebag-style across the back of the seat and hanging off of each side.


Enjoying this post? Check out our Cycling page for links to other cycling articles on Applied Life


The benefit to these over my existing approach is that they move the weight both down, and more to the center of the trike. While what I had set up was working, there was visible movement in the backpack stack as I was riding. I don’t think this was at risk of a catastrophic failure, but it would suggest that I might have to periodically stop to straighten things up and re-secure them on a longer ride. In addition, with my approach pretty much everything is weighing down on the rear wheel, while these bags spread more of it across all three wheels.

In addition, these look to be relatively easy to put on and take off, which will make them easy to use any time I need to carry more stuff, but allow me to keep the weight down when I don’t. I can see them replacing the use of my trailer for grocery trips and similar types of activities. So they have real utility beyond just trike packing.

There are a couple of different versions of these that looked like they might work for my purpose. One is the Smokey Mtn Saddlebag Max (linked here at Utah Trikes, which also has a video about them), and the other is the Radical Design Banana Racer. There are smaller versions of these as well, but those wouldn't have offered the space I would have needed.

The Radical Design bags are quite a bit larger than the Smokey Mtn bags, so I fairly quickly moved over to looking at those.

Radical Design Banana Racer

The company is based in The Netherlands, but I found that they were available through The Hostel Shoppe. I’ve ordered things from them before - most recently my Windwrap Fairing - so that seemed like a good option. They also have a video that shows the bags in detail (the Banana Racer comes in at about 1:35).

The video really was the thing that finally sold me on these bags. It clearly shows them as being capable of holding a large quantity of stuff, which is what I am looking for. They also have a bottle carrier at the top of each bag. I found that kind of hard to resolve in the pictures on the company website (which is where the pic above comes from), but it was very clear in the video. I have a very nice T-Cycle Adjustomatic Bottle Mount on my trike, but those mesh pockets would be very handy for keeping other things at hand.

The only challenge for me was the color options. At the time that I looked at the site, The Hostel Shoppe only had a couple of colors available - I believe red and blue - with others being out of stock. And none of the out-of-stock colors included the all-important orange option. However, I could see on the company website that orange was offered, so I emailed The Hostel Shoppe to see if they would be able, and willing, to order one for me in the appropriate color.

And indeed they were. They estimated that the bags will come in about the middle of this month (May 2022) which is plenty ahead of my planned trip in June, so that’s all looking pretty good. Now I’m just keeping fingers crossed (metaphorically of course - otherwise I couldn’t type) that shipping and supply chain issues don’t get in the way.

Trike Packing - Putting it on the Rack by Erin Wade

Last week I spent some time obsessively weighing things with my new scale, and came to the conclusion that, proud of it as I was, at nearly 29 lbs my DIY flatbed trailer was not going to be a good option for ride carrying all my gear on a multi-day ride.

This leaves me with a couple of options - either I buy a lightweight cargo trailer for the ride, or I try to get everything on the rear cargo rack.

Getting everything on the rear rack is almost certainly the less expensive option, and my Catrike Expedition is built to be able to do this very sort of thing (it’s right there in the name, after all). Other people do trike packing this way - Sylvia Halpern and her trike Myrtle the Turtle and Matt Galat at Jayoe being some more public examples of this. I’ve watched Sylvia’s videos, and one of the things that is clear is that she has much bigger panniers than I do.

The bags currently on my trike are Axiom Seymour Oceanweave P25’s. I ordered these when I ordered my Expedition back in 2019, and they have served me well for carrying my everyday stuff - tools, tubes, patch kits, extra water bottles, clothes (particularly in winter) and sundries. They’ve even been up to the task for small volume grocery runs. I liked them as an option when I ordered them because they are a single unit - the two bags are connected by a somewhat rigid fabric section that connects to the top of the rack. The center, connecting section has a handle on it, and that all seemed like it would be pretty handy as a way to easily allow you to pick up the bags and carry them around if needs be. And it is, tho it’s a feature I’ve only rarely used.

The “25” in the name is the number of liters they can carry between the two bags. In actual capacity that’s on the relatively small side. It’s certainly adequate to my everyday needs, and has been more than capable for longer single day rides, but I’ll need more space than they can offer by themselves. One option, obviously, would be to get larger panniers. The challenge with this is that any decent set of bags that are sufficiently larger than my current option starts to get somewhat pricey. Combine, for example, a set of 40L Ortlieb Panniers with a Rack-Pack bag and your price starts to come very close to the cost of a Burley Trailer. That’s not necessarily a problem if it meets your needs, but it does make one want to investigate A) how well the trike does at carrying things in general; and 2) whether stuff you already have can meet the task.

So this past weekend I set about searching for answers those two questions. I am a backpack person - I use a backpack for my professional work (as opposed to a briefcase, for example), and have routinely used them for carrying sports gear, travel, etc - if you can get everything you need for a trip into a backpack it’s a lot easier to navigate thru the airport. What this means, ultimately, is that I have a backpack or two that I could apply to this purpose.

The first thing I tried to sort out was what the best way would be to array things on the back of the trike. I played with the idea of setting one backpack upright and the other flat:

Nope

But this really seemed to take up too much horizontal space. The upright bag was not on the rack - it was sitting between the seat frame and the rack on the top of the fender. And the rear bag was hanging off of the back. I briefly thought about fashioning an extension for the rack in each direction - I have some aluminum tubing left over from the framing of the child trailer that I built my DIY trailer from. I played with that idea long enough to do an Amazon search for tubing benders and such, but then decided maybe I should just try stacking them and lashing them down with bungees.

And that worked:

Stacked up

(I replaced the orange backpack in the first picture - which is my work backpack that I grabbed initially because it was handy for thinking things thru - with a red Lands End one that I had in the closet). Both backpacks are bungeed down - e.g. I put the bottom one on the rack, bungeed it down, and then put the red one on top of it and strapped it down. The bottom one has my sleeping bag and sleeping pad in it, as well as the two battery packs I will take along; and the top one has the clothing I would take along on the trip. I have a tent for the trip as well, but I’d set it up inside to allow it to air out, so I put an electronics bag (cords, adapters, etc) that weighs about the same as the tent does into the top bag to simulate it’s weight. I weighed the two backpacks (of course), and together they came out to 16.9 lbs. I oriented the top backpack backwards so that the red material would face oncoming traffic for visibility. And I did have to move one of my rear flashers from the neckrest handle to the backpacks so it could be seen.

In the panniers I always have extra tubes, a patch kit, and tools. I put a couple of extra bottles of water, which I would plan to carry for the ride as well. They also still have my winter support gear - extra layers of clothing, some chemical warmers and such - in them. I left that in them to simulate the remaining items that I do not have yet - e.g. a small cook stove, food, and a first aid kit. I suspect the winter gear is a little lighter than those items will be, but not a lot. But with all of this the trike was definitely heavier. I often pick it up by the rear rack to wheel it out of the garage and turn it around, and that was noticeably harder than it usually is.

With all that in place I headed out for a test ride.

I wanted a route that was a little further distance - I wanted to have a sufficient length of time to get a real feel for the extra weight and how the stacked backpacks would behave. I picked a 21.5 mile route with a few hills on it. It’s also one of the only routes I have that also has a short section of gravel on it (which I usually avoid like the plague). The gravel section is poorly maintained:

Hero Gravel

Which is to say that its mostly a dirt road with a bit of gravel residue on it - the sort of road sometimes referred to as “hero gravel”. Much of the Hennepin Canal trail is more or less this sort of surface. I think it’s described as “crushed stone”, but if that’s true, that was one heck of a crusher… At any rate, it was an opportunity to ride it on a bit of surface similar to what I’d be encountering on the trip.

All in all, it went pretty well. The extra weight was detectable, but not terribly so. I could see the backpacks in my mirrors, and they did noticeably sway back and forth in synchrony with my pedaling motion. However, they stayed in place very well - there was no real shifting during the ride, and they looked to be in essentially the same place at the end as they were in the beginning. As long as the lighter weight items - like clothing - are at the top I think the arrangement will be fine for a longer trip.

I’ve ridden this route once before, and my time on the route this time was slower, but only by slightly over two minutes. Speed for it was 13.11 mph, down from 13.4 on the prior ride. This may have been abetted somewhat by a lower wind speed - 0 wind for this day, compared to a 10 mph on the prior ride - and the fact that I have my Windwrap fairing on the trike (which I’m anticipating leaving on for the Hennepin ride as well).

Overall this suggests that I should be able to get everything on the back of the trike, and that the additional weight shouldn't slow me down too much. This feels like proof of concept for packing on the trike itself as opposed to buying a new trailer.

The next thing to consider is whether I just go with the bags I have for this trip, or whether I shell out for something purpose-built, like the aforementioned Ortlieb setup. I go back and forth on that. New bags are pricey, but there’s a get-what-you-pay-for factor with them - they are waterproof and designed to work together. I’d need to pack stuff in garbage bags and/or figure out how to set up a small tarp over the backpacks to hedge against rain otherwise. I think if I was certain that I’m going to enjoy the camping component it would be a no-brainer to go ahead and get them, because I’d want to do more of it going forward. But if 50-ish me finds that he doesn’t enjoy sleeping on the ground the way that my 20 and 30 year old self did, I’ll have laid out the cash for something I won’t really use again.

So - continued thinking required.

Trike Packing - Weighing My Options by Erin Wade

As I mentioned last week, I’ve begun thinking my way thru the idea of a trike packing trip down the Hennepin Canal Trail.

What I’m looking at would likely be considered pretty modest by the standards of people who do this regularly - three days of riding punctuated by a couple of nights of camping. But for me it’s very new, and what I’m discovering, not for the first time, is that the idea of the trip, and the planning for it, makes it all fun even before I put tires to trail.

One part of that planning is figuring out how to carry everything along with me. I’ve been debating whether to try to get everything on to the panniers and rear rack of my Catrike Expedition, or to put it in a trailer to pull behind me.

I’m going to continue to explore the idea of using the panniers and rack, but given that I’ll be traveling down a pretty rustic trail with pretty limited resources, I’m starting to mentally lean towards using a trailer. This gives me a couple of options. I can use my existing, hand built flatbed trailer, or I can look at purchasing something new - such as a Burley Nomad - for the trip.

To that latter point, I’ve started to think about weight. I’m pleased with how my DIY trailer turned out, and it has turned out to useful for hauling a variety of things back and forth from town, it is not a dainty item.

Last week I estimated that it was probably in the 20-25lb weight range. It turns out that was a little optimistic:

Trailer on scale - 28.28 lbs

It moved around a bit, but it seems like it centered at 28.28 lbs.

I first weighed it by asking my Dad if he had a scale we could use for the purpose. It turned out he did - he had a fishing scale that goes up to 50lbs. But, given that it was a fishing scale, it was designed to be held in one hand while taking the weight. We managed to make it work (thanks Pop!), and got a weight - 26lbs, 14oz - similar to the weight on my own scale above. But once I’d seen the results I decided it was time to get my own scale, because it was clear I was going to want to weigh more stuff, and weigh it with more precision.

There are a couple of factors at play here. First, because my home built trailer is a flatbed, I will probably need to put some sort of container on it to hold and make weatherproof anything I’m carrying. That will compound with the original 28.28 lbs of the trailer itself.

For example, I have a couple of existing Rubbermaid Action Packer containers that I purchased several years ago to store camping gear. I bought them at the time because they are rugged and lightweight. I pulled them down, and two of them fit quite nicely atop the flatbed.

But while they seem lightweight when they are something you are hauling in and out of your outdoorsy motor vehicle, the scale tells a different story for this application:

Action Packer - yeah, it’s been in the rafter of the garage for a long time…

The container comes in at 5.3 lbs. This means that, where I to set myself up with two of them on the home built trailer I’d be pulling almost 39 lbs (38.88) before adding any actual cargo to it.

Obviously there are other possibilities. I could stack items on the flatbed directly and cover them with a tarp and strap them down instead of putting containers on it. This would lose the 10.6 lbs worth of container weight, but would leave things potentially more exposed to the elements. And it would still leave me pulling a 28+lb trailer.

An other factor is that the home-built trailer is… bouncy. The hitch hookup uses a flexible nylon connector, and it has a fair amount of give to it. When I am riding with the trailer on the road I can see the trike wobbling gently from side to side. This undoubtedly is distributing energy in a way that isn’t just directed at forward motion. It hasn’t been enough to bother me for the short utility rides that I’ve been using the flatbed for but I suspect it would be an energy drain on a longer trip. I’ve been aware of this since I built the trailer, and it could conceivably be addressed by using a different type of hitch connector. Still given the weight issue, I doubt that fix would change things enough make the flatbed an attractive option for this trip.

Long story short, then, I think my home built flatbed is out of the picture for the ride along the Hennepin Canal. Next question is whether I can get everything I need on the rack, or whether I’m ordering a fancy new trailer…

Time for Spring Planning by Erin Wade

We had a bout of faux spring here in Northern Illinois last week - multiple days in a row with temperatures in the 60’s and low 70’s (F). Predictably, that has turned out to be just a tease (projected high today of 36°), but it was enough to allow for some longer rides, which gets me thinking about what sort of riding I want to do as the weather warms up in earnest.

Something that has been on my list for a long time is to do some type of trike packing - e.g. a trip covering some distance, with overnight camping stops along the way. And despite the fact that the onset of spring turned out to be a lie, it’s gotten my wheels - my mental wheels, anyway - turning on what goes into such a trip.

Where to Go

My first area of consideration was where I would want to go. I do most of my riding out of my own driveway, on the backroads of northern Illinois. But while this is a pretty friendly area for the riding itself - generations of sharing the road with slow moving agricultural equipment makes for people who are pretty accommodating on the tarmac - it’s not a region that offers much by way of camping opportunities off the side of the road. The land here is generally privately owned, and engaged in active farming use.

This led me pretty quickly to trails, which then leads me to the Hennepin Canal Trail.

Val @ the Hennepin Canal

It’s a place I’m already somewhat familiar with (at least along the eastern end). It’s a state park, and it has designated camping sites along the route. Most of these are pretty rustic, but there is one site along the way, outside the town of Geneseo, that has showers and similar facilities. And while the teenage boy inside me loves the idea of the adventure of rough camping, the middle-aged dude typing this post knows that having a place to shower and plug in his stuff is going to make things a lot nicer, especially for a first time out.

Exploring more of the canal trail in general has also been on my list, so this gives me an opportunity to kill two goals with one ride (I may have mixed - or possibly butchered - that metaphor a bit…). This has, of course, led me to spending time poring over the trail map on Google Maps and I think - if I plan it right - I could actually make this a ride from the trailhead in Bureau Junction to the end of the trail, and include a side trip up to cross over the Mississippi into Iowa.

The total distance from start to finish in Iowa - one way - is about 80 miles. My longest single ride distance to date was just over 75 miles, which was at the hairy limit of my conditioning, even after several weeks of training. Given that, I’m looking at probably two nights of camping, breaking the 160 miles across three days of riding. This makes for three days at just over 50 miles (53.33333…). Thanks to The Hilly Hundred, I know that this should be doable for me, especially since the canal trail lacks the hilly part. And it should mean that I can ride with an eye towards enjoying the trip, with plenty of time to stop, take pictures, and generally enjoy the nature as opposed to trying to push to reach a given goal or destination.

Equipment

The other question is what to take along. My Catrike Expedition is definitely up to the task - it’s right there in the name, after all. And this sort of riding is why I chose the Expedition specifically. I’ll want to make sure everything is in good working order, of course, but that is something that should be done on a fairly routine basis anyway.

I’ll need equipment to support the trip as well. Among the things I’ll need to take along will be:

  • Tent
  • Sleeping bag & mat
  • Change(s) of clothing
  • Towel
  • Food & water
  • Tools and tubes
  • Battery packs for the phone and lights

And this, of course, is just my initial list. I’m absolutely sure there are things I’m not thinking of yet. Some of these things I already have, of course. Others I do not - I don’t have a one-person tent yet, for example (but I’ve wanted one for a long time, and here’s my reason to get it).

The next question that pops up in my head is how to carry all of this. Essentially there are two options - I can try to get it all into my panniers and/or on the rear rack, or I can pull a trailer behind me.

Part of me likes the simplicity of just using the bags and rack on the trike. I know that the trike can carry a fair amount of weight on the back - I’ve managed, for example, to haul a full grill-size LP tank on the top of the rack with my regular backup gear still in the bags. And I am not currently using most of the seat pockets - the zippered containers on the back of the Catrike seat - because I have always had plenty of space in my bags. If I plan for efficiency, I might be able to just haul it all as a self-contained unit.

The alternative option is to use a trailer. I do have one - I built a flatbed trailer out of the frame from a very run-down kid-carrier and a selection of palettes I had at the Homestead. It works well, and can carry a fair amount of weight. I’ve carried up to 80lbs on it - that being softener salt from the hardware store. But while I’m somewhat proud of my DIY trailer and it’s capabilities, it is… shall we say, it isn’t a dainty item. I’m not sure exactly what it weighs, but I’d guess it’s in the neighborhood of 20-25lbs unloaded, and I’d need to add a container (more weight) to it to use it. I’m sure to feel that on an extended ride.

Which then makes me think about buying something like a Burley Nomad. These are lovely little trailers, clearly well designed and specifically built for the sort of thing I’m trying to plan. And, at 17lbs, almost certainly lighter than my DIY trailer. The big “but” in the room, tho, is that you definitely pay for that special design and lighter weight. And to be clear, I think they are worth what they are asking. But I’m not sure I want to make that kind of investment for my first time out - I might find, despite the inner teenager, that the middle-aged dude doesn’t like camping out any more.

So - my plan for now is going to be to optimize my use of the storage space on the trike and see whether I can comfortably haul what I need that way, and take a few longer practice runs like that. If that works, great! If not, then I’ll start to work in the trailer and see how much it impedes my progress.

Curing the Shakes by Erin Wade

It’s a beautiful winter day - the sun is shining, the snow is glistening white, a resplendent blanket over the earth. You see all of this because you are riding your recumbent trike thru it, taking in the scenery.

And it occurs to you that this moment would make a good picture. You take your hands off the handlebars to grab your camera. This should not be a problem because you are on a trike - three wheels on the ground, inherently providing stability.

But then it happens - perhaps a wheel hits a road imperfection - and the front end begins to tremble, the wheels shimmying back and forth, jostling you about. It stops when you put your hands back on the handlebars, but it returns the next time - and each time - you let go. Your trike has got the shakes.

I’d been dealing with this for the better part of four months, and it was getting progressively worse. What had been an occasional issue, just occurring on certain types of surfaces if my hands were off the handgrips, had progressed to the point where it would start to shake over every bump even with my fingers securely wrapped on the handles.

There are a number of things that this can be due to. Recumbent trikes are more complex than bicycles, especially at the front end, so in addition to the things you might think of on an upright - loose headset or bent wheel - there are things like tie rods, axles, and alignment to be considered (and a special “thank you” to the helpful folks in the Catrike Owners Group on FB for compiling that list).

For my part I was pretty sure I had loose headsets (that’s plural because there are two of them on a trike, one on each front wheel). In part, this was because I’d been messing with them - back towards the end of September I’d ordered a second B&M mirror for my Catrike Expedition, and they mount directly on the top of the headset. And in part, it was because I could see and feel that the headset was loose. I could feel it move when I hit the brakes, which prompted me to pick up the trike and see if I could move it around. Sure enough, it jiggled in place.

Given this, I did what any red-blooded American would do when something is loose: I got a wrench and tightened it.

Which did… nothing? That couldn't be the case, I told myself, it probably did something, but I just hadn’t tightened it enough. So, of course, I tightened it some more. And then some more. And then…

Then I learned that what is inside the headset is called a “star fangled nut” (or just “star nut”). And I also learned, entirely coincidentally, you understand, that it has an upper limit to the torque it can withstand.


Enjoying this post? Check out our Cycling page for links to other cycling articles on Applied Life


In a way one could consider this a good thing, because it did afford me an opportunity to learn new things about my trike, and an opportunity to buy a new tool. I’d never heard of star nuts before, never seen one in the wild. Now I’d not only become aware of them, but would get to learn how to replace one!

(These are the things I say in my head in order to get the swear words to stop coming out of my mouth. It’s only a moderately successful approach…)

So I ordered a tool (that was clearly made for upright bikes, but I got it to work), replaced it, learned about the torque rating that it’s supposed to be tightened to, dusted off my torque wrench, and… still shaky.

Over the subsequent weeks I continued to gently tighten it, trying to get some improvement without springing the star nut again. The result of this was:

A. It never got any tighter; and 2, I managed to pop the star nut on the other side.

It’s a dark, black hole…

I studied the diagrams in the Catrike Owner’s Manual, asked the folks at Utah Trikes how deep the star nut should be placed (thinking maybe I hadn’t put it down far enough). But nothing I tried helped, and it just kept getting worse, reaching the point I described above - getting shaky even with my hands on the grips. It started making me wonder if it wasn’t approaching the point where it was a little unsafe to ride.

So I broke down and did something I’m always reluctant to do: I asked for help. Specifically, I described my problem to the folks in the Catrike Owner’s Group on FB. I got the list of possibilities that I described above - all of which made sense, and included my loose headset. So I asked a second question: why can’t I get it to tighten?

I don’t know exactly why it always takes me so long to ask for help. It’s a congenital thing, and it happens across the board. I’ll spend an hour in a hardware store looking for the thing I want rather than ask an associate for assistance. I could charitably call it an independent streak, but in many cases - like this one - it’s an impediment.

Why? Because this was an issue of two bolts and about three minutes worth of work. As is invariably the case, when I ask for help I find that the solution is often simpler than I thought, and I feel like an idiot for not asking sooner.

It turns out, as was gently pointed out to me, that you cannot tighten the headset without first loosening the handlebar mount.

They seemed so simple and unassuming. I had no idea they had such power!

Two bolts and three minutes per side. One minute to loosen the two bolts on the handlebar, another to tighten the headset, and a third minute to tighten the handlebar back in place. Six minutes of work and my three year old Atomic Orange Expedition steers like the day it arrived.

I understand, in retrospect, that the handlebar keeps the headset from tightening because it cannot move - it’s held in place by the handlebar. But I’m quite certain that I could have looked at diagrams, and started at it on my garage floor, till the end of time and not seen that. In fact, I was well on my way to that outcome.

I had also begun to wonder whether the issue might actually be the mounting of the B&M mirrors on the headset. They are actually made for a different make - HP Velotechnik. I didn’t want to believe that, because they are so much better than the Mirrycle mirrors the trike came with, but I’d considered removing them to see if that made the difference. And now I know it wouldn't have, so I was able to skip that experiment.

So - back on the road, without the shakes! In fact, now that it’s tracking straight, I’m becoming aware that this has been a longer-term issue than I realized. It’s been a very long time since I was able to let go of the grips and not expect that the trike would at least wander aimlessly, following the curve of the road, if not shake me silly.

All in time for a high of 50° and sunshine here on the northern Illinois prairie!

My Faired Lady by Erin Wade

Regardless of what they are riding, every cyclist has a love-hate relationship with the wind. The gusting atmosphere can have a significant affect on your forward progress either to the positive or the negative, and often both across the course of a given ride. If you ride into the colder seasons, it can also provide a biting chill that you have to bundle against to keep your extremities safe. Out here on the northern Illinois open prairie we have that wind in abundance year round, but particularly in the winter and spring months.

One of the benefits a recumbent trike has over a standard upright is that it provides a more favorable profile to that wind. I realized fairly early on, when comparing my first trike - a Catrike Pocket - to riding our upright Schwinn Mountain Bike in the snow and cold, that when the wind was blowing and cold, it was just better to be lower down and out of the wind.

But while they are indisputably better in terms of aerodynamics, they are not perfect. A strong enough wind can still push a recumbent trike around, and in the winter your feet, for example, are out in front of you, right at the front end of the wind you are creating with your own movement. But there are ways to further enhance the aerodynamic profile of one’s Human Powered Vehicle.

Enter: The Fairing

In simplest terms, a fairing is essentially a windshield built to improve the aerodynamic profile of a machine - human powered or otherwise. You’ve probably seen them on motorcycles (but may have just thought of them as windshields - I know that I did), and they’ve been applied to all sorts of other machines, including recumbent bikes and trikes.

In addition to the potential aerodynamic benefits - improving speed, or at least decreasing the effort needed to work against the atmosphere - they also provide some weather protection. Moving the wind around you in the winter means less wind chill effect on your body, and in rain and snow, being at least partially covered means less moistening from the elements. All of which is to say that getting one for my Catrike Expedition has been on my mental list for some time.

I’d started looking for a fairing in earnest in the winter of 2020-2021, but it didn’t work out financially (this is not an impulse-buy level of accessory). This winter proved to be more amenable, and I decided to go ahead and pull the trigger.

…and what I quickly realized is that my decision to move forward wasn’t going to be the only factor in this scenario. The ongoing supply chain issues and the Great Resignation that we are experiencing appears to have had an affect on the availability of fairings in general. As best I can tell there are currently two main makers for these items for recumbent trikes in the US, and contact with both found that they were currently not available.

This past summer I ran into a similar issue when I wanted to get a chain gobbler for MLW’s Pocket - I had money in hand, but they were listed as out of stock on the manufacturer’s websites. Back then I put in a request to be notified when it came back into stock, and after waiting several weeks, it occurred to me to check with some of the bike shops that sell recumbent trikes to see if they might have them in stock. That worked - the Hostel Shoppe in Stevens Point Wisconsin did, in fact, have one. I ordered it up, and had it a few days later.

Given that success then, I decided to try it again, and found that both Utah Trikes and the Hostel Shoppe (again) had them in stock. I’ve had good luck with both companies, but I decided to go with the Hostel Shoppe simply due to proximity. Stevens Point is a few hours to my north, while Springville, UT, is half a country away - I was hoping it being closer would get it to me sooner.

Windwrap WINTR Fairing

There are a couple of different types of fairings. Some of them are small affairs that mount out on the front of the machine and direct wind away from your feet - which would provide some decreased chill in the winter. But I wanted a more full-body fairing, to provide a greater aerodynamic benefit and to get some additional weather protection. Both bike shops had only one option available that met this description, and that was the Windwrap WINTR fairing by TerraCycle.

Now, TerraCycle makes some great products, a couple of which I already own, including the aforementioned chain gobbler as well as their Adjustomatic Bottle Mount. So, while it would have been nice to have some additional options, being “stuck” with one of their products was hardly a hardship.

It arrived in a box that is a little smaller than I expected, and lighter than it looked:

Valencia checking out her new outfit

Getting it On

As is sometimes the case, it arrived a couple of days before I could find the time to actually install it. But once I did, things went relatively smoothly. I had my helper crew ready to go, and opening up the boxes found, among other things, more boxes and lots of packing paper:

The crew at the opening ceremonies

(You know, they always join me for these projects, but every time I actually try to get them to offer actual assistance they demure, offering up some lame excuse about not having thumbs…)


Enjoying this post? Check out our Cycling page for links to other cycling articles on Applied Life


One of the things that quickly became clear as I started pulling things out of the box is that you wanted to check the packing paper carefully - several of the parts were wrapped up in the paper. I actually have held on to the boxes and the paper for the short term to make sure I don’t discover a piece missing only to have inadvertently thrown it away.

Once it’s all out you see that there are multiple pieces, each nicely packaged:

A fairly nice job of packaging

The rolled up item you see is the fairing - it’s made of Lexan, and is quite flexible. The rest of it are the items that make up the frame and the mounting points.

Terracycle makes a very handy installation video for the Windwrap WINTR fairing. I watched this section by section as I installed it - which is to say that I watched them install the first piece on the video, then put that piece on, then repeated with each section. I will sometimes watch an installation video all the way thru first, but there were only a few pieces to work with, so this seemed a reasonable strategy.

Long story short, this essentially involves putting a mounting clamp on to the boom, and then mounting the different pieces of the frame to that clamp in a given order. This went relatively quick:

All framed up

In the video, when the put the frame together, they mention that you want to do your best to center the upper crossbar when you attach it. A very nice touch is that TerraCycle has explicitly identified the center point on the bar for you:

I am feeling very centered

From there the next step was to unroll the fairing itself and mount it to the frame.

Wrapped up in itself

Probably the single most challenging part of the process was getting the protective blue film off of the fairing:

I’m so blue…

The fairing attaches to the frame with rubber expanding nuts that “mushroom” around the opening they are inserted into in order to hold it tight. These are designed to be hand tightened and easily loosened for removing the fairing.

It’s a Wrap

With that it was all mounted on the trike:

My Faired Lady

And if you are (understandably) looking at this picture and wondering “how are you supposed to get into that thing?”…

It knows yoga

…it is designed to fold forward for just such an occasion.

There are multiple small adjustments to be made to ensure that your feet and knees clear the fairing when pedaling. I’ve found these to be a multiple step process - first measuring things out as described on the video, but then making a handful of adjustments out on the first ride as well. These were simple and required only the Allen wrenches on the multi-tool I always carry on the trike. I also had to move around my phone mount, as my (big-ass) iPhone was now in conflict with the edge of the fairing.

One of the other things I’ve wondered about is transporting the trike with the fairing. I typically both haul and store my Expedition in my Mobile Trike Garage (my Subaru Outback). To get it into the Outback I have to lower my neckrest already, and the trike pretty much fills the available length of the back of the car. The fairing adds both some height and some length to the trike, so I wasn’t sure how well it would fit.

And: it doesn’t.

This one is too big

Or, at least it doesn’t with the fairing on the frame. As noted above, the fairing is designed to be easily removable by hand, and with it off, the frame does fit under the roofline.

If I fits, I sits

The frame itself still adds length to the trike. I usually store the trike in the back of the car in a diagonal orientation, which allows me to have some view out of the inside rear-view mirror. It won’t fit that way with the frame on, but does fit with the rear wheel sitting dead center, between the front seats:

Dead center

This is workable, at least for the time being, tho it wouldn't be comfortable for longer trips. Fortunately, removing the frame is a two-bolt job with an Allen wrench, which I can do in those situations. I wouldn’t want to do it every time - removing and replacing both the frame and the fairing each time I go out for a ride would start to be more futzing than I want to engage in - but seems a fairly low effort set of tasks for traveling with the trike. And frankly, my day-to-day solution for the first week of having the fairing on the trike has simply been to leave the car outside, with the trike in its spot in the garage, fairing in place. This is actually a fairly common arrangement for me in general, particularly in the warmer months, as it lets me get out and ride at a moment’s notice.

I’ll be keeping track, over the next few weeks, of what the impact is from having the fairing in place, both in terms of comfort and speed. And I’m fortunate - in a way - that I was able to get it now, as we roll into spring, which is our windiest time of year here in northern Illinois.

So - more to come…

Strategerie Follow-Up by Erin Wade

I posted last time about my efforts to find a way to ride that wouldn’t put me out on the road in the deafening wind of late February. I had a primary plan of heading down to the I&M Canal Trailhead in LaSalle, with a backup plan of just going into town and riding around the all-too familiar streets of my childhood home.

I’d formulated the backup plan because I really didn’t have a clear idea of what the conditions would be like on the Canal Trail. This has been a struggle both with respect to finding out current conditions, and how the trail is managed for the winter and snow in general. Viz: do they clear the trail, do they groom it for skiing, do they let snowmobiles use it? What’s the story?

I’ve tried asking after this on social media in the past, but the extensive nature of the trail makes it difficult to sort out - it appears that different areas may manage their sections of the trail differently, so sorting out an answer for the area of one’s own specific interest can be challenging.

You know - unless you actually go and look at it. This has been on my list for some time - the last several years, to be honest. But the trailhead is a half-hour away, and there are usually other things to do (like riding out of my own driveway) to compete with the investigation.

I figured this was going to finally be my opportunity to find out.

Let’s get the good news out of the way: I didn’t have to resort to Plan B.

When I got the trailhead it was clear that the low-lying nature of the canal and the woodlands around it were helping to avoid or screen out most of the wind that I had been contending with on the open prairie. This was sort of a bonus - I thought that might be the case, but I wasn’t really sure it would turn out to be.

The trail itself turned out to be an interesting mix of surfaces. A couple of days of above-freezing temps had melted the snow away in the more open spots…

Open Asphalt

…while the shady areas retained more coverage.

Residual white stuff.

I also quickly got my answer to how the trail is managed for winter use:

I can see why you’d want to mark this as a danger spot…

In addition to the hazard marker there were also “curve ahead” signs on a couple of sections of the trail further down. I’m a little ashamed to admit that at first I found these a bit odd - I mean, what cyclist rides so fast on these trails that they need a curve warning? - before I realized that they were for the snowmobiles.

The snowy sections made it clear that, despite the signs for the powered sleds, there is quite a bit of mixed use of the trail. There were lots of footprints, dog tracks, and at least one extended section of cross-country ski markings. So: it would appear that this section of the trail, at least, is not cleared, nor is it groomed for skiing. All of which is well enough - I have no objection to snowmobiling, and in fact spent a fair portion of my youth sliding around the winter countryside on an Artic Cat Lynx my own darn self. But it means that you’d likely need a fat bike or trike to tackle it when there’s been a sizable deposit of the white stuff (and I do not currently have such a machine in my stable).

But none of that applied to this ride. The snow-covered sections were not so deep that they couldn’t be managed by my mostly stock Catrike Expedition with her road tires, so I was all good on that front.

I did become acutely aware of a couple of things as the ride progressed, however. First, I was thankful for the presence of my fenders for, oh, say, the thousandth time, as temperatures in the mid- to high-40°’s conspired with the snow to allow for a lot of standing water along the trail. I also found that, while my rear fender does prevent that telltale cycling mud-stripe from appearing on your back, it is still possible for your posterior to become soaked under the right circumstances.

It was also clear that I had hit the trail on perhaps exactly the right day. Where the snow had mostly melted away the ground was soft underneath. But, thankfully, the thaw had thus far only affected the first inch or so of topsoil. This meant that, while it was slow going in some spots, there was none of the deep mud suck that can happen after several days of spring warming. It took me a little bit to figure out, but it turned out it was a little better to ride thru the wetter sections of the trail. The standing water was perhaps acting as an insulator, or possibly was just a sign that the ground underneath hadn’t warmed enough to absorb the water, but either way it was typically more solid that the stuff free of moisture. I’m pretty sure it sections would be very challenging with another day or two of temperatures above the freezing mark.

Valencia at New Bridge (that’s my name for it - I don’t know if it has an official name…)

I decided to stop at the new bridge over the former rustic creek crossing. This spot is a little over seven miles in, and so made for about a 14-mile round trip. This fit nicely with the time I had allotted for the ride, and if I’m being honest, as wet as it was, I did not want to contend with the clay-soup sections that lie between the bridge and Buffalo Rock State Park.

As it was, my orange girl collected a fair amount of trail residue along the way…

Dirt from the expedition on my Expedition.

…but that’s a good thing in the grand scheme of things, because the dirt means I got to ride. And all in all, it was a good ride. A few more days of thaw and it would have been considerably less pleasant - soft, slow, and messy - but then that’s a reality of both the big canal trails here in northern Illinois. But I was able to luck in on a good moment this time around.

Soft

Winter Cycling Strategerie by Erin Wade

February is, hands down, the most challenging month for winter cycling here in northern Illinois.

You might think, as you read that sentence, that it’s the snow or the cold that makes it more challenging. If you are not from the region it’s an understandable thought, and that is a part of it. But there’s more to it.

The early portion of the month often is cold and snowy, But it gets warmer here as we move into the second half of the second month. Today’s high is projected to hit 49° (F), and we already have an ambient temperature of 35° at 9:30 this morning.

But with that increase in temperature comes the first vestiges of the winds of spring. While we have what many would consider a delightful forecast temperature-wise, the entire day is also projected for high winds:

Harbinger of the Winds of Spring

My weather app says that the current wind speed is sitting at 22mph. More importantly, I can hear that wind pounding against my window as I sit and write this. While the warmer temperatures remove any concerns about wind chill (which could otherwise be moderated by proper clothing), the higher wind levels make it very difficult to hear anything around you on the open road.

Motor vehicle traffic is very forgiving on the northern Illinois backroads - people here are very accustomed to sharing the road with slow-moving equipment. Even so, I’m reluctant to share those roads when I can’t hear things coming.

That combination of early February weather and late February wind is responsible for making it routinely my lowest month both for rides and for mileage. But I gotta get out and ride, so it seems like it’s time for some different strategies.


Enjoying this post? Check out our Cycling page for links to other cycling articles on Applied Life


I’ve decided to come at this from a couple of different directions. The longer-term strategy involves getting a fairing for my Catrike Expedition. For the uninitiated, a fairing is essentially a windshield for bikes and trikes. There are many advantages to having them, including weather protection in a variety of conditions - snow and rain, for example - and aerodynamic advantages on speed. And I’m hopeful that it will additionally decrease the ambient wind noise around me when I’m riding on the road.

Getting a faring has been on my mental list for quite some time, but they are not an inexpensive addition for the trike. However, I’m pleased to say we’ve reached a point where this addition is finally feasible.

Of course, now that it is, when I finally go out looking for one it turns out to be hard to find them in stock. I suspect that this is due in large part to that two-headed monster born of the 2020’s: supply-chain issues and the Great Resignation.

So I spent my morning following the strategy of seeking it out on websites for trike-friendly cycling shops. I’ve found this to be successful in the past - both when shopping for TerraTrike heel slings, and more recently when looking for the chain gobbler for MLW’s Pocket. The rationale here is that, while the manufacturer may not have any in stock, cycling shops may have some inventory on hand. This appears to have been successful, as both Utah Trikes and The Hostel Shoppe appear to have Windwrap Fairings on hand. I have ordered from both in the past, and had very good luck with both companies. I put in my order with the Hostel Shoppe this time around primarily because it’s more local - Steven’s Point, Wisconsin is sort of in my midwestern neighborhood. It’s nice to shop the “local” guy where possible, and if I’m being honest I also figured that it being closer would mean a shorter shipping time.

Of course, ordering a fairing doesn’t help for the 20+ mph winds today. In order to get my ride in today I’m going to head down to the I&M Canal Trail. The canal trail takes me off the road and largely removes the risk from vehicle traffic. It has the additional benefits of running east-west on a day where the wind is pounding in from the south, and being somewhat sheltered with tree cover on either side for much of that section.

There is an unknown to this strategy: I do not know what the condition of the trail is at the moment. I’ve seen recent pictures which suggest some light snow coverage, but they pre-date the most recent snowfall. And with the recent precipitation and higher temperatures today, it’s possible that sections of the trail will be muddy or flooded - the sheltered nature of it is due, in part, to being in a very low-lying area along the Illinois river.

For that potentiality I have a backup plan. If the trail isn’t cooperative, I’ll head back towards home and stop in Mendota - our nearest town, and my hometown - and lay out a ride there. It’s the least attractive option because it’s literally scenery I’ve been around my entire life, but the buildings in town will block the wind.

So that’s the strategy, both today, and for the longer term. We will see how today goes, and of course we’ll explore more when the fairing arrives. It’s time to ride!

Das Boots by Erin Wade

When it comes to winter cycling, one of the most challenging parts of the equation - coming just after “how do I keep my glasses from fogging up”, is keeping your extremities warm. People who have been doing this for a while have likely arrived at their own answers to this question (I would assume that anyone who isn’t able to sort out an answer to this has long since given up on the idea of riding in the winter).

This is true for myself as well. I’ve got different levels of weather gear lined up for different temperatures. Although it often takes me a couple of rides to sort out which level I need to be at when the temperature shifts, particularly when moving from my medium gear to full cold weather gear.

The reason for this struggle: the boots

For anything below about 30° F I typically shift gear to my nuclear option for warmth: a pair of heavy-duty, wool felt-lined, waterproof Sorrel’s. These boots are warm, pretty much impervious to any moisture, and they are at least a size and a half over my regular shoes, which allows for plenty of room for thick socks, even in layers. I even have room for chemical warmers in there when I need them.

These are them, on the left, along with the middle-tier hiking boots:

Das Boots


Enjoying this post? Check out our Cycling page for links to other cycling articles on Applied Life


Sounds great, right? And from a warmth and weatherproofness standard it is. The difficulty is that those Sorrels weigh approximately one metric ton (Seriously, they do weigh a lot - I don’t have a scale, but REI lists the weight for the modern version of these boots at 5lbs for the pair, with a fully synthetic liner. My boots are older, with a liner that is a wool blend, so I’ll bet they are slightly heavier). I’ve convinced myself over the years that this is okay - I am out there on the trike for exercise, right? A little heavy lifting on the pedals is just a bonus, right?

Right?

But if I’m being honest, the reality is that I sort of dread transitioning to the Sorrels. To avoid it, I tend to push myself out to colder temperatures in my hiking boots, trying to convince myself that toes being a little numb is good for the soul. More recently I’ve begun adding chemical warmers to the hiking boots to make them functional down to lower temperatures. This works to a degree, but it also starts to add-up costwise.

Which, ultimately, gets to the heart of the matter. Some of you, at this very moment (or possibly sooner) have already said to yourselves “why not just get warmer boots? You know, ones that don’t weight a metric ton…”.

I’m not completely dim - this has occurred to me as well. But I have an ongoing problem with my Cheapness Gene firing up at any point that I start to consider buying something that I already own a solution for. The Sorrels work, and I already have them, so I really shouldn't be out there shopping for other boots. Or at least that’s what the Gene says to me.

Thing is, once I’m at the point of applying a non-reusable item that also has a cost for every ride, the calculation starts to work out differently. A 40-count box of toe-warmers comes in at about $23 on Amazon. Depending upon the weather, these usually last about a season and a half for me. But when I realized it was time to order up some more of them a few weeks ago, my Cheapness Gene started to relent a bit.

I spent a little time on an obscure shopping website) from a company based in Seattle and, with a little bit of back and forth, landed on a pair of Rockmark Men’s Winter Snow Boots.

My key criteria for this was that they be warm, but also lightweight. The Amazon page indicated that they were good to either -25° or -30° F (both claims are made on the same page, so…), and multiple reviews referred to them as being lightweight. Of course, when they arrived I found that I’d ordered the wrong size, so I had to then go and order a second pair and prepare to send the first ones back. But once the second pair came in it was time to try them out:

Boots on Pedals

My initial impressions are very good so far. The pair of the Rockmarks are lighter than even one of the Sorrel boots (Amazon lists the pair at 2.43lbs) - in fact, they are comparable to, and maybe lighter than my hiking boots. They are fairly rigid, but give enough to allow for comfortable pedaling. And they are warm.

In fact, they are warmer than the Sorrels are. This was unexpected - I sort of thought that I’d have to keep the Sorrels in the cycling rotation for the very coldest of rides, but that’s not the case. I started out for the first couple of rides with the new boots outfitting them with the same types of socks I would have worn with the heavier boots, and my feet were actually a bit too warm. I’ve since started to dial back the socks, and with relatively thin (tho still wool - always wool) socks I’m finding myself perfectly comfortable in temperatures that would have previously required the thickest of stockings. All without the use of chemical warmers.

The weight difference is enough that I’m also seeing a real-world difference in performance. I don’t expect winter riding to be fast - it is always slower than the rest of the year. But in my first outing with the Rockmarks I managed to pull my best time ever on my Rocks 8 route:

It’s about time

(For reference, this is a route that is half-gravel and which, as a result, I only ride in the winter ).

So now I’m finding myself wondering why this all took me so long (stoopid Cheapness Gene). And all of these are initial impressions of course. It hasn’t been super-cold here yet since I got the new boots - in fact, it’s ranged from the low 20’s to the mid 40’s (F) for the rides I’ve taken over the week or so that I’ve had them. This morning, however, we have the mercury sitting at a solid 10°, with a projected high of 16°, so today’s ride should provide a bit more of a test.

An additional note to add here: I’m aware that there are other options to consider for one’s feet. In particular, I know a lot of folks like to use heated socks. I did look at these, but most of the decent options - e.g. rechargeable, etc - appeared to come in at a cost level not that far below the boots I ended up buying. And at the risk of an over share, my feet have a tendency to run on the… moist side. I’d likely need to wash them after every ride, so I’d be concerned that I’d wear them out relatively quickly. Hence: boots.