Biking

Comparisons... by Erin Wade

A couple of weeks ago I was pulling my Catrike Pocket out of the back of my car, and noticed something on one of the front tires - a bit of greenish coloring. I rolled it into the garage to get a closer look. At first I thought it was something that had gotten on to the tire from the road. As I looked closer, however, it became clear that it was the layer under the black rubber peeking through. A spin of the wheel found that it was showing in spots all the way around.

I got my Pocket in June of 2017 - about 19 months ago. It’s a 2012 model that I found on eBay. Technically it’s used, of course, but the person I’d bought it from had been given it by someone else who hadn’t ridden it, and he got it for his wife who also decided she didn’t want to ride it. The tires on the trike still had the little nubs around the outside. My little Pocket had seen very little action.

Since then, according to Cyclemeter, I’ve ridden 1861.02 miles on the Pocket. This may seem like a lot, or not that much, depending upon the circles you travel in - to avid, regular cyclists this type of distance in 19 months is no big deal. But it’s important to compare yourself to yourself, and for me last year was my biggest mileage year ever up to that point; and this year I’ve already ridden further. This owes in no small amount to my trike - I love riding this thing.

So: it makes some sense that it would be time for new tires. I took the trike in to the always helpful folks at Meads Bike Shop in Sterling to perform the feat (a bike mechanic I am not). Because the tires needed to be ordered it was going to take a couple of days. (I did actually take a couple of rides on the worn tire, but I figured I was really increasing my odds of having to call for a pickup each successive time).

This meant, when it came time for last week’s Sunday ride, I had no trike. I do, however, have my road bike - it’s a 1987 Cannondale SR400 that I’ve had for years, and was my primary ride until I got the trike. Here she is:

Cannondale SR400

I looked back in Cyclemeter later and realized that it had been over a year since I’d ridden the Cannondale. This week’s Sunday ride was on October 14th, and my prior ride on this bike was October 10th, 2017. The ride prior to that had been on June 27th and, in both cases it was, then as now, because I’d had the trike in the shop.

Now, to be clear, I didn’t get the Catrike because I was unhappy with my Cannondale. Quite the contrary, I’ve always been very fond of it. It’s lightweight, it has an elegant simplicity, and even with only the 12 gears it’s age allows it, it is a fast, capable machine. And I love the clean, simple lines of its design. Heaven help me, I even kind of like the 1980’s pink neon lettering.

I didn’t get the Catrike because I was unhappy with my bike. I got it because I think recumbent trikes are cool. I mean really cool. As I’ve said here before, I’ve wanted one pretty much since the day I realized they existed.

That said, I figured it would be good to get the old girl out and take her for a spin. Of course, there’s been nothing to stop me from doing that over the past year - she’s always waiting, patiently, there in the garage. But still...

I pumped up the tires (it had been a year, after all), put some oil on the chain, and rolled her out down the driveway. The Cannondale rode perfectly, as if no time had passed. But for me, there were several things I noticed on this ride that I likely wouldn't have a year and a half ago:

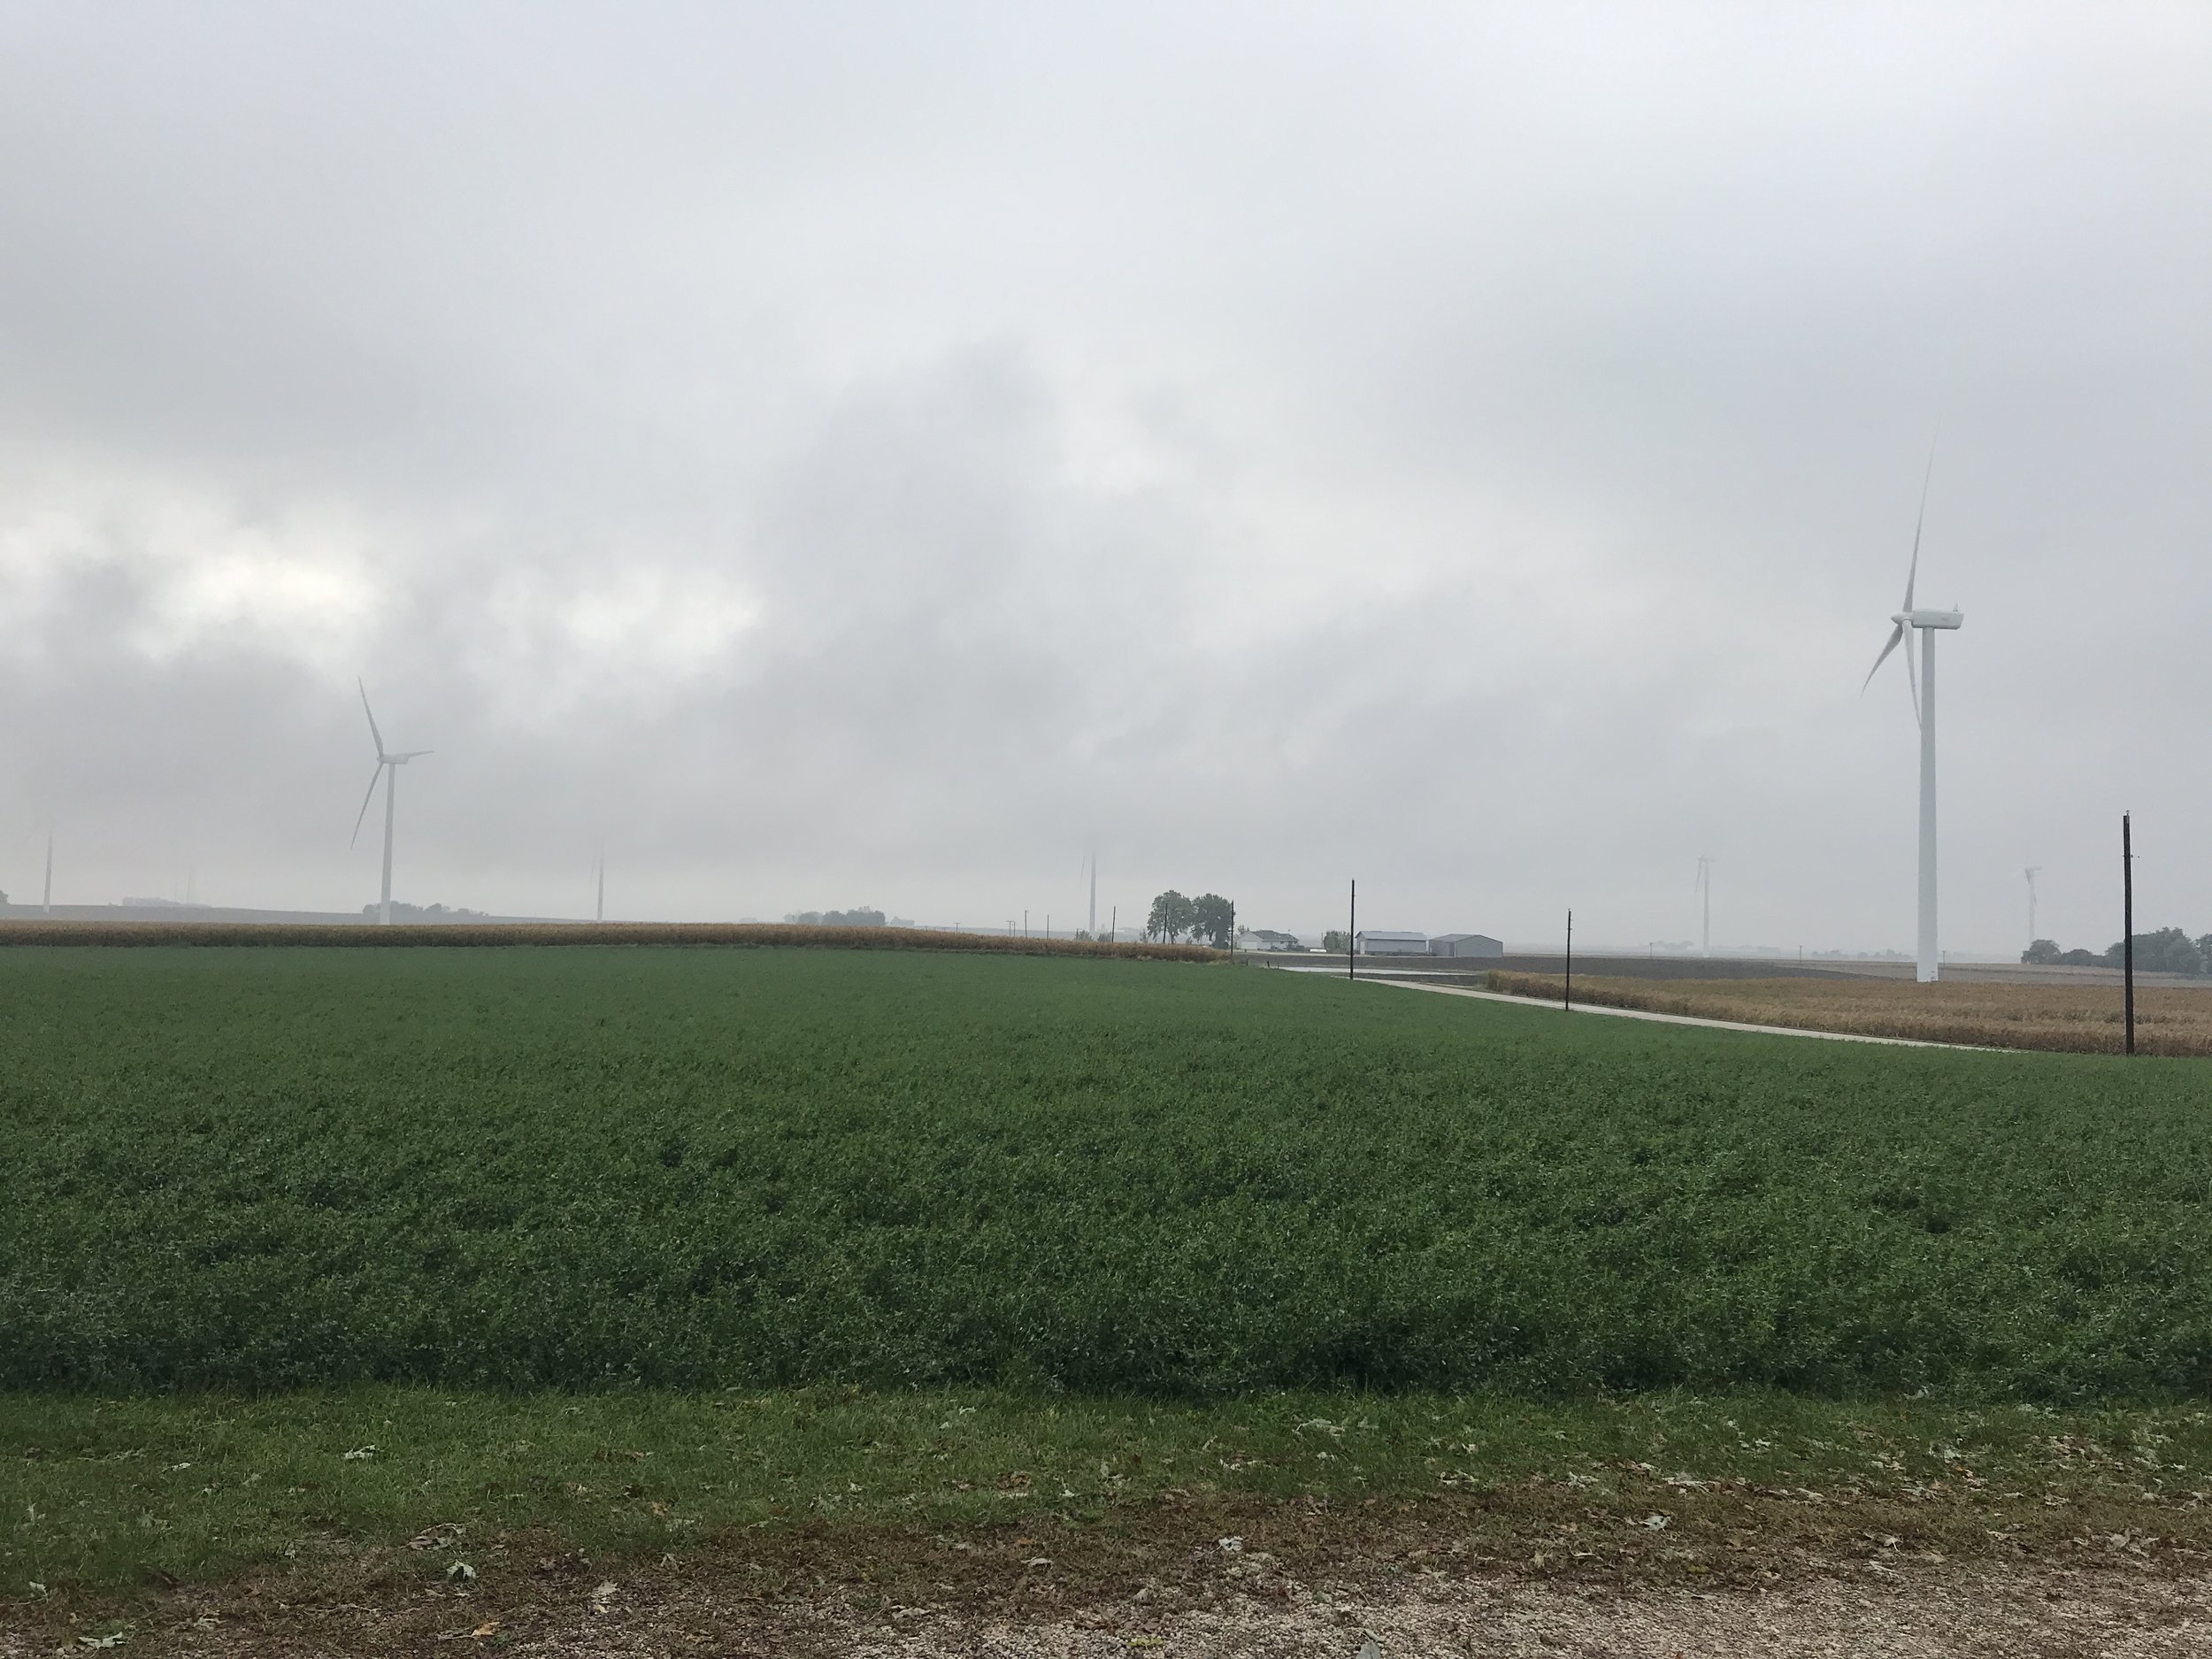
  • Wind noise. It was immediately clear to me that this was going to be a louder ride than usual due to the wind in my ears. We live in out on the Illinois prairie, in a wind farm, so this is always a factor, but it was so much more noticeable here.
  • Speed - I was still as fast, or perhaps a bit faster, as on the trike. This isn’t necessarily surprising - the Cannondale is lighter and has larger wheels than the Pocket, and my speeds on it are historically higher (though I’ve been getting closer).
  • Comfort - My tuchus was sore well before I reached the end of my 12-ish mile ride (perhaps a loss of callous over time?). And I do not miss the riding position - cranked over and tilting your neck up to see the road ahead is not a bonus.

I had noticed the wind issue from a different perspective last winter when I took my wife’s mountain bike out for a comparative ride. In that case, being up in the wind was noticeable because of how much colder it was. Out here on the prairie, lower is definitely better when it comes to dealing with that wind.

Speed, as I noted, was not an unexpected difference. Here, I suppose, what’s nice to see is that a year away on a different type of machine hasn’t really affected my ability to ride the Cannondale - I suppose it’s true that you never forget how. But I’ve gotten faster on the Pocket since I got it, and it makes me wonder how much closer I’d be with a more comparable machine. Would an Expedition or a 700, with their larger rear wheels, be more comparable machines? (This also leads me to wonder what the valid comparisons are between different bikes and trikes - a question we certainly won’t answer here today...).

The comfort issue is also unsurprising, I suppose. One is actively choosing to make a trade-off when one chooses to ride a road bike. And there will undoubtedly be people out there who suggest that I’d be more comfortable on my Cannondale if I got a fitting for it. For them, let me say here: this is possibly true. Did I mention that I love my Catrike, and that it wasn’t for reasons of comfort that I bought it? A fitting on my road bike isn’t going to get it back off the hooks any more frequently.

The Pocket is back now, fully shod with new shoes on all three wheels. The Cannondale is back in the garage. It is a fine machine, and it did a wonderful job of standing in when needed. But I’m afraid it’s going to remain on the backup bench.

TerraTrike Comfort Pedal Conversion Kit by Erin Wade

In a lot of ways, a recumbent trike is arguably safer than an upright, "diamond frame" (DF) style bike. The fact of having three wheels under you instead of two means that there is no need to balance, nor any of the issues that can come from failing to do so. I’ve been riding cycles for most of my life, and the majority of the injuries and mishaps I’ve experienced over the years have involved some instance of the upright not remaining so.

This is not to say that a recumbent trike is free of risk. It is possible (or, ahem, so I hear...) to roll or flip a trike, for example. But a somewhat unique risk is the one that falls under the charming description of leg suck. This is what occurs when the feet leave the pedals at speed and get caught and dragged under the seat of the trike.

I’ve been fortunate enough not to have experienced this thus far in my trike-riding tenure. Over the first couple of months this was just dumb luck - I bought my Catrike Pocket used on eBay, and so didn’t know about this phenomenon. Joining triking groups on Facebook made me aware of it, and after that it seemed reasonable to take precautions.

Catrikes come with a pretty nifty stock pedal that has a flat, platform-style regular shoe option on one side, and a fairly standard "clipless" option on the other. This offers up the option of simply getting clipless cycling footgear and snapping into the pedals. For a lot of people this is probably a pretty good option, especially if you already own cycling shoes.


Enjoying this post? Check out our Cycling page for links to other cycling articles on Applied Life


I am not one of those people. My DF bike is a 1987 Cannondale SR400 (sadly, largely in disuse since I got the Catrike) with Toe Clips, the old stirrup-style cages that wrap around (but, oddly, don’t clip on to anything) the foot. As such, I’ve never purchased cycling shoes. And because I ride year-round, I’d need several different types for the different seasons, which could get spendy in a hurry.

My interim solution for this was to use cross-straps built from Velcro Thin Ties (like a Velcro tie wrap). This is two strips of Velcro put in a diagonal pattern across the pedal that I slide my foot into. When the foot turns vertical they tighten up and hold the foot in. They seemed to work ok, and at just over $10 for 100 of them, they are pretty economical - about ¢0.20 per foot. I’d love to take credit for this idea, since it seems such a simple, elegant solution, but I borrowed it from someone else in one of the triking groups (I wish I could remember who) who clearly does a better job of thinking outside the box than I do.

Now, they would periodically wear out and break, but that’s only ever happened when putting my foot in them - never when riding.

...So far.

It’s the so far part that bothered me. Maybe this solution is perfectly sustainable over the long haul, or maybe I’ve just been lucky. If the latter was true, though, it seemed reasonable to look for a different solution.

This past April I had the opportunity to swing through the Wheel and Sprocket Bike Expo in Milwaukee. I’d gone to get an opportunity to take a test ride on a Catrike Expedition (this seems like the front-running candidate for my next trike), but while I was there I looked at the other trike displays as well. TerraTrike was there, and one of their models had heel slings on the pedals. I asked the staff/salesman about these, and he indicated they are designed to bolt on to any pedal. They go by the somewhat cumbersome name of Comfort Pedal Conversion Kit. Apparently "heel slings" isn’t a jazzy enough name. But jazzy or not, they run right under $45 bucks, which is way cheaper than all but the least expensive single pair of cycling shoes on Amazon.

That was April and this is October, so it clearly took me a while to get around to ordering them. When I did so, they were out of stock on TerraTrike’s Website, but Bicycle Man had them (I may have bought their last set - it’s currently listed as sold out).

I ordered them in late August, but ran into a snag as I went to install them. These are, perhaps unsurprisingly, not designed with the standard Catrike pedals in mind. They are a pretty simple design, intended to be bolted in through the holes that the standard pedal reflectors mount to. To do this, they come with a threaded backing plate.

Backing Plates

This would work quite nicely, but the backing plate was too wide to fit into the space allowed on the Catrike pedals. So I stepped away from them, went out for a ride, and waited for a day that I would have time to sit down with a grinder and shape the plate down so it would slide in.

When that day came I was able to get it to slide in to the open space with a minimal amount of shaping. But once it slid in it was clear that the plate was also too tall for the opening - the holes didn’t line up (and it drops against the pedal on the other side). Clearing away that material would have involved a lot more grinding, and my skills in this area are limited. So, again, I stepped away, went for a ride, and thought it through a bit.

Ultimately I realized that I might be able to find nuts to secure them to the pedals instead. I stopped by the local hardware, taking the mounting bolts with me, to see if I could get a match. After a little bit of trial and error I was able to find them - they are M5.00’s. I picked up a handful of both nuts and lock washers in the appropriate size (I always get extras - makes it much less frustrating when something gets dropped and rolls away, nowhere to be found).

nuts and washers

Pedal with nuts

This worked, albeit with caveats:

  • The bolts it comes with aren’t long enough to get both the lock washers and the nuts on, so I went with the nuts alone. The bolts come with thread compound on them, so this should help hold it. I’ll need to check them periodically.
  • To get the nuts on I had to remove the Allen bolts from the outside frame of the pedal and swing it up. This meant that the plate for the heel sling covered one of the holes once it was attached, so I had to leave one of the bolts off. The outside frame is now held on by three bolts instead of four. Hopefully that will not cause any issues.

swing down pedal frame

All told, once I had all of the parts together, this took about an hour to do for both pedals. If you are more handy than I - and odds are good that you are - it will probably take you less time.

How Do They Work

Caveats aside, I got them installed and I’ve since had them out for a couple of rides. My very first impression involved trying them out for a very short ride with my typical summer riding shoes - a pair of Keen sandals. The picture on the box shows them used with sandals, so you’d think this would be ideal:

Judging a box by its cover

It... wasn’t. The way the strap falls does not go across the sandal strap as is shown in the drawing on the box. Rather, it falls across the heel, below that strap. Having the strap loose enough to get the shoe through means that it is a little loose at the heel. Yes, it is Velcro, so you could open it and close it each time, but it’s one very long, continuous piece of Velcro, so that would become a real pain in a hurry. On that initial ride, it didn’t feel as secure as I would have liked. It was fine with the cross straps (which I left on the pedals), but didn’t feel as secure when I rode for short ways without them.

foot strapped in

other foot strapped in

However, they worked quite nicely with regular shoes. In this case, I broke out my nearly pristine pair of running shoes that I purchased, oh, say, 10 or 12 years ago (turns out I love cycling and hate, hate, hate running). The straps fit perfectly over a shoe without an open back, and the extra lip of the heel holds it in. I did (and do) continue to use the cross straps, but I did ride for a short distance without them just to test them out, and the slings seemed to secure the foot (with regular shoes) quite nicely. I took them out for a 20-ish mile ride, and found them to be quite comfortable. Getting in and out of them while also using the cross straps takes some learning, but it gets easier with practice.

I also took them out for one of my most common rides with the sandals on. They still felt a little less secure, but the sensation went away after a bit. And since the strap falls at the heel, if the foot does drop out, it’s going to catch between the bottom of the foot and the sandal - it’s still in a position to keep the foot from falling off the pedal.

While they take some learning in terms of getting into and out of, they took none at all once I was riding. They technically add a bit of weight to the trike as well, I suppose. In either case, on my first two rides I actually had personal best times for both. I don’t think they improved my speeds (though I suppose I could be wrong about that), but they certainly didn’t slow me down, and they felt pretty natural after a few minutes.

Visually, they aren’t particularly sexy, but in the end, my risk of leg suck should be significantly diminished.

not sexy, but safe

TL:DR Section

The long and short of it works out like this:

  • These appear to be an economical alternative to cycling shoes, especially if one rides across multiple seasons.
  • They work better with solid-backed shoes than sandals. I will continue to use a cross strap in addition to the heel sling for all shoes, but especially the sandals.
  • They are not designed to bolt directly to the standard Catrike pedals. This is not surprising, since they are built by TerraTrike. But you can attach them with M5.00 nuts. Make sure you have some kind of thread locking compound.
  • When I put them on, it involved removing the outer bolts on the pedal frames to swing the frame up so I could attach the nuts. This resulted in the sling brackets covering one of the bolt holes, so it left me with three rather than four bolts holding on the pedal frame.
  • They take some learning to get in and out of, but riding with them comes quickly.

Follow-up 2/28/2021

In the time since adding this kit to my Pocket I purchased a Catrike Expedition, and after experimentation with clipless pedals and shoes, ultimately added these to that trike as well. But I upgraded, adding a set of low-cost toe clips instead of the Velcro straps, and that’s the set up I continue to use. I also learned a bit more about how to more easily install the kit. You can read about all that here.

Benefit of Hindsight by Erin Wade

I struck out a couple of weeks ago for a 38 to 42-ish mile ride - I’ve been working on building up to longer distances. The weather was practically idyllic - partly cloudy, with a high in the lower 80’s; honestly better than a mid-August day in Illinois has any right to be. I’d worked out the route to allow for a full 42-ish miles, but to be easily cut to the shorter distance if I didn’t feel up to the full course.

All was going well until right about mile 10, at which point the rear view mirror on my Catrike Pocket snapped off of it’s post.

these pieces should be connected

That’s right - just snapped off. Not so much as a "by your leave", or "toodooloo" - one second it was there, doing a stalwart job at its duty, and the next it was a decoration on the pavement behind me.

The township road crews in the area have been diligently working on culvert repair over the course of this summer. As a result the highways and byways are punctuated with 3-4’ wide removed sections that reach across the breadth of the road, filled in with gravel rather than asphalt. These occur every few miles across the region right now and, inevitably, the difference in material results in a difference in the elevation between the road and the filler. It was upon encountering one of these sections, rolling along around 15mph or so that my mirror made its escape. As best I can tell, the jarring nature of the bump into the gravel fill must have been just enough to get it to give up the ghost.

I stopped and turned around to pick up the mirror, tossed it into a saddlebag, and continued on. I was already a third of the way into my ride, more or less, so it made just as much sense (I reasoned) to go on as it would to go back.

One of the things you quickly realize, under these circumstances, is just how valuable a rear-view mirror is on a recumbent trike.

Rear view mirrors are, arguably, desirable equipment for all road riding. I certainly have one mounted to my Cannondale upright as well, and I know that I miss them when I’m riding a borrowed bike, as with our adventures with bike sharing earlier this summer, or on the rare occasion that I take out MLW’s big-box Schwinn mountain bike.

Mirrorless rear view, however, is an area where a diamond frame bike has an advantage over a recumbent trike. Turning your head to look behind you is considerably easier on a DF bike than on my trike. It’s not impossible, mind you, but the effort is considerably higher, and the view one gains for that effort is not all one might hope.

This actually resulted in my cutting the ride down to the shorter route. The longer route included a section of road that, while only a couple of miles long, rises, falls, and twists with a minimal usable shoulder for emergency runoff. It seemed better to avoid that portion without the benefit of a rearward view.

I decided, given this experience, to order and mount two rear-view mirrors on the trike instead of just replacing the one. This puts a second mirror on the right handlebar.

The Repair Crew My repair crew helping me out

Two Mirrors

behind sight!

With the relatively small size of the trike, this may seem to be overkill. And from a visual field perspective, it is. Cars nowadays have mirrors mounted on both doors in addition to the central rear view mirror (though I’m old enough to remember when they came with one, standard, and getting one on the passenger side was an extra cost option. And then you had to prevail upon your passenger to adjust the mirror on that side, because there was no such thing as a power mirror... I digress - suffice it to say that I’m old enough to remember things that make me seem old...). The general width of a motor vehicle means that those three mirrors each provide a different view, with information within each that is valuable for the safe navigation of the machine. On a trike, however, the difference between the view in the two mirrors is negligible.

The similarity in view between the two, however, is more a feature than a bug. While it is overkill in terms of the visual field, what it offers is redundancy. When I first ordered the two mirrors, my thought was towards the idea of keeping the second one in the saddlebags as a backup, alongside the spare tubes and my toolkit. But while the mirror can be installed with a bike tool kit - all of the connectors have Allen heads on them - the real question that occurs is just how badly one would want to do a roadside mirror installation. Which is to say: not at all.

If I’d had the second mirror on the trike a couple of weeks ago, losing the one would have been a non-issue. Given that they provide virtually the same rear view, I could have comfortably soldiered on without alternating between wondering if anything was coming up behind me and shifting and craning uncomfortably to see whether or not that was the case.

I’ve also realized an additional advantage in rides since doing the installation. With the single mirror on the left side of the trike, I cannot see behind me when I signal a left turn - my arm is the only thing featured in the mirror at that time. It’s a small thing, for a short period of time, but now I can still get the rear view from the right-side mirror.

It’s always possible, tho, that the fates were just looking out for me that Sunday. As I mentioned, the loss of the mirror caused me to cut about five miles from the ride. It doesn’t seem like much, but my legs were pretty much spaghetti by the end of the trip even as it was, so all may have been for the best. Gotta get up to 42 miles eventually, though...

Winter Cycling - Northern Illinois by Erin Wade

Ask people of a certain age what winter is like in Illinois, and you will undoubtedly hear tales of the winter of 1979. If those tales were summed up in a picture, it would look like this:

IMG_1339.JPG

This is an effect of human memory, which likes to latch on to significant events preferentially. The reality, however, is different. We rarely get large snowfalls, and temperatures across the course of the winter vary considerably, from negative double-digits (particularly with windchill) up into the 40’s and 50’s. These variations come in batches of a week or two at a time, and the snowfalls we do get typically do not remain for any extended period of time. This means that, when it comes to winter cycling, what I want to picture is this:

C66D9B46-8150-4846-98C9-8F4EBE9F6612.JPG

But what I get is something more like this:

C002A6E1-C709-4DC8-B26A-8CD6EDE2B94A.JPG

Or, even more typically, like this:

C9F9F532-BA2C-40F2-8C77-988D2B0ED746.JPG

During most of this it is still cold, of course - we can periodically have temperatures in the 20’s or even the single digits during periods of time that the bottom picture above represents. But there aren’t the vistas of snow across the plain to enjoy as a part of the ride.

What I have realized, as a result of this, is that all of my mental back and forth on the type of winter tires I might need to put on to my trike is largely academic: for the overwhelming majority of the winter here all I’m contending with is either partially, or entirely, cleared asphalt. Even with patches of snow on the road, as above, it’s easy enough to ride between them when needed - e.g. on the hills - and they otherwise aren’t an issue (at least, not on the trike. Upright on the other hand...).

I’ve managed three outings thus far in January - fewer than I’d like, but the limitation has primarily been due to my schedule rather than due to weather conditions. Still, I’ve already matched January of last year, and my nine rides in December of 2017 are far ahead of the two I had in December the year prior. I had hoped the trike would facilitate my winter riding, and so far it really has done so. For anyone who likes to play outside in the winter, but lacks for sufficient snowfall to facilitate winter-specific sports, I can’t recommend it enough!

Riding in Snow - Upright vs Trike by Erin Wade

Winter Wonderland

This was the view as I set up my trike to go out for a ride early yesterday afternoon. I’ve been doing winter biking for the past several years. When I got my Catrike Pocket, one of the things I was looking forward to was this part of my riding experience - Winter riding is great, but there are disadvantages to having a two-wheeled conveyance underneath you in the ice and snow...

Today wasn’t my first cold weather ride on the trike, or even my first one encountering snow, but it was my first out here on the prairie, on a day like this - actively snowing, with the roads as yet uncleared.

I didn’t want to spend a lot of time on the actual road under these conditions - I ride my bike and trike out here on the road all the time, and I find people to be quite respectful, but the earliest snows often find drivers have forgotten everything they previously learned about driving in the white stuff. And, as the picture accurately displays, visibility was not ideal (yup - that’s the sun overhead). So I decided to ride down the wind turbine service roads instead. This involved only a short distance on the road itself. The service roads aren’t long, but it would still get me out and about for a little bit.


Enjoying this post? Check out our Cycling page for links to other cycling articles on Applied Life


Cutting thru the snow is more work than one might realize - the gears you use are lower, and there’s a lot of spinning going on. The section of the road going towards the service road is downhill to get there, and I was a little surprised how much the rear wheel moved around. I was never sideways, but there was a lot of wiggling from side to side (I still have my road tires on the trike).

Once I hit the service road this was the view:

Hoth?

The service roads are gravel, and simply there for trucks to get back to the turbines, so the surface is a bit rougher than being out on the open road. It was passable, however, while I was heading east/west. When the road turned to the north the volume of snow - probably just due to wind direction - was too much to make it passable.

So I turned around and headed back. This was mostly uneventful, except that the downhill section on the way there was now an uphill section. In the snow on the pavement I did finally hit one section where all I could do is spin the back wheel with no forward progress. I tried for what felt like ten minutes (but was probably 30 seconds) to get it to move forward without dismounting, rocking back and forth a bit (it works in the car, so why not here?) but finally gave up, got up, and rolled it forward a few feet. That seemed to do the trick.

I was a little disappointed both in the distance and duration of the ride, so I decided to take out MLW’s upright for comparison. Her bike is a Walmart-special steel Schwinn mountain bike, and I’ve used it before for winter rides. I thought it might be interesting to compare both the experience, and the numbers for the two.

What I found was:

  • The wiggly downhill section on the trike was wiggly on the upright as well, but with both front and rear wheels moving unpredictability.
  • I made it slightly farther on the northerly section of the service road, but it was still pretty much impassable.
  • I didn’t get stuck on the uphill return, but again had both wheels periodically breaking free (I didn’t drop the bike or wipe out - but I certainly have done so in the past on winter rides).
  • The 3-4’ higher you sit on the bike makes a real difference with respect to wind exposure. I think I knew this from a logical perspective, but there was definitely more of a sensation of the wind cutting across me as I was sitting up on the Schwinn.

And the numbers? Pretty similar overall:

Pocket in the Snow

Schwinn in the Snow

On the Catrike the ride took me a little over 10 and a half minutes. My average speed was a little slower, but my top speed was a little higher (not that top speed is a target for winter riding). Being a little slower on average probably had to do with the fact that I tried a little longer to get forward progress on the northward section of the service road while I was on the trike, since I wasn’t originally planning on this to be a comparative test; and it would reflect the time spent spinning on the hill before I got up and moved the trike. In both cases, these events (and picture taking) would also account for the longer stopped time on the trike as well.

So - ultimately the trike appears to have done about as well as the mountain bike from a numerical standpoint. And from a never-threatening-to-disappear-out-from-under-you standpoint, it far exceeded the upright. I think now I just need to consider whether, and what type of tire change to make for the rear wheel to improve traction. I won’t typically ride on unplowed roads, but it would be good to not have to get up and push on a slippery uphill section.

Against the Wind by Erin Wade

Life on the open prairie is often a windy affair. This is a year-round phenomenon, to some degree, which is why, when I look out any window of my house I see giant white turbines. But there is some considerable variation across the seasons out here. Mid-summer and, to a lesser degree, mid-winter can have extended periods of relative calm, while spring and autumn kick things into high gear, perhaps feeling the need to make up for the laziness of their seasonal predecessors.

Any cyclist who has ridden for any length of time knows the wind can be a formidable foe, and it can absolutely be a factor in deciding whether one wants to ride at all. This is what I was contemplating this past Black Friday - I wanted to get out there and work off some of the turkey and gravy, but the 20+ mph winds were weighing in against that notion. Still, if one waits for the perfect conditions to do a thing, one will never get to do that thing, so I geared up myself and got out my Catrike Pocket. It also occurred to me that this might be a good opportunity to see what the actual effects of the wind are on riding.

To do this, I stopped and took screenshots of my Cyclemeter readings at three key points in the ride - at the end of the first section, riding into the wind, and the end of the second section, mostly with the wind, and again at the very end of the ride.

I selected my route so that I would be riding into (or against) the wind for the first five-ish miles of the ride. I try to do this in general so that the hardest part of the trip presents early on, when my energy level is at its highest. In this case I would be riding directly against the wind - straight south against southerly winds. Cyclemeter indicates the wind speed for the ride was 26mph.

The Numbers

This is how that came out:

Riding against the wind

The average and top speeds are really the primary areas where the impact can be seen. I’ve ridden this particular route four times prior on the Pocket, and my speed across those rides on the route averages out to 12.22 mph. Here, for the first five miles I’m down to 11.36. Cyclemeter also lets you break down your rides into mile splits, so I can compare the first five miles on this against previous rides, and looking back it’s clear that I’m at least a little bit slower, and in some cases dramatically slower, than on previous rides over this section:

breakdown by mile

Both my average speeds and my top speeds are down from the prior rides. In some cases I have weather data for the other rides to compare against for wind speed and direction:

  • On the 11/19/17 ride Cyclemeter indicates the wind was out of the West by Northwest (WNW) at 14mph, so I would have had a partial tailwind for that section.
  • On 11/11/17 it was South by Southeast (SSE) at 8mph, meaning I was riding partially against the wind, although a much slower wind.
  • On 10/20/17 the wind was out of the south at 8mph - a direct headwind.

The 19th - with the partial tailwind at 14mph - is definitely my fastest ride over this section, suggesting some benefit from having the wind behind you (unsurprisingly). These numbers also suggest a bit of a threshold effect - the 8mph winds (which feel like a relatively still day out here) don’t seem to have much of an impact.

And what about getting the wind behind you?

I took the next measurement 6.48 miles later (these were each taken at convenient stopping points). This segment consisted of approximately two miles heading east, and and four going straight north (the rural roads here are mostly laid out in a grid pattern - makes for ride maps that look like Tetris blocks), putting the wind to my right for 1/3 of the segment, and directly behind me for 2/3. That 26mph tailwind does make a bit of a difference:

With the wind at my back

As you can see, the average speed is up by a couple of mph, and the top speed is way up. In the interest of full disclosure I’ll note that this is (of course) a downhill speed (yes, we do have hills in Illinois). This is actually not far off of my highest speed on the Pocket, which was 31.72mph, and that on a much bigger hill during the 2017 Farmondo put on by the Tempo Velo Cycling Club in Sterling IL.

The wind at your back - at least when it’s a big wind - would appear to make a considerable difference.

The remaining couple of miles of the ride were mostly westward, with the very last half-mile going north (with the wind). My average dropped a scosche, but otherwise the numbers look similar to the prior measurement:

the final results

The Takeaway

It’s not terribly surprising to find that the wind against you will slow you down, and that the wind with you will speed you up. With respect to that we pretty much have confirmation of what would be the expected hypothesis. But looking at this over time does show a few other things that I found interesting:

  • While the headwind slowed me down, it didn’t slow me down as much as I expected. An average of ~11 mph on the Pocket is not awful - scanning back over the year my speeds on similar roads range between ~11.5 and ~14.5 mph. I’m at the slower end here, but not so much so as to make it unreasonable to consider riding.
  • There seems to be a threshold effect - an 8mph wind doesn’t seem to have much of an impact, but higher winds look like they do.
  • A good tailwind clearly does have an impact. This always felt like it was the case, but I am a little surprised about the degree of impact.

An additional observation here for me is the subjective difference offered by the recumbent trike. I’ve loved riding for a long time, but riding on windy days, against the wind, on my road bike, has always felt like a slog. The Catrike was different. Yes, it was more work, and I was riding in lower gears, spinning much more than usual, but it didn’t feel like work the way that it does on my Cannondale. Some of this may be due to the aerodynamic advantage of the recumbent - you are simply not up in the wind in the way that you are on an upright bike. Some of it may also be due to not having to maintain balance in addition to pedaling for forward motion. It’s also possible that there is a difference due to gearing. My Cannondale is old - it’s an ‘87 - and only a 12-speed. The Catrike has 27 gears to choose from, and many of them much lower than those on the Cannondale. It might not be as different if I could grind less and spin more on the upright. Regardless, while I still love my Cannondale, I really love my Catrike.

Ultimately, for me this shows that it’s really worth it to get out even when the wind seems to be working furiously against you. And, since most of it is for exercise, I suppose one could say that the wind is ultimately working with you...

Trike as Transport by Erin Wade

There are certainly people who use bicycles or trikes as part of their daily transportation. I have fond memories of this myself, riding around the countryside and, later, around my small town with a bicycle as my primary form of transportation for most of my childhood right up until the day I got my driver’s license. It’s a recollection brought forward for me most recently by the show Stranger Things, since I was also a kid pedaling around in between sessions of D&D, albeit with considerably less telekinesis (though not for lack of trying...).

As an adult I’ve had little opportunity to use my various pedal-powered implements as transportation in any meaningful extent. While I’ve managed the occasional trip to the grocery store with a trailer, the reality of extended commuting distances and large portion of life in an urban setting that didn’t (and doesn’t) embrace bikes as transportation means a lot of time in the driver’s seat instead of the saddle.

There is a very real part of me that wishes I had more opportunities to use my pedal-powered options in lieu of my car. When possible I’ve tried to manufacture those opportunities - last summer I rode to several cemeteries in the region as part of my ongoing genealogical research. This can be a fun way to combine activities and feel like I’m making some progress, but somehow it’s not the same as really replacing the car.

Last week, as luck (?) would have it, I had such an opportunity. Both my car, and my wife’s car, had to go in for repairs. We are out in the country, and the repair shop is in town - about six and a half miles away. To limit time off from work I made arrangements to have the work done on both cars in the same day. This led to the following routine:

  1. Load my Catrike Pocket into car number one (both cars are Honda Fits - and the Pocket... well... fits in them). Drive the car to the mechanic’s shop.
  2. Ride the trike back home.
  3. Load the trike into car number two and drive the car to the mechanic’s shop.
  4. Ride the trike back home.
  5. Wait for the cars to be done (its possible I did other things during that time as well).
  6. Ride the trike in to the mechanic’s shop to get car number one.
  7. Put the trike into car number one and drive it home. And...

Ok - so for contininuity and storyline, I really want item number eight to say "ride the trike in to the mechanic’s shop to get car number two". The reality is that what follows includes gathering up my spouse and enlisting her help to gather up the last car. In my defense, however, we had parent-teacher conferences to attend, and I don’t really have an extra seat on the trike for my beloved, and she objected to the notion of being strapped to the cargo rack, so...

But this was still real-world transportation use for my machine, the sort of which I almost never get the opportunity to engage in. As a bonus, the three trips - two back, and one forth - offered up about 19.5 miles worth of riding, which is at the higher end of a day’s riding for me (my average trip in 2017 is 11.71 miles, according to Cyclemeter).

I realized as I was doing it that this was also some of the first times I’d actually ridden the trike in town. Since I just got the trike in June of this year, and the majority of my riding is recreational in nature, and catch-as-catch-can, I don’t venture in to town often - the open road is both more alluring and more convenient. I’m pleased to say it feels little different from riding a regular, upright two-wheeler in town, something, as I noted above, I had done many times before. Now I just need to find less costly reasons than car repair to ride rather than drive...

Using All the Gears... by Erin Wade

I got my Catrike Pocket in early June of this year. With a handful of exceptions - primarily days in which the Pocket was in need of some sort of minor repair - it has replaced my 1987 Cannondale SR400. I don’t have the prodigious mileage numbers of some, but when I have been riding this year it’s almost always on the trike, and my personal mileage is up considerably from the last couple of years because I’m early enjoying it.

In my eagerness to get and start riding it, I simply started out with the setup that it had when I bought it. As I understand it, the trike had been owned by a woman who didn’t ride it, and then given to my seller, who took it for his wife who also didn’t ride it (the tires still had all the little nubbins on it when I got it). He’d adjusted the boom on it - the telescoping shaft that has the pedals on the end - for himself, and we seemed to be of similar size, and since I wanted to get out there and start riding, I went forward with that setup.

I fairly quickly realized that I was having trouble getting into the lowest gear on the big ring, and top gear seemed a dubious endeavor as well. Still, I was having a lot of fun, and with 25 of the 27 gears to choose from there was still a lot to work with.

But over the past month I noticed - with the increased riding - that I was starting to get some pain in my knees. This was relatively mild, and resolved easily with ice and a bit of ibuprofen, but this was also new to me. A bit of homework suggested that my pedals were in too close. I went online to find some positioning guides and got things set out to where it looked like they should be. In order to test it out I went out for a ride. I planned on 13-14 miles, figuring that was long enough to see if my knees were managing things better, but no so long that it would occupy the time I’d need to make further adjustments.

What I found was two things:

A -My knees felt just fine (yay!), and; 2 - I now had access to about 12 of my gears, with an unpleasant grinding if I tried to get to others.

I spent a little time at the side of the road trying to make derailleur adjustments, to no avail, and tried more focused work on this when I got back to the garage. As is too often the case for me, after struggling with it for about an hour or so, I decided to look things up. I fairly quickly came across this video from the folks at Utah Trikes. I realized the error of my ways right at the point where they start talking about how to find the master link in the chain...

Being new to trikes, and given my tendency to dive in and ask questions later, I was not aware that an adjustment in the boom position would require an adjustment in the chain length as well. I don’t know where I thought the extra length of chain was going to come from - perhaps the Catrike comes with a mystical bag of holding that hides away the extra chain until it’s needed?

Perhaps not.

And once we’re at tasks like adjusting chain length, my course of action is clear: I’m headed to the bike shop. I have neither the tools, skills, nor extra length of chain that would be needed to undertake this task. Also, as I periodically have to remind myself, it’s often much easier, and certainly less frustrating, to let a pro handle things for you.

So - I popped the trike into the back of the car and headed off to Meads Bike Shop in Sterling, which is the localest bike shop that handles recumbents, and specifically Catrikes. The folks at Meads were great! An overnight stay - and one ride out on the Cannondale in the trike’s absence - and we were back in business, now with access to all of the gears.

I’m finding, with things set up properly, that the knee pain is no longer an issue. I’m also finding that I can stay on the big ring without mashing quite a bit more of the time on Northern Illinois’ relatively level roads. I suspect I was missing more of the smaller cassette gears than I thought.

Time will tell whether this makes a change in actual riding performance - if anything, I suspect it will make me a little faster on average. In any case, it turns out that life is better when you get to use all of your gears

Things I Learned this Morning - Rainy Day Ride by Erin Wade

October is a tough month for cycling in the Midwest, specifically for finding openings in the rain that correspond to openings in the schedule. Today presented a forecast of rain throughout the day, but there appeared to be a tiny opening between weather systems on the radar. I decided to take that opening, and rushed out to get on the trike.

I learned or realized several things as a result of this experiment, and they are, in no particular order:

  • My Columbia nylon "noisy pants" are not nearly as water resistant as I thought they would be.
  • I do not own any actual rain gear.
  • Fenders might be a more worthwhile accessory that I had originally thought.
  • A break in weather systems on the radar does not necessarily equal a complete break in the rain.
  • My accessories that claim to be waterproof/resistant - my lights and iPhone 7+ - appear to be good to that claim, at least for this short ride. And...
  • A visible lightening strike in the distance is a terrifying thing when you are sitting on the open road. On a metal frame. A wet metal frame...

It’s the last item that ended the experiment. I turned tail and went home. I had originally planned on a short ride - about 7 miles - that I knew would turn me around quickly, but I bailed a little over two miles in.

Still - getting some time on the road - wet or not - is better than getting none at all.

1AC73946-E16F-4080-A73E-0404110B2C22.JPG

I swear it seemed like a good idea at the time... 

Shedding Light on the Trike by Erin Wade

When I first got my Catrike Pocket it had an inexpensive lighting setup already on it. This consisted of a mount that held a small flashlight and also held a computer on the accessory mount up front, and a flashing rear light mounted on the rear frame.

Initial Lighting Setup

I started out simply using this setup. I don’t typically ride at night. However, I suspect like most people who ride on the road regularly, I am concerned with being visible to others as much or more than helping with what I can see. Having lights, in addition to a flag, seems a good call on the open road.

My first change was not planned. The taillight apparently was not happy in its relationship with me, and chose to leave me in early August. To be fair, there had been warning signs that things were not going well - it had fallen off the trike on a particularly rough patch of the Perryville Road trail in Rockford, making me stop and pick up the pieces. But when it left, it was truly gone, which is to say it fell off somewhere along a trail and I have no idea exactly where. I noticed it missing when I got back - it didn’t even leave a note.

I replaced the taillight with the Blitzu Cyborg 168T. This light had good reviews on Amazon, looked to have a nice, stretching, adjustable mounting system1, and it was rechargeable. It came from Amazon as advertised, and I added it to the back of the Trike. The one change I made here was to put it up on the horizontal crossbar rather than the vertical, which put it a little higher on the trike, hopefully in a better sightline for drivers coming up behind me.

Blitzu in place
Blitzu close up

I’ve been pleased with how it works thus far. The only situation in which it had failed on me was when I rode in the Farmondo in Sterling, IL. I rode the 43 mile course and somewhere in the 3 hours and 24 or so minutes of the event the taillight gave up the ghost. It must have been near the end of that time, however - there were two stops along the course, and I don’t recall it being out on either of those.

As the days have been getting shorter, I also started to think about the lighting up front. The original setup has been fine for riding during the day, I think. But, while I don’t really plan to do nighttime rides per se, it’s becoming a more common occurrence that the daylight is running out before I get home. Given this, it seemed like a good idea to have something that would make me more visible at night, and would let me see things better in the dark as well.

I returned to Amazon2 to see what they had to offer in this department. My primary criteria were brightness, a good mounting system, and that it be rechargeable. There are a lot of bike lights on Amazon. Ultimately I landed on this light by INBIKE. It’s bright - brighter than most of the lights I looked up, has side markers, is water resistant, and can also be used as a flashlight. And the mounting system looked convincing enough on the site1.

I didn’t want to remove the old light, mostly because I wanted to keep the computer mounted there, so I also ordered a Minoura Accessory Holder to mount it to. This also has a couple of additional benefits:

  • It puts the light up higher, further enhancing visibility; and
  • It has space for at least one additional item to be mounted to it. I’ve considered putting my iPhone up front rather than off to the side, for example, so this would offer that option in the future.

Everything came together well - things mounted as expected, and seem to attach appropriately. This is the initial setup I’ve put together:

Before:

One Lonely Light

And After:

And then there were two
Two from the right
Two from the left
(I adjusted the angle of the top light after I took that picture)

Probably the most fiddly part of getting things right was the Minoura Accessory Holder. I’m still not certain the angle that it sits at is perfectly vertical (this is a need I have - don’t judge me). In addition, the screws in it take three different sizes of Allen wrench, and you have to use all three to get everything tightened down. However, once it’s in place it seems to work well.

Of course, once I had it all in place I had to give it a try:

Light up the prairie

Out in the dark of the open prairie this brightens things up pretty nicely. I rode about a half mile in each direct to try it out, and I certainly felt comfortable that I was seeing far enough ahead of me to judge the road - I was not able to outrun my headlight.

Why Rechargeable?

I noted that being rechargeable was an important criteria for me with both lights. I’m sure opinions vary on this point - I am old enough, and geeky enough, to remember the debates over whether it was better for a cell phone to have a removable battery. But for me, being rechargeable has multiple benefits:

  • I can plug them in after each ride to be sure they are fully juiced up for the next trip. With regular, removable batteries you are left with whatever is left from the last usage, with no way to know how much that leaves you, which means...
  • I don’t have to carry spare batteries with me. AA and AAA batteries aren’t especially heavy or bulky in small quantities, but they do take up some space, and remembering to replace them as you go is something that is easy to not do.
  • I can charge them in my car. In most cases, my car also doubles as my bike prep station. I keep my air pump, helmet, gloves, chain oil, etc, in there. I also typically plug in the lighting items in the car (I have a separate battery for this purpose), so I always have them with me, fully charged, and ready to go.
  • I can plug them into my power pack if they run out while I am riding, and recharge on the go. While I don’t want to carry AA/AAA batteries with me, I pretty much always have the power pack on the back of the trike. This would also be a benefit for folks running with hub generators.

The debate over removable phone batteries seems to be resolved, so maybe this isn’t the question it once was. Still, there seem to be plenty of bike light options that still have removable batteries out there, so...


  1. In my experience, the mounting system is at least as important as the product itself when it comes to bike accessories. I’ve had excellent lights, for example, that have been nearly unusable because it’s too difficult to get them to strap properly to the handlebars or other mounting points.  

  2. For the record, I absolutely believe that you should support your local bike shop whenever possible. I do this where I can for repairs, tune-ups, and so on, and I find them to be great. Unfortunately, our most local bike shop is a half-hour away, and not in a location that I routinely travel to for other things.  

Trike Storage by Erin Wade

Riding and living with a recumbent trike is different from from the upright variety in a number of ways, and one of those is storage. There exists a cornucopia of storage options for upright, two-wheeled cycles, ranging from very simple options to mechanically complex.

My Catrike Pocket takes considerably less vertical space than an upright bike, but it’s also considerably wider. Out at the Homestead we have a fair amount of space, but useful storage area outside the house is mostly limited to our small garage.

While, as noted, there are certainly a number of fancy ways to store a bike, I’ve always been partial to the simple approach offered by a ceiling hook. If one has a crossbeam to screw a couple of these in to, hanging up a two-wheeler becomes a simple exercise of identifying a location where one hopefully will not repeatedly walk into the bike (a step I may have failed at a time or three in the past), measuring out the distance between the wheel centers, and mounting the hooks. Not fancy, but a pretty reliable system, even in our limited garage space:

bikes hanging out together

The layout of the trike complicates things. The three wheels do not run in a line, so they cannot be managed by simply putting hooks in a crossbeam. What’s more, the distance between the front wheels does not match the distance between the beams, so mounting each wheel to immediately parallel beams wasn’t an option either. And given that most of the airspace that doesn’t have people walking through it regularly is already occupied by the other bikes, having the trike hang that low wouldn't have been a great option anyway.

I considered mounting along a wall instead of in the ceiling, but the layout of the garage is such that any wall space that isn’t occupied by stuff already is unoccupied for a reason - mostly because a car has to pull up close to the wall in that space. While the trike isn’t tall, it would stick out far enough to impede that sort of use. It was going to have to be mounted above, high enough to prevent noggin-knocking, but not so high that I couldn't get it up and down (I am not a tall person).


Enjoying this post? Check out our Cycling page for links to other cycling articles on Applied Life


My solution was to install 2x4’s across the top end of the cross beams - two of them running side by side, and the third set back at the rear wheel’s center. This arrangement allowed me some play for the mounting of the hooks side to side as well.

Hooks! Nothing but hooks!

This position gets the Catrike up high enough that I can walk under it without fear of hitting my head.

Hello!

Hello again

It also sets it high enough that the car can fit under it (since my bike storage needs are now spreading out into the car area of the garage).

Catrike over car

I was initially a little nervous about the fact that the trike is hanging right over the windshield of the car, but it’s been there for months now, without issue. Also, there really wasn’t much by way of other option - moving it further back, say over the roof of the car, would interfere with the travel area of the garage door.

To get the trike up on the hooks, I have to pick it up, flip it over, and then lift it above my head - a variation on a clean and jerk. I hold it by the crossbar across the top of the seat back, and the accessory mount on the boom. Fortunately the Pocket is only about 33 lbs from the factory, and probably around 35 with my bags and accessories on it, so this isn’t significantly harder than lifting the two wheelers. Lining up the three wheels with the hooks was a little more challenging at first, but that’s gotten easier with practice.

Overall it’s been a good solution. Getting it in place took a bit longer than my usual bike system - lots of measuring to make sure everything lined up before I finalized things, and of course considerably more cutting, drilling, and driving of screws. And I am now running out of ceiling space. I would need to get more creative if I were to get another trike (but that never happens, right?).

Powering My Ride by Erin Wade

I knew when I got my Catrike Pocket I'd need to devise a setup to mount and charge my iPhone.

For the phone mounting purposes I used a Rokform Pro Series iPhone Bike Mount. I have used Rokform cases to protect my phones from myself back to my iPhone 5 days. The cases offer a mechanical mounting system and a magnetic mounting system, and uses the two in combination for the bike mounting system to make your phone extra secure[^1].

Rokform Mount

As I've mentioned here before, when I go out riding my iPhone gets heavy use. I use Cyclemeter to track my speed, distance, and route, and that involves having the screen lit throughout the ride so I can get the feedback from the app. I'm also typically playing either an podcast or an audiobook to headphones over Bluetooth. These are battery intensive tasks and, especially on longer rides, even a fully-charged, plus-sized iPhone may run low. Since the phone is also my lifeline if I run into trouble, I need it to remain functional throughout the ride. This means I need a way to charge the phone during the ride.


Enjoying this post? Check out our Cycling page for links to other cycling articles on Applied Life


On my Cannondale I put together a fairly basic setup using a USB cable and a Mophie Powerstation dropped into the bike's frame bag. This worked well enough, and I've used a variation of that setup for a little while on the Catrike, with a battery pack in one of the saddlebags. But I wanted to improve on this arrangement. Last fall I picked up a battery with a solar panel. While it takes some time to fully charge using the solar panel alone, once it has an initial charge the solar panel can defray the power loss and extend the length of a charge. I have a rear rack on the Catrike, so it wasn't much of a leap to put the battery out in the sun on the rack.

I originally tried strapping the battery to the rack using elastic straps. Unfortunately the straps blocked some of the solar panel and, worse than that, rattled like crazy on the aluminum rack. My solution for this was Velcro. Specifically, getting a roll of Velcro with an adhesive back and set the soft side on the rack.

Velcro Battery Pack

To connect it all I ran a 10 foot braided nylon lightening cable up through the seat and attached it to the frame at either end using Velcro wrap thin ties[^2]. 10' is longer than I need for this application, but I like having the extra, so I have the extra coiled up in the saddlebag.

The whole kit

Ready to hit the road

The result of this? After getting everything set up I took my Sunday ride. I was out for a little over an hour. I ran the screen the entire time, bright enough to see it in full sunlight, using Cyclemeter (which runs the gps), and listened to an audiobook. I stopped a couple of times to take pictures along the way as well. When I arrived at the end of the ride the phone battery was at 100%, and the battery pack on the back of the trike was at 75%. This suggests I probably could have ridden another three hours before I put a dent in the charge on the phone itself. The Velcro attachment worked a treat - my ride was 14+ miles, and included some gravel. I heard no rattling, and came home with the battery firmly attached.

Because of where the phone sits, my right leg hides the bottom part of the screen at times when I'm riding. Still, while it's close I don't actually hit the phone, and Utah Trikes seems to make additional attachments that I could consider for mounting the phone down the road. For the moment, it appears to work well enough.

Until and unless I start on much longer rides, I think this will work well. And, as far as that goes, there is room on the rack for at least one more battery. All in all, I'm pretty happy with this arrangement.


[^1]: I've used a variation of this on my Cannondale - the bike mounts are built to work with the top cap of a 1/8" threadless tube, which is common on modern bikes, but predates my vintage Cannondale, so there I used the Rokform motorcycle mount attached to the handlebar. The motorcycle mount is more expensive, though, so I was pleased that the 1/8" threadless mount worked for the Catrike.

[^2]: These are sort of like reusable Velcro tie wraps. They come in rolls of 25 wraps, and once you have them you'll find dozens of uses for them around the house. They are pretty awesome.

Biking Through Illinois Roadsides by Erin Wade

Travel thru the state of Illinois by interstate, and one could be forgiven for thinking that there's nothing to see but acre after acre of corn. Get onto a bike (or trike) and venture out onto the rural backroads and there is nature aplenty.

IMG_4725.JPG

These pictures are from my Sunday ride, which included a trip through, and in the vicinity of, the tiny borough of West Brooklyn. Parts of the route run along the south side of the Richardson Wildlife Foundation, which offers up views like this:

Lots of False Sunflowers

And while Montana is officially big-sky country, when you find the right spot, Illinois has some of that to offer as well...

Big-Sky Illinois

That's a patch of sunflowers in the middle distance, I suspect planted by the Richardson folks to attract and feed the wildlife. All in all it made for a lovely Sunday ride.

Support Your Local Bike Shop by Erin Wade

A short while back I went for a ride on the Catrike Pocket on the Perryville bike path in Loves Park, with a goal of riding up into Rock Cut State Park. This is a route I've taken many times, and riding it from the vicinity of Rockford Bicycle Company up into and around the park road and back is just shy of 12 miles. It's a winding path that follows along Perryville road in Loves Park for a couple of miles, and then up through the woodland that leads into and surrounds the park.

Unfortunately, on this particular ride I came up with a flat tire about 3 miles in. It had occurred to me that it would be good to have replacement tubes in the bags on the trike for just such an occasion. Unfortunately, occurring doesn't equal doing, so I had only that thought to accompany and comfort me as I walked myself and the trike the nearly three miles back to the car.

I did stop in at Rockford Bicycle Company to see if they could address my tire. The folks there have worked on my bikes many times, and they've always been very pleasant and helpful, and this day was no exception. Unfortunately, the wheels on the Catrike are smaller than typical bike wheels, and no shop in the area carries recumbent trikes as a sale item. After a valiant effort of looking throughout the store, they did not turn out to have the correct size. I thanked them, loaded up the trike in the car, and moved on.

This issue in mind, I took to Amazon and ordered tubes to fit both of the front wheels and the back wheel (the back is a different size - larger - than the fronts). This all happened shortly ahead of our trip to Detroit, so when the tubes arrived I set them aside and resolved to address it when we returned.

It occurred to me, as it has on several previous occasions, that I really don't have much experience changing bike tubes, and that it would be good to practice so that I would be more adept the next time this happens and I need to change the tire at the side of the road or trail. With this impeachable logic, I resolved to do it myself. I watched a couple of YouTube videos and, armed with my multi tool, I took my shot.

What happened next was not an inspiring tale of self-sufficiency...

I have changed bike tubes once or twice before. It's been a very long time between events - I've been riding bicycles of one stripe or another for something in the neighborhood of forty years, so my ratio of ride time to tube changes is minuscule at best. And that poor ratio shone like a laser pointer in my eye through the entire experience.

For example, I didn't have tire levers, or I thought I didn't. The multi-tool handles turned out to be meant to function as such, which I figured out after a bit. And the tire over the tube turned out to be extremely tight. I suspect this is a function of its small diameter compared with a typical bike tire. While I was able, with quite a bit of effort, to get it off the wheel and get the tube out, getting it back on was considerably harder. It ultimately took about two hours of bending and pulling (and sweating and swearing) before I resorted to using a screwdriver to get the tire back on the rest of the way.

This is the sort of decision that one realizes is probably a mistake when one makes it. The use of a metal implement around a rubber item that is meant to hold air is less than ideal. But it's the sort of decision that one makes out of fatigue and desperation with the hope that this time, this one time, it will work out okay.

It did not.

After a bit of swearing and stomping about (yes - I am sure you would be much more mature than I in such a moment) I decided learning time was over, and checked the hours for Bike Works in Peru. It looked like I had time (Peru is about a half-hour away).

As has been my experience there in the past, the folks at Bike Works were very pleasant and helpful. They also do not, to my knowledge, carry recumbent trikes, and so did not have a tube in the correct size. Anticipating this, I'd brought mine along and, that settled, they got to work on my trike.

Watching this was a little like watching Norm build a chair on New Yankee Workshop. He used real tire levers to pop off the tire and pop out the old tube. The new tube went on, and he did say that the tire itself was very tight, which made me feel vindicated. That feeling lasted for about five seconds - right up to the point at which he then popped the tire back on using his bare hands...

All told, they got me in and out in about 15-20 minutes, and the repair itself was an extremely reasonable - it cost me less than ten bucks.

All of this is a reminder that illustrates for me how important it is to support your local bike shop. Over the years I've had experiences with multiple local bike shops, in multiple towns. To a place and a person I've found them to be helpful in getting and keeping my bikes on the road. In this case, the total time I spent traveling to and from Bike Works, and getting the repair finished, was less than the time spent in the garage working on it myself. It also involved considerably less sweating and swearing on my part.

And - lessons learned from this in relation to my ongoing recumbent trike experience:

  • Order and carry your own tubes. It's always a good idea to have spares on the bike or trike if possible as a general rule, but with the trike you should be prepared to provide them when getting a repair.
  • Your local bike shop can almost certainly repair or replace your tubes faster than you. Let them when you can. It's not expensive - the time spent unfrustrated and getting back to riding alone more than makes up for it.
  • The rule above also applies for virtually all bike or trike repairs and tune-ups that don't need to be done on an emergency basis. Let your bike shop handle it - you will be happier.
  • I do still need to learn to change my own tubes - at some point I'm going to be out somewhere where I'm too far out to want to walk back - and I did buy a set of tire levers to keep on the trike in case of just such a situation. But probably this will need to involve practicing with the right equipment, and when I'm not also really, really wanting just to get it done so I can ride.

Catrike Factory Video by Erin Wade

As often happens, the acquisition of my Catrike Pocket has caused me to begin exploring online for information about my particular trike, available accessories, and recumbent trikes in general. This has led me to a great many places, but one particular site is a treasure trove of information - BentRider.

BentRider is a recumbent bike and trike (and it appears, mostly trike) news site with a deep archive of back posts. It would be a good first stop for anyone interested in starting to gain information about these machines, as well as trying to get information about the machine one already has - for example, I was able to sort out information about the specifics on my particular trike by finding the post for Catrike's 2012 release notice.

Going through that archive will also periodically allow you to come across little gems like the video below - a 12 minute tour of the Catrike factory in operation. As BentRider notes in their original post, there is no narration - "just pure trike-building porn". Watching it reminds me a little of the old-style factory videos - where the camera followed a piece through the production process - that used to play when I was a kid.

Catrike Pocket Maiden Voyage by Erin Wade

Pocket ready to roll

The Maiden Voyage of the Catrike Pocket went well. I chose a route that I was already familiar with, that offers some elevation changes but avoids gravel (we'll try that out later). I was a little slower than my rides on the Cannondale, but this is to be expected, I suppose - the Catrike is about 11 lbs heavier than the Cannondale, there's a higher rolling resistance with the third wheel, and of course I'm still learning the new machine.


Enjoying this post? Check out our Cycling page for links to other cycling articles on Applied Life


There are several differences from riding an upright bike that became clear on this initial ride:

  • You sit low. This is a given when you look at it, of course, but when riding down the road you quickly realize that you are at eye level with the top of the grass in an unmowed ditch. The value of the bike flag becomes immediately apparent.
  • Because of the height difference, extra care needs to be at intersections to be sure you can see whether a car is there.
  • You cannot see into the cars as they pass you from behind - the angle is too steep. Oncoming traffic, however, is much the same experience as on the upright bike.
  • At first the act of pedaling causes a bit of torque steer. This goes away with some practice (smoother pedaling), but it's a real adjustment (enough so that it's mentioned in the Catrike owners manual).
  • Riding this is noticeably more of a leg workout than with the upright. This seems be due to the differences in positioning. On the upright you can stand up on the pedals, of course, but you can also use more of your upper body to supplement by pulling against the handlebars. It is possible to brace against the seat back, which offers a different but similar benefit, but I didn't fully sort that out until about two-thirds of the way thru the ride. I suspect this also contributed to the slower ride time; it will likelly improve with practice.
  • In relation to the above item, I did a lot more shifting than usual. Some of this, again, will likely pare back with practice. Still, I suspect more shifting is simply a part of the deal.
  • Because the rear wheel is right behind your head, you are much more aware of mechanical activity of the trike.
  • Steering is immediate and awesome - it's like riding a pedal-powered go-kart.
  • Similarly, the brakes are astonishingly quick. I don't know if this is because of the design of the trike itself, or just a feature of the disc brakes - I've never owned a bike with disc brakes. But in either case, it's noticeably different from my Cannondale.
  • This is the first ride of any length I've taken in years in which my hands did not become numb from road vibration. In fact the difference in controls and position was quite a bit more comfortable than on an upright bike.
  • Having a full seat back - even when it's made of mesh - results in your back getting exactly as sweaty as you would think.

Part of my route selection today was intended to minimize the likelihood of encountering much by way of traffic (seemed wise to do for the first trip out). However, I did come across a handful of cars. The first vehicle I encountered - a man in a Ford pickup - slowed way down. The expression of confusion on his face as he sorted out what he was seeing was priceless.

The differences here are just and only that: differences. I enjoyed myself a great deal - I am looking forward to many, many rides on my Catrike.

Catrike Pocket by Erin Wade

I am pleased to announce a new addition to the biking family:

Catrike Pocket

This is a Catrike Pocket - it's a recumbent tadpole-style trike. I have wanted a recumbent trike since... well, honestly, since I realized they existed.

In fact, I've wanted a three wheel vehicle since I first read about the Trident Trihawk in Car and Driver whiling away my study hall hours in the Mendota high school library (what was I supposed to do? Study?). And while teenage and early-twenties-me loved cars, I've also always loved human powered vehicles, and many of my early noodling designs included three- and four-wheeled, pedal-driven machines. I thought I was drawing something unique until the internet became a thing and the Human Powered Vehicle Association website showed me that I was just one of many who had such things running through their heads. Fortunately, some of those others (unlike myself) had the technical know-how to actually build the things they designed.


Enjoying this post? Check out our Cycling page for links to other cycling articles on Applied Life


Several companies build recumbent trikes. In addition to Catrike, I am aware of ICE, Scarab, and TerraTrike available in the US (and there are probably others). Like any specialty bike, however, recumbent trikes tend to run in a price range well outside of what you will find for a bike in your local big-box store. But this lovely blue Catrike popped up on eBay and offered an opportunity well below what they cost new, so I let myself be taken along for the ride.

And along for the ride is where I will be today as soon as I finish a bit of coffee and sort out how to mount my phone to the trike (more on that later, most likely)...

Bicycle Adoption - a Timeline Analysis by Erin Wade

In the western world we live in an automobile-dominated society. Whether it involves tooling down the interstate at 70 miles an hour, or pulling up to a drive-thru window to pick up your food, your medications, or to withdraw money from the ATM, it's easy to see that we've designed much of our entire transportation system, and indeed our lives, around these vehicles.

This is, of course, a phenomenon of the last century, give or take, and it certainly wasn't always this way. While it seems perfectly clear now, from our modern perspective, couched within this car-centric society, why people might prefer to travel in an automobile rather than by bicycle, I sometimes wonder why it is that the bicycle didn't take a greater hold on our transportation needs. For millennia we relied upon our feet, and the power of domesticated animals, to transport ourselves and our goods across distances. The bicycle fits nicely as an advance upon that lifestyle, and is, in fact, the most efficient type of human powered transport. It's also very flexible for traveling on variable road surfaces - the cyclist who encounters a problematic road surface always has the option of walking or carrying the bike past an impediment.

The inklings of the why first started to dawn on me when I listened to the Wright Brothers biography, which started to suggest there might have been an issue of timing. To look at this more closely I spent a little time digging thru Wikipedia and putting together a timeline of transportation developments:

  • 1869 - Frenchman Eugene Meyer invents the wire-spoke tension wheel.
  • 1870's - Penny-farthing bicycles become popular.
  • 1885 - John Kemp Starley produces the first successful "safety bicycle". This bike featured a steerable front wheel, wheels of equal size, and a chain drive to the rear wheel. It is, essentially, the first modern bicycle.
  • 1886 - Karl Benz invents the Benz Patent-Motorwagen, widely regarded as the world's first automobile.
  • 1888 - John Dunlop re-invents the pneumatic bicycle tire. Notable that, according to the Wikipedia entry on the history of the bicycle, this removed the need for complicated bicycle suspensions, and paved the way for the diamond frame design.
  • 1898 - William Reilly of Salford, England, puts a two speed gear hub into production.
  • 1903 - 3-speed gear hubs go into production.
  • 1903 - The Wright Brothers make their historic flight at Kitty Hawk.
  • 1900-1910 - The Derailleur gear set was developed in France.
  • 1908 - The Ford Model T is introduced.
  • 1933 - Paul Morand wins the Paris-Limoges race on a recumbent bicycle designed by Charles Mochet; Francis Faure rode a modified Mochet Vélo-Velocar (recumbent) 45.055 km (27.996 mi) in one hour, beating a 20-year old speed record.
  • 1934 - Union Cycliste Internationale (UCI) publishes a new definition of "racing bicycle" that effectively - and purposely - banned recumbent bicycles from UCI bicycle racing events.
  • 1965-1975 - US Bike Boom; includes the 10-speed derailleur bicycle becoming widely available.
  • 1981 - The first mass-produced mountain bike appears.
  • ~ 1987 - 5-speed hub gears become available?

As I said: a matter of timing. The first modern bicycle appeared only a year before the arrival of the first modern automobile. It's another three years before a crucial invention - the pneumatic tire - appears, making it possible to design light weight bikes that are comfortable to ride (older bikes were often referred to as "bone shakers"), and that invention also benefitted the automobile.


Enjoying this post? Check out our Cycling page for links to other cycling articles on Applied Life


What's more, while early automobiles were not terribly fast - the original Benz Patent-Motorwagen had a top speed of 10 mph - the advancements that would have made bicycles competitive with those early cars, namely gearing, did not show up in earnest until the early 1900's. The Ford Model T, arriving in 1908, could travel at speeds in the 30mph range, with a top speed (which was surprisingly difficult to find information about online) of about 45mph. It's arrival is, for all practical intents and purposes, at the same time as that of the derailleur system, the chain and sprocket system that is a familiar feature on multi-speed bikes thru current day. The technology for bikes simply did not develop early enough for it to take hold.

While the inklings of this occurred to me listening to that Wright Brothers biography, it became starkly clear when I put together the timeline. It also opened up a couple of additional facts, about which I was completely unaware.

The second, simpler fact is that the real arrival of the precursor to the modern road bike in the United States seems to have been a later development. Growing up in the early 1970's riding my first banana-seat bicycle, I remember coveting what we referred to as a "10-speed" from the first moment I saw one. For a time I had a 5-Speed - essentially a 10-speed frame with only one front sprocket - which my parents had picked up at a garage sale, which made my young self think these were old bikes. Clearly that was not accurate.

The first, more interesting fact is the 1930's developments surrounding recumbent bicycles. In a series of events akin to the General Motors Streetcar Conspiracy, or the Windows vs. Macintosh story, or, frankly, dozens of other stories in business, it appears that the manufacturers of upright bicycles banded together to significantly limit the exposure and development of the recumbent bicycle by having them banned from bicycle racing after it became clear that the recumbents were the faster bikes.

Given that recumbent bikes are both undeniably faster, and arguably more comfortable, than uprights, their development in the 1930's, occurring when automobiles were still in relatively early development, and with the financial opening of The Great Depression making automobiles challenging for many to afford, might have been the opening that the bicycle needed to again take hold. Alas, the shortsightedness of business defending the status quo seems to be an historical constant.

There have been many advancements in bicycling design over the past few decades - gearing continues to climb both for derailleur and hub-style gear sets, bikes are designed for all sorts of different surfaces, and recumbents have slowly gained in popularity. Still, it looks a lot like early development - with a little help from non-competitive practices - just happened within the wrong window of time for the bicycle to catch on as a primary mode of transport.

Military Ridge Trail by Erin Wade

image.jpg

Military Ridge Trail Ridgeway Wi to Barneveld Wi

Most years for Thanksgiving we travel to the Cheese State to spend the holiday with MLW's family. My sister-in-law suggested that I bring along my bike this year and take advantage of the bike trails in the area. Seemed like a pretty good idea - in line with REI's #optoutside campaign and all - so I did just that.

The Military Ridge State Trail is a Rails-To-Trails path that runs from Dodgeville to Madison. The entire trail is about 40 miles long, but that seemed a touch optimistic after all the turkey and wine, so I rode from Ridgeway to Barneveld and back. The trail over this section is primarily crushed stone, which was very soft following the persistent rain we had here for Thanksgiving. It was a fair amount of work, and I was rarely able to get MLW's Schwinn up into the big front ring. The Schwinn, incidentally, I borrowed partly in anticipation of encountering surfaces which would not be friendly toward my vintage Cannondale road bike, and partly because said road bike is in desperate need of some rear-wheel maintenance.


Enjoying this post? Check out our Cycling page for links to other cycling articles on Applied Life


With regard to scenery this section of trail is somewhat of a mixed bag. The area in general is beautiful. The Baraboo region is essentially an ancient, buried mountain range, the peaks of which jut above the sediment, giving an alpine feel in a landscape of rolling hills. If you like the outdoors and live in the Great Lakes portion of the Midwest it's an excellent place to spend time. It provides a wonderful backdrop for any riding trip.

As is sometimes the case for riding trails converted from rail lines, though, the trail often runs within direct view of the highway. In addition, while most of it is bordered by plowed farmland, this section does run past a fairly large livestock operation, which one can detect via olfactory means before one actually lays eyes on it.

I had the trail entirely to myself, being the only person nuts enough to be out riding in 30-degree weather, and overall, it was a nice way to spend some time on Black Friday.

Of Bikes and Batteries... And Cell Phones by Erin Wade

The Mophie Powerstation fits nicely in my frame bag.  

The Mophie Powerstation fits nicely in my frame bag.  

In an unusual twist the weather today - November 1 - turned out to be perfect for riding.

When I go out for rides I use my iPhone to track my distance, speed, etc, using an app called Cyclemeter. I also use it, paired with my Jumbl Bluetooth Audio Receiver, to listen to audiobooks and podcasts while I'm riding[^1].

The difficulty is that, on longer rides, the battery on the iPhone may have trouble keeping up. It's not really the phone's fault - it's being asked to do a lot: run the the GPS radio continuously, keep the screen lit, and transmit audio over Bluetooth. For rides that run longer than an hour it's hit or miss as to whether the phone will last the entire ride. I can lengthen this by turning off the screen, which can help quite a bit, but I enjoy the feedback the app gives.


Enjoying this post? Check out our Cycling page for links to other cycling articles on Applied Life


It occurred to me a while back that I could take a battery pack and attach that to the phone while I was riding. They do make products to do this - for example, this gizmo that uses the power from your pedaling to provide a charge. But that type of thing seemed fiddly and expensive, and a simple battery pack like the ones made by Mophie would also have uses in settings besides riding.

So that's what I did. I purchased a Mophie Powerstation and set it up to sit in my frame bag, with a lightening cable connecting it to the iPhone, secured to the frame using a Velcro cable strap. I've been using it for the past two or three months, and it works like a charm. I have enough power to get through the ride without worrying about my charge, with a minimum of fuss.


[^1]: The entertainment for today's ride was the 10/29/15 episode of NPR's Ask Me Another featuring Bruce Campbell and Lucy Lawless. I always enjoy this show, but it was exceptionally good this time - both Bruce (from the Evil Dead movie franchise and Burn Notice, as well as the short lived, and truly awful Brisco Country Junior) and Lucy (Xena: Warrior Princess and Battlestar Galactica) were some of the funniest guests I've ever heard on the show.