Cycling Resources

Space-Age Solutions by Erin Wade

I’ve written here about my appreciation for the fenders I have on my Catrike Expedition. After two years of intermittently getting water, mud, and snow, flung up at me while riding my Pocket, they were a pleasant relief.

What I did not realize or anticipate was that I was also getting a little bit of bonus shelving with those fenders as well.

Because of where they mount at the base of the handlebars, the struts for the fenders actually offer a bit of rare semi-horizontal surface on the trike. I say "semi" horizontal, because they actually sit at a bit of an angle. And, if we are being honest, it’s really a semi surface too, since it’s an open triangle with two small flat bars about a quarter-inch wide. So seeing it as a semi-horizontal surface may take a bit of imagination.

Or - more accurately, it takes a bit of help.

Early on it occurred to me to use this area when I was looking for a means to mount a battery pack on the trike - here I’m referring to the small batteries for charging mobile devices. These are wonderful for extending phone life while on longer rides, and can be used to charge USB lights in a pinch as well. On the Pocket I had been carrying the battery in the Arkel bags, and had used a USB extension cable routed though the seat and strapped to the frame. This worked ok, but was prone to bouts of suddenly not charging, which necessitated trouble shooting through multiple connection points - a thing you don’t really want to stop in the middle of your ride (and it always happened in the middle of a ride) to do. But the Pocket, being on the smaller side by design, didn’t offer a lot of other options for location, so I struggled through with it.

When the Expedition arrived, it wasn’t long before I began eyeballing that space on the fender struts for the battery. It sits right beneath the phone mount (I use a Rokform motorcycle mount, which works with a Rokform case), so it would offer a much shorter - and much less complicated - connection to the phone. It would also be closer to the front light on the boom mount, which is the light I’m most likely to need to plug in on a longer ride, allowing me to get there with a single, longer cable, removing the need for an extension cord.

The question was how to get a battery pack - or anything really - attached to the fender strut. I puzzled over this for a bit and played with a couple of unsuccessful options. And then I realized what I needed was a space-age material - something that astronauts would use - to solve this problem.

Yup - I needed Velcro. Or, I suppose I should say "hook and loop fastener material"...

I’m making like this was a great revelation, but the reality is that I use Velcro for a lot of things. Adhesive Velcro can be purchased in big rolls, and you can cut pieces to size and purpose. It’s pretty handy stuff.

Velcro

What I did, then, was to line the strut arms with the soft side of the Velcro, cut specifically to the shape of the arms. You can do this by simply tracing around the arms on the back of the velcro (easier to see if you use a white marker) and then cutting it with scissors. I think the end result looks pretty good - because the Velcro and the fenders are both black, it’s almost unnoticeable when there’s nothing on it, and I’ve had it there for about a year, and it’s still in good condition.

On struts

On the battery pack I just place a nice, large piece of the hard side across the back.

Battery

There may be a temptation to put small pieces on in order to line up with the struts, but this is additional effort without much benefit. While you will use less material, it’s much easier to get the battery seated if you don’t have to be super-precise in how it is situated. Once it’s on there you can just stick it on the fender:

Battery on fender.

The little shorty Lightening cable is a find from Amazon, and it’s perfect for this sort of application.

While I set up the battery pack this way early in the game, I have since adapted it to add some additional items. As I’ve increased my riding over the season, I’ve also been experiencing some increased engagement with citizens of the canine variety (more on that another time, most likely). Given this, I’ve found it helpful to have some deterrents close at hand. For these I mounted additional strips of Velcro across the top strut and the vertical portion of the fender beside the wheel:

More Velcro

And then just put strips across the deterrent items:

Air horn

Pepper spray

battery, phone, deterrent

battery, phone, deterrent

Horn

The air horn is wedged in pretty solidly, but I find that it doesn’t usually have to be pointed straight at the offender to be effective. I put smaller strips on the pepper spray because it’s lighter, and I wanted to be able to pull it off quickly and easily at times of deployment. It works pretty well.

And I still have an open "shelf" on the left fender if I need it. So far I haven’t had anything to put there, but I could imagine specifically setting up a second battery pack there - maybe a dedicated one to power the headlight for longer rides.

Ok - now that everything is set up, it’s time to ride!

What to Wear by Erin Wade

I am on record as being personally opposed to buying and using cycling specific clothing. My greatest area of resistance is clipless shoes, but I also chafe at the idea of having other clothing items specifically for cycling.

Now - to be clear - I don’t have any problem with others wanting and using those items, this is very much just a personal thing. I prefer the flexibility of using clothing items that can be applied to other activities as well. For example, my basic winter riding gear is the same setup that I use for cross country skiing. It’s a getup designed for exercising, but flexible enough to apply across multiple winter activities.

My gear for riding has evolved over time, particularly with the transition from uprights to recumbent trikes. On the upright, for most of the year, I rode with a t-shirt and cargo shorts. Yes, I know cargo shorts are a fashion crime, but they are also very useful for carrying things when you are riding upright.

I learned very quickly that, on the trike, those things fall out of your cargo pockets. You’d think that I could have intuited that by looking at the angle of the pocket and all, but (apparently) I enjoy learning things the hard way.

Additionally, the shorts become something akin to a low-level parachute given the fact that your legs are pointing directly into the wind that you are generating. Granted, this can be somewhat refreshing on a hot day, but it’s somewhat unsightly. Plus, the buttons on the shorts tend to strike the handlebars as they come around. I can still hear it in my head:

snik-snik-snik-snik-snik...

Like an animal

I needed a different solution. I used a basic pair of nylon shorts for a while, and those worked ok, though the wind issue still presented. A few years ago MLW bought me a couple of rash guards for swimming on a family trip to Mexico, and the following summer I switched to those from the t-shirts. They aren’t significantly warmer than the t-shirts, and they offer UV protection, which allowed me to stop putting on sunscreen, at least up top.


Enjoying this post? Check out our Cycling page for links to other cycling articles on Applied Life


I was happy enough with the rash guards - and more importantly, the reduced amount of sunscreen use - that last summer I started to look for an alternative for my legs. I wanted something that would cover them, but not be too hot in the summer. And while I’m good with the rash guards on top, modesty prohibits the wearing of compression garments on my lower half.

What I arrived at for a solution was linen beach pants. Linen is lightweight and cool, and they met my flexibility requirement because they are also suitable for casual wear around the house and yard - and they were great for our trip to Florida in February, both for cycling and theme-parking. The only additional component needed were some Velcro straps to keep the cuffs out of the chain - and Amazon has them in orange, so...

Yup - you can get them in orange

I mean, no one is going to accuse me of being a fashion plate while I’m wearing these outfits, but then, no one did before, either.

I’ve got two rash guards and two pairs of the pants, and a third top - the orange (yes, I have a problem) San Pellegrino jersey MLW got me last year. I’ve been pretty happy with this solution, but as my riding has increased I’ve begun to fear that I may have painted myself into a corner.

It’s been a mild summer, but even so, things need to be washed after pretty much every ride - Recumbent trikes are much more comfortable than uprights as a general rule, and my seat is mesh, but it still functions as a back sweat production machine. So: I am now periodically finding myself waiting for things to dry so I can ride.

Waiting Impatiently

But as I am waiting to ride, I find myself wondering: if I’m wearing the same thing every time I ride, such that I am now waiting for the clothes so I can get on the trike, don’t I essentially have specialized riding gear? I mean, regardless of how I’ve put it together? Am I just a hypocrite?

It was with that in mind that I hopped on the trike to take something over to my aunt and uncle’s place. They live about a mile down the road, and my gear was still in the wash, so I said to myself "just go with what you are wearing - you used to ride like this all the time" (I was wearing a t-shirt and cargo shorts - it’s sort of a personal uniform. And yes, I _do_ trade the cargo shorts for cargo pants when it gets colder - how did you guess?)

And as I started to pedal down the road, I heard it:

snik-snik-snik-snik-snik...

I think maybe I’ll just order another rash guard and pair of pants and learn to live with the hypocrisy.

Tunnel Hill Trail… After Dark by Erin Wade

Back in May of 2019 I ventured out to the Tunnel Hill Trail in Southern Illinois, riding from the town of Vienna (say "Vy-Enna") to the Egyptologivally named town of Karnak. This was a beautiful ride, including woodlands, wetlands, and a couple of tiny little settlements across a 21-mile round trip. There were also a couple of side-trips that I didn’t take - Heron Pond, a little Winery, and a Wetland Center - and are on my list for when the opportunity presents again.

Still, the thing the trip to Karnak and back lacks, as lovely as it was, is the tunnel that the trail is named for. I still wanted to see that, and I had another opportunity to be down that way towards the end of last October.

Both trips to the Tunnel Hill Trail were end of the day affairs, but their location on the calendar made for some differences in terms of available daylight. I knew I’d be riding against the sunset, but I reasoned that I had lights on the trike and, if could get _to_ the Tunnel in the daylight and get an opportunity to see some of the rock formations I’ve seen in pictures, I wouldn't mind riding back in the dark.

The Norns clearly detected my urgency on the way to Vienna, and decided to have a laugh at my expense by putting road construction along the way that had not been there in May. Sitting still in a line of traffic on a two-lane road knowing you are racing against the sun and are otherwise 10-15 minutes or less from your destination is its own exquisite type of torture. Still, I took deep breaths and waited semi-patiently. Eventually the road opened up and I was on my way.

...Until the next construction zone. I’m pretty sure this happened approximately 723 times on my way to the trailhead.

But once I got there, I got the trike unloaded, and everything started out fine...

Starting Out Good

I had not researched ahead of time exactly how far from the trailhead the Tunnel was - it didn’t really matter, because I was going to ride to it regardless - but I’d be lying if I didn’t admit that the 9.3 mile indicator on the sign didn’t concern me a bit - I routinely ride further distances, but the trail is soft material - ranging from crushed stone to, at times, frankly just dirt, which always tends to be slow going. Still, as I’ve told my child on multiple occasions, if you wait for the perfect day, the thing will never happen. Besides, either way, I wanted to ride, so I rode on.

The first half mile or so this way is reminiscent of the ride to Karnak, including the very cool retention of the old railroad bridges. This is a taste of how it all starts out:

But while the trail starts out similar in this direction, it did start to hint at the rocky nature promised at by the pictures I’d seen fairly early on:

Rock preview

And rolling on, I was pleasantly surprised to start to hit the rock wall sides I was hoping before while there were still some vestiges of daylight:

Rock wall coming

Rock Wall here

Riding with the rock walls on either side provides a very different feel from my usual experience of being on the open road. It’s very cool, but did have me beginning to imagine myself traveling through a medieval world, watching for ambushing archers above... but that’s probably just me.

What the rock walls also meant, however, was that the available daylight was rapidly occluded. For a brief period of time I needed my light to see even though I could see blue sky above:

Daylight Expulsion

It was an interesting effect - I’ve seen it before, traveling out west, when mountains interpose between you and the sun later in the day. I can’t say I’ve ever seen it in Illinois, but here we were.

It was also brief. Though I wasnt able to see the sun go down, it clearly departed. Now it was dark overhead as well as in front of me. But at this point I figured I had gone this far, and that I might as well keep going till I got to the Tunnel itself.

It emerged from the shadows in a fashion that was, well, surreal at least.

The Tunnel Emerges

As it broke from the shadows it occurred to me - perhaps not for the first time - that we were just two days away from Halloween.

Of course, it would have been a little creepy anyway, and somehow riding into the dark of a tunnel is still a little unsettling even when the area outside of it is also pitch black.

But I went thru anyway. Honestly, the fact that it creeped me out made me feel like I needed to go thru it. Besides - I’d come this far, hadn’t I? So I went thru, and then turned around and came back thru the other way:

It really was just as dark coming out of it as it was inside. I live in a pretty rural area at home as well, but on the prairie you can see the open sky. Here, between the trees and the rock walls there was nothing. It was a different experience to be sure.

Trike in the Dark

I can’t recommend waiting until the end of the day to tackle Tunnel Hill Trail. My time in southern Illinois was very limited - I was headed for home the following morning, and I wasn’t sure when the chance would present again - so I didn’t want to let the opportunity pass. But I definitely hope I get the chance to do it again in the daylight.

Roadsides for Wildlife by Erin Wade

Illinois is one of those places for which people - if they are not from here - often seem to have one or two particular perceptions about. The first is that Illinois is synonymous with Chicago. While that’s not remotely true, you can understand why people would make that association. Chicago is the third largest city in the country, and the city proper accounts for over 20% of the state’s population. Include the entire Chicago Metro area, and you’ve accounted for 75% of the population for the entire state. Odds are that, if you’ve met someone from Illinois, they were from the greater Chicago area.

This first point is so pervasive that, on occasion, people from other parts of the state itself will assume that you are from Chicago. When I was in college I had a fellow student ask me where I was from, and when I told him the name of the town and where it was at, he said "so: basically Chicago".

No. But again, you can understand it.

For the rest of the state the picture I think people most commonly have, when they have one at all, is of a flat terrain desolate but for cornfields. There is some truth to that perception - most of Illinois hosts intensive agriculture, and corn is a primary crop. The little town I’m from, in fact, hosts The Sweet Corn Festival every August, so it’s hard to argue that’s not an accurate picture. It’s not the only picture, of course - there are multiple other crops sown here, including soybeans, peas, hay, and so on. But there is a lot of corn.

Despite all of that when I write about my part of rural Illinois - particularly when referring to cycling through it - I often refer to it as "the prairie". Folks looking at satellite shots of the area, or who are traveling over it by plane or even by interstate, might understandably tend towards saying "well, maybe former prairie, but now...?"

Still, prairie is how I think of it. And much of that is due to the roadside.

When I was kid in the 1970’s and 80’s I would routinely see signs in the ditches proclaiming a given area part of the Roadsides for Wildlife program. I was a kid, so I didn’t entirely understand it - in some ways it seemed like it might be an excuse to not mow the ditch. But it turns out it was an active program designed to encourage prairieland wildlife because of the increasing movement towards monoculture (corn) in the state. The Illinois DNR maintains a copy of a brochure for it here on their website. And, while I’m not sure that program is still active (the DNR was actively planting grasses for the purpose), they do still recommend holding off on mowing.

The program was active when I was a kid, and it has a distinctive effect on the landscape that remains for much of the region still. While there are certainly people who fastidiously mow their ditches, many are left to grow. For the cyclist riding in rural Illinois it means that you aren’t just seeing cornfield after cornfield. Rather, there’s prairie right along the roadside:

a channel of prairie

clover

Depending upon the part of the season you are in, you’ll see not just grass, but also a variety of flowers and flowering plans - clover, as above, but also raspberries and sunflowers and black eyed Susan’s; bee balm and phlox and - of course - the ubiquitous presence of the trusty dandelion, often in great profusion early in the spring before the grasses grow up.

But wait, you say, the program was roadsides for wild life, not wildflowers, right?

Yes:

Fox at Rest

If you choose the road less traveled - and the ones where mowing is not routinely conducted - you will find those ditches contain a wide variety of critters. The original program was originally focused on prairie birds, and particularly on pheasants, and you will see those here, along with killdeer, red-winged blackbirds, and many others. In addition to the fox, above, who was one of a pair of juveniles curiously playing alongside the road (see here) for more pictures of them) in the past two months I’ve seen countless versions of the aforementioned killdeer (they are prominent because they actively try to lead you away from their nest) and other prairie birds, but also pheasants, hawks, and even a young deer or two out in the fields, one of which stayed still long enough for me to get a pic:

outstanding in his field

Here’s a bit of a closer look:

a closer look

"Ok", you say, "so there’s more to see than corn. But it’s still flat."

First, the countryside rolls more than can easily be conveyed in a photograph. But second: Yes - and we’re talking cycling here. Flat is hardly a major downside.

I don’t expect to see legions of cyclists showing up suddenly across the northern Illinois region. But story after story tells us that the bike shops have been cleaned out by people looking for things to do in the era of social distancing. If you are one of those folks yourself, and you live within a reasonable distance of Northern Illinois, you may want to come out our way.

I’ll be the one on the orange trike - and I’ll wave if I see you.

Hennepin Canal Trail - Further Exploration by Erin Wade

Here in Illinois we had a loosening in some of the restrictions related to Coronavirus beginning on May 1, and a part of that loosening was the opening of some (but not all) of our state parks.

The Hennepin Canal State Park was initially not on that list, but then it was added. I figured it might be a good opportunity to explore the canal trail further, so I decided to trek out to it last Sunday.

For those not familiar with it, the Hennepin Canal is a very large - if unusually shaped - state park. It consists of two narrow strips of land bounding the canal (of course), one running from Bureau Junction on the Illinois River east-west across about half of the state to the Mississippi River, and another running north-south from Rock Falls to meet the east-west portion just north of Interstate 80. I’ve written about it here before, exploring portions of both the lateral and vertical portions.

I wanted to explore a portion I hadn’t yet seen, and I wanted to avoid people, as much as possible, both for purposes of social distancing and because, as a general rule, I enjoy solitary riding. I figured the portions of the trail that bound towns and settlements would be pretty busy, given the pent-up demand for any activity, so I decided I’d begin in a more rural location. This is not hard to do for the canal - the word rural describes most of it. The last time I’d ridden the Feeder Canal - the north-south part - I’d ended at Route 172. That seemed like a good place to begin, and my plan was to ride from there to the junction of the two sections just north of I80, which would make for about a 40 mile round trip.

Route set, I packed up my trike and mask into the mobile trike garage and headed out.

When I arrived at the entry point for Rte 172 I quietly congratulated myself at my genius. There was only one other vehicle in the parking lot, and the occupant was inside, so I was certain that I was going to pretty much have this section of trail to myself.

I was, shall we say, something different from a genius. It became clear that I had not fully appreciated the degree of pent-up demand for outdoor activity. It also became clear that many folk may not have fully grasped the guidelines given for social distancing, group size, or face coverings. But I had my mask, and I quickly moved it from my bag, where I’d put it in the presumably very unlikely chance that I would need it, to keeping it on my neck so I could quickly apply it when people approached. And I applied it a lot.

I should say, tho, that encountering people was most common within a relatively short distance of a road crossing. Fortunately, there are long stretches of the trail that don’t involve a crossing, and these were as secluded as I could have hoped for.

As I mentioned, I started at 172, which is where I ended when I rode here last June. It had been a wet spring, and I’d encountered a couple of mildly flooded underpasses before getting to 172, but when I arrived there, this is what I encountered:

Flooded

I’d ridden through the underpasses before, but I couldn't tell how deep that one was and, while I could have ridden up to the road to cross, I had ridden about as far as I wanted, so I let the flood waters turn me around.

I wasn’t sure what I would encounter this time, but I went ahead and decided to start where I ended. Fortunately, it was a different picture this time:

Not flooded

Not only was it not flooded, it looks like work has been done fairly recently to bring the trail under the bridge to a higher grade to help prevent it. I rolled on under and I was on my way.

The trail surface for this section was what I’d remembered from last year - essentially deprecated crushed stone (and packed dirt) with a fair amount of low-lying ground-cover growth in it due to a relative lack of foot traffic.

Trail surface

It’s absolutely passable on the trike, but the going is slow because the surface is somewhat soft. Mountain bikes soft-readers of various sorts would be fine here as well, but you’d be struggling with a road bike, I believe.

It’s also slow because the trail isn’t cleared well - there’s a lot of dead wood on the trail from overhanging trees. This is likely due to the fact that the park is huge, and that it had been closed for the past two months. I don’t remember that being an issue in my prior rides, so it may be less of a problem as the season progresses and park personnel can tend to the trail.

That said, there is a portion of the trail in this section that is - suddenly, inexplicably- paved. The paved section begins about nine miles south of Rte 172, and continues up until the point that I turned around (more on that below). I didn’t pay close attention to where the pavement began at the time, but it was easy to suss out by looking at my route speeds by mile:

Speed graph

In case it’s not immediately clear what I’m showing, the paved portion would be in the circled area:

Speed graph with circle

The views are always everything you could hope for from this sort of location. Spring is underway, so everything is greening up, there are birds on the water and in the trees. I saw fish jump in the canal, a turtle sunning itself on a log, and a snake coiled around a branch at the canal edge. That last fellow I tried to get a picture of, but I was too noisy in my approach and scared him off. However, I did manage to capture this guy:

Cardinal

Cardinal closer up

As you might extrapolate from the name, the Feeder Canal wasn’t designed for shipping. As such, except for at the very beginning, the Feeder Canal doesn’t have any locks. This doesn’t mean that there aren’t things to see for those interested in the history and construct of canals - What the feeder canal has - in spades- is aqueducts. The canal is carried over multiple small streams over the course of the ride, and the first couple of times you see them it takes a bit to fully process what you are seeing. You a riding on a trail with water to one side, perhaps a foot or so below you. But then you and that water both travel overtop another stream five to ten feet or more below you. There are also portions of the trail where you can see creeks running alongside and below the trail at the opposite side of the canal.

It’s a bit surreal because it’s unnatural. But then, of course, so is the canal.

The best and most impressive example of that on this portion of the canal trail is the aqueduct that crosses the Green River.

Green River Aqueduct

Green River

Green River

The Green River itself is also somewhat unnatural - it’s been channelized and modified to drain Inlet Swamp (successsfully - it’s no longer there) about 32 miles to the east as the crow flies. But for that reason it’s large and the aqueduct that crosses it is similarly grand.

Green River Aqueduct

My ride ended about two miles south of the Green River Aqueduct, and about four miles short of the junction between the canals. Why would I stop so close to my ride goal? Well, there were a couple of reasons. The first one was this:

Well shit - that’s a big tree...

I couldn't tell if this was a tree fall from the copse to the far right of the picture, alongside the road below, or perhaps something placed to purposely block the path. Accidental or purposeful, it was doing an effective job of being a barricade. I could have gone around it, and I absolutely considered it, but while it’s a little difficult to tell in the picture, the road to the right is some 15 feet below, down a pretty steep grade. In addition, I didn’t know if it was there on purpose (I know that is sometimes done), and if it was barricaded on purpose I didn’t know what I’d encounter further down.

It was also affected by the fact that I’d already had one flat tire, so I’d already been out longer than I’d anticipated (I am not a rapid tube replacer in the comfort of my garage, much less at the side of a trail). I decided to take the tree as a sign and turned around.

That may have been a better idea that I’d realized, because I got another flat on the way back. That’s right: My trip on this particular day was lengthened by the delight of not one, but two flat tires. They were both on the same wheel (right front), so I suspect I’d gotten something into the tire that flattened the tube it a second time. I also discovered that I’d used up my only new spare on the first change.

This meant that I’d have to do a patch, but it was challenging because it had been a slow leak the second time, which meant a very small hole. Small holes are hard to see, and I stood there for a couple of minutes, moving it between my hands slowly and wishing that I had some water I could put it in to find the leak.

Some of you have no doubt already arrived at it: I was wishing for water.

That’s right - wishing for water while standing next to a canal.

I took a moment to dutifully chastise myself for being a dumbass, then found a spot at the edge I could access, pumped up the tube and stuck it under the water. It literally took seconds to find the leak, and another couple of minutes to patch it and get it in. I also ran hands around the inside of the tire hoping to pull out whatever might be in there. A week and two rides later it’s still holding air, so I must have gotten lucky.

Those moments are frustrating, but they never fail to illustrate the fundamental truth to the fact that even a bad day riding is better than a day without. I was frustrated by the need to fix the flat, frustrated with the fact that I was out of fresh spares, but once I had my canal-water epiphany and got back rolling I felt like a hero and I was enjoying myself again.

It goes without saying (or saying any more at least) that I would absolutely recommend trying out these trails - Hennepin and the I&M as well - if the opportunity presents. But they do require planning. Particularly as you move into the rural areas of each, you are going to be your own support, and they are quite rustic. If that’s a concern, for the Hennepin I’d recommend riding the Feeder Canal - the north-south portion - in and around Rock Falls. The area there is well settled, has lots of stores for supports, and has an excellent local bike shop - Meads - which also sells and services trikes for the three-wheeled riders among us.

In addition, because of the slow nature of the surfaces, for either of the canal trails - Hennepin or the I&M Canal - you want to allot significant additional time for the distance you want to cover. My average speed on the trike is right around 12-13 mph, but I routinely come in under 10mph on average for the canal trails. If you are wanting to cover a fair amount of distance, I’d suggest you just plan to make a day of it. And if you do, it will be a good day!

Trailer Project Part 4 - Finished-ish by Erin Wade

Trailer Project Part 4 - Finished-ish

Trailer Project Part 1

Part 2

Part 3

In an effort to not have another year between sessions of working on the trailer I dedicated most of last Sunday to putting it together.

Mostly this session involved time laying it out, thinking through a couple of the design components, and then spending time with my table saw as well as a hammer and nails.

I knew the basic design I was looking for - just a rustic flatbed trailer, with maybe some sides on it to hold things in and/or strap to. And I was considering a rear lip to keep things from sliding off the back:

C1D7E944-3EBE-4AEF-8EC6-13A4A9A6A2E3.jpeg

804F9D62-FF75-410A-856A-2A207BF4B9DE.jpeg

As the day and my time with it went on, though, I ended up deciding to go with a simpler, more basic approach, at least for the time being:

Finished?

Part of this was a simple matter of time - as in, I was running out of it. Part of it was questioning the utility or need of the lip. I’ve hauled items on my automotive flatbed trailer - strapped down of course - just fine without having either sides or a rear tailgate. I suspect the same will be true for this device.

I’d also considered putting another layer of palette boards on the outside edges of flatbed - where the blue outline appears here:

08488EB1-13B1-43A1-BF25-4F1B0D249E51.jpeg

This would have largely been a decorative element - it would have covered the joint space between the outside edge pieces and the inside slats, making it look more uniform. I had also briefly considered having the inside slats just float instead of nailing them down, which would have required the pieces on the edge to hold them in. In the end, though, I was surprisingly happy with how well they fit together - I don’t think the joint spaces look too bad, and it should be noted that most of the slats are uncut - the pieces coming off of the palette were surprisingly uniform in length.


Enjoying this post? Check out our Cycling page for links to other cycling articles on Applied Life


I discarded the idea of having the slats float because I wasn’t convinced I could get them in place tight enough to keep them from rattling over bumps, and our Illinois backroads have plenty of bumps.

I also realized as I went that the decorative edge pieces would mean less flat surface on the trailer - the edges would be raised by the 1/8" or so of the pieces themselves, which would mean less useful area in the trailer. Plus, not having the decorative edge pieces would reduce weight. So - no edge pieces.

I am still mentally debating whether to add some sort of side rail. I cut pieces for them, but one of them split when I started to screw it on. It was at the end of the day and I was running out of patience, so I decided to set them aside for now and see whether I would miss them and/or see a need for them after I actually get to use it.

My attachment approach for getting the flatbed on to the trailer was a combination of a couple of screws and mounting blocks cut from sections of 2x4’s:

Mounting system

I used the wood blocks in part because each of them would/could also be an attachment point for a side rail. There are four bolts at front where the frame sections join, and four at the rear where the wheel attaches that could be used if needed, and I will likely do that if the wood blocks don’t hold up. I didn’t do that here primarily because I don’t have bolts long enough for the job, and part of the idea here was to use materials I had on hand to avoid going to the store and to maintain social distancing.

Once I had it all together I wanted to see how it all would look and work. I’m pleased with how it looks:

Does the Subaru look jealous?

The final change I need to make with the trailer is to its hitch. As I mentioned in the second trailer project post, the donor trailer was a 2000 Schwinn Joyrider, and the hitch was designed for attaching to the rear of a diamond frame bike (and even then, only a diamond frame bike with tubing of a specific diameter - it never worked with my Cannondale either). So it won’t connect properly to the frame of the Expedition. I ordered a proper axle hitch to replace the mount.

Still, I wanted to get out for a ride with it attached to see how much the additional weight of the trailer seemed to affect things. So I finagled the old hitch into the rear cargo rack and went out for a ride.

hitch in my get along

This put the trailer at a bit of a jaunty angle but I wasn’t hauling anything so it didn’t matter.

Jaunty angle

Overall, it seemed to go pretty well. I did a very familiar 13-ish mile loop that doesn’t take me far from home so I could call for help if there were any significant issues. I did have a short period of time where it seemed to really be slowing me down and pulling me to the right, but that turned out to be a flat right tire (the one where I had to use the tube I’d patched when replacing the tires). This required a bit of swearing and ultimately a roadside repair, but it wasn’t the trailer’s fault. Looking back at the route in Cyclemeter, my speed on this trip for the portion following the tire change appears to be more or less comparable to prior rides without the trailer, which would suggest the weight of the unloaded trailer doesn’t make a lot of difference. I’m sure that won’t be the case once I put things on it to carry, but that would be the case regardless of how I carry things.

I’ll continue to evaluate the need for side rails one way or the other, and as I’d said in Part 3, I wondered about having a raised handle for pushing it as a cart. That would involve either using the old aluminum frame from its stroller days, or building a handle with wood, and either is a possibility. But as I think about it I suspect the likelihood that I’d actually use it as a cart independent of the trike is pretty slim, so that, like the side rails, will probably wait till if or when I see a need for it.

So - at this point I am feeling this is a qualified success, and just one trailer hitch away from being complete. I may do a brief update when I get the new hitch attached and get everything set up.

Until then, it’s time to ride!

Tired by Erin Wade

I am running just a little shy of 1400 miles on the Expedition since I got it last July. I noticed, as I was extracting it from the mobile trike garage the past couple of rides, that the front tires were starting to look pretty worn.

(With Shelter in Place orders, the mobile trike garage doesn’t go much of anywhere lately, but I’ve found it’s easier to just leave the trike in the Subaru than to back the car out in order to get the trike down from its hooks. I’ve definitely been riding more than driving).

In fact, I’d been noticing the progressive loss of tread on the fronts for the past month or so, but I figured they still had some life in them. By yesterday, tho, it was starting to look pretty bad.

Still, I wanted to ride, and all a blown tire on a trike does usually is strand you - unless you are going very fast downhill there isn’t the risk of wipeout there is on an upright machine. Besides, right now both My Lovely Wife and my child are, like most of us, perpetually at home. A rescue mission would, instead of a hardship, likely seem a welcome opportunity for some variety .

So I rode.

I rode 16 miles out and back, give or take, and rolled back into the driveway without a hint of a problem. I did my usual tear down on the trike - take off the flag, remove the lights to put them on the charger, fold the headrest forward - and put the Expedition into the back of the Subaru. And then I did a tire inspection and found this:

Bulge

So: It didn’t fail, but failure was imminent.


Enjoying this post? Check out our Cycling page for links to other cycling articles on Applied Life


It was clear that I was going to have to get new tires. These are the original tires the Expedition came with - Schwalbe Marathon Racers 20x1.50 - and I’ve been pretty happy with them. My criteria for tires is not terribly strict, but I haven’t had a single flat (including, by some miracle, on this last ride) since I’ve gotten them, which wasn’t true on the Pocket with its Marathon Plus’s.

My localest bike shop (about 20 minutes away) doesn’t sell trikes, and so typically doesn’t carry tires or tubes in trike sizes, and they are currently open only by appointment. The closest shop that does carry trikes is an hour away.

So I went online.

A search on Amazon for these tires was... frustrating. Even with the full name of the product and size entered, it was difficult to find an item that was clearly the correct size (e.g. with too many different pieces of information in the description), and the search still returned multiple items that were not matches. Obviously you can return things if they aren’t right, but I really didn’t want to risk waiting through multiple purchase cycles to see if I had the right items.

So I went over to Utah Trikes and ordered them there. I could have tried cross shopping at other online bike shops - I’ve done so for other cycling items I’ve purchased to be sure - but I was A) already frustrated from trying to find things on Amazon; and 2) the information on the Utah Trikes page was extremely clear about what I was ordering; and besides: iii) they were cheaper than on Amazon even with having to pay shipping, so...

And so now I wait, Expedition grounded. I gave brief consideration this morning to applying duct tape across the bulging section - it’s what Red Green would do, after all, but I suspect I used up all of my good fortune on the last ride. The Norns have already smiled upon me, but they are fickle - no need to tempt them further.

It’s a bummer, of course, but I do have options. The Pocket is still here - it belongs to MLW now, but she might let me ride it if I ask nicely. However, I’d have to re-set the boom and re-size the chain to make that work. I also still have my Cannondale road bike always at the ready to ride if needed. I’ve actually gotten fairly good at re-setting sizes on the trikes with practice, so I’m confident that I could do that with the Pocket fairly easily, but the lazy guy in me ensures that I’ll go with the Cannondale first. All I have to do with that is take it down and pump up the tires.

Sometimes people think that they will gain a renewed fondness for a thing that they’ve stepped away from and are now returning to. I’ve been a victim of that impulse in the past, but I’ve been through this with the Cannondale since getting trikes - I already know it won’t happen.

Still, I guess I’ll struggle thru (I can just feel your - understandable - lack of pity for me). Now it’s time to ride... something.

Tiptoeing with the Toe Clips by Erin Wade

Last fall I ended my experiment with clipless shoes on my Expedition and installed the TerraTrike Comfort Pedal Conversion Kit - a type of heel sling which I’d already used on the Pocket - on the Expedition. This time around, though, I added a toe clip to the mix - specifically the Evo Double Quick Strapless Toe Clip - instead of going with my prior strategy using Velcro straps across the top of the foot.

That setup looked like this:

3A6C194C-CE30-4E8B-82B4-95F06BF986FA.jpeg

A9956963-EECA-4C9E-8C6B-EB7B581555D6.jpeg

One of the questions at the time was as to how the toe clips - which were about $10 and made of plastic - would weather the winter season given the combination of cold weather and additional stretch needed for my heavy-duty winter boots.

heavy boot

I promised a follow-up on that, so here we are. But I have to qualify things up front - it’s only a partial follow-up.

The thing is: I used them all winter, but it literally never got cold enough this winter to require my heavy winter boots. I have a pair of hiking boots that I wear as my regular daily kicks from late November to about April (I’m a sandals guy the rest of the year - hot feet, don’t ya know. No, not hot as in sexy, just hot as in much too warm. And sweaty. And now I’ve said too much...). I use those hiking boots as my riding shoes until the weather drops below, say 20° or so.


Enjoying this post? Check out our Cycling page for links to other cycling articles on Applied Life


Which it just never did. I mean, we had a couple of cold nights across the course of the season, but I don’t ride at night much at all, and definitely not in the winter. There were probably a couple of days in the mix that also got there, but they didn’t correspond to days that I was free to ride. And I suppose I could have gone riding with the heavy boots on for the sake of science but have I mentioned the hot feet? So - no testing with the heavy boots.

Qualifications made, I’ve now ridden with this arrangement in place for over five months and over 650 miles. This has been thru good weather and bad, and in the snow and cold (but just not really cold). Thus far, what I can say for them is that they work exactly as expected. I see very little evidence of wear or strain on the toe clips, and I’ve had no issue with feet slipping out of the retention. And, as was the case initially, they are much easier to get into and out of than either clipless mounting or than the straps I was using on the Pocket.

So - short but sweet, they continue to work well for me, and the toe clips appear to be more durable than I had honestly expected. For $10 bucks they were a "why not" purchase, figuring I’d be out very little if they didn’t work out. Now I’m seriously thinking of getting another set and putting them on the Pocket for MLW.

In addition, they continue to offer the advantage of working with whatever shoe I have on in the moment. I’m still holding on to the Shimano SPD sandals - I took them with me to Florida in anticipation of possibly needing them when I rented the trike on my trip. But Trailside Bikes had its own solution on the pedals, so the sandals remain relatively pristine.

Hindsight with Clarity by Erin Wade

A few weeks ago I had the brief opportunity to take a ride on the Withlacoochee Trail in central-ish Florida. I live, shall we say, slightly north of Florida, and so instead of riding my faithful Catrike Expedition I rented. My rental ride was a HP Velotechnik Gekko in a bright yellow/green.

Gekko

I really like my Catrikes, but my experience with other makes is extremely limited - my first trike was a Pocket, and while I’ve been cycling most of my life, that’s the Pocket was the only recumbent trike I’d ridden, and I’d bought it without a test ride from a man on the internet (on eBay). I did get a chance to ride an Expedition before buying one, briefly, at the bike expo in Milwaukee, but that was honestly just to be sure I liked the additional size. I was already hooked at that point.

So the Gekko was somewhat of a new experience for me. I described most of the details about that experience in the Withlacoochee trail post, but there was something I noticed about the Gekko that I left out of that post.

I was in a hurry to get riding on the day that I went out in Florida, so aside from a quick look over to familiarize myself with the location of the controls and the in-seat storage, I decided I’d have to learn anything else about the trike on the go.

The thing that stood out the most was how startlingly clear the view to the rear of the trike was.

The mirror on the Gekko is a teardrop-shaped, heavy-duty affair that gives the impression of durability and quality. It also seemed extremely stable and vibration free.

My Catrikes, like most, have the round Mirrycle mirrors on them. These are small, inexpensive mirrors that do give a view of the activity to the rear, but they are extremely subject to sympathetic vibration with road imperfections. This can be controlled for to some degree by removing the vertical section of the mounting system, which I did on my Pocket. However, that seems to be less of an option on the Expedition, as the position of the mounting post and the fenders make things a little more intimate on that machine. Even with that change, tho, the improvement is incremental - the vibration is reduced, but not gone. This means that you can see things coming up behind you, but details are not available - it’s hard to tell a car from a truck from a wildebeest (big wildebeest problem here on the roads of Northern Illinois, don’t ya know...).

And that was the difference here. While there wasn’t any worry about motor vehicles approaching from the rear - the Withlacoochee is a recreational trail - I was still surprised at how well I could see riders approaching from behind, for example, or the receding image of people that I passed. The difference was stark.

Stark enough that I asked the very helpful woman at Trailside Cycles about the mirror. She went out to look at the trike, and indicated to me that it was a HP Velotechnik mirror (which made sense at the time - more on that below). She also had one in stock.

I asked if she thought it could be mounted on a Catrike and she thought it could, pointing out that it mounts to the head tube.

The price on the package - $69.50 - was not insubstantial, particularly compared with what I was accustomed to spending on Mirrycle mirrors, which can be ordered from Amazon for less than $13. I gave thought to taking a picture of the package and looking it up online later - this is often a fairly decent strategy for saving a bit of cash on a purchase. However, I am loathe to do that to a small business in general (but hey, suck it Wal-Mart!), and the folks at Trailside Bike had been very kind and accommodating to me, so I thought it only fair to buy it from them. In deference to the price, however, I bought just the left side mirror.

As is often the case, it took me a while to get to mounting it to the trike. In this case the primary impediment was that the bolt that came with the mirror - as well as the one already in the head tube - was too short. I didn’t have a longer one at home, so it had to wait until I could make it down to my localest bike shop.

I was a little concerned that what looked so clear and vibration free on a Florida trail might not contend quite as well with the weather-challenged byways of rural Illinois. Since the new mirror mounts to the head tube, and the Mirrycle mirror is mounted to the accessory bar, I left the old mirror on so I could do a direct comparison.

dogs photobomb things

two mirrors are better than one?

Yeah - it’s better, even in Illinois.

The Mirrycle’s are convex mirrors, which adds a wide field of view, but makes everything in the mirror smaller (objects in mirror may be...). By contrast, the flat display on the HP mirror provides for a larger picture, and while it does have a reduced field of vision, what it offers is more than sufficient to see the road behind.

While that’s good, the more vital detail is that it is stable - virtually vibration free, even on the Northern Illinois asphalt. This leads to a clear picture of what is approaching from behind, which can be more important than you might think. Wildebeests aside, the whole idea of a mirror is that you can glance into it periodically to see if something is coming. The small, unclear image in the old mirror would sometimes appear to render immovable objects - trees over a hill, for example - as things approaching from the distance. Sorting that out sometimes takes extended viewing and processing time, all of which is time not looking at the road ahead.

When the thing in the mirror is an actual vehicle, it’s good to know the type, at times. While I firmly believe in taking my lane, how one handles approaching farm implements is still different than what one does for automobiles.

So - in short, I like it. The price is rather dear, to be sure, and if I had just been looking at it on a website instead of having used it on the rental trike, I can just about guarantee that my cheapness gene would have won.

Which brings me around to the type of mirror, and where one can find it. It turns out that researching the mirror for this post - and for consideration of a right side mirror for myself later on (I like symmetry) - was a bit confusing. If there is a way to order it through the HP Velotechnik site I was unable to find it. Even doing a site search for "mirror" turns up nothing related to mirrors. So I looked over the package from Trailside Bike for information, and it has has two labels on it:

Big Label

Little Label

I started out with the larger label, and then when to the smaller one. I should have started with the smaller one. Using "HP Velotechnik Mirror" got me to Industrial Bicycles. You can also find them at Utah Trikes (of course) under "B&M Head Tube Mounted Mirror". In both cases they are slightly cheaper (by 50¢) than I paid at Trailside Bike, but shipping from the former is over $20, and for the latter is $13, so I got a pretty good deal buying it on site (makes that cheapness gene unclench just a little bit).

What oddly didn’t occur to me until later was to look up and see whether Trailside Bike had a means to order one. They do - and they’ll ship it via US Mail for as low as $5.27.

So that’s where I’ll go to get the right-side mirror if I can get that cheapness gene to unclench the rest of the way. After all, I like symmetry, and I want to be able to see the approaching wildebeests from all angles...

Withlacoochee Trail by Erin Wade

The events of the past week found me and mine shedding the bonds of rural northern Illinois in favor of the sunnier - and mostly warmer - embrace of central Florida.

This was a family trip, and as such was primarily centered around what you’d expect of a trip to the Orlando area. While we aren’t, as a rule, fans of the corporate mouse, we do all enjoy the creations of George Lucas and of Stan Lee, Jack Kirby, and crew; and there is a significant subset of the family partial to the Potter that is Harry. But all that being the case, it seemed like there should be some opportunity in the week to squeeze in a ride.

Several years ago I’d realized, in part by chance, that there are often places in well established communities that will rent you a bike if you are looking for a ride and did not happen to bring one along. That first opportunity was in Arizona - Scottsdale, specifically - and was prior to my triking days. But I figured since I was heading to the homeland of Catrike there was a fairly good chance that I could find someone to rent a trike once I got there.

We drove for this trip (in fact, we are on the way back as I started writing this post, tapping away in the passenger seat as LB pilots the Mobile Trike Garage), so I did consider the option of simply taking my Expedition along for the trip. The Outback handles the trike just fine on the roof, and I could have pulled off the seat mesh and bags to improve mileage on the drive. But I was less concerned about getting it to and from, and more with what to do with it during. This was a week-long trip, and the riding was incidental. I love my trike, but they are somewhat cumbersome. I wasn’t sure if we’d have space for it in the room at the resort, and I didn’t want to leave it exposed on the roof for the week. I suppose I could have stored it in the car when we weren’t using it, but I suspect that would have involved a lot of moving it back and forth like, say, every time we wanted to carry people the car.

So: Rental.

I tapped into the Recumbent Trikes Group on Facebook for thoughts on places to try, and helpfully got a couple of options. I went with Trailside Bikes in Floral City because it is right beside - and I mean literally right beside - the Withlacoochee Trail, and also because Trailside Bikes did not require a deposit. They also did not take reservations, so I was taking a chance that they wouldn't have anything for me. I timed my arrival to just before the shop opened and crossed my fingers.

The trail was about an hour and a half from where we were staying in Kissimmee, and the route the map gave me was almost entirely two-lane roadways. I quickly began to realize that absolutely no one in Central Florida appears to be in much of a hurry to get anywhere. Fortunately, things did move along at something approximating the speed limit, and I got to the shop a couple of minutes before opening time.

Trailside Bikes

The shop was already open, getting things set up for the day, and there was already a line for rentals (three groups, including me) - and this was a Tuesday morning!

Trailside was very much like any small bike shop, making it familiar territory, with the exception that it was literally full of trikes. Catrike, HP Velotechnik, Ice, were represented in the shop, as were a couple of other brands.

Rental group

The rental group was small, but with some choices - the gentleman ahead of me, for example, was specific about wanting to rent a full suspension trike and wanted an ICE, which wasn’t available for rental, but chose an HP Scorpion FS instead.

I was offered an HP Gekko. There were other models to choose from, and it was clear I could have asked for something else, but I was looking forward for the opportunity to try something different from my usual.

HP Gekko

Once selected, there was a brief set-up - mostly sizing - that I was assisted with, and I was ready to go. I had brought along my SPD sandals in anticipation of needing them, but all of the rental units were set up with flat, heel-sling supported pedals. I am certain someone out there will know what specific model of pedals these are:

Pedals

While it wasn’t what I expected, it immediately made sense to me. If you are renting trikes, you can’t count on the average, curious weekend or vacation explorer bringing along foot retention. The pedals lacked the top of the foot retention that I use on my Expedition, so you only get to push, not pull. All-in-all, though, it seemed a reasonable compromise for a rental.

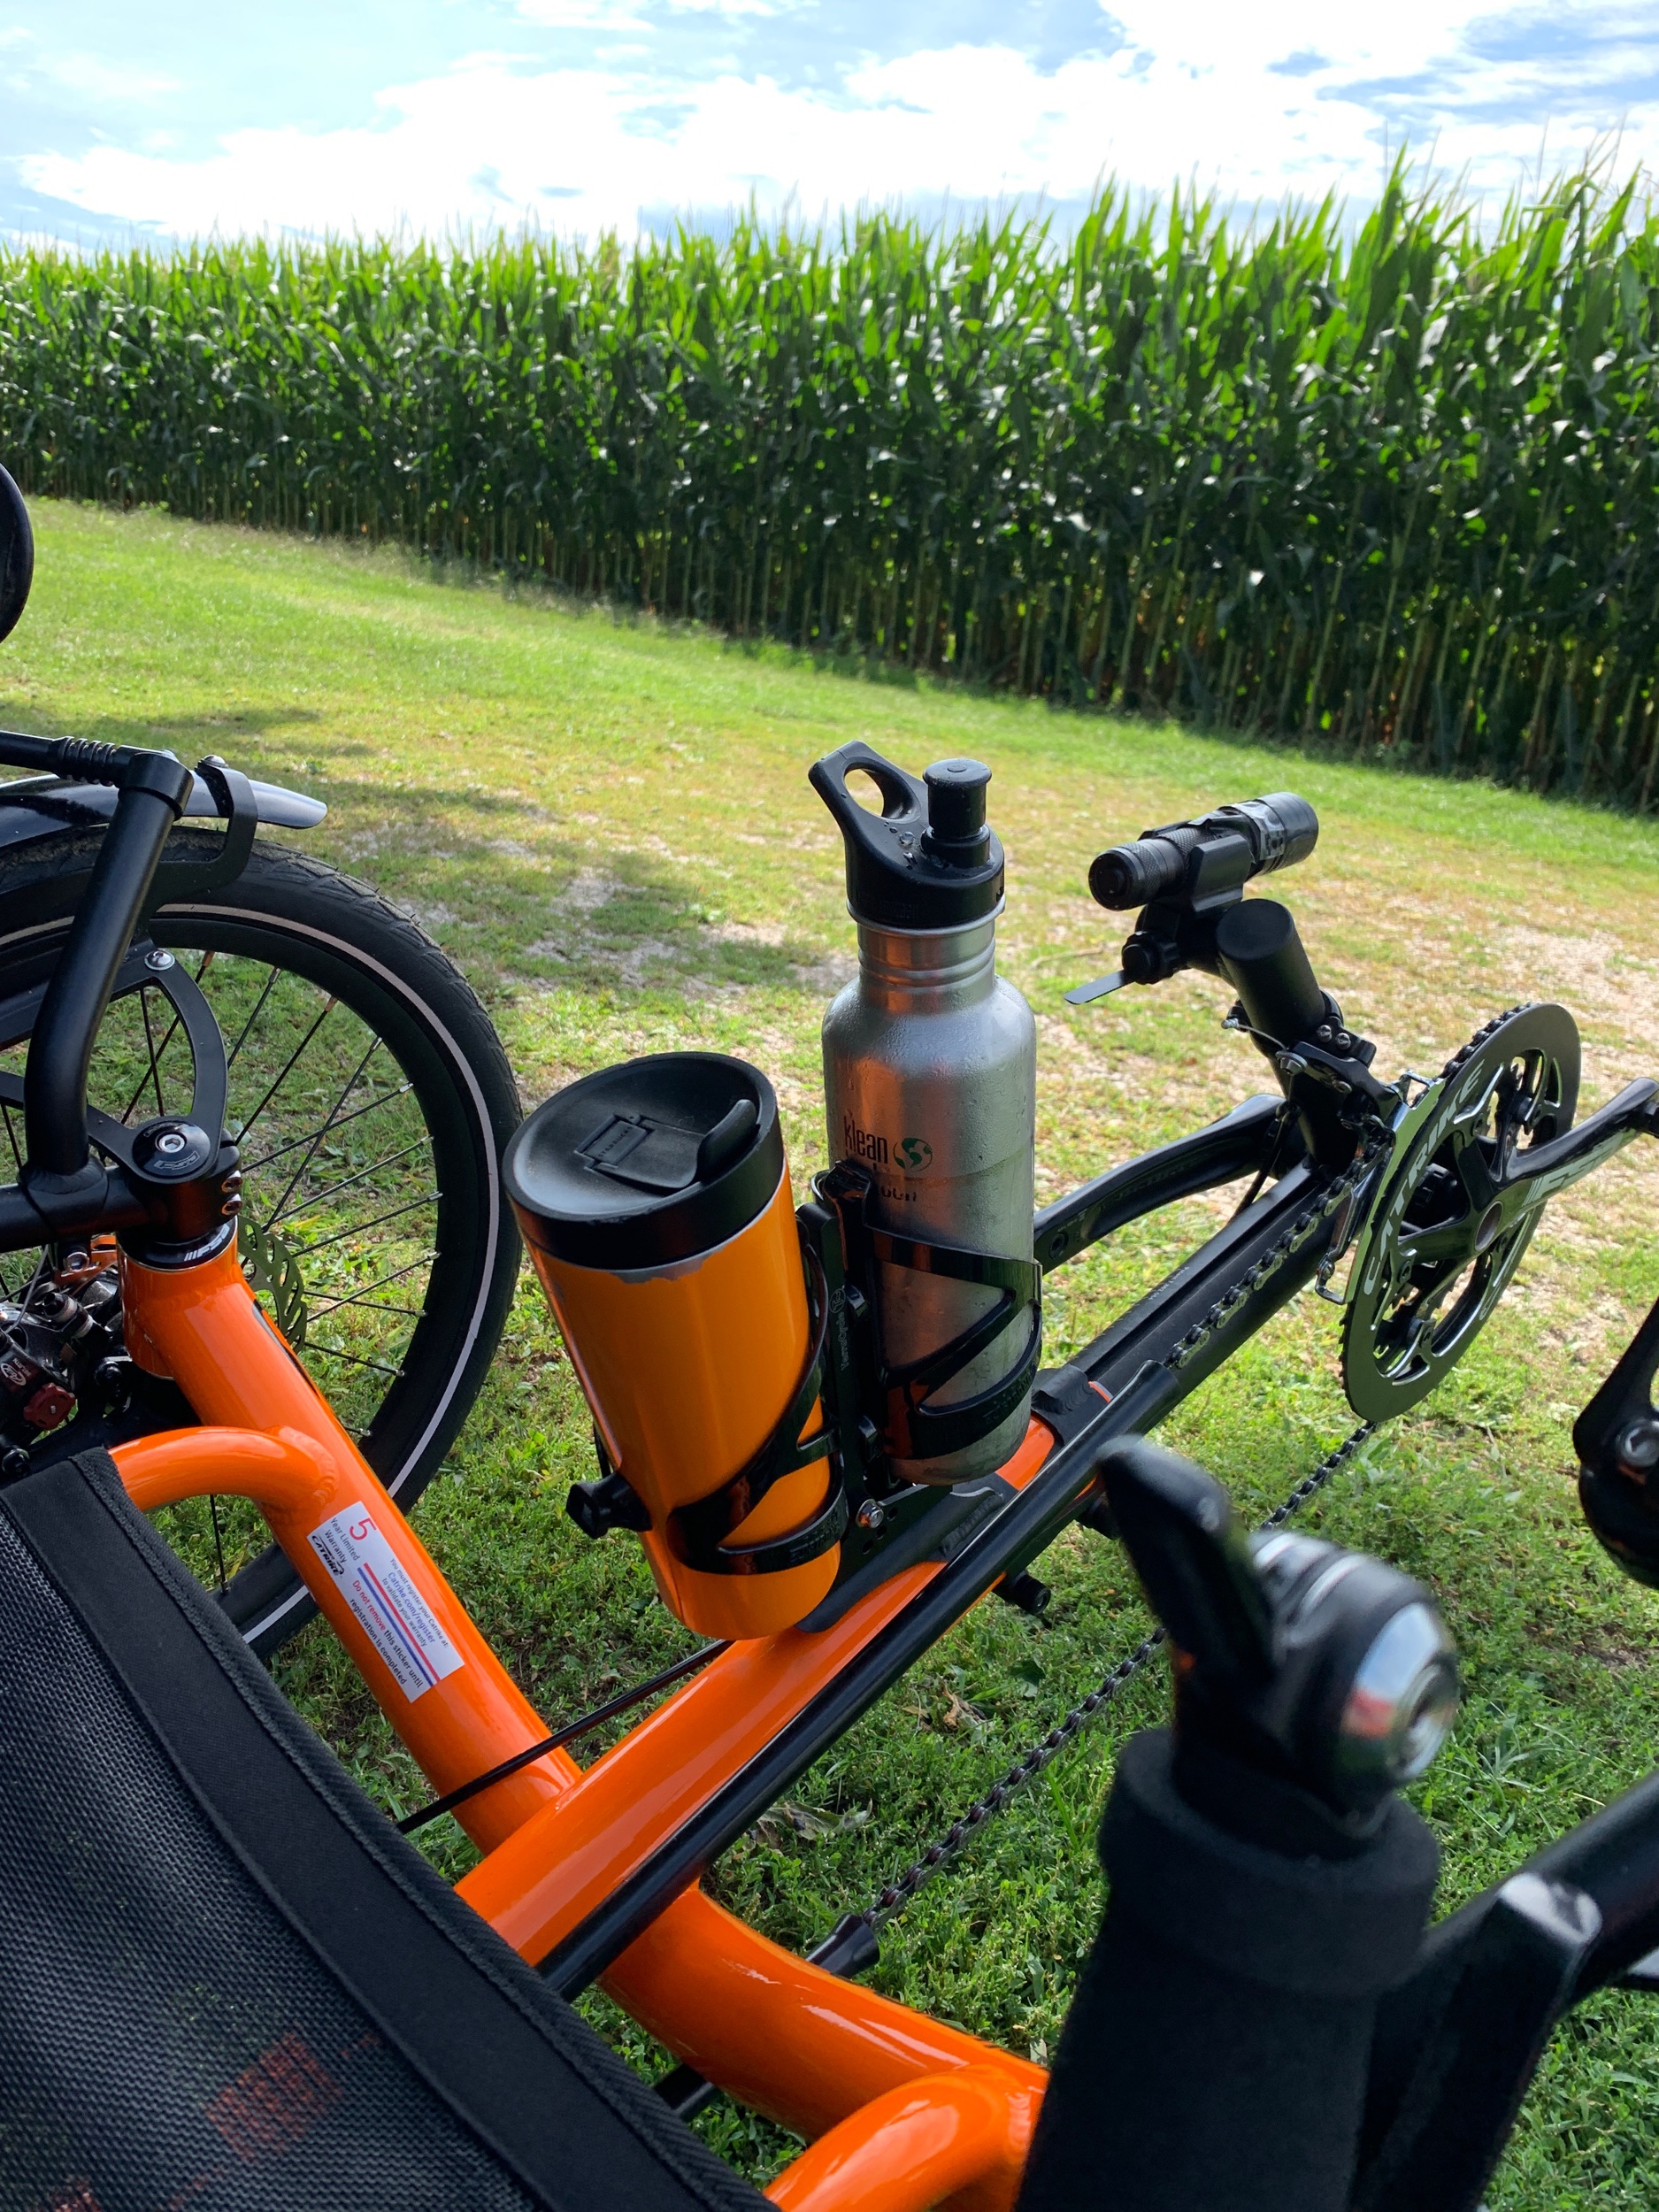
Renting also meant that I didn’t have mounting points for my phone (for ride tracking), nor were there pannier bags and such. However, many trike models, if not all, typically have some sort of storage built into the seat. On the Gekko, it turns out, there is a zipper pocket right at the top of the seat, and it was more than large enough for my phone, wallet, and keys.

The Withlacoochee Trail

Withlacoochee Trail Sign

Once I was all set up I hit the trail, which is, as previously mentioned and as implied by the name on the sign, quite literally right beside the the shop.

Trail beside the shop

My time on the trail was limited - I was squeezing this ride in ahead of going to see the Star Wars exhibit at Disney Hollywood Studios, and I needed to get in, and get back, by noon. Ultimately this gave me just over 50 minutes and 12 miles of experience with the trail itself. In order to keep myself cognizant of the time without my phone easily accessible I set a timer for the halfway point in terms of total time, and wore a single Apple AirPod Pro so I’d be sure to be able to hear it when it went off. Yes, I hear you saying, a watch would have been a simpler solution, but I don’t own one. Also, I was more concerned about getting lost in the enjoyment of the ride and forgetting to check the time. I probably would have set the timer even if I’d had the phone mounted in front of me.

I started out riding south of Trailside Bikes for a little over five miles. This direction, as indicated by the helpful folks in the shop, was more rural, while the northerly course was through more settled area. The trail itself was asphalt, and in excellent condition (a very different experience from the asphalt trails - or roads, for that matter - in Illinois). The Withlacoochee is a rail-trail, so it bears the familiar signs of that type of setup - it is flat (although, so is most of Florida), and runs mostly in a fairly straight line. It’s separated from the roadway, and has vegetation barriers on each side, giving it a somewhat isolated (in a pleasant fashion) feel.

The vegetation is, of course, Floridian in nature, with Spanish moss in the trees, and other items of a rather tropical nature...

Spanish moss

Palm

The sign for the trail indicates there are no horses allowed on the pavement. There is a grass strip down each side of the trail, however, which would imply that equestrian use _is_ allowed along that portion of the trail. I did not encounter any horses on the trail itself, but I was treated to this sight along the way:

Horse and wagon

My alarm went off just a little past the five mile mark, so I turned around and headed back. Looking at the map, this meant that, while I was in a fairly rural area, I didn’t reach the Withlacoochee State Forest, nor had I come across the portion where the trail runs along the Withlacoochee River. This was ok, and consistent with what I had expected, given my limited time. Still, if a future opportunity presented itself, I think I’d set things up to ride further to the south.

When I got back to the starting point, however, I found that I still had a little bit of time to work with - I was riding pretty vigorously, trying to make the most of the workout opportunity. So I set another, shorter timer and rode about a mile or so to the north of Trailside Bikes.

This area was more settled, and in fact there were a few businesses along the way:

Oranges

In addition to the Fruit Stand there were a couple of taverns just off the trail with varying levels of entryway from the trail to the parking lot. If one were taking the time to ride the entire trail one could probably find a stopping point for some lunch and a beer.

This was an active trail. As I noted above, I was riding on a Tuesday morning, and there were multiple cyclists on the trail, as well as the occasional walker and/or jogger. Most were pleasant and returned a wave or a "good morning". Especially fun and interesting for me was the one thing, aside from the vegetation, that made it clear that I was in Florida: the sheer number of trike riders I encountered.

Some of this was to be expected, given that there were folks renting ahead of me, and I did encounter those folks. However, I also came across at least a half-dozen other people out on their trikes on this lovely morning.

Many Trikes

This is a special delight for me, given the number of trikes I typically encounter when riding in rural northern Illinois (for those playing at home the number you are looking for rhymes with "Nero"...).

All in all it was a good ride, and a pleasant trail. It’s a little away from the Orlando area, but worth fitting in to a family trip. To be clear, a look at Google Maps with the bike trail settings turned on will show many bike routes available closer by Orlando. However, none of these are nearly as long, and most, if not all, seem to have an urban or suburban orientation, with several running at least part of the time on City streets. Good enough for exercise, but not what I’m looking for from a trail. Plus: Bike rental appears to surprisingly limited in the Orlando area, and trike rental even more so. Having a shop renting right on the trail is a major bonus. If you are going to be in the region and want to ride, I’d suggest checking it out.
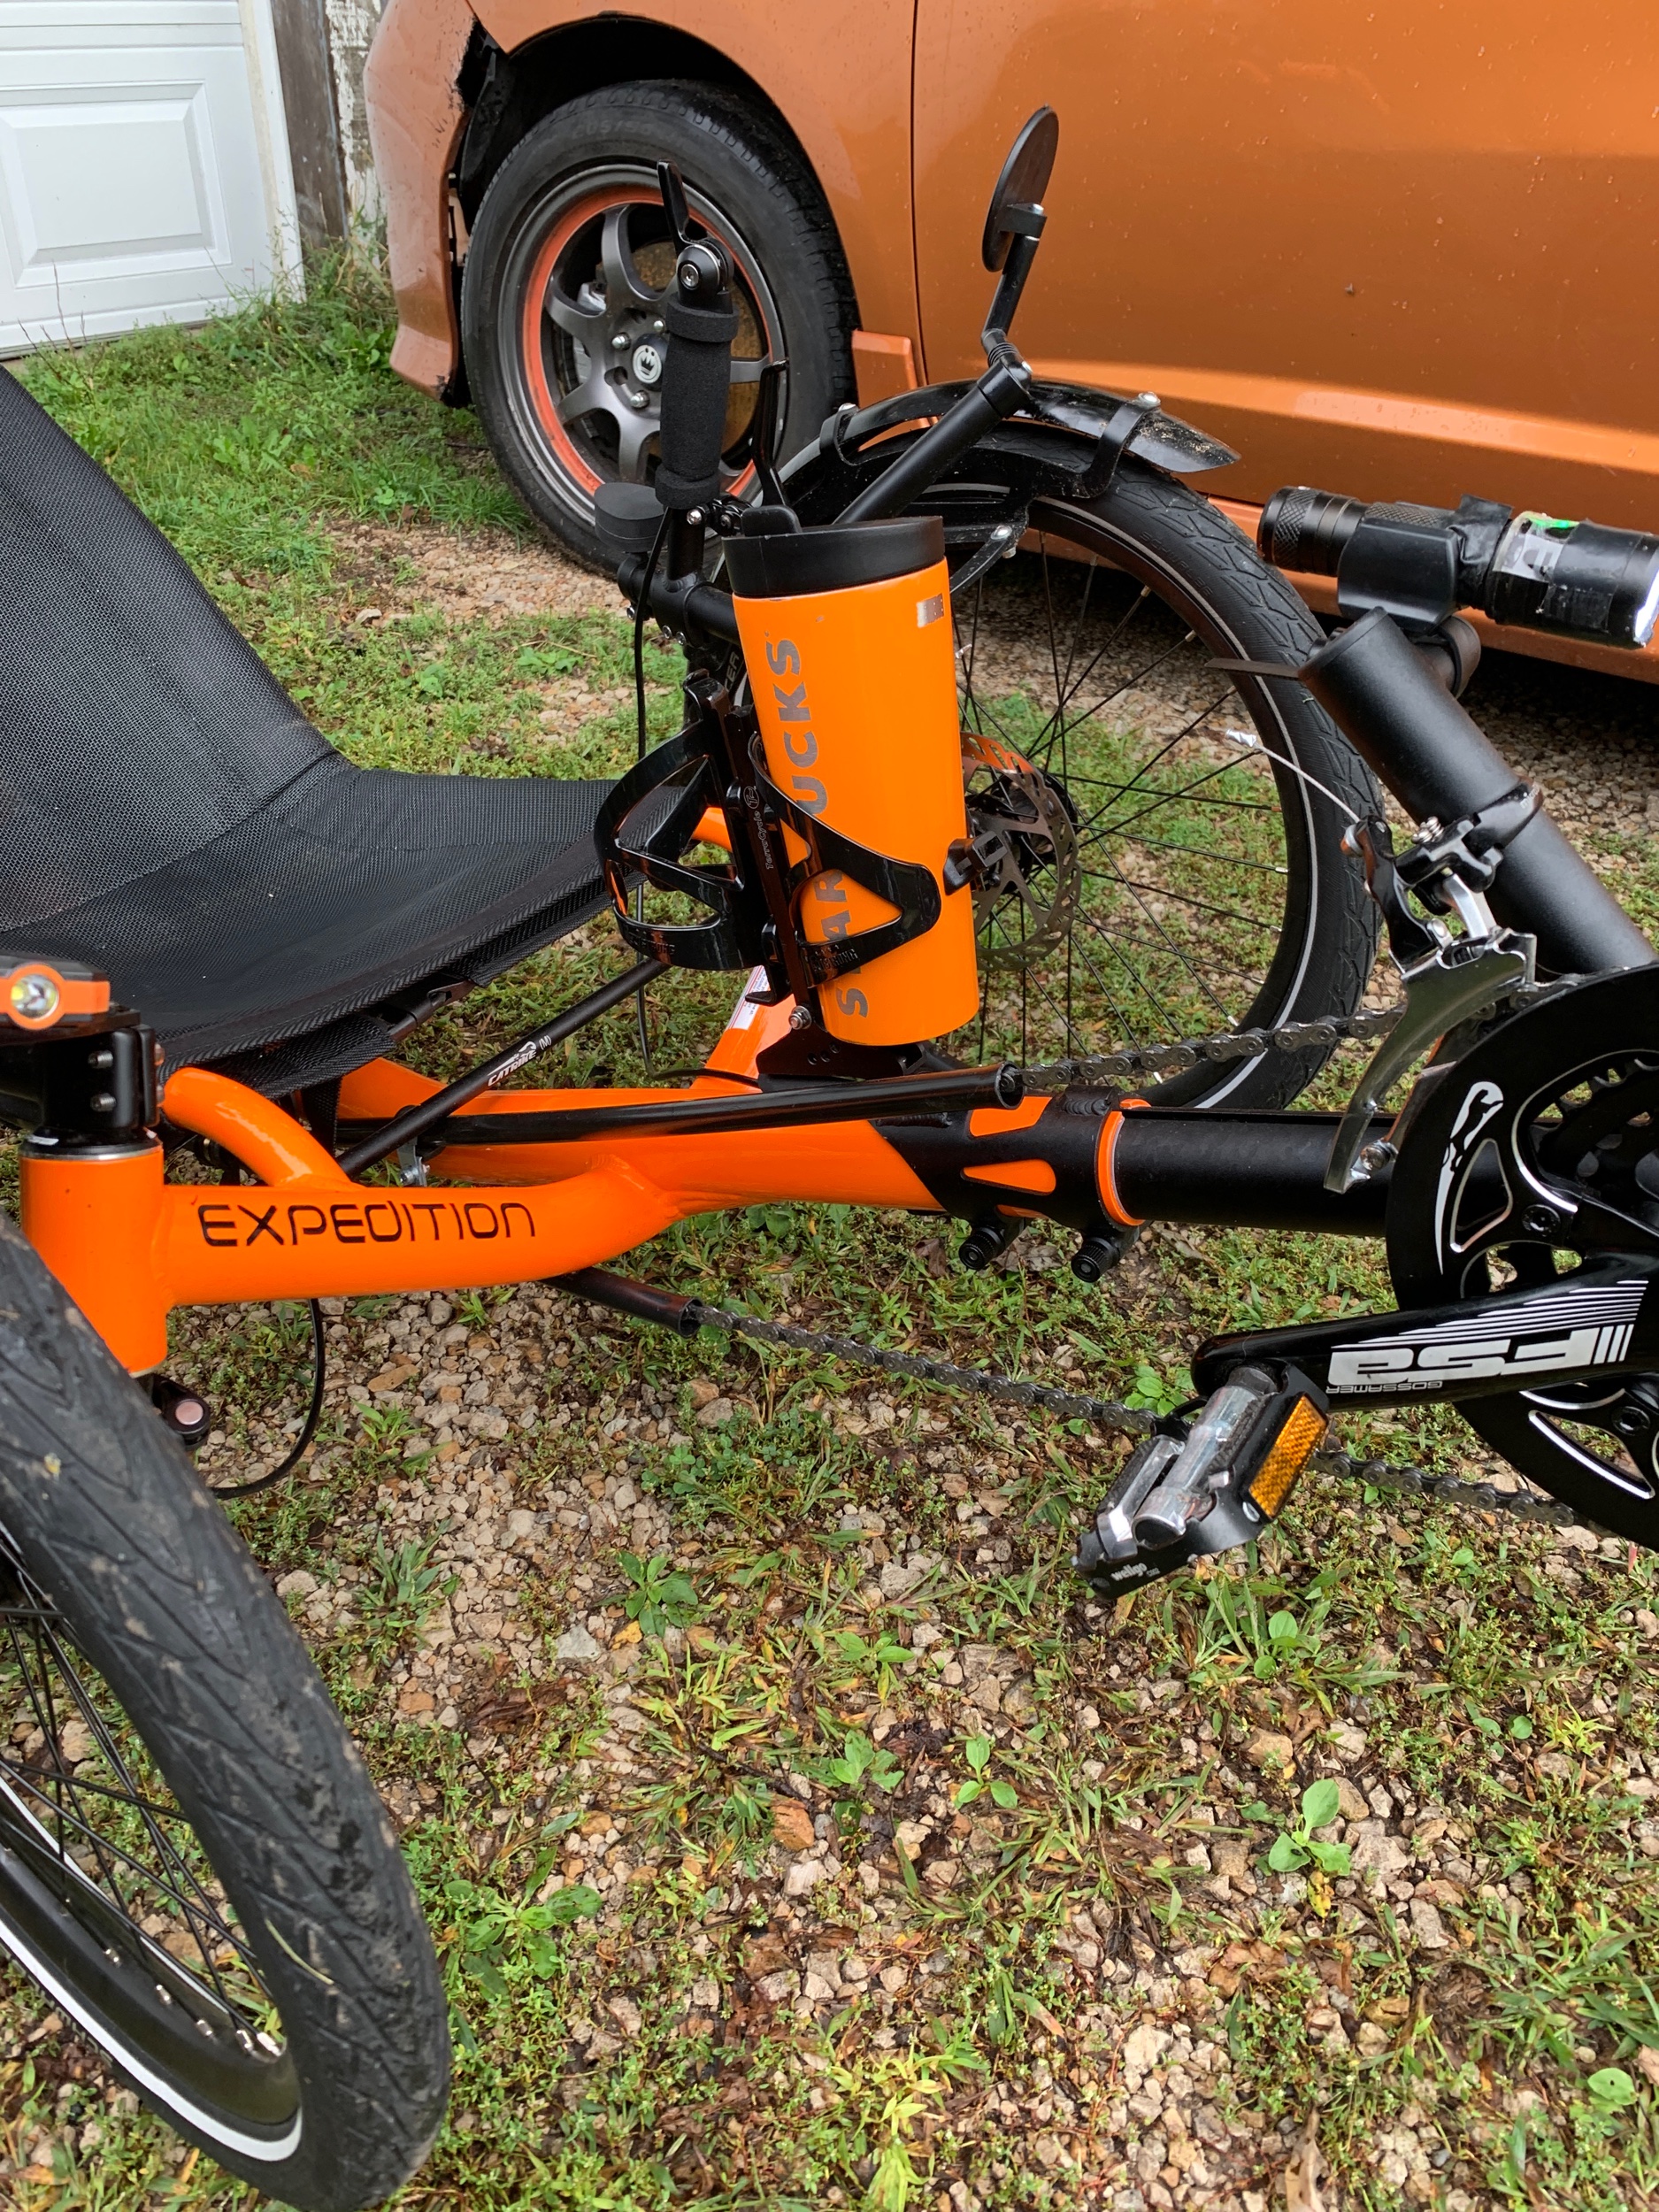
The Gekko

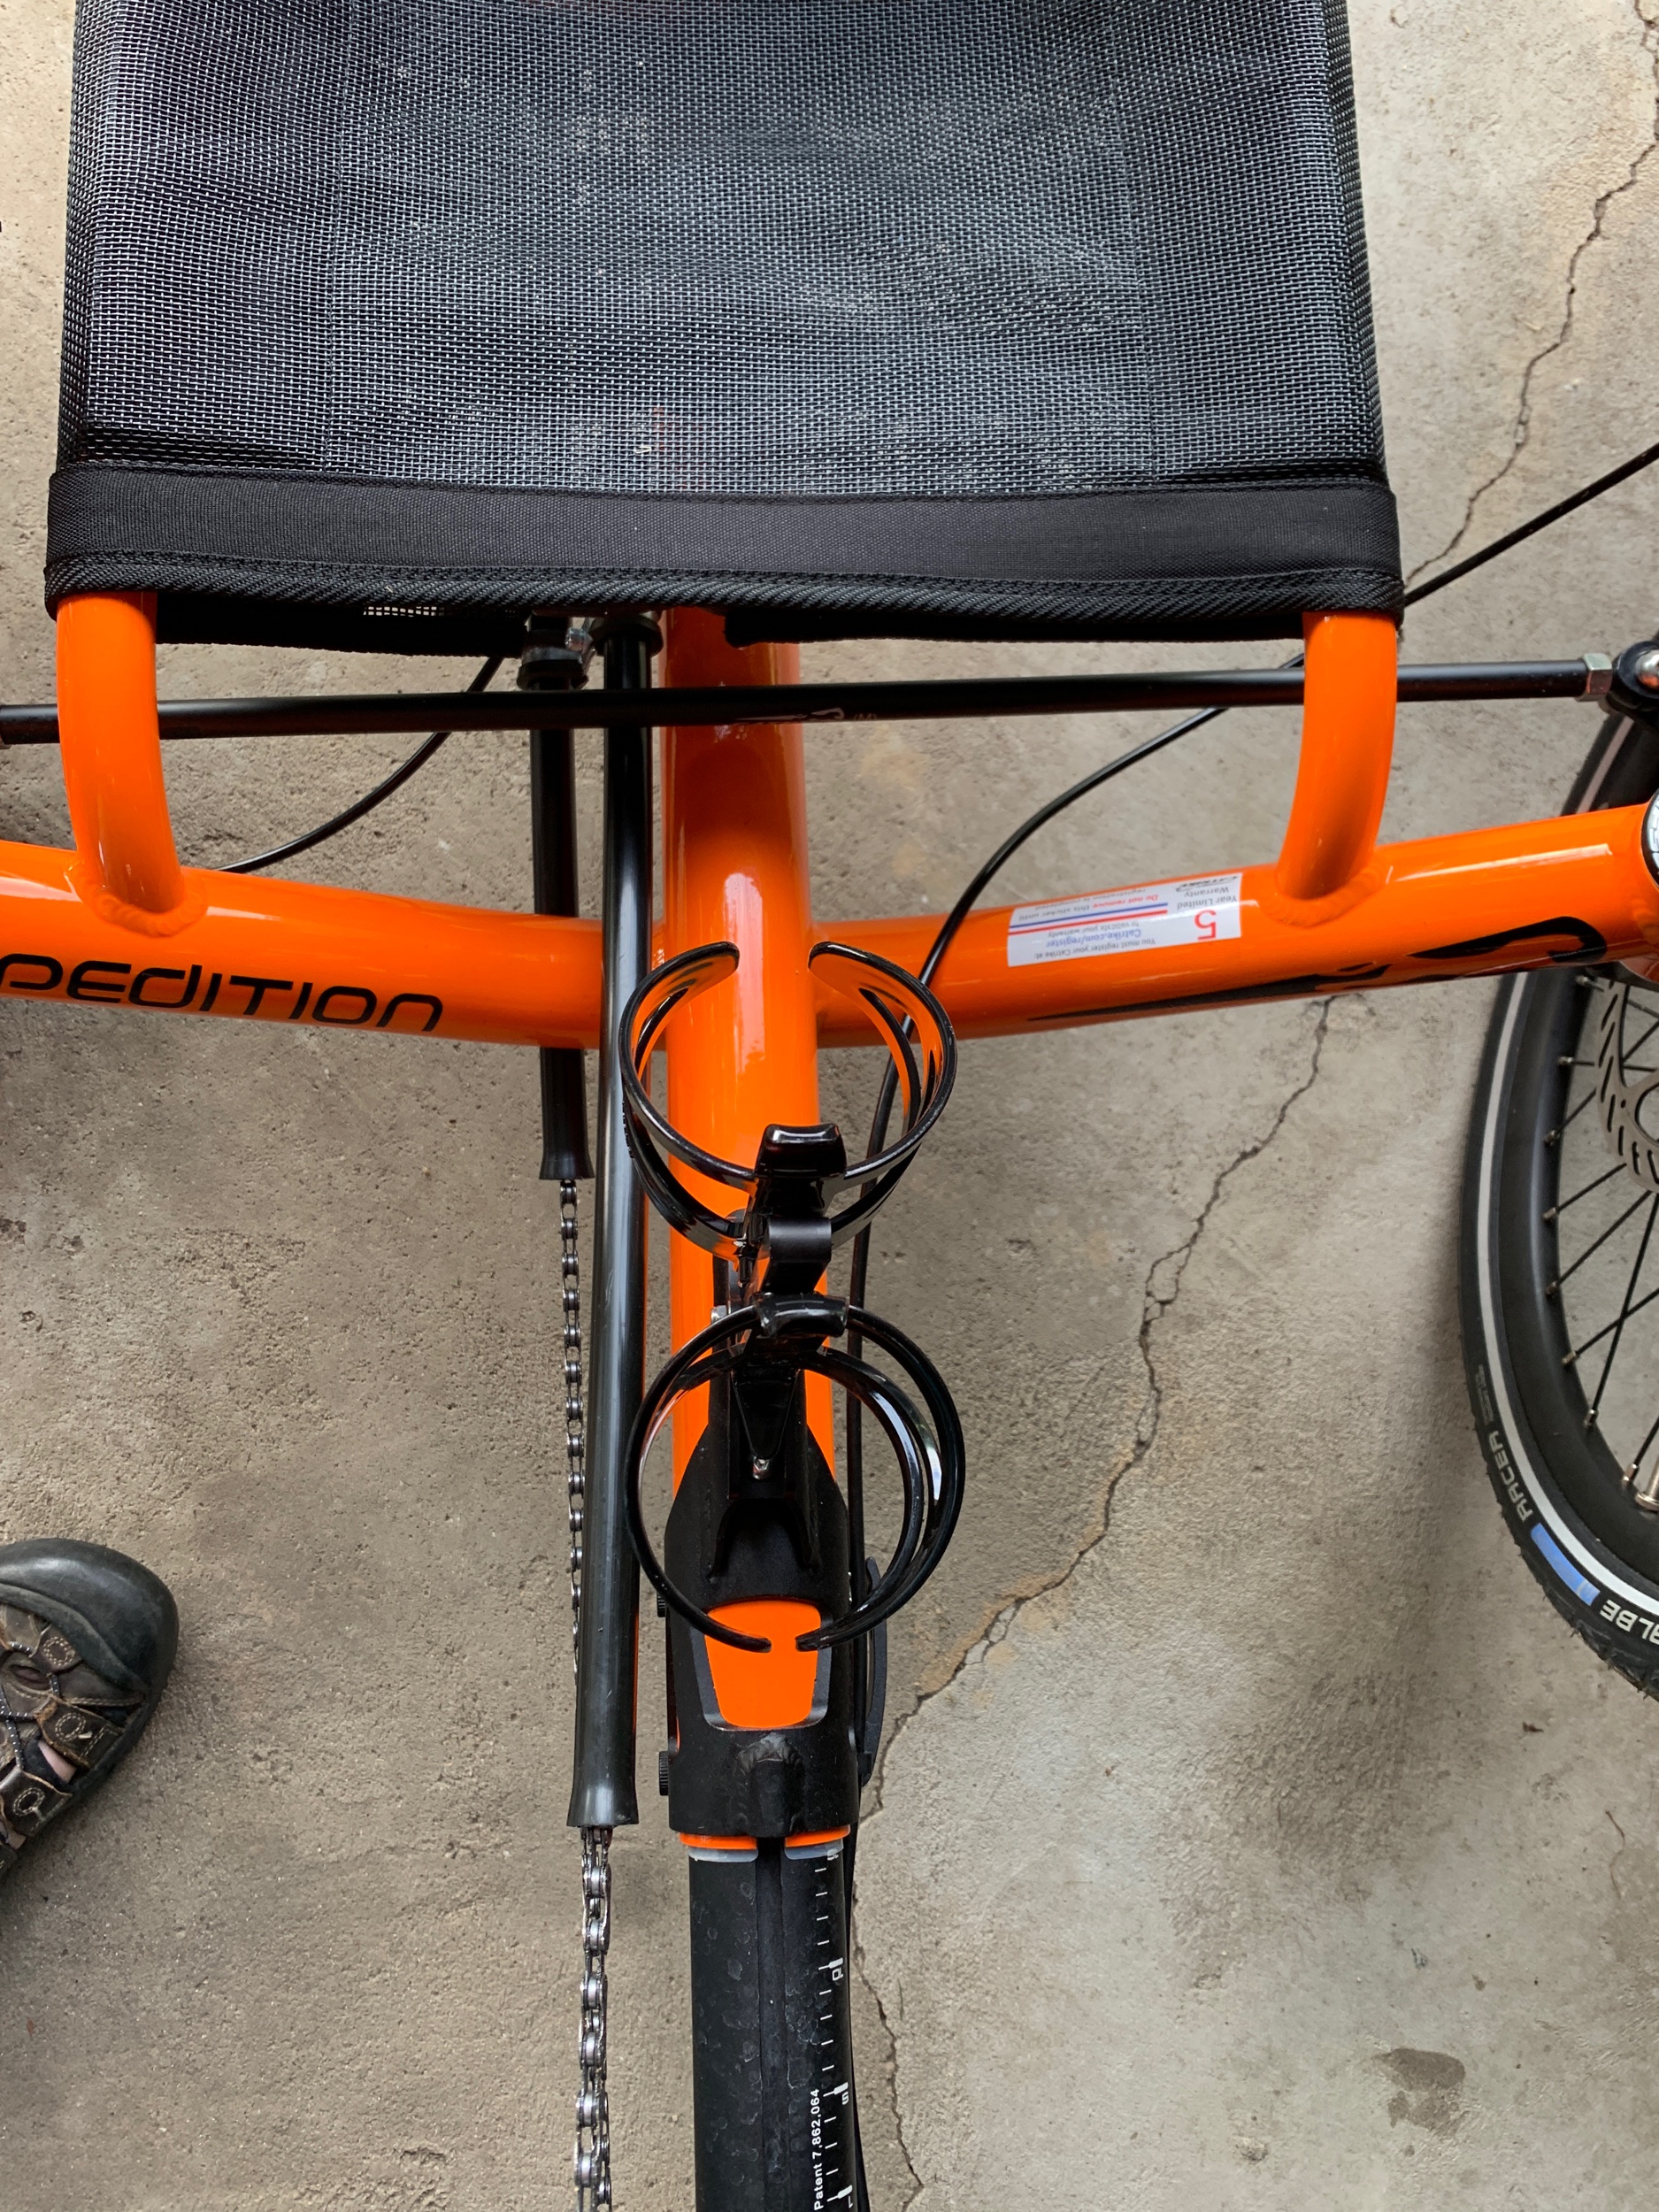
My steed for this brief journey was an HP Velotechnik Gekko - I believe with a 26" rear wheel. My usual ride is now a Catrike Expedition, and previously a Catrike Pocket, so those are what I have to compare the experience to.

The Gekko

The Gekko seems to sit a little higher than the Catrikes, though not to a disorienting degree. The spec sheet on HP’s website indicates it’s about two pounds heavier than the Expedition, but given that it was bare - no rack or bags or cargo of any kind - I suspect it was comparable to my Expedition as it is currently kitted out. The Gekko has grip shifters instead of bar-ends, which was a nice change - I had them on the Pocket, and miss them a bit on the Expedition, though I’ve since adjusted.

Overall, it was a very familiar experience. I was cautioned to stay out of the little ring when it was being set up (I suspect to avoid dropping the chain), which was not a problem on the flat trail. It spooled up quickly and was a comfortable machine. I did find myself leaning in to turns more, I think as an artifact of the increased ride height. This was a felt need - at no point did the trike tip. Speed was good - my average speed for the ride was 14.42 mph over 12.31 miles, and my top speed was 26.31 mph. These are good numbers for me, and comparable to my summer speeds over... similar terrain. I say similar here because I don’t often ride trails, and those in my area are neither as smooth or as flat as the section of the Withlacoochee Trail that I rode. People think Illinois is flat, but Florida could teach Illinois a thing or two on that topic... in any case, the trail conditions abetted higher speeds.

Probably the only area of noticeable difference was the steering. Catrikes have direct steering, while the Gekko has indirect steering. This seemed to allow for a tighter turning circle, which I appreciated when I did need to turn around. Otherwise, it also seemed a bit more disconnected and less immediate, and on occasions where I had to take my hands off the handlebars while moving, it shook a bit in a fashion that doesn’t happen on my Catrikes. I don’t know if this was an artifact of this particular trike (maybe something was a little loose) or more broadly due to the type of steering, since I’ve never ridden an indirect steering trike before. However, I found the difference to be minor. Overall, I was glad to have the experience - the relative paucity of trikes in my area limits opportunity.

Me at the trail


And that was my Florida ride. People sometimes bemoan returning from winter vacation to the cold northlands. For myself I’d normally write here about how I enjoy winter - and I do - but it’s 43° here in Northern Illinois now, working its way up to a high of 51° (F). We had a beautiful week during most of our stay in Florida - highs in the 70’s and 80’s, including the day of my ride - but our last two days were in the 40’s, so coming home wasn’t much of a transition at all.

And - of course - a high in the low 50’s along with sunshine means today is a great day to ride...

2019 Cycling Year in Review by Erin Wade

So it’s that time when we look back at the year that was and consider where we’ve been, what we’ve done in regard to our goals, and consider where you’d like to go from there. And here at Applied Life it’s now an annual tradition. You know, cuz I did it once before, last year.

We’ll set aside the fact that there’s nothing actually special about the end of the month of December, and further set aside the fact that a more reasonably designed calendar would end the year either on the winter solstice or the vernal equinox. But that’s what you get when you have a calendar designed by committee, so, you know, I won’t even bring that up here.

As always, it is always important to remember to compare oneself to oneself, not to others. I periodically have to remind myself of this, particularly when undertaking something like this. With that in mind, what follows is a look at _my_ year in cycling.

Distance

My goal for this past year was to get to 1500 miles. This seemed a reasonable, achievable increase from my ultimate 2018 total of 1372 miles (well, technically 1372.14, but who’s counting...).

That won’t seem like a huge increase - 1372 to 1500 - for some people, I realize. In the cycling groups I follow there are people who literally have tens of thousands of miles per year. But keeping in mind that adage of comparing oneself to oneself, it seemed reasonable at the time.

I may have undersold myself. I met the goal this year, and then sailed past it a bit, to hit a year end mark of 1722.34 miles.

In terms of the how and why, according to Cyclemeter I rode both more often, and for longer distances per ride on average. Last year I managed 106 rides, with an average distance of 12.94 miles. For 2019 I came in at 121 rides, with an average distance of 14.23 miles.

That may seem pretty elementary, and in some ways it is. But rides and distance both take up time, and it can be challenging to squeeze additional riding into my schedule. But I did make a conscious effort to increase the length of my Sunday rides, which seems to have had an effect. I’ve also tried to do a better job of taking riding opportunities where they present - for example, riding to my mailbox on days when I am working from home (it’s a 16-mile round trip to a PO Box - I’m not just riding to the end of the driveway).

It also helps sometimes when you have a new toy, which brings us to...

Machines

I know that a lot of cyclists are N+1 types (as in the right number of bikes to own is the number I have now - _N_ - plus one more). I am not. I think new bikes are cool and all - they sure do look pretty sitting there on the showroom floor. But I’m really much more the sort of person who establishes a long-term relationship with a machine. I rode my 1987 Cannondale for at least a decade before getting the Catrike Pocket, and I was set to ride off into the sunset with the little blue machine.

But I didn’t.

At the end of July I took possession of an Atomic Orange Catrike Expedition.

Atomic Orange

To be clear, was absolutely nothing wrong with the Pocket, and I’d been happy riding it for the past two years or so. But I’d purchased the Pocket as my entry into the world of recumbent trikes, a chance to see whether or not I liked it. My selection of it as a particular model was one of convenience - it came up as available on eBay, was in my price range, and was only an hour away.

It’s worked out well for all of that, but when I felt like I was finally in a position to consider getting something different, I decided to take a more considered look at what I thought would work for me and my cycling goals, and the Expedition seemed to fill the bill. I’m liking it a lot, as anyone looking back across the posts this year can see. And I suspect this will be a long-term fling.

And this doesn’t hang the Pocket out to dry. I resized it for MLW so she can have her own triking adventures.

Trips

This year, as usual, most of my rides started and ended at my driveway. But between opportunities offered by work travel, and some additional general adventurousness, I did get out to a few new trails, as well as revisited some more. Those included:

  • The month of May offered an opportunity to drive down to the pointy end of the state, so I took a ride on the Tunnel Hill Trail, riding from Vienna to Karnak.
  • In June I made the trip over to Sterling to tackle the Hennepin Feeder Canal trail. I managed to get very wet. Incidentally, the feeder canal provides the water supply for the Hennepin Canal. If that name sounds familiar, it’s because it’s Illinois gateway trail for the Rails to Trails coast to coast path project.
  • In July I returned to the I&M Canal trail and learned a thing or two about what the rainy season can do to a trike. And then I returned again to go hunting for my lost flag (ugh).
  • In August the opportunity to ride the Des Plaines River Trail presented itself.
  • I rode in the Farmondo again in September.
  • On Black Friday this year I decided to give the Expedition a shot at the Military Ridge Trail in southwestern Wisconsin. I did not distinguish myself in terms of either speed or distance, but I did learn a thing or two about the rolling resistance provided by wet sand, and got quite a workout in the process.

There were a couple of others that I returned to or tried but didn’t find the muse to put them down here, including two return trips to Rend Lake (one on the Pocket, one on the Expedition), and a late day adventure riding north to the titular Tunnel on the Tunnel Hill Trail (that one may still get its own post). One of my goals for last year was to explore more trails and, all in all I think I managed to get there.

Miscellaneous

I had a couple of other areas of more technical exploration in 2019:

  • When I ordered the Expedition I also ordered up a pair of Shimano Spd sandals and decided to give being clipped in a try. That experiment was not successful, but I did learn some things along the way; and
  • My desire (okay - need) to sometimes have coffee along for the ride led me to add a Terracycle Adjustomatic Bottle Mount to my Expedition. Besides having a product name that is just delightful, it also works very well; and
  • The addition of a second trike required me to rethink the storage setup in our comparatively tiny garage. And finally
  • Serendipity brought along the opportunity to get a new mobile trike garage in the form of a Subaru Outback. That experiment is more successful than the spd shoes thus far...

Next Year?

The end of the year is also the time to set goals for the new one coming.

In terms of mileage, last year I set my goal at 1500 miles. In retrospect, that seems like it may have been too safe a number, but I also find myself mentally wanting to make excuses about how I’m not sure where or how I would fit much more riding into my schedule. I’m sure I’m not the only person that struggles with that issue - as I said before, distance equals time. Still, I think I need to at least shoot for a 2000 mile goal.

There - I said it. Now we’ll see if I can actually _do_ it...

Last year I said I wanted to explore more trails. I’d like to do a little more of that for 2020 - I think there are a handful of routes in areas I visit that I haven’t yet taken advantage of. But I’d really like to manage a couple of options that I didn’t achieve from last year:

  • I would really like to finally make it from LaSalle to Ottawa along the I&M Canal Trail. I tried this year, but was stymied by mud and... well... just so much mud. And I didn’t make it back later in the season, when the rain finally had tapered off.
  • Similarly, I didn’t make that trip further down the Hennepin Canal Trail. I did, as noted above, take a ride along the feeder canal, but I didn’t make it back down for the main event. Portions of the Hennepin Canal trail were closed during the rainiest parts of this spring (this is something that, hopefully, Rails to Trails has a plan for sorting out), but again, didn’t take the opportunity to return to it later in the season.

And along these lines, I’d like to see if I can’t find a way to fit the occasional stop in at restaurants or taverns along those routes. This is a thing that I’ve often considered, but with one exception - the Lodi Tap in Utica, following my struggles with the mud along the I&M canal trail (did I mention the mud?) - I usually just keep going (I’m a fairly solitary soul by nature). But I think that would add to the variety along the way.

And finally, I need to finish my trailer project. I’ll be honest here and admit that part of the issue is that working on the trailer directly competes with riding - both are spare time activities, and faced with doing one or the other, I’ve generally chosen to ride. I may need to bring it inside and do some work when the winter snowstorms rise up.

So: that’s it for 2019. Come on 2020 and show us what you’ve got!

Trike Transporting - The High Seat - Getting on Top of Things Revisited by Erin Wade

One of the things that goes with getting a new mobile trike garage is learning how to work out the different aspects of carrying the trike. Most of the time, of course, I plan on just carrying it inside. This is really the safest option in multiple ways - keeps my Expedition out of the elements and keeps it away from prying eyes and touching hands.

Trike Inside

And while I chose the outback because it would carry the trike and a couple of people, sometimes we have to carry multiple people and their stuff.

A notable example of this occurred over thanksgiving. Apparently my wife and child want not only to be transported over the river and through the woods, but they also want to bring along other ridiculous items like, say, pajamas, toothbrushes, and changes of clothing - so demanding.

I’d dealt with this before, setting up the rack for the Pocket for the same trip last Thanksgiving, but that was on my Honda Fit. For that car I’ve used an entire separate Yakima rack that mounts to the roof (no particular allegiance to Yakima here - it’s just what I already own). The Outback comes with its own roof rails - specifically swiveling roof rails (it took me a little while to figure out what that meant) - so I’d need a bit of different equipment.

As you might expect, Yakima makes mounts for factory roof racks as well. I spent a little time on their website, and it appeared that all I would need was the Mighty Mount 23H to hook the wheel trays to the Outback’s factory rails. I ordered them up. They come in packs of four, and I needed six (two mounting points for three wheel trays), so I ordered two packs.

What’s on the box?

I was a little puzzled by the warning on the box - where exactly did they think I was going to put these?!? But then again, those silica packs look pretty tasty too...

Once they came in, installation was pretty straightforward. Of course, on the Outback the first thing you have to do is swivel your roof rails. I said before that I had read this phrase several times when I was researching the Outback, but didn’t know what it meant. When you look at the car, the roof rails run parallel to the sides:

roof rails

On most vehicles this means that the rails essentially serve as a mounting point for crossbars, which you will have to purchase separately - e.g. from the manufacturer or from an aftermarket company like Yakima or Thule. That’s initially what I expected to have to use as well, but I already have two separate sets of crossbars (I’ve had to mount bikes and skis to a lot of different roofs over the years. Anyone need crossbar mounts for a 1994 Nissan Pathfinder...?).

What I learned is that when they say "swivel" what they mean is that the bars unhook from their parallel mounting and swing around (swivel) across the roof to a perpendicular position.

Crossbars swiveling

Crossbars swiveling

Swivel baby!

Why I am spending so much time writing about this aspect? Honestly, it just tickles me. I’ve spent years putting racks on cars, some of which had no factory rack, some with just side rails, and some with full racks that I just wouldn't trust. In every case part of the problem is putting on and taking off the rack, storing it, etc. You can’t just leave it on because it plays havoc with mileage and presents a noisy intrusion. Subaru has solved at least part of that problem by keeping the rack (or at least the crossbars) always on top, but out of the wind until you actually need it. It’s just elegant. Maybe other car companies have similar systems, but none of them have ever been on a car I’ve owned, and I’ve had a few. So I’m a fan of this solution. But now I’ll stop gushing and move on.

Everything else is pretty much what you’d think - line up the mounting points so they are straight, put the wheel trays on to them, and tighten everything down.

Rails on roof

One’s (my) natural tendency might be to try and center the rails on the roof, but you want to keep in mind that you have to lift an entire Catrike Expedition up there. I try to mount it as close to the driver’s side as I can get it, since that’s where I’ll be lifting up from.

The wheel trays I’m using are Yakima Copperheads. What you see are the wheel tray part of those with the fork mount head removed. For the trike what I needed was the ratchet straps that would go around the rear wheel of an upright. This is all the same system and equipment that I used with the Pocket last year.

The trike is awkward to get up there, but it gets easier with practice.

In the high seat

I supplement the ratchet straps with bungees (the heavy duty black rubber ones)...

Bungees!

...And I always put my cable lock around the seat frame and crossbars. I think of this last part as a bit of double security. Hopefully it will keep people with wandering hands from contemplating taking my trike, and also will act as a final safety catch if other parts let go.

How did it all work? I love my Honda Fit for a lot of reasons, but you can tell that the Outback is designed with the idea that people will carry things on top. It’s relatively quiet even with the trike on the roof (the Fit was not), and where the Fit struggled to maintain speed in a headwind the Subaru (with its much larger engine) managed just fine.

I’ll still carry the trike inside most of the time. The following morning in Wisconsin illustrated the reason why quite nicely:

Trike and Outback in snow

I love a fresh dusting of snow, but I don’t love it being on my trike... You know, unless I put in there myself.

Ok - time to ride...

Frostbike - A Review by Erin Wade

Frostbike!

One could be forgiven for thinking that a book about cycling in the cold months of the year would have a very narrow field of interest. After all, it’s a pretty small group of people who even want to venture out to do anything in winter’s chill, much less spinning pedals on a decidedly weather-exposed machine. Indeed, for myself I first heard about Frostbike: The Joy, Pain, and Numbness of Winter Cycling by Tom Babin through the Winter Cycling group on Facebook. This is an excellent, and well moderated group, but it’s group that exists in part because a relatively small number of people share the interest. And, of course, those folks are nuts, right?

It turns out that this perspective is, in fact, a distinctly North American one. As Babin notes, here in the US and Canada...

What usually happens when winter rolls in is that the number of cyclists tumbles, and those who do it are seen as zealots or oddballs.

As the book makes clear, however, there are other parts of the world that do not share our way of thinking. Babin explicitly describes arriving at the airport in Oulu, Finland, and finding that the bike routes not only came directly to the front door of the airport, but they were being actively used. And he was there in February.

That’s right - Finland. in February.

But none of that was what I expected when I purchased Frostbike and downloaded to my Kindle last spring. I bought it last March, at the end of the winter riding season, purposely planning on holding off reading it until things got chilly here at the end of the year. I was anticipating a book about the author’s personal journey towards becoming a winter cyclist, and I figured that would help me with mentally gearing myself up for the next season. And the book does include that journey - I suspect Tom Babin’s beginnings with the world of cold-weather pedaling will be familiar to many winter cyclists. But Tom Babin is a journalist and cycling advocate from Calgary, and Frostbike extends well beyond his personal journey.

Frostbike explores the bigger picture of understanding where people have been historically with respect to cycling and winter, as well as literally journying to cities around the world to see how other cities - cities where there is actual, real winter - handle cycling.

It’s not too big a spoiler to say that they handle it well. Of Oulu, Finland, Babin writes:

I realized I had probably, in just a few minutes, seen more people riding in the snow than I ever had in my life.

From Finland he also travels to Copenhagen to keep his perspective from being too narrowly focused, and finds a similar picture. And when he asks people there why they ride in the winter the answer is both surprising and simple:

The reasons people ride bikes in the winter, he said, are the same reasons they ride bikes in the summer–doing so is quick and convenient. You just have to dress for it.

The book also takes time to investigate why we seem to have such a different perspective in North America from Northern Europe when it comes to winter cycling and, frankly, just winter in general. Where he arrives is illuminating, and for myself placed the finger finally on the nose of a phenomenon I’ve been trying to mentally sort out for years. I remember, as a kid, enjoying being outside in the winter weather, and having friends routinely joining me. I still enjoy it, but I no longer have company in those pursuits. He hits the nail on the head with his observations and conclusions in this area. I won’t give it away here, but I will offer this quote as a teaser:

For Canadians, and perhaps many North Americans, complaining about the weather has become second nature, our default way of relating to each other.

You will see the cycling advocate in this work as well. In particular, he does an able job of outlining whether, and why, cycling infrastructure should be supported and maintained in winter months, and it involves a hard look at whether there are other facilities that municipalities develop despite not having year-round applications...

Going in, it is good to be aware that the book is very much focused on learning about and developing winter cycling for urban settings. This should, perhaps, not be surprising - that’s where the bulk of cycling focus seems to be, where the majority of people are to be found, and arguably urban areas are where cycling has the most benefit to offer in terms of reducing congestion. There is some discussion about the development of fatbikes, and it was interesting to read the history in that area, but it’s ultimately in service of the author’s efforts to determine which type of bike will work best for his (urban) winter commute. I would have liked a little more about the broader world of winter riding. Still, my hope for more on the wider world of winter cycling was an expectation the author did not promise, and was not obligated to meet.

There is also a section at the end of the book, styled as an addendum, offering up tips for winter cycling. It’s brief, but practical, and will be helpful for new adventurers. I’m certain that the existing, died in the wool cool kids will have disagreements with the author’s recommendations, but then again, they don’t really need the tips either.

If you have an cyclist on your holiday shopping list, or if you are just interested yourself in looking into winter cycling around the world, Frostbike (I love the play on words with the title, and iOS autocorrect, incidentally, hates it) is an excellent read. It’s available in hard copy and Kindle through Amazon. (Regular readers will be aware that I usually listen to my books, but Audible doesn’t (yet) carry this particular tome).

Enjoy. Now it’s time to ride. In the cold...

New Mobile Trike Garage... by Erin Wade

For much of the past two years or so, my car has largely functioned as a mobile trike garage. While I went through a fair amount of thought and effort to figure out how to store my trike by hanging it from the ceiling in the garage, the reality is that it spent relatively little time on it’s perch. The Pocket, being a relatively small machine, fit nicely behind the rear seats in my Honda Fit, and since I most frequently drive alone or, on rare occasion, with a single passenger, it was simpler to leave it in the car much of the time. Besides, you never know when an opportunity to ride might present itself, and you can only capitalize on that if the trike is present, so...

When I got the Catrike Expedition this summer I knew that it’s increased size was going to complicate things a bit. I love Honda Fits - they are extremely flexible, efficient and, with a stick shift at least, fun to drive. But the Expedition is both wider and, notably, longer than the Pocket. I expected it would strain the Fit’s capabilities as a trike transport.

Pocket and Expedition side by side

Strain was correct. While the Pocket fit behind the front seats with the rear seats folded, I was not able to find any way to carry the Expedition without encroaching into the front passenger area. Ultimately, the best arrangement turned out to be sliding the passenger seat all the way forward and then leaning the seat back forward. With this done and the Expedition put in the back at an angle I could just barely get the rear hatch closed. (I also quickly discovered that I had to remove the passenger headrest because it now sat directly in my line of sight of the right-side rear view mirror).

Expedition in back of Fit

Expedition up to seat

As I mentioned, most of the time I’m in the car by myself, so this wasn’t necessarily the end of the world. However, it does decrease flexibility. Say your child needs you to swing by and pick them up on the way home, for example. Unless they are going to ride in the seat of the trike, there’s nowhere for them to sit. Oddly enough, passengers tend to object to this option.

Yes, it is possible to carry the trike on the roof - I’ve done this before - but that puts it out in the elements and in view of prying eyes and wandering hands, so I prefer to have it inside whenever possible. And besides, the roof rack has a negative impact on noise level and gas mileage, so I don’t put it on unless I’m planning to carry the trike up top in advance. It’s not there on the car to be used if I encounter an unexpected passenger need.

All that aside, it’s been workable, if occasionally inconvenient, for the past several months, and I’d been prepared to work with it for the longer term. However, events transpired such that the family was going to need to get a different vehicle. Given that, it made sense to pass down my trusty, but well used, Honda Fit to the aforementioned offspring and look for a vehicle more suitable to trike transport.

Of course, the ability to transport the trike was not the only criteria I needed to meet (believe it or not). We live in the hinterlands in northern Illinois, and I travel by car a fair amount for work. A vehicle for me needed to meet the following criteria:

  • Have real all-wheel drive - we contend with a lot of snow
  • Be comfortable for distance driving
  • Sporty and relatively fun to drive
  • Get relatively decent gas mileage
  • Have room for the trike and at least one other passenger to ride in comfort; and
  • NOT be a truck or SUV

It’s the last one, of course, that really narrows things down, given the rest of the list. While we’ve had a truck or three in the household over the years, I prefer the handling characteristics of a car. Plus, since I drive a lot, the greener side of my nature struggles with the mileage hit of, say, a Suburban or Tahoe (which would otherwise easily meet the other criteria). To boil it down: I can’t help myself - I’m a car guy.

This list frankly left me with, as best I could determine, two potential choices: Subaru Crosstrek or Subaru Outback.

I like them both, and I loved the fact that the Crosstrek could be had with a manual transmission (car guy, remember?). However, I’ve parked next to many a Crosstrek with my Fit over the past few years (well - mostly the same one many times- a friend in my martial arts class drove one, also in orange), and the Crosstrek appeared to be bigger than the Fit, but not by a lot. So I posted a question for the folks in the Catrike Owners Group on Facebook to see if anyone else had experience with Expeditions and Crosstreks and, well, they had (groups are really the best part of Facebook. Maybe even the only good part...). The upshot: it’s about the same situation as with the Honda Fit.

So that left me with the Outback.

I spent a few evenings searching online for something in our desired price range, and then MLW and I set a day aside to go have a look. Besides identifying a dealership and mapping a route, my primary act of preparation was shoehorning the Expedition into the back of our 2011 Honda CR-V. My logic here was that, given my primary criteria was being able to carry the trike and people, the best way to test that would be just to bring along the trike and try it out.

Brilliant, right?

What followed was a phenomenal testament of just how good My Lovely Wife is to me. When I say "shoehorned", what I mean is that it does not fit comfortably in the CRV, which is taller, but not really that much longer than the Fit. So, in order to fit it inside, I had to slide the passenger seat forward, set the seat back bolt upright (but not forward - yay!) and push down on the trike against the tire pressure in order to slide it back because the rear cargo rack was pressing against the ceiling.

After I had accomplished all this MLW looked at it and said: "so - that’s right against the back of my seat."

"Yeah" I said. "Is that ok?"

"So" she says "I can’t lean back or, you know, move or anything?"

"Umm... I could take it out. I could just bring along a tape measure and do measurements..." I said.

"How far is it?" She asked.

"About an hour and a half".

And then she sighed and said "it’ll be fine. Let’s go."

I’m quite certain I don’t deserve her.


I’m pleased to say that the salesman at the dealership appeared completely unphased by my request to cram my trike into the back of a car I did not yet own. I’m sure that part of it is just due to wanting to make a sale, but I suspect that it was also helpful that the car, though used, happened to be for sale at a Subaru dealership. Given the target market for these cars I suspect I’m not the first person they’ve encountered bringing along equipment of one sort or another to see how it fits.

And: it does. I’m pleased to say that, with the back seats down and the front seat moved slightly forward the Expedition fits and allows for two passengers in addition to the driver - one in the front passenger seat and one in the rear driver’s side seat (in the "40" side of the 60/40 rear seat split). I did have to loosen the neck rest on the trike and tilt it forward to fit it in, but that’s a pretty easy adjustment to work with.

That sorted, it was just a test drive and some negotiation time before we settled things up and I took it home:

Subaru Outback

I’ve had it out and about a few times now with the Expedition in the back, and it all works out well. I did briefly try running the rear wheel in-between the front seats, but that blocked the central rear view mirror more than I cared for, so I switched to setting it in at an angle. That adjustment made, everything seems to work quite nicely. We’ll see how it works out over the longer term, but at the moment I’m pretty optimistic.


I have no doubt there will be readers who will quibble with my conclusion here on various fronts. If that’s not you, feel free to stop here. But if you are thinking something like:

"You know, this [type or brand of minivan/crossover/panel van/Conestoga wagon] does most of what you want and you can haul two trikes in it at once."

Or

"There’s nothing like a Suburban [Excursion/Escalade/full-size pickup/etc] for cargo capacity and four wheel drive. You live in the country - it’s time to step up to a truck."

Or

"They make rear hitch racks/you could use a trailer/did you consider [type/brand] of carrying system?"

Please know that I think these (and related ideas) are reasonable ones to present. But I think there are a few things that are important to consider when looking at vehicle solutions surrounding carrying a trike. Probably first and foremost is considering whether your transport vehicle is going to be your primary vehicle or whether you will use a secondary vehicle for that purpose. If you are in a position to have a vehicle oriented just towards your recreational activities I am happy for you. I have periodically considered that - getting an older truck of some sort just for hauling the trike. But I’ve done that in the past and it really didn’t work out for me. While I do have just recreational riding times - my regular Sunday rides, for example - in order to increase my riding opportunities I try to integrate riding into the rest of my regular schedule. If I’m traveling somewhere for work and it offers trails, paths, etc, I’ll bring the trike along and ride over lunch and/or after the work day.

This approach has worked well in terms of enhancing my riding time, but when I say "traveling", it’s often distances of two to six hours in the car - this really isn’t the ideal sort of situation for a utility vehicle. Hence the focus on comfort and gas mileage in the criteria.

It’s also the case that this decision point was triggered by having a family vehicle taken out of service. We weren’t in a position to get a secondary vehicle - anything added would have to serve full-time duty.

Finally, while I don’t care for SUV’s or crossovers as a general rule, I don’t have anything against minivans - I think a good minivan is a beautiful thing from a utility perspective (though they are not sporty or fun to drive, as a rule), and I’ve eyed the little Ford Transit vans closely in the past for similar reasons. But nothing in the class does what I’d call real all-wheel drive. Most of these vehicles, when they have all-wheel drive, have systems designed to aid in stability and traction under slippery conditions, and this is what is needed for most people in most situations. As far as that goes, that same type of benefit can also be conferred on virtually any two-wheel drive vehicle by adding a set of snow tires. What neither solution does well, however, is crawl their way through, or out of, a snow drift. We are rural enough that this is a periodic need - and I can tell you that my knowledge in this area is more than academic...

While it doesn’t quite have the capabilities of a four-wheel-drive truck, Subarus occupy that middle ground between being much more capable than the typical slippery-road friendly vehicle and a truck, while still operating like a car the rest of the time. They are, in a way, kind of an odd compromise machine that other manufacturers just don’t make, but which happens to fall right into my current sweet spot.

Trike Storage Revisited by Erin Wade

Back when I first got the Catrike Pocket I fairly quickly realized that I would have to re-think storage. As I mentioned then, for my uprights I’ve long relied upon the basic and traditional hang from the wheels method. That approach has a lot to say for it. It’s extremely cheap and easy to set up. A couple of lag hooks from the local hardware store, 30 seconds with a drill for a pilot hold, and a minute or so with a hammer using the handle to screw the hooks in. Bam! Bike storage.

I adapted this approach for the Pocket and it worked well for me. Yes, it did involve doing a clean and jerk with the trike to flip it over and lift it up, but it’s only 33lbs and, to be honest, it spent the overwhelming majority of its time in the back of the car. I didn’t have to hang it up much.

Part of the rationale behind getting the new trike was because MLW was interested in riding. At about 5’1" tall she’s the perfect size for the Pocket, and so it made sense to pass that on to her and order the Expedition for myself. But while her height fits the Pocket well, it also means that she can’t even reach it when it’s hanging up on its hooks, much less get it down. If she was going to be able to use it whenever she wanted it needed to be stored in a fashion that wasn’t oriented explicitly towards an almost-average height American male.

For a large chunk of this past summer that just meant that the trike sat down on the garage floor to keep it accessible. That’s fine, as far as it goes - for much of the summer if the choice is between protecting the trikes or protecting the car, well, the trikes are going to win. But as the weather turns more crisp I begin picturing the act of scraping windshields, and while I love being out in the winter weather, that particular activity is not one I treasure. I needed to be able to get the car into the garage. It’s not a large space, so that meant the trikes had to be able to be stored _up_, above the cars. But it had to be stored in a way that allowed MLW to get her Pocket up and down without gaining 7 inches in height or developing a talent for Olympic weightlifting.

The old setup just added the Pocket to the existing bike storage in the garage:

Pocket with diamond-frame friends

Diamond frame crew

This approach reflected the idea that I was adding the Pocket to our existing stable. I imagined, at the time, that I would be alternating use of the trike with my Cannondale, and perhaps occasionally using MLW’s mountain bike when the situation called for it, as I’ve done in the past. The reality turned out quite different, and I pretty much rode the Pocket all the time. In addition to that, some time ago MLW had indicated that she no longer found her upright bike comfortable, and the little Specialized hanging there belongs to my child, who has since outgrown it. It seemed that some rejiggering was called for.

We have a large machine shed on one corner of the property, and I relocated all of the uprights, except for the Cannondale, out there. I suspect I’m mostly being sentimental about the old girl, but I’m telling myself that I’d like to keep it at hand because it is the machine I ride when my trike is out of commission.


Enjoying this post? Check out our Cycling page for links to other cycling articles on Applied Life


Once the old guard was retired the next step was to sort out how to hang up the Pocket in a way that MLW would be able to get up and down. At the risk of being somewhat unoriginal, I decided to look into bike hoists. I have seen other people hang up their trikes using these, so it seemed likely it would work for us. The trick was getting one mounted high enough so that the trike wouldn’t be a noggin knocker for people when doing other work in the garage.

Now, I’ve referred to the hook system that I’ve typically used as being cheap - inexpensive - and it is. Lag hooks usually run less than $1-$2 or so at your local hardware store here in the Midwest. But it’s been a long time since I’d priced bike hoists, so I was surprised that our local-ish big-box store had them for less than $10.

To accomplish the height I built a mounting frame out of 2x4’s and attached it to the top of the garage ceiling joists. This raised the height of the hoist by about 3 1/2", and of course would raise the rest of the trike that same amount relative to just attaching it to the joist. While assembling and mounting the hoist itself is somewhat more complicated than putting in a couple of hooks, it’s still pretty straightforward: measure the distance between mounting points and set your pulleys at that distance apart (and make sure you have leave enough space between the pulley and the wall for the wheels and/or boom).

Determining mounting point was a bit of a question. On an upright bike the mounting points are generally going to be the handlebars and the back of the saddle. The hooks that the kit comes with are sized for that approach, and so equivalent positions on the trike have to be identified, and they have to be far enough apart for the trike to hang stable. I used the horizontal crossbar on back of the seat and the center of the front crossbar as the mounting points. I had considered the possibility that I’d have to do something to widen the front mounting point - e.g. set up a rope or similar across the handlebars but decided I’d try its without first. I could always add it later.

rear crossbar

front crossmember mount

(I used the Expedition in these shots to make the hooks easier to see - the orange provides better contrast than the blue on the Pocket)

Mounting the hoist and getting it ready to lift was a matter of setting the two brackets at the measurement between the two mounting points, and then threading the rope through the pulleys. When I started screwing the brackets in to the 2x4’s I think I discovered why the kit was only $10 - the mounting screws it comes with looked substantial, looked like they were made from hardened steel, but might as well have been constructed of cheesecloth and spit. After I snapped the heads off of two of them I switched over to my own supply of screws.

Once it was all put together and mounted overhead I gave it a test run with the mounting points I selected. As might be expected, it does sway just a bit from side to side when being hoisted up and down, but the movement was easily manageable, so I left it as is, mounting to the front crossmember.

Pocket Secured

The additional height of the frame I built proved to be enough to get it over my head. Substandard screws aside, the hoist works exactly as advertised, including the vitally important catch and lock system that means when you stop pulling on the rope, the trike stops moving up - it just locks in place. The pulley system makes it little physical work to raise and lower - it’s not just doable by Olympic hopefuls. Probably the only caveat is that, I think because the pulleys are attached to the trike at different vertical locations, it doesn’t want to come down level, and so you have to periodically correct it so it doesn’t come down boom first. It’s a little fiddly in that respect.

I originally figured I would use the hoist for the Pocket and perhaps move the Pocket’s old hooks around a bit for the Expedition. However, with this working so well for the Pocket, and with the kit coming in at less than $10, the prospect of doing a clean and jerk with the slightly heavier and more considerably more awkward Expedition suddenly seemed considerably less attractive. I went back and bought a second kit and repeated the process (though I just went ahead and used my own hardware this time). So now what we have is this:

Two Trikes and a Cannondale

Two Trikes and a Cannondale

(If you peek in the back, you can see that the Cannondale was narrow enough to hang in a space against the garage wall. That narrow profile is a true advantage of upright bikes when it comes to storage. Which is good, because it’s likely to sit, stored there, for quite some time).

I’m expecting the Expedition, like the Pocket before it, will ultimately just spend most of its time in the car. But now both of the trikes can be stored up out of the way when needed, and the car can be put back inside ahead of scraping season.

Ok - it’s time to ride... (my trike).

An Experiment Ends by Erin Wade

When I ordered my Catrike Expedition this summer I decided to give clipless pedals and shoes a try. Although I’ve been cycling off and on for most of my life, I’d never used them. I have a personal resistance to specialized cycling gear (clothing, specifically) in general, as I’ve discussed here a time or two before. Still, you really cannot judge a thing until you’ve tried it, so I ordered up some Shimano SPD sandals and decided to give it a go.

This weekend finds the end of that experiment, at least for now.

I ordered a second Terratrike Comfort Pedal Conversion Kit for the Expedition (I already have them on on my Pocket) a few weeks ago in anticipation of the change in season.

TerraTrike Kit on a Catrike? Hybrid vigor or horrible abomination?

I ride year round and, although my feet absolutely run hot, I knew there would be a time in the not-too-distant future where even committing the fashion crime of wearing socks with the sandals would not be enough. Part of that personal resistance to specialized gear is that, were I to continue to use the SPD side of the pedals, I’d need to buy at least one, and probably two additional pair of cycling shoes to get through late autumn and the winter. That can get spendy in a hurry and, frankly, I’m somewhat skeptical that I’d be able to find winter cycling boots that would be sufficiently warm for riding on the open prairie.

I’m also finding that I’m getting knee and ankle pain with the SPD setup, which is not an issue I’ve ever had before. I’ve tried some adjustments in the length of the boom to alleviate this, but without success. I suspect that the static position of the foot is part of the issue there for me. We’ll see if that resolves with the switch back.

I’ve found that, for whatever reason, every time I’ve looked for the heel slings on the TerraTrike site they are out of stock. When I purchased them for the Pocket I got them from Bicycle Man, and went to do so this time, but they also did not have them in stock (they are in stock there as of today, however, if you are looking). So I looked and was somewhat surprised to find that they are also available on Amazon.

I described in detail the process of installing them on the standard Catrike pedals back when I put them on the Pocket. The biggest part of it is realizing that you will not be able to use the little backing plate that comes with them - it does not fit on the Catrike pedals. You can get nuts to replace that plate however, and then it works fine. Being aware of that this time made putting them on a lot faster (and a lot less frustrating). I also sorted out a way to do it without removing and leaving off the inside Allen screw on the pedals. I was able to block off the nuts sufficiently with a screwdriver blade to hold them still while I tightened them.


Enjoying this post? Check out our Cycling page for links to other cycling articles on Applied Life


The TerraTrike heel slings are designed to be used alone, but I push and pull on pedals when I ride, and the design doesn’t support that. On the Pocket I used inexpensive Velcro tie wraps, and I’ve found them to work quite nicely for that purpose. This was my plan this time as well (the Velcro tie wraps come in big spools - I’ve got a lot of them), but when I was looking up the slings on Amazon, one of the related products was a basic toe clip - the Evo Double Quick Strapless Toe Clip (I’m not sure what quality is supposed to make it "double quick"...). They were less then $10 bucks for the pair, so I figured they were worth a try.

Evo toe clip

Evo toe clip

The reviews for the toe clips on Amazon suggest that some people struggled to install them on their pedals for different reasons - sizing of the clips, or length of the hardware. I did not find any of those difficulties applied for the Catrike pedals. In fact, the only challenge was the same one you get with the heel slings - the otherwise very cool double-sided pedals give you a tiny space to work in when it comes to putting nuts on to bolts inside the pedal space.

Catrike pedals are small spaces

My trick for this included a couple of things:

  • I put the heel slings on first, which meant that the weight of them kept the pedal upright while putting on the toe clips. I’d like to say that I made this choice because I am a brilliant strategist, but it was just simple serendipity. But being upright held the pedal in the perfect position for installing these.
  • I put the nut in the box end of a hand wrench, which was small enough to hold it in position while I got the screw started. I say held in position - I didn’t turn with the wrench - there’s not enough space for that. And only to get it started - if you screw it all the way in you won’t be able to pull the wrench out.
  • I did the same trick with the screwdriver blade inserted between the nut and the side of the pedal to hold the nut still while I screwed it in the rest of the way. I really wish this had occurred to me back when I was working on the pedals for the Pocket...

Screwdriver trick

The end result is here:

Heel slings and toe clips

Heel slings and toe clips

Foot in pedal

The design is a little less elegant, perhaps, than using clipless pedals and shoes, but now I have a foot retention setup that will work with just about any pair of kicks. They are easier to get the foot into than the setup using the Velcro cross straps because I can rotate my foot into the clips sideways. The cross straps require you to reach forward and put them on by hand. An initial test ride - about a quarter mile down the road and back - suggested they work more or less like you’d expect, including supporting pulling back on the pedals in addition to pushing.

I was a little concerned that the clips might not allow enough room in the toe area for my big winter boots, but that was a question easily tested:

Winter boots in pedals

Winter boots in pedals

The clips stretch a bit with the boot in them, but the give allows them to fit. Probably the only remaining question will be whether that give still works when it is very cold out - plastic can get brittle in winter. I always have a spool of the Velcro tie wraps in the pannier bags on the trike (they are useful for so many things!), so I’ll have a backup if they break.

I’ll be trying this setup out over the next several weeks to see how I like them, with the maiden voyage likely to occur a little later today. Details to come in the future.

Now it’s time to ride...

Terracycle Adjustomatic Bottle Mount by Erin Wade

public.jpeg

It goes without saying that the design and layout of a recumbent trike is different than that of a traditional diamond frame, or DF, bicycle. Many of those differences are exactly what the Tri-cyclist is looking for - different (I’d say better) seating arrangement, reclined position, lower profile to the wind, no need for a kickstand - and the list goes on.

However, while it does seem that recumbent trikes are gaining in popularity the reality is that DF bikes are still by far the majority. This means that while the cycling accessories world - which is massive, to be sure - predominantly develops its products for DF bikes, and that’s what we have to work with. Often this can be ok, but at other times it involves compromises. One of the more glaring examples of this that one encounters early on in the trike experience is the water bottle cage.

The cage in repose

The cage in repose

The boom is an obvious location for the water bottle cage - it’s easily accessible, it’s visible, and it’s wide enough for the mounting point. But (you knew there’d be a "but", right?) it lays the water bottle down at something like a 5° angle - not perfectly flat, but close enough to it that a full water bottle with a drinkable spout is inevitably going to leak.


Enjoying this post? Check out our Cycling page for links to other cycling articles on Applied Life


This isn’t really a problem on most DF bikes, where the cage is put inside the frame either on the upright seat post portion, or on the forward front bar, which is at an angle, yes, but far more acute and thus less prone to bottle weep (and really, as we look forward, could we make the term "bottle weep" a thing - I think if we try it could really catch on...).

That angled position also means that the bottle cage is not suited for carrying other types of containers at all. For myself - though it may seem sacrilegious - an early-ish morning ride is made much better when accompanied by the presence of a nice cup of coffee. But if there is a travel mug out there that won’t leak precious brown liquid when laid at a 5° angle, I haven’t found it. And once you add cream and sugar to your beverage you have A) a delightful beverage, yes, but 2) something you really don’t want drizzling all over your machine.

I cannot recall whether I’d first seen the Terracycle Adjustomatic Bottle Mount on the the Terracycle website, or in a Facebook group (Facebook overall is kind of a dumpster fire, but the groups - especially when well moderated - are a relative shining light), but I know that I’ve seen pictures of trikes using this product. At $45 it certainly isn’t as inexpensive as just laying your bottle down at an angle, so I’d put off purchasing one for quite a while. Still, as I rolled toward the Farmondo this year, presenting (for me) an extended distance ride, it seemed a more justifiable purchase because it also allows for mounting two bottles or containers instead of just one.

public.jpeg

The product itself is CNC machined, black anodized aluminum, and it looks just as good and sturdy as that description would suggest. It literally bolts right on to the bottle holder mounting point on the boom with little to no difficulty. All the bolts needed come with it, so you just have to supply the 3mm Allen wrench. There are multiple mounting holes on both sides for the cages, so you can choose the height that works best for you. The hardest part - and it isn’t very hard - is setting and deciding upon the right angle for mounting it. It has three preset points, or you can simply choose any angle you like. You can order it with bottle cages from Terracycle, or simply use your own. I’d purchased a pair of black plastic cages from Amazon back when I’d ordered my Expedition, so I used those.

public.jpeg
public.jpeg

You do want to be sure that you get the set screw for the angled portion set tightly - I was apparently too gentle the first time out and it came loose and started to lean. I’ve since tightened it and have had no further difficulty.

It works exactly as designed. I installed mine a few days ahead of the group ride, in early September, and have been out several times with it since. It holds my Kleen Canteen in an upright position so as to minimize issues from the aforementioned bottle weep, and does, in fact, do a fine job of carrying a travel mug. It rained for almost the entirety of the Farmondo this year - a low-level, but persistent drizzle - and it was comforting to have hot coffee at hand to warm things up a bit. It will be a nice addition to my winter riding as well.

I have clipped it - or rather the cage attached to it - a few times with my foot while getting on the trike. Because of the way it sits and where, I have to take more care when stepping into position to sit down. This has not been a hard adjustment to make.

As I noted above, the device does have multiple holes on each side, and the Terracycle site suggests that other things could be mounted to them - they note that they might be offering a computer mounting stub that would fit (though there is no link, and I don’t quickly find such an accessory on the site). I can easily see the more creative folks out there finding multiple additional uses for what device. For my part, it does what it is designed to do quite nicely.

I am slightly fond of orange…

I am slightly fond of orange…

Farmondo 2019 by Erin Wade

For my third consecutive year I decided to enter the Farmondo - the group ride put on by Tempo Velo bike club, based in Sterling, IL. The event is three separate group rides of different distances - 20, 43, and 80 miles. Each year I’ve participated in the 43 mile ride. It is not a race - not technically - just a group ride where you are timed, your time is rank-ordered against the other riders, and the information is then publically posted for the world to see.

I was excited for the ride this year because it’s my first year with my Catrike Expedition. I have been finding that the Expedition is faster than the Pocket that I’ve been riding the past couple of years, and I wanted to see if that would hold true over a longer ride (43 miles is the longest I’ve ridden thus far, and so far I only go that distance once a year - in this event), particularly over the hilly terrain that the Farmondo covers (if there is a hill around Sterling, they’ve found it for this ride).

So it was with that in mind that I headed out last Sunday morning with the trike in the back of my Honda Fit.

Knowing that there was rain in the forecast, and that the event ran regardless of weather, I’d purchased rain gear the day before and packed it up in the pannier bags. I also spent time the day before getting all of my lights on to the charger and setting up a new battery mount for my phone since I would be using it to track my ride stats and to listen to podcasts or audiobooks on the ride (in one ear only, of course).

Things did not go as planned.

A Series of Unfortunate Events

It’s about 45 minutes from my home to the starting point in Sterling. I gave myself plenty of time to get there, or so I thought. But while I was riding through Dixon - about 35 minutes from home - I realized that I had not taken any of the lights off of the charger. They were sitting at home, happily sipping electrons off the grid and, most importantly, not on the trike or in the car with me in any way, shape, or form.

After a bit of self-flagellation I mentally set this aside - nothing I could do about it at that moment; I certainly did not have time to go back - and continued on course.

When I got there I looked at the immediate weather, which was a light mist, and looked at the radar, which seemed to be offering more of the same going forward. I made the executive decision not to put on the rain gear (though I did keep it in the panniers), reasoning that I would get damp, but not so much so that I’d be uncomfortable, and not nearly enough to justify the trade-off against the bulk of the rain gear.

Then I hauled out the trike and started to get things set up - flag on (I almost always just keep that in the car, so I had it along) and went to hook up the battery for my phone and found that it was, well, also not there.


Enjoying this post? Check out our Cycling page for links to other cycling articles on Applied Life


I’d thought that I had put it in the mounting position the day before, but I must have set it aside while working on prepping other things. I say "must have", because finding it "not there" led to a search of the car to see if it had just fallen off, if I’d set it somewhere else, etc. But it was simply not present.

This offered up an interesting problem, given that it limited what I could do with the phone. I’ve got an iPhone XS Max, which has pretty good battery life, but GPS is a battery hog. I’d been doing longer rides without the backup battery tho, and it had come thru when I left the screen dark most of the time and just checked in on my pace periodically. This is what I determined I would do.

But processing that threw me a bit and, more importantly, slowed me down. So I found that, as I was walking the trike up to the starting line in the parking lot, they announced "riders ready?"

I was not.

I pulled the trike up to the side of the group and mounted. I did not have my helmet or gloves or glasses on yet. I reasoned thru my options, put on my helmet and clipped in, and put everything else in my sweatshirt pocket, figuring I could put them in as I rode. Because I was to the side and not in the pack, I let the entire group go by - I didn’t want to cut anyone off - and took my position in the absolute rear of the pack. It’s a timed event, so this didn’t seem like a problem. I’d be compared against my start and stop time, not my position in the pack.

All good, right? I rode forward down the first straightaway, just behind the rest of the group. I rounded the first corner, rode forward another hundred feet, and heard a "click" on the pavement.

I think anyone who rides regularly can tell you that you become accustomed to a certain array of sounds as a part of the experience. There is the sound of tires on water as you go through a puddle, of stones as the come up against a fender or the frame, and all of that occurs against the backdrop of the mechanical sounds of the machine.

The "click" was not a familiar sound.

I knew the sweatshirt pocket was not an ideal location for storing anything, being open on the sides. It’s not ideal in general, and even less so in the reclined position of the trike. But it was only going to be for a short time, right? Well, it was clear that I’d dropped something, though I wasn’t sure what.

I turned around and rode back. I passed the truck that brings up the rear of the group and said "dropped something" to him as he went by. Another couple dozen feet and I found my reading glasses (stoopid middle-aged eyes) there on the asphalt, miraculously undamaged. I picked them up and turned around and started pedaling back the other way, now behind that pace truck.

The beginning part of the race in Sterling crosses a four-lane section of Route 2 at a stoplight-controlled intersection. The police actually cordon that off for the riders. Unsurprisingly, however, when the pace truck went thru - visually signifying the end of the group - one of the two patrol cars, the one dealing with traffic to my left, or closest to me, pulled away. This left me stopped at the stoplight, and falling further behind.

The other officer had remained and saw me. After a cycle of traffic he very generously stopped and directed traffic to get me through the intersection ahead of the changing light and got me on my way (my enduring thanks to him!).

I was now far enough behind now that I could no longer see any of the group. After the stoplights they make a left turn through the neighborhood, which took them out of view. I’ve ridden this ride twice before, so I knew that was the case, but I honestly wasn’t sure which left turn the route took, and I’d been watching the traffic, not the group, while I’d been sitting at the intersection. That uncertainty actually caused me to briefly wonder if I should just pack it in and call it a day, but I took my best guess at it, and about four blocks later came across the pace truck, patiently waiting for me (my enduring thanks to him as well). A block or two later and I could see the tail end of the group having turned right at Challand Middle School and followed them. I felt much better actually having people in view.

I was also breathing pretty hard at this point, since my pace was a little higher than it might otherwise have been this early on, trying to make up for lost time and catch the group. And I don’t care how many times you tell yourself that your position in the group doesn’t matter because it’s an individually timed event, you still want to catch up to (and pass people in) the group. Plus, you know, I’d lost actual time by turning around and by sitting at the stoplight.

The Rest of the Ride

Once I got past that comedy of errors, everything started to level out and work just fine. To ensure sufficient battery life for ride tracking I opted not to listen to any audio on the ride. This made the ride a more meditative experience in some ways. I ride that way sometimes outside of this, but this was a long ride, and I usually like some entertainment as a part of things.

That decision allowed me a little extra battery life for some video and pics along the way:

The video is from mile 7 of the 43-mile group route. I’m probably going 14 or 15 miles an hour in that segment. And importantly, I think I’m gaining on someone (!).

If you like the scenery of the Illinois countryside (and I do) this is a lovely ride overall. It’s also interesting to me because your ride takes you past at least four cemeteries - one in the town of Sterling (where you turn left to stay on the route, I gambled, and turned out to be right, thankfully), and the others mostly tiny rural affairs that dot the countryside out here.

3B5F7ABD-30EB-4D90-BA57-341CD83FD9FF.jpeg

86CA0EA6-5E5B-4CE2-8AA4-36E2E71DB750.jpeg

E0E1F11C-D085-46B1-8F3A-032D987353D3.jpeg

It did rain for the majority of the ride - you can see that the sky is steel gray pretty much throughout. My executive decision on the rain gear turned out to be a good one. I wore linen pants for the ride as well as a rash guard. Both sets of items have the benefit of drying quickly (linen is a great material for warm weather where you want to cover up rather than using sunscreen - I prefer it to spandex for riding). The only fly in the ointment was my cotton sweatshirt, which got very hot about four miles in, but I didn’t want to stop and lose more time taking it off. The upside to that was that by mile 10 it was so thoroughly drenched that it was no longer warm, so it ultimately worked out.

Aftercare

The folks at Tempo Velo always have a spread out for the end of the race - tacos made on the spot, beer and soda available (and the beer is always interesting - I had a Harp), and this year they had custard from Culver’s in the mix as well. It was a smaller group at the end this time, most likely due to the rain, but those who came and rode got to eat and drink well.

A13985A6-FB9F-4D94-948F-04F466BAA67C.jpeg

Results

After the ride the results get posted online. It takes a little while for this to all get done, but once it is, it’s there for you to consider. My goal this year, and every year, is to do better than last. And as I mentioned, I also wanted to see how much the Expedition seemed to contribute to increased speed/decreased time.

Obviously, my muck-up at the beginning had an impact on my time. I turned around, I got stopped at a stoplight that the event timing expects you to simply be able ride through, and I spent the first several minutes of the ride futzing around with getting gloves on and such, which is not an ideal path towards increased speed.

So here’s the deal: I was faster than last year.

2019 Results

That 3:17:53 for this year compares to 3:20:46 last year. I’ll grant that it’s not a lot faster, but it’s still an improvement of nearly three minutes (2:52), all with a series of unintentional self-induced impediments along the way.

In terms of how much of it is due to the new trike, and how much is due to me, I’m gonna chalk most of it up to the trike. I did condition my way up to the ride distance this year, but my training was fairly similar to last year. My average speed for the ride, however, was up from 13.09 mph last year to 13.29 mph this year (according to Cyclemeter), and I was definitely carrying more weight in terms of both the trike (which is two lbs heavier than the Pocket) and the rain gear in the bags.

And despite all of the chaos, Cyclemeter, which tracks stopped time (the race timing does not - it’s all event time) finds that I was sitting stopped for less time this year than last. I didn’t purposely stop this year or last, so all of the stopped time both years was in situations where traffic required it - e.g. waiting at road crossings and such. So apparently I did have some good luck in there, even tho it didn’t feel like it in the moment.

All in all, and the comedy of errors aside, it was (and always is) a fun event. I was once again the only trike rider in the 43 mile event, but I was not the only trike rider that day. Another gentleman, with a Villager he’d rode in the 20 mile event, and I met and chatted for a few minutes afterward. It was good to see and touch base with a like-minded soul.

And good to put this ride down in the books.

Des Plaines River Trail by Erin Wade

Sometimes traveling for work offers up cycling opportunities. This past week I found myself with the chance to try out the Des Plaines River Trail.

DPR Trail

This is a relatively long trail, as far as it goes - 56.2 miles, according to the TrailLink app (from which that screenshot is taken), covering an impressive stretch of territory across Lake County and into Cook in the northeastern corner of Illinois. Surfaces listed on the app include asphalt, crushed stone, dirt, and gravel. The section I rode - a 7.82 mile stretch from just north of Route 132 to Route 173 in Gurnee Illinois - was predominantly crushed stone.

DPR Trail Route 132 to Route 173

As the name implies, this is a lowland trail. It runs along the Des Plaines River, and includes multiple backwater marshes in direct view of the trail. The surface is well cared for - in my experience, many lowland trails in Illinois - paved or otherwise - struggle with the obvious combination of water erosion and limited maintenance budgets - there are often potholes and ruts due to wear and water undermining. It had rained earlier that day and portions of the trail were a little soft (I was glad to have the fenders on the Expedition - first real test of them), but it was otherwise in excellent condition - no holes, no washed away sections, and any undulating sections were minimal and avoidable. I was honestly impressed with the condition of the trail. I will note that it was probably too soft to be comfortable riding on a road bike, and it was definitely slower going even on the trike.

It’s a winding affair, and it passes thru multiple parks along this section. One of my first views as I came around a curve into the early part of my ride was of high tension power lines, and I thought "well great" (drip some sarcasm on that), but my fears that I’d be spending a lot of time in the company of electrical transmission were quickly allayed, and much of the ride is lovely, with an interesting variety of scenery given that it runs thru a river valley.

There are, of course, the marshes and wetlands periodically dotting the trail

Green Water

And I saw multiple white egrets on the ride. They were shy, and difficult to catch on camera, though I did glimpse this specimen thru the trees:

I have egrets

He’s far away and hard to see, but a little editing brings him up somewhat closer:

Considering my egrets

According to my Peterson Field Guide for Birds of North America this fine fellow could either be a snowy egret or a great egret. Differentiators would size and the color of the bill, but I didn’t catch those details in person, and the picture doesn’t resolve enough to tell.


Enjoying this post? Check out our Cycling page for links to other cycling articles on Applied Life


Portions of this section of trail run along railroad tracks, and they are absolutely in use. During my 80-minute ride three trains went by - one Amtrak and two freights. Anyone who has lived near trains knows you can hear them from a considerable distance, so you’ll know when they are there, and you will briefly be within 20 feet of the tracks.

Just the tracks, Ma’am

The trail sometimes winds tightly enough to allow for some fun on the curves, sliding a bit on the crushed stone.

Long and winding trail

There are also brief sections of rise and fall - an unusual feature, in my experience, for a waterway trail.

In addition to wetlands, portions of the trail are open prairie...

Flowered glen

...while others are fairly heavily wooded (and some of the wetland areas are in the woods as well). The trail cuts its way thru County and Sterling Lake Forest Preserves. I was riding at the end of the day, and working against sunset as I returned to the start.

The impending darkness is why I stopped at Rt 173. This was where I’d planned to ride to, offering up a 15-16 mile round trip that I could get in before complete nightfall. And I did manage to reach that point before dark.

Rt 173 Crossing

I don’t really smile

However, on the way back the wooded sections were dark enough I switched my headlight from flashing to steady in order to light my way.

This is a fairly heavily populated area, and there were others on the trail - cyclists, hikers, and at least one runner (and it’s also an equestrian trail; I saw no horses, but I did see... evidence of their passing) - but it was not crowded. Since, as I mentioned, I was there at the end of the day, it may be busier at other times. The trail does have several road crossings, some of which are relatively busy, so you do want to take care. The signs - like several others I’ve seen on trails - indicate that you should dismount your machine and walk it across. I’m quite sure this virtually never happens, but the signs are there for the liability coverage, I suppose.

All in all it was a nice ride over some beautiful territory. I’d note too that this section of the trail is, quite literally, just down the road from the north entrance to Six Flags Great America. I could see this as a great option for a cyclist to hit in the morning before taking the kids to see Bugs and Daffy at the amusement park.

I&M Canal Early Summer 2019 by Erin Wade

I’ve been wanting to get back to the I&M Canal Trail this summer, but I’ve been reluctant given that the Midwest has become the equivalent of a northwestern rain forest this year. At the top of my list of concerns was the rather rustic stream crossing that appears about 2.5 miles east of Utica.

And by “rustic” I mean that you have to carry your machine over the water. There’s a bridge, of sorts but, given its positioning, odds are good that at least your feet will get a little wet. This is a picture of that crossing from last year:

The "bridge"

This Sunday the weather was just too perfect, and MLW and LB were away visiting family, so I was footloose and fancy free. I decided to give it a shot, and figured I could just turn around at the stream crossing if it was washed out. And if I made the crossing, I figured this would be my chance to cover the distance all the way to Ottawa - maybe stop in at Tangled Roots for a Kit Kupfer - instead of stopping at Buffalo Rock State Park like I had last year. Either would make for a great ride, albeit one option longer than the other.

The trail between LaSalle and Ottawa is a varied affair that I’ve discussed here before, but I’ll note again that it make for some very enjoyable scenery. There’s the canal historical site at LaSalle, the sandstone bluffs between LaSalle and Utica, the brief glimpse of downtown Utica itself, and then the more remote trail from there to Buffalo Rock. This was predictably pleasant and, at least when in motion, the bugs (which have been prodigious this year due to the rainfall) were a minimal problem even as I rode into the cattail lined portions of the trail towards the aforementioned rustic crossing.

There were a few puddles and soft spots as I progressed along this portion of the trail, and I did come across this section of water crossing the entire trail:

Early water crossing

It’s hard to tell from the picture, but the water is not a puddle - it was flowing from one side to the other. The flow was slow and gentle, so any fear of washout is a distant one, but it did serve to remind that the trail is a firmer canal towpath, and that it was all built in the floodplain of the Illinois River. And of course, it did make me wonder once again what I was likely to find at that crossing.

My curiousity was sated soon enough as I rolled up to the spot...

The rustic crossing

So - clearly what had happened here was that the stream had moved the bridge down a bit, one suspects during a higher water period, but there was enough solid (or semi-solid) material on the route to and from the bridge to make it passable. I was going to get my feet wet, that was clear, but I was wearing my usual summer riding footgear (sandals - Keens, and they are waterproof), so that wasn’t any big deal. I carried the trike across. I did sink in and gather material into those sandals, but I went back, sat down on the bridge and rinsed them clean before riding on.

Rinsing the feet

That hurdle cleared, I figured this was my day to make the ride the rest of the way out to Ottawa.

I was not correct.

The trail from this point eastward to Buffalo Rock is remote, without a doubt. You get peeks at water occasionally through the cattails and other tall wetland plants, but for much of it you are in a botanical tunnel of sorts - nothing to see but the trail ahead.

The wetland plants should have, perhaps, been a hint of what I was about to encounter, but I’d ridden this trail before without incident. Given that, I was surprised when I came across the first...

...I’m not actually sure what to call it. Clay soup, perhaps?

It was an expanse of very wet, soft, slippery exposed gray clay filling the trail from one verdant wall to the other, proceeding forward as far as the eye could see.

Clay soup

I’m sure in the dry this is just a bare and dusty spot - I didn’t remember anything about this area from last year’s ride to suggest it would be like this when things were more damp. Not that any of that mattered, because here it was, regardless of my recollection.

I gave it a moment or two of thought, and then figured "how much of it could there be?" and decided to tackle it.

It was slow going, to be sure, and there were many moments where I could feel the rear wheel slipping, and there were a couple of times where I had to provide front-wheel assist (wheelchair-style, but using the spokes instead of the tires because, well, yuck), but I got thru it without having to get off the trike.

I also got thru the second patch.

Now, to be clear, I am not, and have never been, a person who enjoys playing in the mud. Before I got my trike my ride was a road bike, and I don’t own a mountain bike - the closest I come is my wife’s Schwinn Suburban - and if I did own such a machine I would not want to take it out when the trails were sloppy. It’s just not my thing. I say all of this so you will hopefully understand the "why" when I say that, when I came up to the third patch of this material I said "I’m not having fun any more", reasoned that there were bars in Utica and that they probably also sold beer, and turned around.

Of course, this meant that I also had to slog my way back through the other two patches, but that would have been inevitable if I’d kept going. And this was all very nice, once I got past the clay soup, and I rode along happily until I got back to the rustic crossing.

I have to get off the trike at this point in order to roll it down the walking path and cross. And when I did, I saw this:

No flag

What you are seeing, or rather not seeing, is my flag. The bottom half of the pole is there, but the top half, which holds the flag and my rear taillight, is gone. Just gone.

No flag

I made a comment questioning the parentage of no one in particular, and began to pace a bit. I walked back maybe a hundred yards and couldn’t see it. I realized I would have to ride back.

So I did, and made my slog again thru, and past, the first serving of clay soup, finding nothing. When I reached the second section I stopped, took a very long look at it and the increasing volume of gray clay coating my ride and myself, and decided that I could probably just purchase another flag and light. I turned around and rode back, tackling my fifth trip thru the clay soup along the way.

The rest of the trip back was more or less what you would expect, in terms of the trail. However, I did make a stop at the Lodi Taphouse in downtown Utica...

Lodi Taphouse

...and bathed my sorrows in an Evil Horse Balmoral - an ESB, which is a style of beer I absolutely love, and which doesn’t often appear nowadays, seemingly lost to the sea of IPA’s and sours that microbreweries are pumping out.

If ESB isn’t your thing, however, they have a shocking array of beers on tap, along with a couple of ciders and a couple of mead options (really!). These were the offerings on the chalkboard when I was there:

Chalkboard

The Balmoral was lovely, and put a much more positive spin on what had become a rather frustrating ride. After I relaxed a bit I headed back out, covered the five miles back to LaSalle, packed up and headed for home. It occurred to me, as I rolled into view of the canal boat moored at the LaSalle end of the trail that, frustrating or not, it really is true that a bad day of cycling is still better than a good day doing a lot of other things.

...Which is where, under most circumstances, the story would end. But of course, now I needed a new flag and rear taillight. So the following morning I fired up my iPad and began my search. This did not go as expected, however, but that’s a story for another post...

TL:DR

  • The section of the I&M Canal Trail east of Utica, from the rustic crossing to Buffalo Rock State Park, as of 7/7/19, has sections of soupy mess that you may want to avoid or wait out until things dry up unless you enjoy riding in the mud.
  • The trail from Lasalle to Utica, and up to that rustic crossing, is just fine; and...
  • ...I can heartily recommend stopping in at the Lodi Taphouse for a refreshment as part of your ride.