recumbent trikes

FINALLY! by Erin Wade

This was the view as I prepped for a Sunday ride:

White Horizon

When I got up this morning I’d been surprised by the blanket of white that covered the landscape. The winters here in northern Illinois have been notable for decreased snowfall and fewer cold periods for some time now - a change in weather patterns that caused me to switch from cross country skiing to winter cycling nearly a decade ago - and this winter has been particularly recalcitrant (two days of recreationally useless “bomb cyclone” aside), with little snow and high temperatures hovering above freezing for most of January. If it seems odd to complain about a winter season that is too warm, I will admit that I’ve absolutely taken advantage of the additional riding opportunities the unusual temperatures have allowed. But still, as a year-round cyclist, one looks forward to actual winter riding.

All of which is why, when I looked out the window and saw the coating of white, what ran through my head was: FINALLY!

I did a quick check of the forecast and saw that, while I was looking at snow out my window then, the high temperature for the day promised to be at least 33°F. This meant my window for a real snowy ride was limited. I’d have to get out ahead of the warmer afternoon hours, and ideally ahead of the snow plows (I try not to share the road with them). So I geared up and headed out.

I took a route I call Rocks 8 - an eight mile loop, half of which is gravel. This would ensure that, at least half of the time I would be unlikely to share the road with much of anyone, much less a plow. It also had this benefit:

Where are the rocks?

That’s the first section of gravel road, there in the picture. If you are looking at it and thinking that it’s hard to tell that it’s gravel, well that’s pretty much the entire point. A good snowfall has the delightful effect of smoothing over the rocky surface, making it much more pleasant to ride with my road-oriented Catrike Expedition. I pretty much only ride this route when the roads are covered in snow.

Because I got out early, the snow was still falling, and the temperature was still abo freezing, but not by a lot, which means that it sticks to pretty much everything…

Snowy trike

Snowy dude, snowy eyebrows

But it all means that I get the opportunity to see roads that I don’t typically travel down any time of year…

But it all means that I get the opportunity to see roads that I don’t typically travel down any time of year…

And ever-so briefly leave my somewhat unique footprint in the ephemeral snow.

Lines of three

Rockford Bicycle Company to Rock Cut State Park - Trail Review by Erin Wade

Happenstances of life put me in the Rockford area this past weekend on an unusually nice November day. Prior to moving back out to our Homestead we had lived in Rockford for a solid 17 years. In many ways the area, with its prominent park and bike trail system, as well as the presence of Rock Cut State Park at the north end of the city, reinvigorated my enjoyment of cycling after leaving college.

When we moved our engagement with the city continued due to family, work, and our child’s engagement in competitive gymnastics with a program situated there. And given those factors, I would continue to periodically bring along my machine. In these latter events, I would typically ride the path from Rockford Bicycle Company into Rock Cut State Park, around the park, and back again. This is a 12-mile loop that offers a bit of hill climbing both up into the park, and along the park road, as well as both urban, woodland, and lake views. In many ways, Rock Cut is a jewel.

Still, it had been several years since I’d ridden the trail. It’s become derigeur to blame such things on the pandemic, but that’s not the case here. Looking into Cyclemeter, my last foray on it was in August of 2018, well before any restrictions went into place; and the time before that had been nearly an entire year before - August 2017. As soon as I started looking up those dates I remembered why - in my notes for the 2017 ride on the trail I wrote, simply: “the condition of both the trail and the road around Rock Cut really, really sucks”. The asphalt trail itself was punctuated by a multitude of frost heaves and cracks, and the ring road around the park itself was full of potholes. It had reached the point where traversing the trail delivered a substantial beating to the rider.

But all of that was over three years ago, so it seemed reasonable to investigate whether there had been any improvements. And besides, I’d never ridden the trail on my Expedition - my last attempt was nearly a year before getting my Atomic Orange machine.

Valencia @ RBC

Valencia @ RBC

I’m glad I did. As soon as I pulled up to the parking lot at Rockford Bicycle Company I could see that the path itself looked to have a relatively fresh layer of asphalt on it. A quick Google Search suggests that this is a very recent change, with the work apparently having been done last month. It certainly looks very new:

Fresh Asphalt

Fresh Asphalt

And it rides much, much better. The new layer of surface also included improvements where the path connected to the couple of bridges along the way - this was often a jarring transition in the past. And this gave me optimism for the route overall, but I kept that optimism guarded - the Perryville path and the state park are governed by different entities. The improvements here did not necessarily mean that things would be better once I got into the park itself.

I mulled this as I rode along Perryville Road. This first 2 1/2 miles of the trail is the urban portion. It is situated alongside, and mirrors, Perryville road, which is a heavily traveled four lane roadway. This section involves crossing four separate intersections (in each direction), three of which are fairly busy and governed by traffic lights. This has always been my least favorite part of the ride, and is probably the biggest downside to the path itself: The crossing are situated at the intersections, which is probably not ideal, but the path was added after the roadways were built. One wants to be alert to the traffic patterns during these crossings.

Getting past that, however, rewards with entry into the winding, tree covered section of the path that parallels Willow Creek up into Rock Cut.

Winding through the trees

Winding through the trees

Winding thru the trees

Winding thru the trees

This is a hill climb - you are riding up the path as Willow Creek falls. How much of a climb depends upon your experience, of course. It gets steeper as you go, and there is no real way to build up speed going into it - it’s all climb on this part - so it’s a challenge for the newer or less experienced hill rider. But getting to the top yields the entrance into Rock Cut:

Valencia @ Rock Cut

Valencia @ Rock Cut

Once crested the hill and could see into the park I could see that there had been improvements. Immediately it was clear that the bridge across the spillway had been replaced (you can see it in the background in the picture above). The old bridge had a wooden roadway with steel bands for vehicle wheel support stretched across it - the new one is an entirely concrete affair. I could also see to the north that some sort of sidewalk had been added along the roadway.

I started across the bridge to follow the road loop around Pierce Lake. The road here has been re-surfaced, and is much improved. I could see also that there is a new, paved bike path off the road that circles closer to the lake. I was interested in following my old route, so I didn’t explore that path, though I would later see that it came out near the concessions and boat ramp.

What I found about the roadway itself was a somewhat …mixed bag. The road was new following the bridge, but seemed less so shortly afterward. Then, as I came down the hill towards the concessions and boat ramp, I discovered another new section of roadway onto which a bike lane had been added! It just sort of appeared there, following that downward section.

Sudden Bike Lane

Sudden Bike Lane

I shifted over to the bike land and proceeded, only to find another 3/4 of a mile or so later (I am estimating) that it just disappeared as the road returned to older surfacing.

Not everything old is new again

Not everything old is new again

The bike lane reappeared again on the south side of the lake.

It’s back!

It’s back!

It doesn’t take much extrapolation to figure out that the park is getting its improvements piecemeal (these done in 2019, according to these plans) . What is notable is that they clearly did focus their initial efforts on what were the absolute worst parts of the roadway around the park. While not all of the surfaces were new, and I did have to steer around some cracks in the older surfaces, I did not have to engage in the rampant dodging of potholes that I recall from my rides in 2017 and 2018. And, while it was very nice to have that dedicated bike lane where it appeared, traffic around the park is governed at a very slow limit (20 mph, I believe), and even with the hills and curves, most sight lines are fairly clear. If you are comfortable riding on the road in general, you will be comfortable here, with or without the dedicated lane.

The hills around the park road do mostly have lead-ins to the uphill sections, so you will mostly have an opportunity to gather speed going into them. The loop around the park itself is a little over four miles, bringing you back to the top of Willow Creek.

From Willow Creek it’s downhill all the way back to Perryville Road. It isn’t a downhill free-for-all though. The path is fairly heavily used, and the winding and twisting nature of it through the trees means that suddenly encountering others is an imminent event - you have to moderate your speed here (my fastest speeds were on the downhill road sections within the park). But given the woodland scenery, it’s hardly a sacrifice to set aside a bit of the downhill speed.

The rest, is, of course, just a reverse of the beginning of the ride. For my part, I found that the Expedition handled the route quite well. I was able to maintain speeds here above my prior rides on my Catrike Pocket, which I wasn’t sure would be the case, as the 20” rear wheel on the Pocket might have given it the advantage. In the end, I was on par with my times on my old Cannondale, tho this might simply owe to the fact that I’m riding a lot more than I was back then.

I had put off writing about this route back in 2017 and 2018 because I really did not feel I could recommend it back then - the poor road surfaces really made it an unpleasant ride. That has changed, now, with the improvements noted here. The new surfaces are wonderful, and within the park itself they appear to have made good choices about where to put their efforts - the older surfaces, where they remain, are good enough to allow for a decent ride.

I can’t recommend this ride as a destination, per se. It’s too short, and too much of it involves paralleling a major roadway to suggest that anyone travel just to ride on it. But if you are traveling out towards Rockford anyway, and are looking for a place to ride, I think this route offers a good reason to bring your cycling machine along.

I’ll note also that it appears that there are plans underway to extend the Perryville path up into the town of Roscoe and connect it to the Stone Bridge Trail. It looks like that’s likely a couple of years out yet, but if/when finished would connect it to a couple of the rail-trail systems in the area, heading out into more rural areas. For folks who are interested, it may be worth it to check back on that.

The Hilly Hundred by Erin Wade

TL:DR

I wanted to see whether my Catrike Expedition and I could successfully manage a two-day, extended event oriented specifically towards hill climbing. Everyone knows recumbent trikes aren’t great at going uphill, right?

This is a long one - scroll on down to “Wrapping Up” if you want to skip to the answer…

It’s all about the hills

It’s all about the hills

Why?:

Despite the fact that this year’s Hilly Hundred was the 53rd occurrence of the event, I only just learned about it this summer when someone mentioned it on Facebook. I looked it up - the event has a pretty informative website, which gave a pretty clear idea of how it was set up.

I was intrigued. I can’t say why exactly - group events are not really my thing - but this one drew me in a bit. I think a large part of it was the challenge that the event represented. I’d never ridden 100 miles over a two day period - in building distance this summer the closest I’ve gotten is 88 miles, with an extremely uneven distribution of 75 miles on one day, and 13 the following - not similar at all. And that 75 was and is my longest single distance ride to date.

And - of course - none of that is through hill country. In training I’ve tried to find routes that aren’t entirely flat. I’ve said here many times that Illinois isn’t the pancake-shaped land that everyone not from here pictures, and that is true, as far as it goes. But it’s certainly not a paragon of elevation changes either. My other two events of the season - the Freemondo and TŌSOC - did offer more climbing, both occurring in different parts of the Rock River valley. But for the most part, here in northern Illinois, even the river valley roads primarily have rolling hills - you may travel upwards for a while, and you can definitely feel it, but the word “steep” doesn’t generally apply.

Plus there is the phrase that you see over and over again: “Trikes aren’t good for climbing”. I’ve read it many times in online discussions, and been known to provide variations of it myself - things like “faster downhill, slower up” when being asked about how they compare to upright machines. It’s said so often that it has become, for me, an uncontested - but also untested - “fact”. And when I first started to ride the trike it seemed completely correct. It felt harder to climb on the trike than it had on my Cannondale SR400. Certainly on the trike you lack the ability to stand up on the pedals and climb. But then again, when I first moved to the trike I was also using my leg muscles differently, and was riding a heavier machine - the Cannondale weighs in at 22lbs, while my first trike, a Catrike Pocket, comes in 11lbs heavier. And there is a somewhat different technique to dealing with hills on the trike - since you really don’t have to worry about cross-chaining, there’s no need to select your gear going into the hill. Instead, whenever possible, you want to go into the rise as fast as you can, and then downshift all the way up to keep spinning. Of course, you can’t always count on going into a hill at speed - sometimes you are starting at the bottom. But in those cases, at least you have the benefit of low gearing, and there’s no expense of energy or effort towards maintaining balance at slow speeds.

All of which is to say that while I’ve continued to agree with the idea of trikes not being good for climbing, I haven’t really felt that way in practice for a while - hills are just a part of the ride. I think of my Catrike Expedition as being a great all around touring machine. But what if that tour actually included some real hill climbing? So it seemed like riding in this event would actually put that to the test.


Enjoying this post? Check out our Cycling page for links to other cycling articles on Applied Life


The Event

As noted above, this is a two day ride over the Saturday and Sunday of a weekend. But it’s really a three-day event, depending upon how you approach it. Ellettsville Indiana is about four and a half hours away for me, so I traveled down for the event the afternoon before. They have accommodations for tent and RV camping at the event site (which is the town’s high school and junior high complex), and also have an area in the junior high school for people to sleep in sleeping bags. Understanding that people will travel in ahead of time, all of that is open and available the Friday before.

There are several nice features that go with the accommodations. When you register you can sign up for breakfast at the high school on both days, as well as supper on Saturday. They have showers available - I’d actually never seen a shower trailer before:

Shower trailer

This is something!

This is something!

This was an awesome option to make available for anyone who is camping, particularly given that you are likely to get very sweaty at least couple of times into this experience. And - to their credit - the shower trailer is available late into the second day, which meant I could shower before driving the 4+ hours back home.

And one of the nicest items in terms of accommodation is that they have a secure bike storage area. This gives you a safe, indoor location to keep your machine when you aren’t riding. I hadn’t caught this on the website at first, and because I’d decided I was going to car camp, I was debating about whether I should bring along the roof rails to put my trike on the Outback’s roof for the overnights. That would have worked, of course, but it would have been additional work, and it would have left my machine out in the elements, and it did rain overnight on Saturday.

All-in-all, this was a well organized and supported event. There were many volunteers, all pleasant and helpful when you needed them. The routes - there are long and short routes set up for each day, 38.4 and 50.6 miles on day one, and 38.7 and 53 miles on day two - each have three rest stops built in. And to say “rest stop” is really to undersell them. Each stop has fruit and carbs available…

Fruit!

Fruit!

And carbs!

And carbs!

…and a water truck. I actually left behind one of my spare water bottles on day two to save a little weight because I knew I’d be able to re-fill. There are bathroom facilities (porta-potties) at each area. The second stop on both days, which I heard several veterans of the ride refer to as the “lunch” stop, had Schwann’s ice cream available. And each of them had both a medical station and a bike repair crew. And all but the last one on day two had live music playing:

Music!

Music!

The music was in a variety of formats - some folk, some New Orleans style jazz, some 50’s rock. And the rest stops gave an opportunity to see the huge variety of bike types that were in the event. Obviously there was an abundance of the high-end road bikes that you would expect, but there was quite a bit more variety than I would have anticipated.

7085D252-5939-404E-A481-BAD248748F5C.jpeg

I saw at least two or three tandem bikes in the event:

Riding in tandem.

Riding in tandem.

And there were a number of folks with e-bikes of different types. This wasn’t surprising in and of itself, but I was a little surprised to see a couple of folks riding electric cargo bikes with the long, low-slung cargo area on the back. I unfortunately didn’t catch a picture of them, but they were there. And - to my surprise - there was a tiny handful of trikes:

Trike!

Trike!

Yup! Trike!

Yup! Trike!

I actually saw three in addition to my own - I ran into one person the morning of the first day prepping his orange TerraTrike, and saw it later in the storage area, but I never encountered him on the ride itself. I saw the other two on day two, though the owner of one said that she was there for the first day as well. The ride has a casual start - they just ask that you begin no later than 10AM so you can be done at a reasonable time for the volunteers to get a break - so it’s quite possible to miss someone if they start at a different time than you.

But given that I usually see none at these events, it was very cool to encounter some this time around. And it suggested that I wasn’t the only person thinking a trike was a perfectly acceptable machine to take along.

The Ride

This is a well laid out course. The organizers provide you with paper maps of the route, it’s pretty well marked out with the typical symbols at intersections, and it’s available through Ride with GPS so that you can have turn by turn directions.

Though Ellettsville is just northwest of Bloomington Indiana, and not terribly far from Indianapolis, the routes are mostly rural. And a fair portion of the route takes you through the Morgan-Monroe State Forest, which provides for some awesome views:

Trees

Trees

Angels on bikes…

Angels on bikes…

And even when you weren’t in the forest, the route often alternated between open agricultural regions - corn and soybeans are the name of the game here, as they are back home for me - and tree-covered byways. And sometimes there’s a mix:

Woods on the left, beans on the right.

Woods on the left, beans on the right.

Probably due to the hilly nature of the region, this part of Indiana did not succumb to the square-mile grid system that we have in much of northern Illinois. This means that you get to ride on roads that wind and twist their way through the countryside even as they rise and fall.

Twisted, sister…

Twisted, sister…

Curving right…

Curving right…

Because it rained overnight ahead of day two, there were sections within the state forest where the roads were still wet. On the downhill sections I had a few occasions where I could feel the rear wheel step out a little sideways as I navigated through the curves. This is mostly fun, but I did find that I needed to remind myself that I had no earthly idea what I’d encounter around the next curve, and I slowed myself down a bit.

On the first day, the long route takes you past kind of an informal additional rest stop - a little shop for the Musgrave Orchard.

Cidery

Cidery

They had fresh cider and water for those who were interested (it’s also served at the formal rest stops). I always bring a little cash along on the trike for just these sorts of opportunities, so I stopped and picked up a pint of cider for the ride.

Getting juiced up

Getting juiced up

This was about 2/3’s of the way through day one, which meant I was at a point where that cold cider was especially refreshing.

Probably one of the more challenging things for me to adjust to was the size of the event in terms of number of people. You can see from the rest stop pictures that this is a very well attended event (and I heard rumblings from some that enrollment was down this year - probably an effect of the pandemic, which had cancelled it last year). I’d anticipated that - it’s clearly noted on the website. But since I don’t often do group rides, and never have done one this big, I found there were some new challenges for me based on that.

People

People

More people

More people

For example, it’s a different riding style on the road. When I ride on my own out in the country, I generally take my lane and I find this works well. In a group, understandably, you want to ride to the right and pass on the left, ideally with that passing occurring in the same lane. Because of the volume of people, I was rarely, and maybe never, in a spot where I didn’t have other bikes at least in view, and often was mixed into a group. This meant that, at times, those other people were an obstacle to contend with. So, for example, there were downhill sections from time to time where I could not get up to top speed heading into the next rise because I couldn't get around the people in front of me; and similarly there were uphill components where I wasn’t able to maintain the speed I entered the hill with because of people in my way. It’s a simple reality of the event, to be sure, but it was one I hadn’t considered going into it.

And of course, because of the large variety of people there, not everyone really understood the rules that go with a group ride, so you got a variety of levels of compliance. And to be completely fair and honest, I do groups very rarely, so I’m sure my application of the rules was less than perfect as well.

The Hills

Of course, ultimately this thing is all about the hills - it’s right there in the name. The entire course on both days largely consists of at least rolling hills - very little of the course is on the type of flat territory that I commonly see when I ride out my driveway. Mixed into that rolling landscape are a few significant rises and falls. This is the elevation graph from Ride with GPS for day one…

…and the one for day two:

0749AFA0-65AE-454F-9C60-7503A23428A5.jpeg

But while most of it is rolling, there are some significant hill climbs in the mix, with grades reportedly ranging from 10% to 20%. Some of the hills are recognized with their own names - I specifically recall three - Camel Back, Bean Blossom, and Mount Tabor - though there are probably others.

Ups and downs

Ups and downs

Camel Back appears on day one, towards the end of the ride. Just ahead of it were two consecutive hills that I don’t believe had names, but were quite steep with no real downhill lead-in. I crawled up the first one, entering it in first gear and grinding my way up the hill, pressing against the back of the seat for leverage. Reaching the top of the first had my thighs burning towards the end, but I felt a sense of accomplishment. When I reached the second, I was stuck with the same approach, and when I hit the top I had to stop and rest.

That rest stop took place in someone’s driveway. I would have felt bad about that, but I was neither the first nor the only person to make that choice. The house was for sale, and chatting with a couple of the other folks there while recovering we wondered if they weren’t moving to get away from all of these damn cyclists in their driveway…

I’d guess that I paused there for at least 15 minutes, which absolutely sounds like, and is, a long break. But I’d skipped the third rest station, reasoning that it was only 9 miles from the end of the ride, so I wouldn’t need it. I wonder, though, if I’d have had an easier time with those two hills if I’d taken that break.

In any event, the top of the second hill also provided a considerable drop that led into Camel Back, so I was able - after some rest - to apply the better hill-climbing strategy: I entered it going fast, and shifted down all the way up.

The other two climbs are on day two, again towards the end of the ride. Bean Blossom came up first. I didn’t catch a picture of the sign, but I believe it said it was 1.4 miles (I see pictures from prior versions of the event that put it at two miles, but I think the route may have been a little different) with a maximum 17% grade. This is right in the state forest, and what little I could look at of the scenery while riding it was beautiful. But climbing this took most of my attention, as (I’m sure on purpose) there was absolutely no downhill on the approach. It was a grind all the way up. Once you get to the top tho, you get to appreciate the view:

At the top

At the top

Time for a break

Time for a break

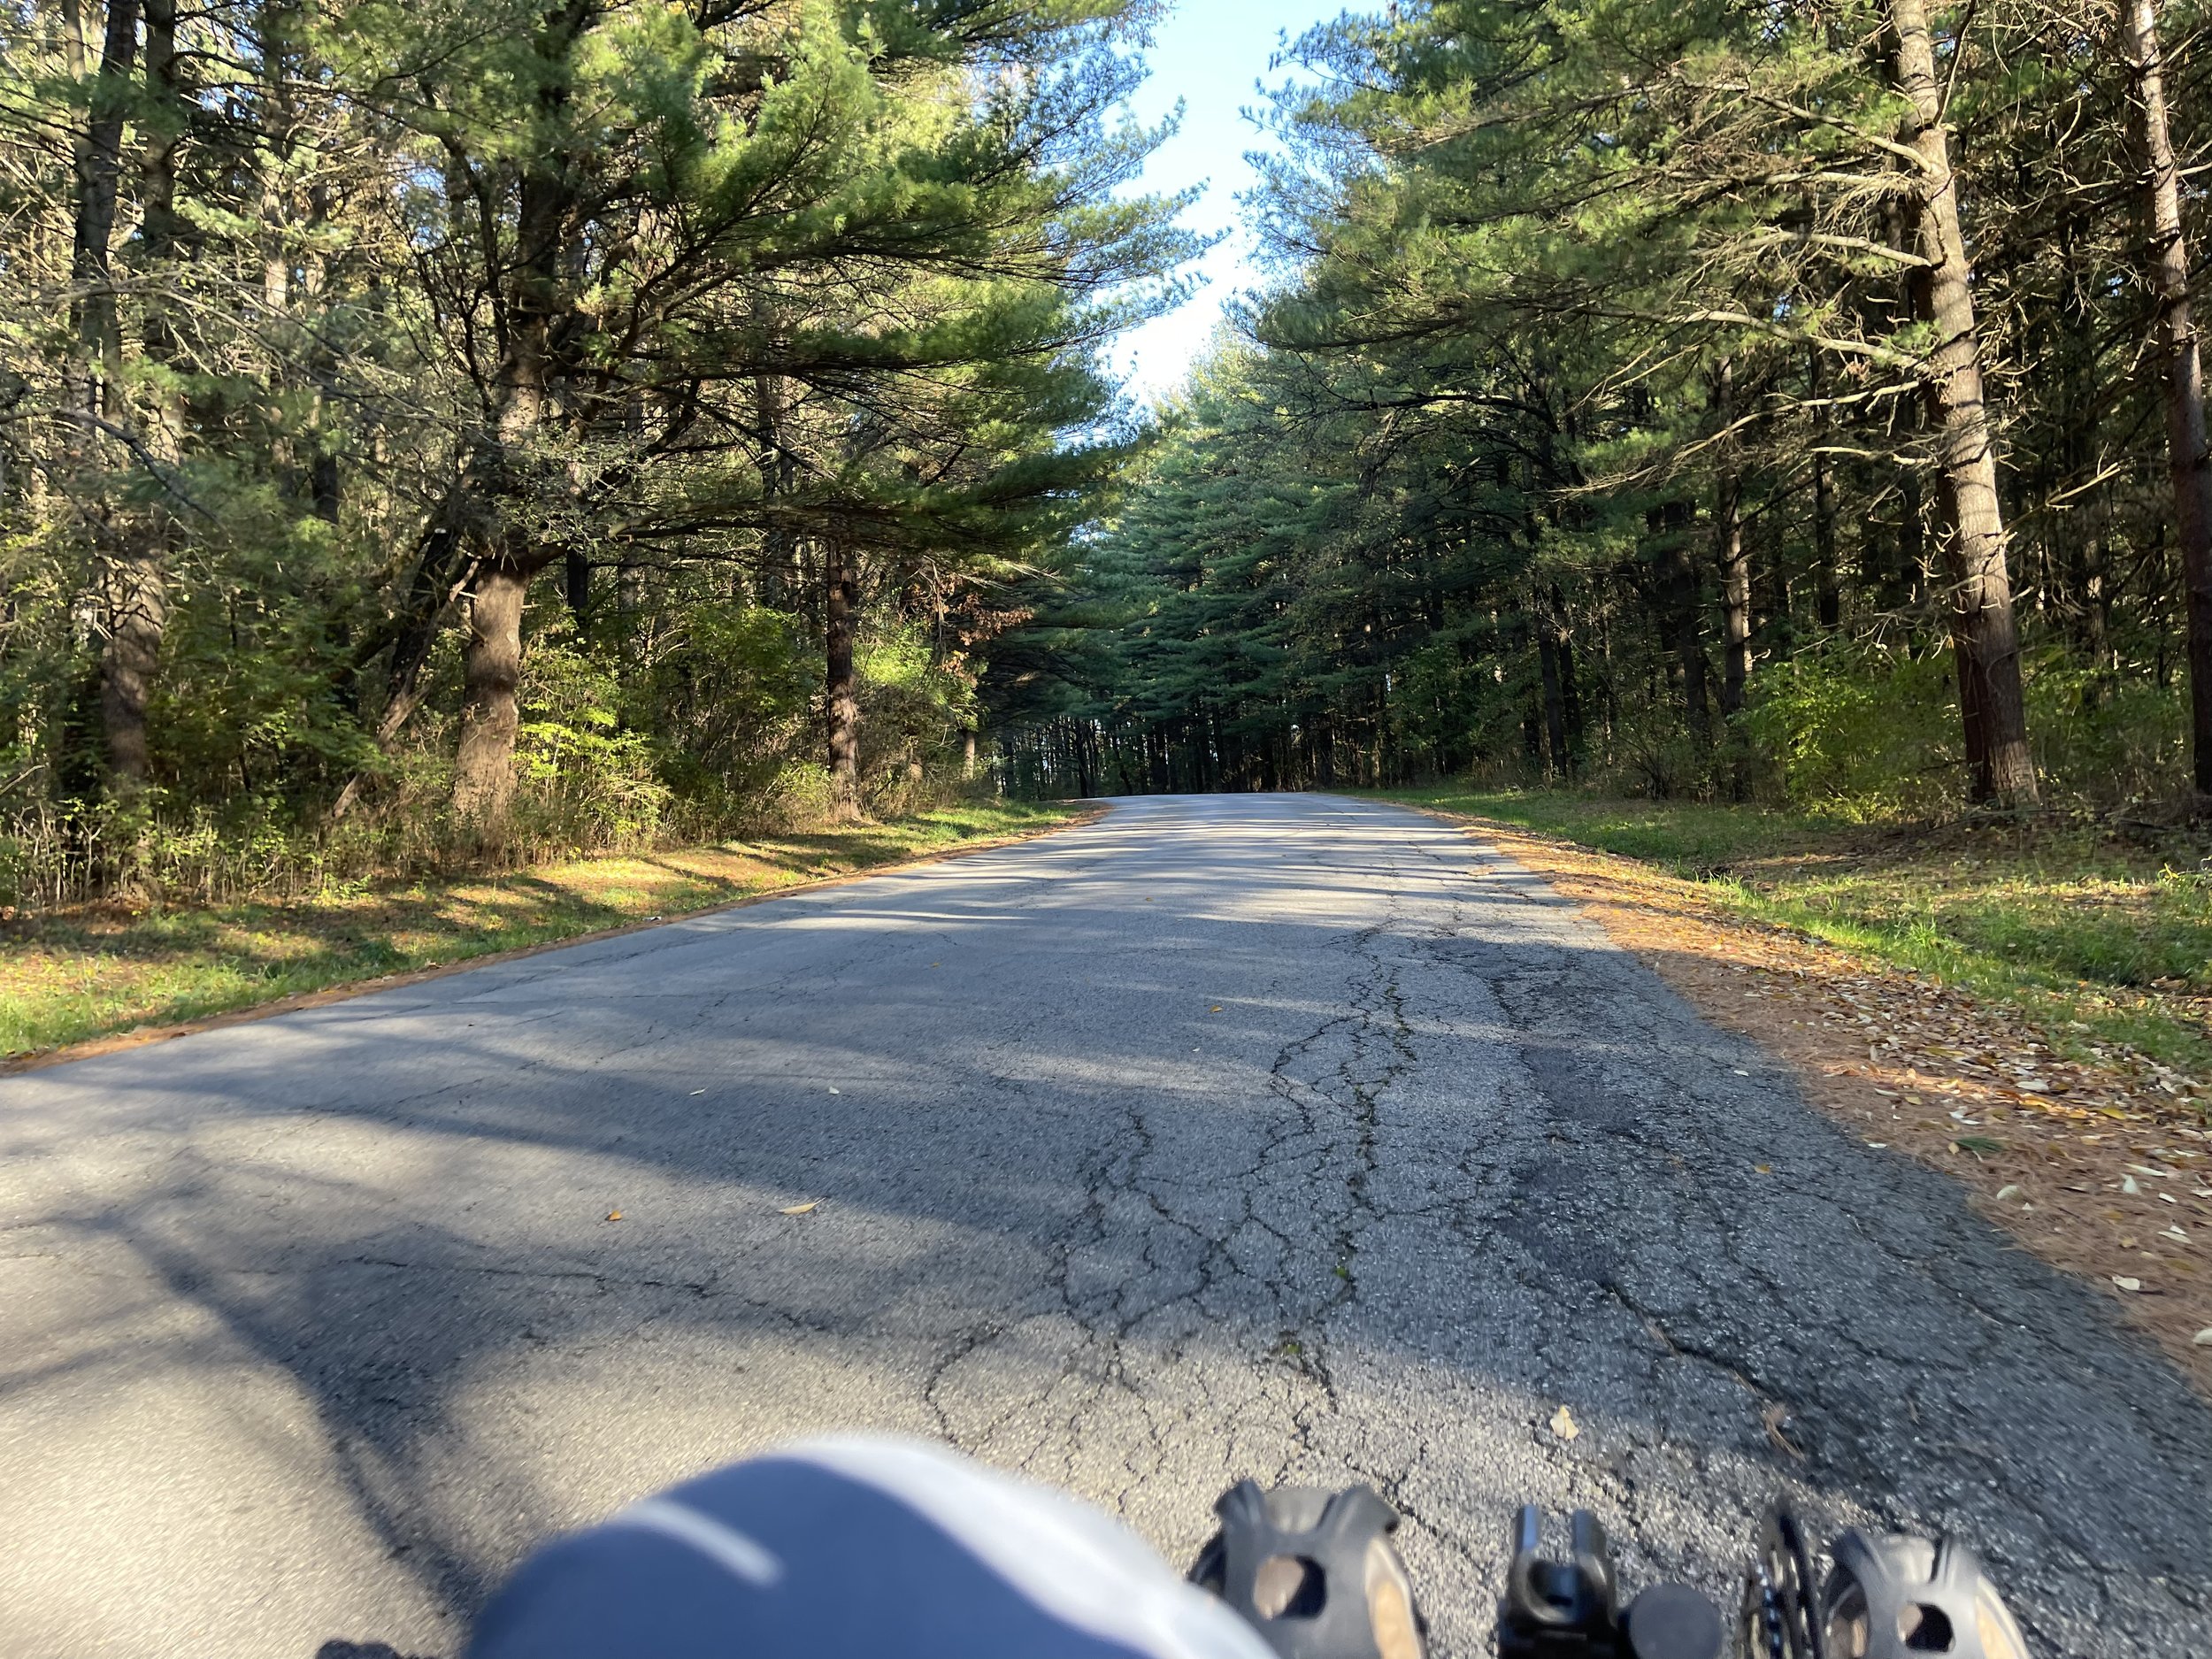
I - and many others - rested there for a bit. The reward of the long climb is that there is also a long, sweeping and curving downhill sweeping through the state forest.

And then - at almost 50 miles in - you encounter what they call Mount Tabor. I’d heard several people reference this, particularly at the second rest stop on day two, because it follows a few miles after that stop. I spent some time at that stop talking with Jim and Sherry - Sherry was one of the handful of other trikers on the ride, and Jim was her husband. They were a delightful couple, and they helped me mentally prepare for this particular challenge. And everything they said about it turned out to be true.

Mount Tabor is not long - 0.2-0.3 miles or so. But it’s at a 20.2% grade. And you enter it coming around a corner with absolutely no downhill lead-in. It is absolutely the steepest thing I’ve ever ridden up on any human-powered machine - upright or recumbent.

I shifted all the way down, and started in.

The Question

Being in an event with only a tiny smattering of trikes I did have people periodically ask me questions about my machine. Now one soul - who I’m pretty sure thought he was being very clever - asked me how many cases of beer I could carry on my trike (at least two if I hook up the trailer). But this being a hill climbing event, you can imagine what the primary question was:

How is that thing at climbing hills?

I’d expected the question, and typically gave the standard answer first - “slower on the way up, faster on the way down”. For folks who were interested in more detail, I talked about the difference in strategy from an upright as well.

But of course, I was also at this event to provide a more detailed answer to that very question for myself. And what I found was a more nuanced outcome that surprised and pleased me.

Was I slower on the way up? I think the real answer is: it depends.

It depends on what you are comparing yourself to. I was absolutely being passed on the uphills by people on high-end road bikes, which is, at this point, a familiar experience for me. But the thing is, the Expedition isn’t the trike equivalent of a high-end road bike. I would say that it is far more consistent with the idea of a long-distance touring bike. As such, it definitely weighs more - 15-20lbs more dry, and a little more still with my gear on it. As such, I don’t expect to be faster than those machines. By the same token, I wouldn't expect someone to run out and get an LP tank for the grill on their 18lb Trek Madone either.

But: When I was climbing most of those hills, even without a chance to enter them at speed, I was often passing people. I passed people on mountain bikes, steel touring bikes - I swear I even passed a few people on e-bikes on a couple of uphill sections. It’s hard to check speed when you are focused on climbing, but when I could I was usually moving along at around 4mph in first gear on the uphill slogs. Slow? Absolutely. But faster than some, and still moving uphill.

And when I could enter at speed, the technique I’ve described - which will almost certainly be familiar to veteran recumbent riders - worked marvelously. It always gets harder towards the top, of course, but I’d put the experience of spinning and shifting down up against any upright climb, standing in the pedals in low gear any day.

Which takes me back to…

Mount Tabor

I entered Mount Tabor in first gear, and barely moving. Thanks to Jim and Sherry I was mentally prepared for it. I was also prepared for the possibility that I’d have to get off and walk the trike. I had not had to do that up to this point, but it seemed a possibility here.

I braced against the seat and pushed against the pedals. I could barely hear anything over the sound of my own breathing. My legs were burning, I was drenched in fresh sweat, and my speed up the hill seemed glacial - I could not let go of the grips to look at my watch, but I’m sure I was not maintaining that 4mph speed from earlier hills.

And? The pattern stayed true, even at the exaggerated angle that this hill presented. The trike was slow, and hard to get up the hill. But I was passing people on the way up - some walking, and others struggling to stay upright, standing in the pedals. The ability of the trike to remain stable at very slow speeds was absolutely an advantage on this climb, and often on the ride overall.

I made it to the top on pedal power alone - no stopping, no walking.

I did, however, take a break at the top. I was happy to get there, but I still needed a rest.

The Other Way

The part that I’ve mostly left out of all of this so far is the additional bonus that goes with taking a trike out for this event: The downhills.

I did mention that there was a downhill section following Bean Blossom Hill that took a sweeping course through the state forest. And there were several others like that. I think, at this point, that I’m questioning the absolute truth of the idea that trikes are slower uphill (at least with comparable machines and riders), but that they are fast downhill is absolutely the case.

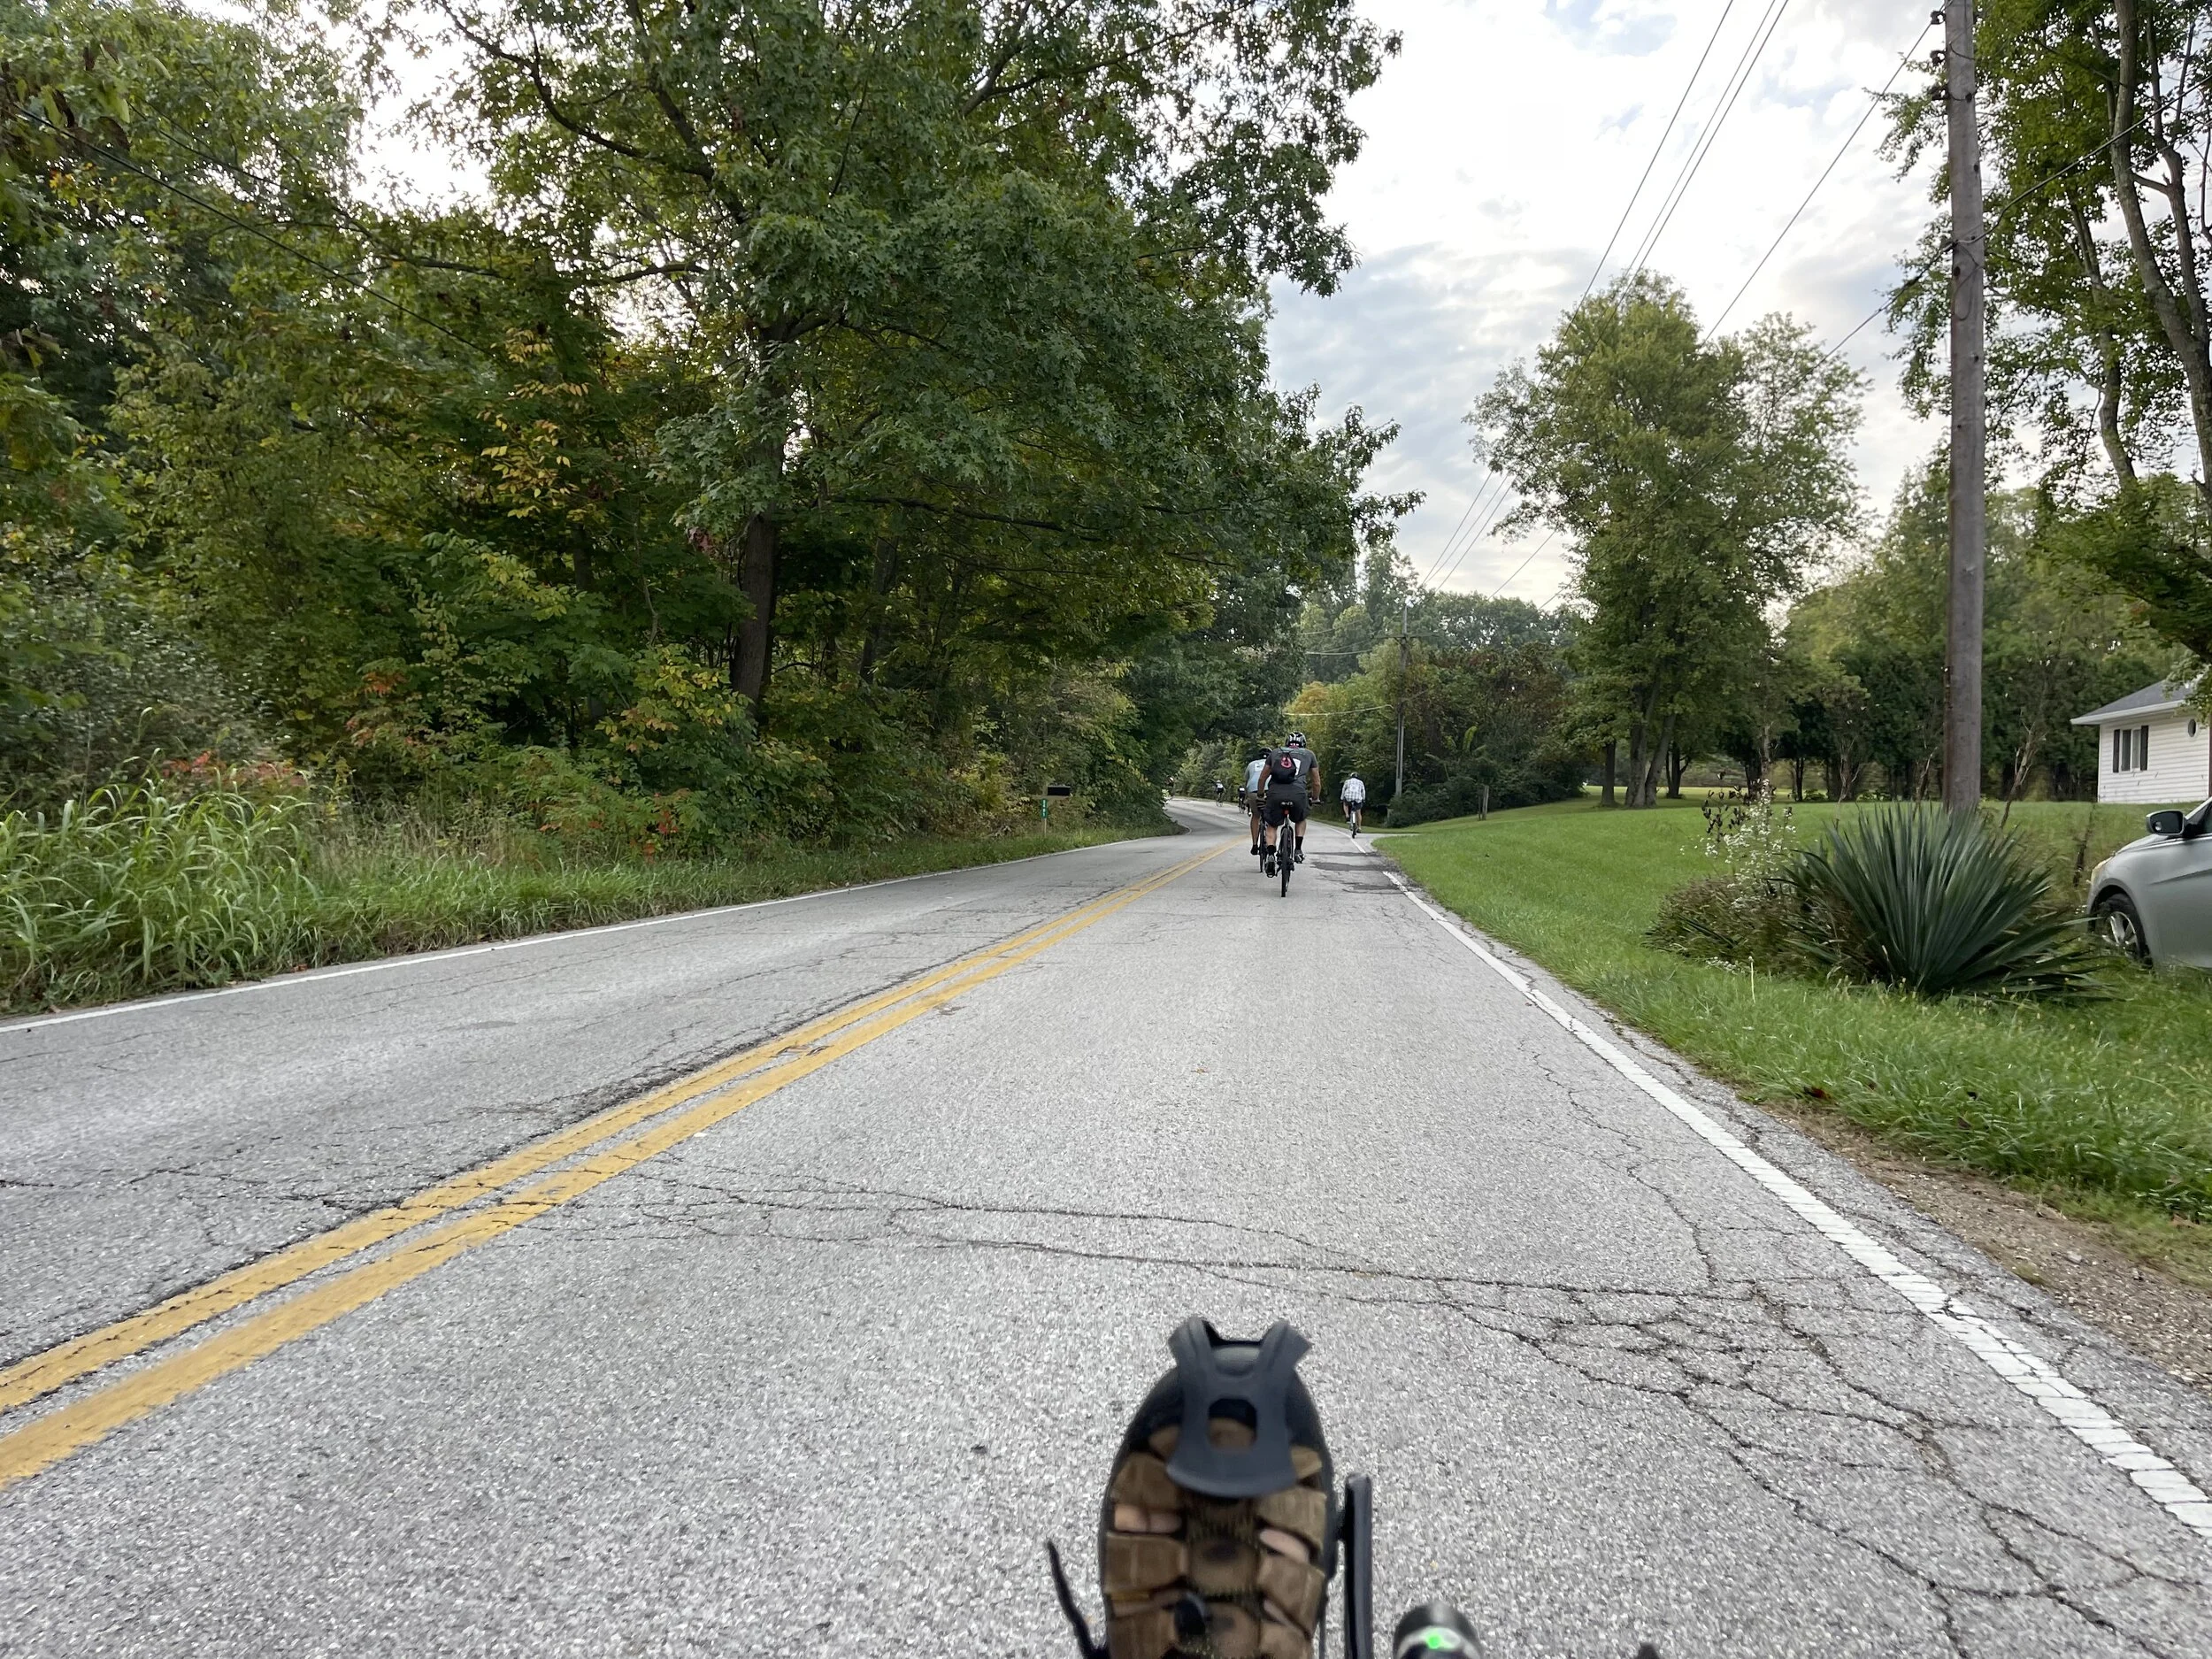
My hands down favorite example of this was a section on day two early into the ride. This was a long downhill curving to the left, just ahead of a turn into Cascades Golf Course. I hit my top speed for the day - about 38mph - going down and around that curve. It was a beautiful human-powered go-kart moment, leaning against the curve and passing, well, tons of people. That moment by itself may have made the whole event for me.

Wrapping Up

I wanted to see if I and my trike could manage an event focused on hill climbing, and I wanted to test the common, received wisdom that recumbents aren’t good at climbing hills.

I feel like I got the answers I was looking for on both counts. The Expedition and I managed to come through the entire event together - I never had to get off the trike and walk. And the relative disadvantage of not being able to stand up in the pedals appeared to be balanced by the advantages of the high speed lead in on many hills, and not needing to work to stay upright when going slow. There is a real-world benefit to having the option of just crawling up a hill.

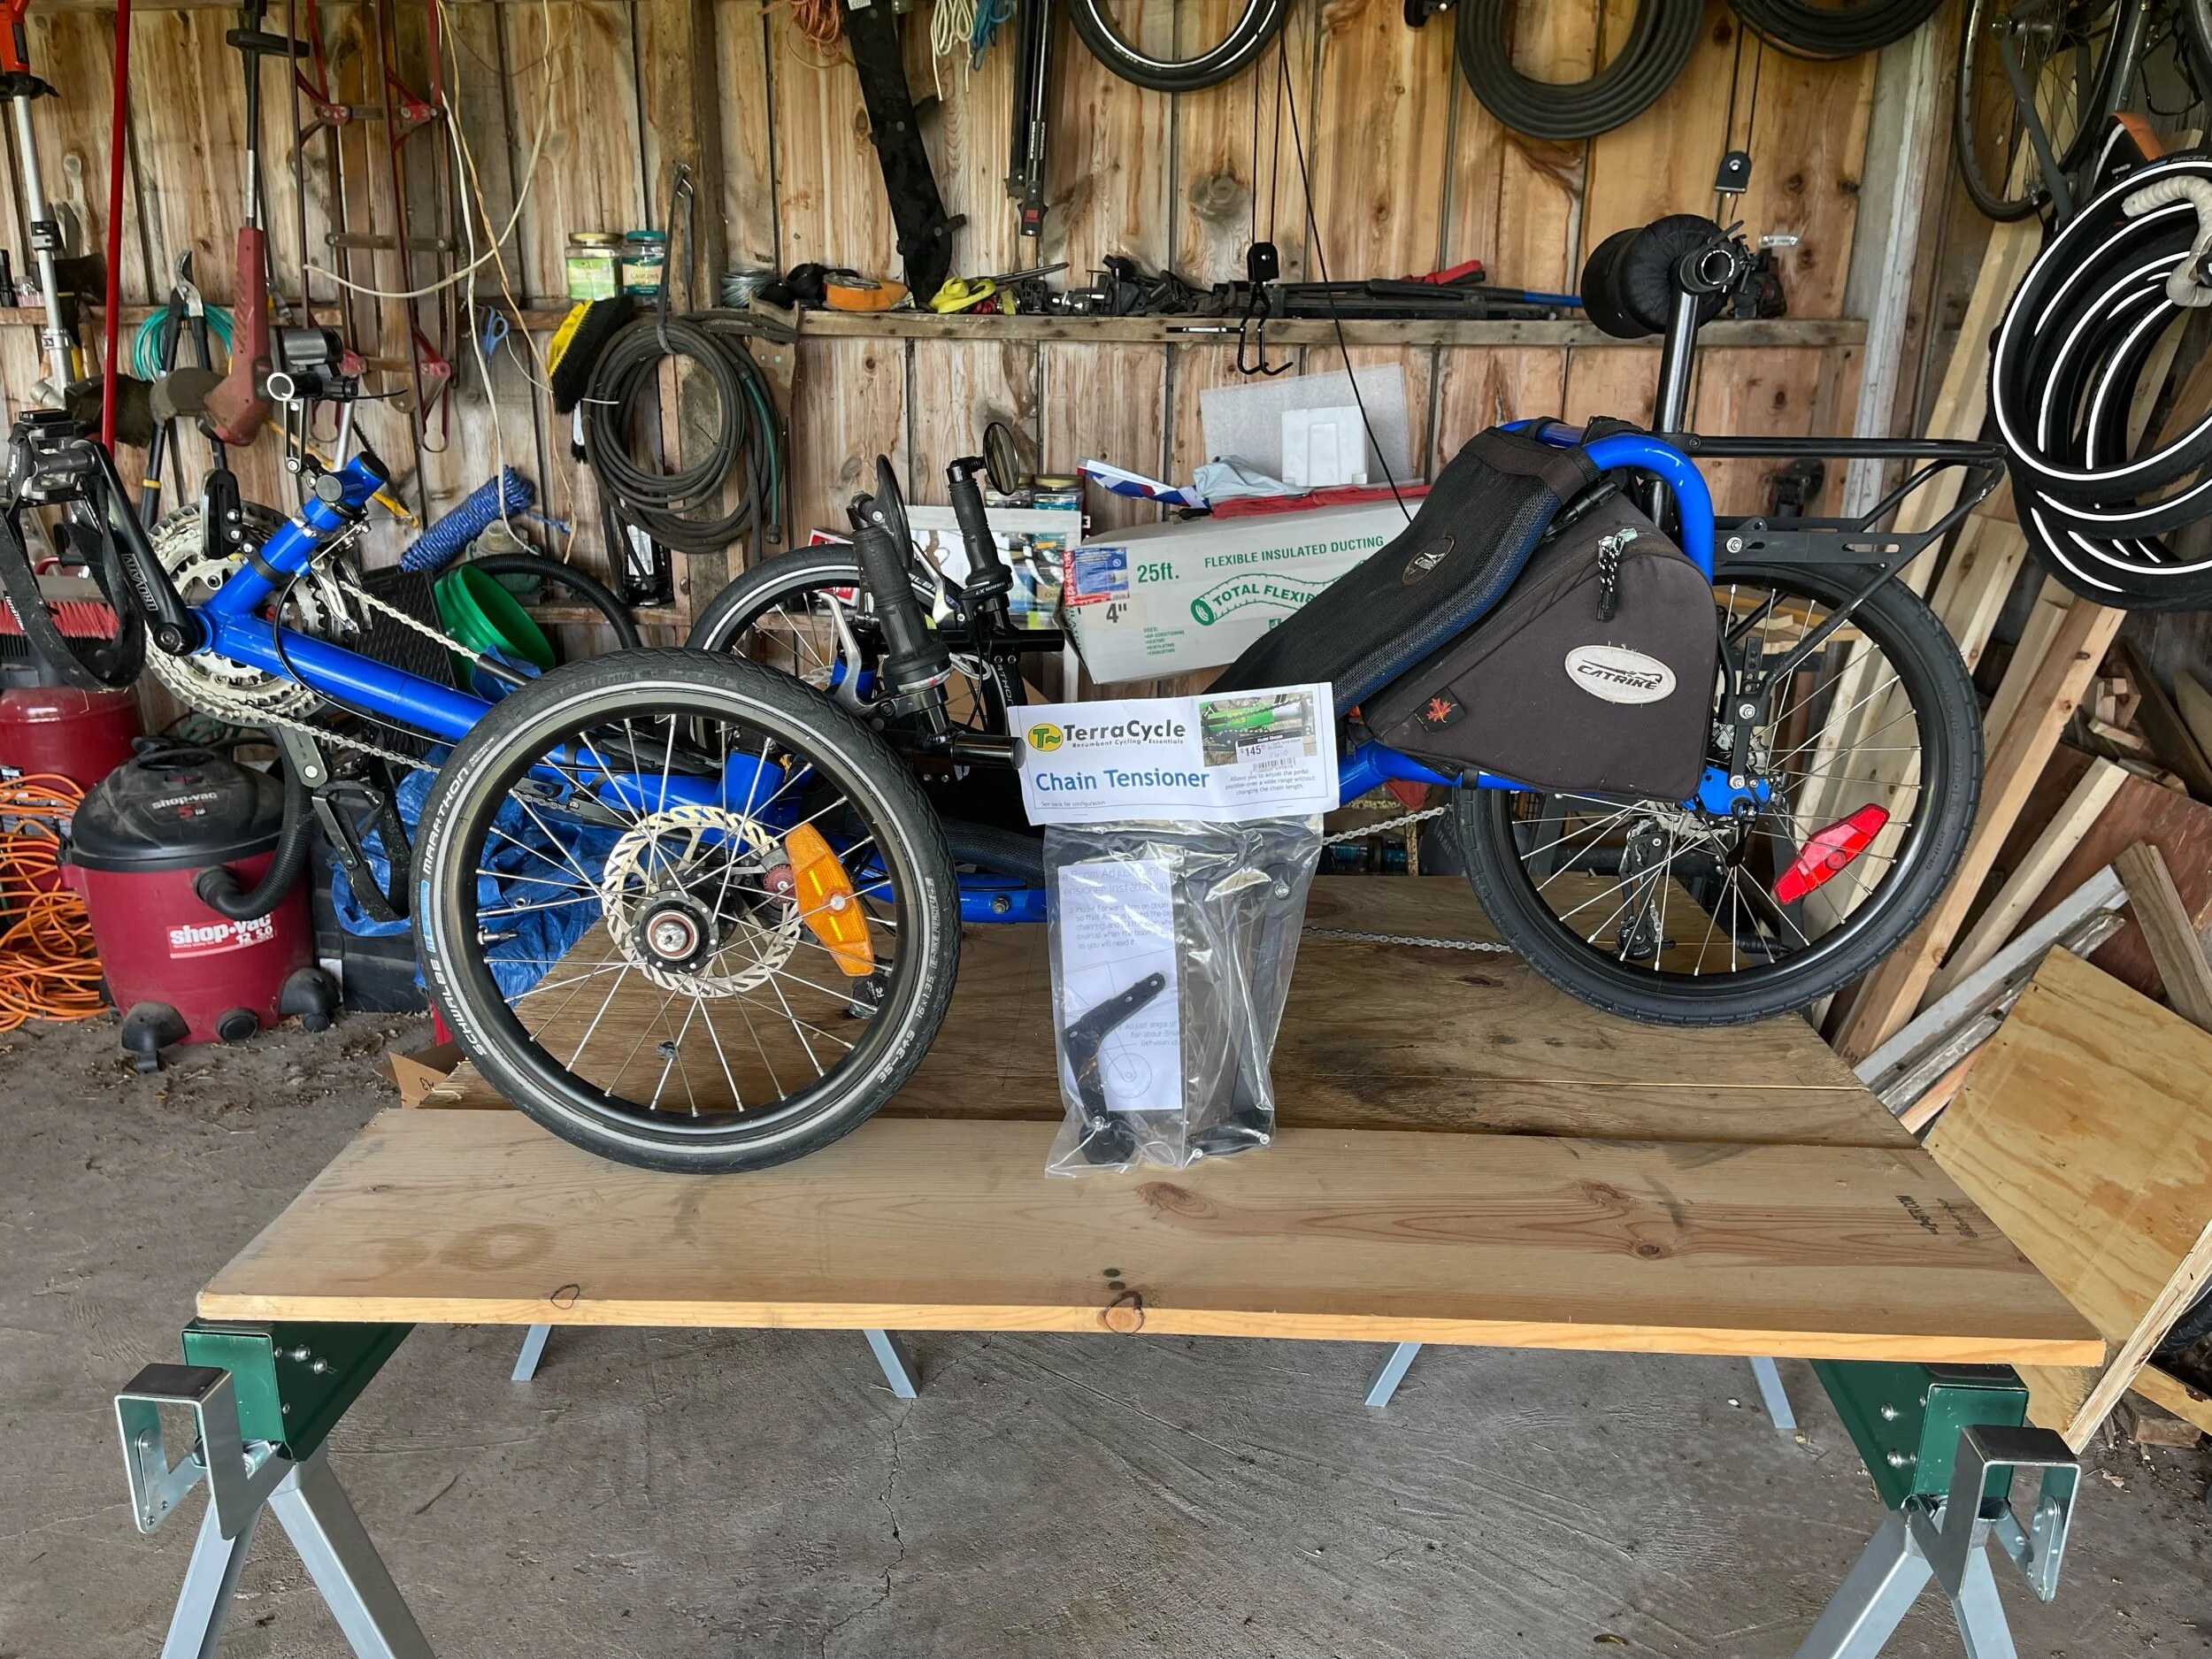
When I look up things online about the event, in different forums, I find people talking about which machine they would take to the event and/or changing out their gear sets to different ranges to manage the hills. And if I’m being honest, I had considered asking MLW if I could take the Pocket for this event instead of the Expedition specifically because of the lower gear ratio the 20” wheel would give me over the 26” wheel on Expedition.

I didn’t, because in the end I wanted to see what my touring machine would do - to answer that question about whether it would still be useful if my “tour” took me into hilly country. The answer, I’m pleased to say, was a resounding “yes”.

Would I recommend this event to others? Absolutely! It’s well run and well supported. If challenging yourself to a long-distance hill climb group ride through beautiful countryside sounds good to you, this would absolutely be the way to go.

For myself, I’m not sure whether I’ll return. I enjoyed myself a great deal, but I also found the answers I came for. It’s a very long weekend away otherwise.

But then when I think about that long, curving downhill sweep… Maybe…

Laid Back Benefits by Erin Wade

Somehow, towards the end of the week, I managed to tweak my middle back area (I am blaming an intransigent office chair). This was somewhat unusual for me - I’m not a stranger to back pain, but my issues in this area, when they occur, are usually in my upper back, around the shoulder blades. This was a relatively new experience.

I did the usual things - ice and ibuprofen and backed off some of my exercise routine. It helped, but the area remained tender, and I debated about whether I should back off my riding schedule.

The thing is, this wouldn't even have been a question I’d have asked myself back when I was riding uprights. The uncompromising position that my road bike requires would have been an automatic “no” for any version of a sore back.

As I thought about riding on the recumbent trike, tho, I pictured the role that the back plays in the activity. It’s possible, of course, to engage the upper body on the trike - push back against the seat and pull forward on the handlebars to grind against the pedals. But you don’t have to (and if you are, you are doing it wrong). The better approach in general is to spin, which engages the legs and a maybe a bit of the core. In any case, it seemed very possible to just leave my back out of it.

So I decided to give it a shot.


Enjoying this post? Check out our Cycling page for links to other cycling articles on Applied Life


I took a relatively short outing to begin with. Aside from a bit of a twinge getting in and out of the seat, which I’d expected, it was absolutely fine. No pain while riding, and while my back wasn’t better after riding (and why would it be?), it wasn’t worse either, which is the important part.

So today I decided to push it a bit. I started earlier than usual to avoid the heat that we were expecting in mid-day (tho it was still running 94% humidity), and set out on a 27-mile route. The ride itself was not without complications - there were a couple of gravel sections that had clearly been recently resurfaced, which meant (for me) that I had to alter the route - but none of it was due to my back. In that department everything was essentially unchanged.

So it was an unqualified success - score this one for the recumbents.

This is maybe not all that surprising. Based on what you see in cycling groups, a fair number of people come to recumbent trikes because of significant health issues that may cause problems with balance or similar. It’s awesome that they make it possible for people to continue (or in some cases, begin) cycling after developing those issues.

I’ve been fortunate enough not to have such issues myself, at least not thus far. But what this event really illustrates for me is that the benefits of the trike apply at a lower level of injury as well. At this point in my life, cycling is my primary means for exercise, especially cardio. That hasn’t always been true.

For many years, off and on, my primary exercise source was martial arts. I realize, as I think about it, that my sore back would have sidelined me if that were the case. The same would be true if I were a runner (heaven forbid), or if I were still riding upright. I’d be out for several days, at least.

And, as you consider it, if I were someone who cycled to and from work on an upright machine, I’d be stuck looking for another way to get there until I healed up.

I’ve often thought that recumbent trikes were the natural, inevitably evolution of the bicycle. I think their adoption was sidelined by the emergence of the automobile at about the same time as the technologies that made both types of machine more practical (something I discussed in greater detail a few years ago). My current situation further cements that idea for me - the relative benefits of the recumbent would allow others to continue to use it for any given purpose even when using an upright bike isn’t an option.

I don’t think they will replace uprights any time soon (nor do they need to), but I do think we’ll continue to see them grow in popularity as people experience them and see the advantages.

Gobbling Up the Chain by Erin Wade

Ask any regular rider of a tadpole-style (two wheels in front, one in back) recumbent trike and they will be happy to tell you about the many advantages that their ride of choice has over traditional, upright or “diamond frame” (DF for short) bikes. They are more comfortable in pretty much every way, less fatiguing to ride over long distances, present a lower profile to the wind, and wherever you go, you have a chair when you arrive…

Yes - maybe a little too happy to discuss it.

But then ask that person if you can ride their recumbent trike - take it out for a spin to experience that enjoyment for yourself - and you will likely see a bit of a pained look on their face, and you will then undoubtedly experience them seeming to size you up, looking you up and down.

In this moment you will wonder:

Do they not trust me? Are they trying to sort out my moral character before they let me try their expensive toy? Do they think I might ride off with it and never come back? I’ve known this person for years - how could they think that I’d do something like that to them…?

And it’s possible that there is a little of that in there - recumbent trikes are certainly a larger investment than those DF bikes at the big box store. But you feel like they are sizing you up mostly because they are literally sizing you up - trying to decide if your height and theirs is close enough for you to fit on the machine.

This is because most of the models of tadpole recumbent trikes are sized to the rider, and changing the size requires the rather tedious process of adding or removing sections of chain. That’s why you got the pained look - the simple question of “can I ride your trike” isn’t really a simple question - it’s a request for a modification to their machine that is messy, time consuming, requires special equipment and material, and may or may not be within the capabilities of the trike’s owner. And because of the physical layout of a trike, anything beyond a minor variation in size and shape between you and the trike’s owner is really going to prevent you from being able to comfortably be able to operate the machine.

On a DF bike, it’s mostly just a matter of raising or lowering a seat. And in this case, yes: Advantage DF.


Enjoying this post? Check out our Cycling page for links to other cycling articles on Applied Life


In a lot of ways, through the routine ownership of a trike, this is a minor issue. If it’s your trike, and you are the only one who will be riding it, once the machine is sized for you it’s really all good. It really only comes up as an issue if you want to share the machine with or between others.

But what if you do find yourself wanting to share a trike? There is a solution - TerraCycle makes chain-tensioners - sometimes referred to as chain “gobblers” - which allow you to install an extra length of chain and lets out or takes up the slack so you can resize the machine for different people.

Getting one of these for has been on my list for quite some time now - since getting my Expedition back in 2019 we are a two-trike household, and I wanted to set up MLW’s Catrike Pocket so that it could be shared with others on occasion. By “others” I mostly mean me - I’ve reached the point where riding my beloved Cannondale SR400 as a backup when the trike is in the shop is fine in theory, but honestly just looking at it hanging on the wall starts to make my neck and backside ache, so…

The chain tensioners have been marked as being sold out on the TerraCycle website for a very long time (and still are as I check them today). For a while my approach was just to check in on the website once or twice a week, and I did email in a request to be notified when they came in stock as well (which was cheerfully acknowledged). I’m assuming that this item is another victim of supply shortages due to the pandemic, which is understandable. Still, as we rolled closer to the warm weather months, I got a little more anxious - I resized MLW’s chain so I could ride the Pocket the last time the Expedition was in for repairs, and it’s remotely possible that I hadn’t gotten around to putting it back yet… I’d been waiting on the task, rationalizing that it would be better to wait until I had the tensioner. So it finally occurred to me that some of the trike shop sites might have them available. I checked all the usual haunts, and most of them were in the same boat - out of stock. Most were out, but The Hostel Shoppe turned out to have a couple in stock. I did not wait - I immediately ordered one up and waited impatiently for it to arrive.

Pocket and Gobbler

Pocket and Gobbler

It arrived just before Memorial Day weekend, which was about perfect, the long weekend offering up time to work on the Pocket. I set up the workbench and got out my chain tools.

Instructions are supplied with the tensioner, and they are pretty straightforward, but rather brief:

Instructions

Instructions

Fortunately, there are also more detailed instructions on TerraCycle’s product page, which I found helpful. The one missing item in the instructions - whether to add length to the chain, and by how much - is answered in the FAQ above the instructions (spoiler alert: it’s about a foot of chain you need to add).

TerraCycle designed these specifically for Catrike (there are also versions for other models), so it really does bolt right on. The upper bracket attaches right to the quick releases on the boom adjustment:

Getting Prepped

Getting Prepped

Bolts right on

Bolts right on

The the lower bracket hooks on to the boom itself. I mounted it about as close to the largest front ring as I was comfortable with, like the instructions indicated.

Boom Bracket

Boom Bracket

There are pictures of it mounted to a trike (they cleverly chose the best color trike for the pics) on the TerraCycle product page as well, which is handy when you are eyeballing where it sits on the boom. Once I sited it on the boom it fit perfectly.

All that was left was to add a length of chain. I took the FAQ at its word and measured out about 12” of chain and went about adding it in. This was the hardest part of the project for me, relatively speaking, simply because while I’m getting better at working on the trike myself, everything still just takes me longer due to lack of practice.

And once I had the additional length on I needed to cycle through the gears at different boom lengths (I’ve marked the boom for both MLW and myself). Since I’m working at a makeshift workbench (wood on sawhorses) I’ve had folks ask me, on occasion, what I do when I need to spin the wheels. The answer is that I position the bench under the ceiling hoists that I use to store the trikes, and hook one up to the end of the trike that I’m working on. Usually this is the rear:

Slightly elevated

Slightly elevated

That gives me enough lift off of the table for the wheel to spin free. You do want to lock both front brakes when you do this though, or things will wobble a bit (or more than a bit). This puts everything at a comfortable standing height for me when working on the trike, and the whole thing can be easily disassembled and put aside when not in use. Some day I hope to have enough workshop space where I have room for a specialized trike stand (they are very cool), but that’s not now.

Once it was all together I took it out for a ride, and aside from initially not tightening the boom enough, everything worked almost perfectly. I needed to do a bit of derailleaur adjustment, but not much - “about a foot” of chain seems to have been the right amount. And it’s hard to find enough complimentary words to describe the build quality of TerraCycle’s products. Like the Adjustomatic Bottle Mount, this product is a real work of craftsmanship. Honestly, I think it looks like it comes with the trike:

Fully installed

Fully installed

In fact, there is a part of me that thinks maybe these should come as stock items on trikes - letting you easily adjust the boom for anyone who wants to try it out. And Catrike sells their own version of it, with their name on it (tho I imagine it is built by TerraCycle, and it is also on back order). But they are not inexpensive, and I suppose that would add more to the bottom line cost of a trike.

In any case, it’s on the Pocket now. Going forward, MLW can enjoy her trike and, on the rare occasion that my Expedition is down for the count, if I ask really nice and MLW takes pity on me, I can borrow the Pocket without dragging out my chain tools.

DIY Trike Air Horn Mount by Erin Wade

I’m spending a little time today getting catching a couple of things up on the trike in preparation for the summer.

I typically carry an air horn on the trike to ward off overly ambitious canines and, on occasion, to make drivers aware of my existence. Last year I had set up the horn so that it mounted via Velcro to my left fender strut. This worked… ok, but the position was somewhat awkward to get to, and the air cans that I had just barely fit into the space.

Awkward, yes, but to be honest I would have put the new ones in the same space except that an errant click on Amazon resulted in my ordering a size larger of horn than I did last year.

I’m really not sure how it happened, but it happened nonetheless, and so I found myself needing to find a different - possibly better? - solution for the horn placement.

On the boom of the trike I have the both very useful and delightfully named Adjustomatic Bottle Mount by Terracycle. I have it set up with two drink holders, but I almost always just carry one water bottle, so that seemed to be a good candidate for a place for the air horn. It is also central to the trike, so it seemed likely to be a better option for sounding it off when needed.

If I had been very lucky, the larger size air cans I bought would have just fit snuggly into the bottle holder, but we know without even checking that the fates would not have things work out that easily. Too big for the fender, but not quite big enough to sit securely in the bottle holder.

So I went looking for something that would fit in the holder and be able to contain the air horn. I had originally considered raiding the beer cozy drawer to see if one of those could be repurposed (don’t tell MLW), but then I realized that a drink can itself was just about exactly the right size, and we have an abundance of those (out where we are they don’t take recycling, but the salvage yard in town takes aluminum, so we lean towards aluminum cans). I pulled a likely candidate out of the pre-crushing pile.

I went with a fizzy-water can, mostly because I knew the former contents wouldn’t have left it sticky or stinky. The fact that the can itself happens to be orange had absolutely nothing to do with my selection process. I swear!

I liked up the air horn and the can to make sure it looked like it would all go together okay…

Can and air Horn

Can and air Horn

Can and air horn

Can and air horn

…and then I set about opening up the top of the can so the horn would be able to slide in.

Can opener

Can opener

I used a utility knife for this and worked gingerly in order to avoid tearing the aluminum (the LaCroix cans seem to be thinner than other aluminum cans for some reason). Then I put several short notches in the top of the now open can and folded it over and covered that with duct take to cover the sharp edges:

Can do

Can do

The air horn fit inside, but it fit loosely, which meant that it would rattle and bounce around in the can. I’d expected that this would be an issue, and my first attempt to address it was to cut up several strips of styrofoam that I had laying around from packaging. This had multiple effects, mostly related to bits of styrofoam going everywhere and not at all related to working the way that I’d hoped. So I looked around for a plan B, and realized that I had some clean shop rags available. I cut one in half and wrapped the can part of the air horn up in the rag, attaching and closing it with another helpful application of the duct tape (thanks again, Red Green…).

Wrap it up

Wrap it up

This appeared to do the trick, making the air horn fit snugly into the can. I tucked some of the shop rag into the can around the top to secure it better, and then fit the whole thing into the bottle holder.

In place, but not quite right yet

In place, but not quite right yet

The whole thing fit ok, but was a little loose in the bottle holder, so I marked off where the holder wraps around the can with a sharpie, and wrapped a layer of duct tape around that part of the can so it would fit more tightly:

That’s better

That’s better

And there you have it - centrally located air horn mounted for an approximate cost of nothing (or - to be fair, maybe 12 cents worth of duct tape and a shop rag) and maybe half an hour of actual work outside of sorting things out. We’ll see over the next ride how it handles with respect to being secure and quiet in the holder. If I’m lucky I won’t have to use it, but I’ll report back as to how it works if I do (and, for better or worse, I always have to use it eventually).

Now - time to ride…

Smack dab in the middle

Smack dab in the middle

Spring Cleaning; or: Time to Wash the Cat(trike) by Erin Wade

The weather here in Northern Illinois has been touching above the half-century mark on the Fahrenheit scale for the past week or so, and this past Sunday we started to see temps in the honest-to-goodness 70 degree range. It seemed like a good day to wash the Expedition.

Well - to be honest, it mostly seemed like a good day to go for a ride. But I knew trike cleaning needed to be in my future. Besides the general need to do cleanup following three months of winter cycling, there was also a somewhat more acute need.

A couple of weeks ago I tackled a short segment of the Rock Island Trail. In the rain.

In response to the picture that accompanied the post one person very familiar with the trail commented that he was surprised that I was so clean. This because the trail is mostly crushed stone, at least in the area that I was riding. As is often the case, “crushed stone” can be a euphemism for “dirt”. And, of course, we all know what dirt becomes in the rain.

My very clever system for coming off the trail not covered in mud? Umm, well, I didn’t. I took the picture at the beginning of the ride, before I encountered said mud. Which is to say that we exited the trail, both the trike and myself, covered in a non-zero amount of mud.

Now, before you think that I am a monster who simply left my beloved Catrike Expedition coated in mud and dirt for the following two weeks, let me reassure you that I did wipe things off initially, and later hit some of the more troubled areas with a broom as well. But even with these efforts applied, it was clear that the trike was going to need more attention - a deeper cleaning, if you will.

With that in mind, I did the responsible thing with the 70° day: I washed my trike. ...But, you know, after I went for a ride. See, I really wanted that ride, and I knew the seat mesh was going to take a while to dry, and nobody wants a wet tush when cycling, so that just seemed like the right order for things to happen in.

I got out the hose and bucket and enlisted the help of a washing buddy...

Catrike and Dog, living together…

Catrike and Dog, living together…

If we’re being honest, Calamity isn’t really much help in the washing department, but she’s pretty good company otherwise.

Given that I didn’t know where all of the dirt/mud might be I pulled the seat off of the frame. I am always surprised at just how different our machines look without them - positively naked:

Look away!

Look away!

My trike washing technique is nothing special - essentially soapy water and a wash mitt in the same top-down approach that I’d use with a car. Maybe the biggest difference is the amount of grease and tar on the paint, which seems like more per square inch than on a car - but then the trike is exposed to an open chain, it’s inches off of the asphalt, and I probably (definitely) wash it less often than I do my car, so I suppose all of that makes sense.

Then I dry it off with an old towel. Somewhere, in the depths of my stuff I swear I have an actual chamois. Still, I’ve been thinking that for probably the past decade with no evidence to support it, so maybe I should just accept that it’s probably gone...

The nice thing about doing the wash with the seat off is that it gives a chance to look at the usually hidden parts of the frame - make sure there isn’t anything cracked, damaged, or otherwise out of sorts (all looked good this time). Even my formerly frozen front brake is back to working now that the weather is reliably above freezing.

For the seat I used the straps that go over the top bar on the frame to hang it from my clothesline pole.

Take a seat

Take a seat

This put it in a good position for both washing and drying. Washing, in this case, consists of a high-pressure spray with the garden hose, followed by a wash down with the mitt (with a more detailed focus on the plastic snaps), and then a rinse.

Then I put the trike inside and left the seat out to dry. I thought I was clever by doing so overnight - giving it plenty of time out there in the prairie wind to blow the moisture clear. However, the prairie had its own ideas, dumping rain on us - and my seat - in the wee hours. Fortunately we had enough sunshine the following day to dry it all up so I could get her back out on the road.

So, for all of my back and forth between riding and washing, it worked out ok to ride first and then wash the trike. In fact, it went so well, maybe I’ll do it again next year...