Curing the Shakes by Erin Wade

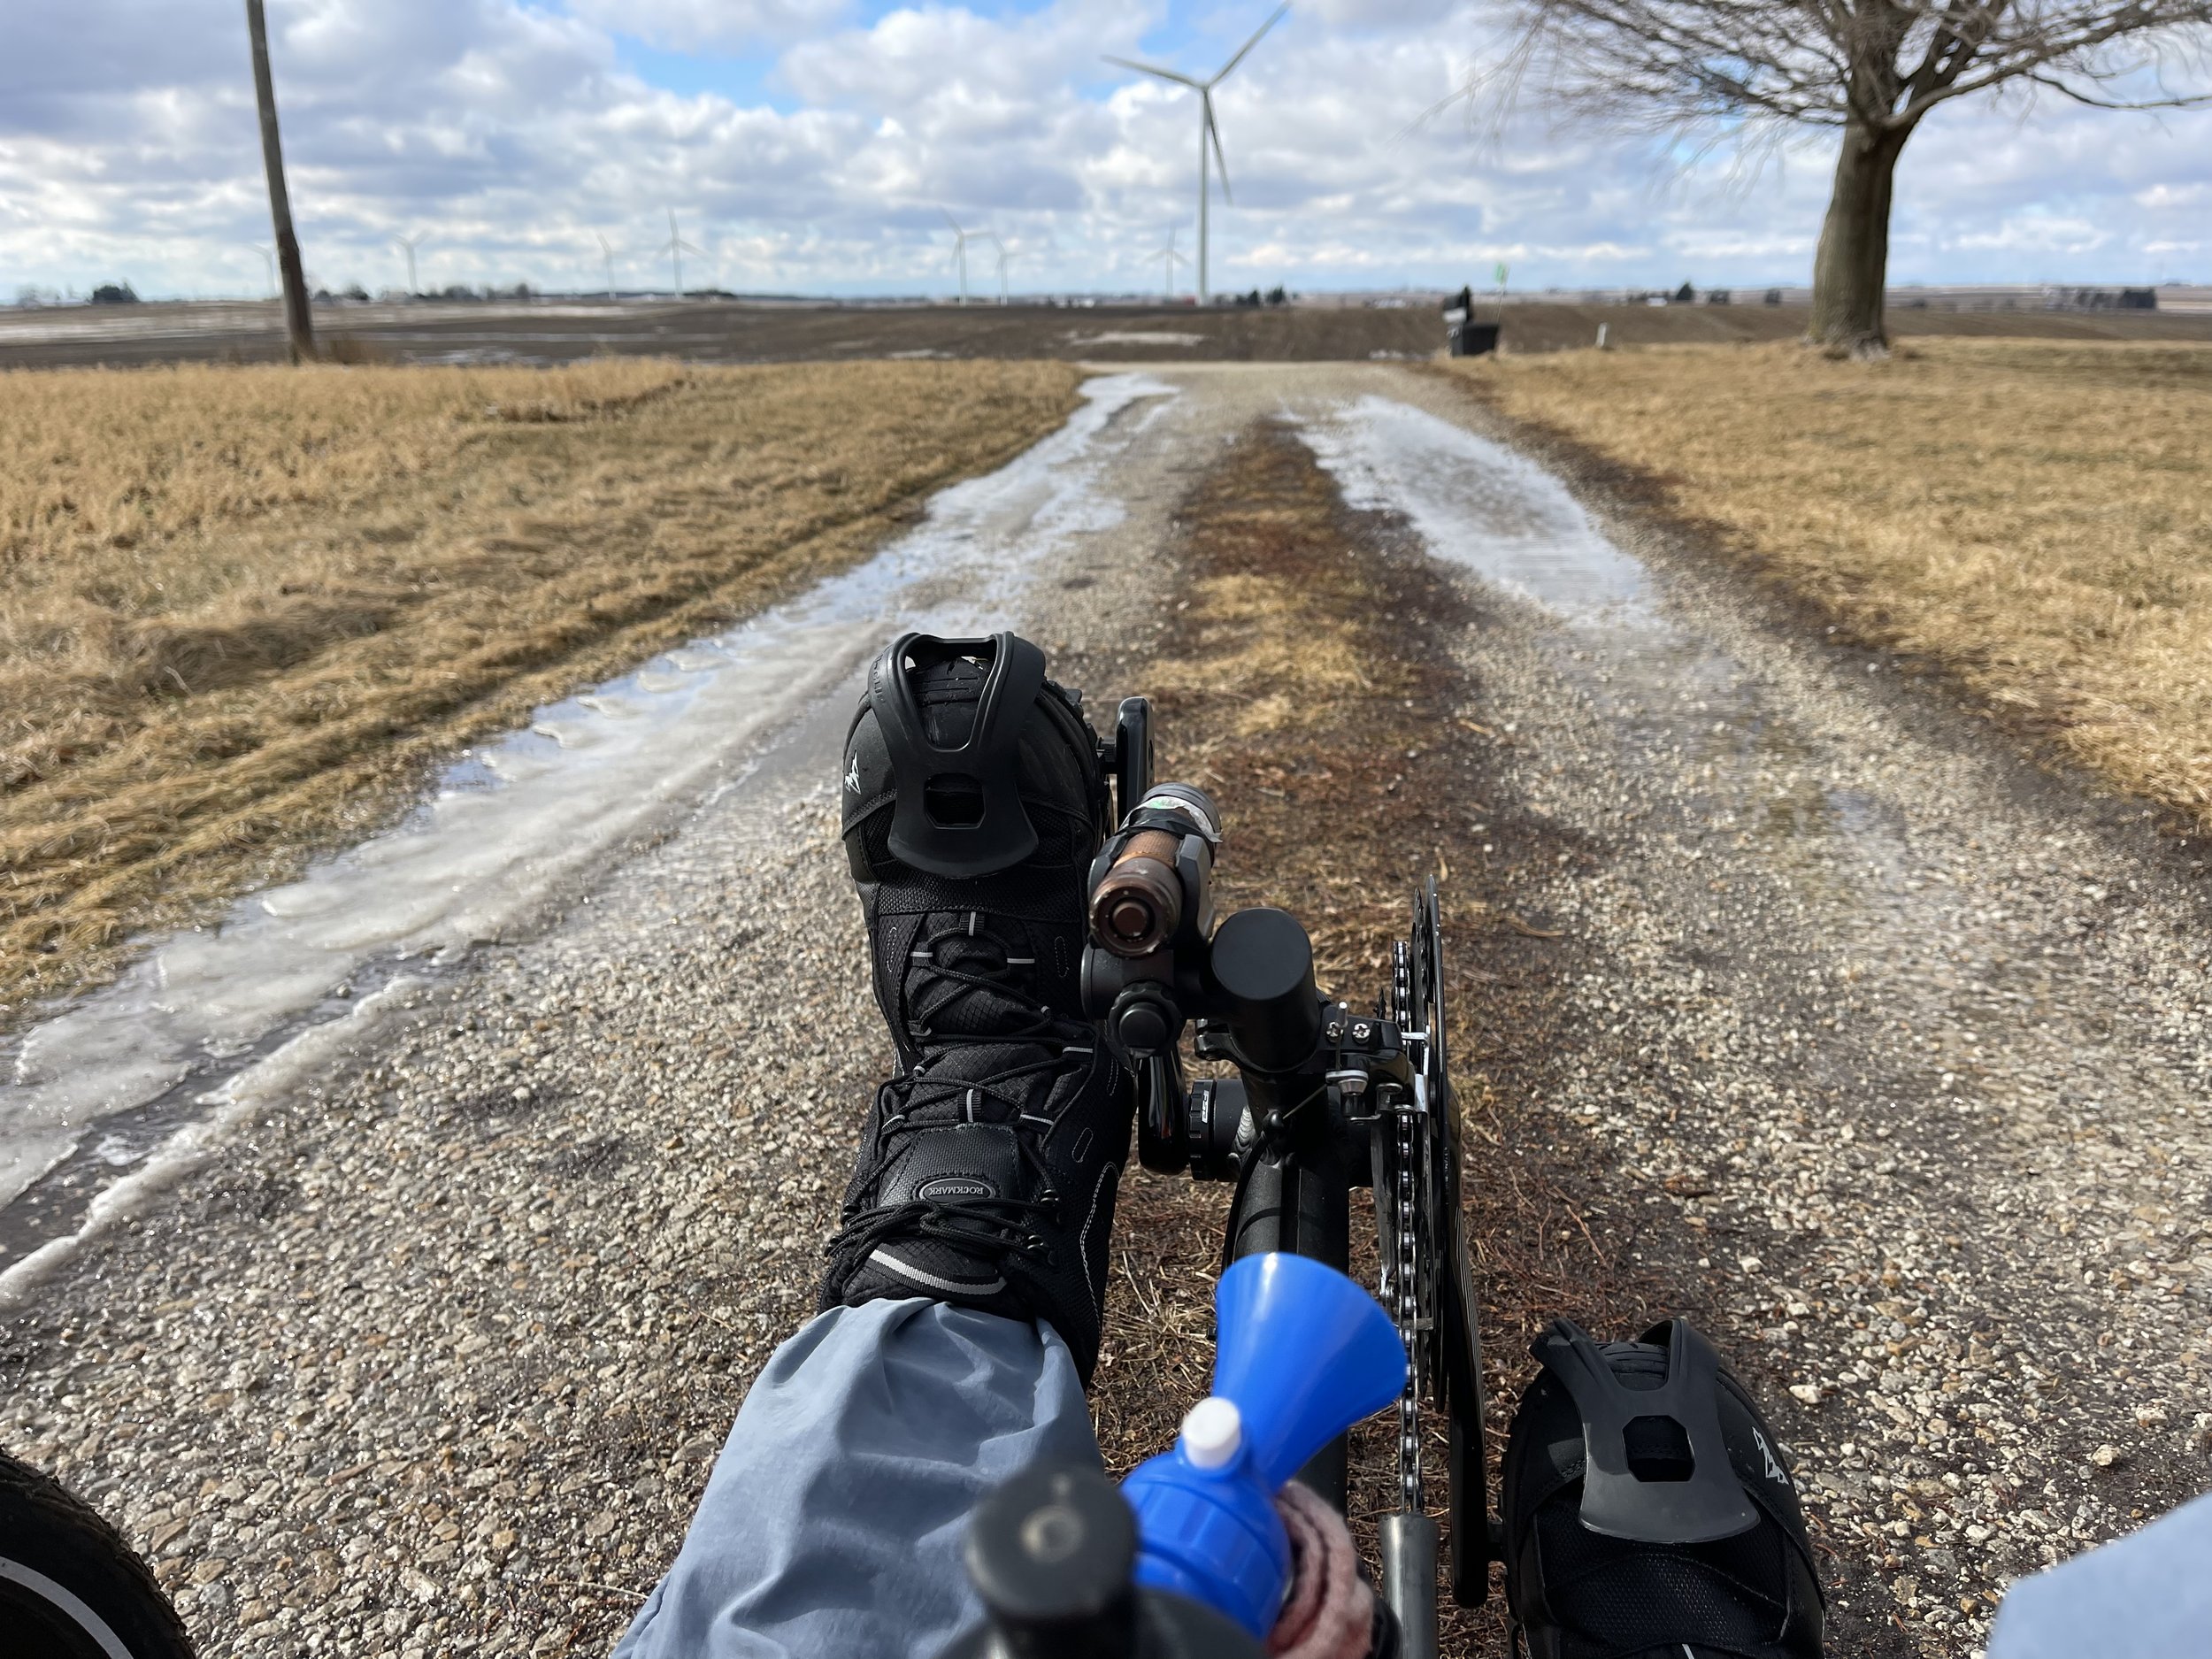
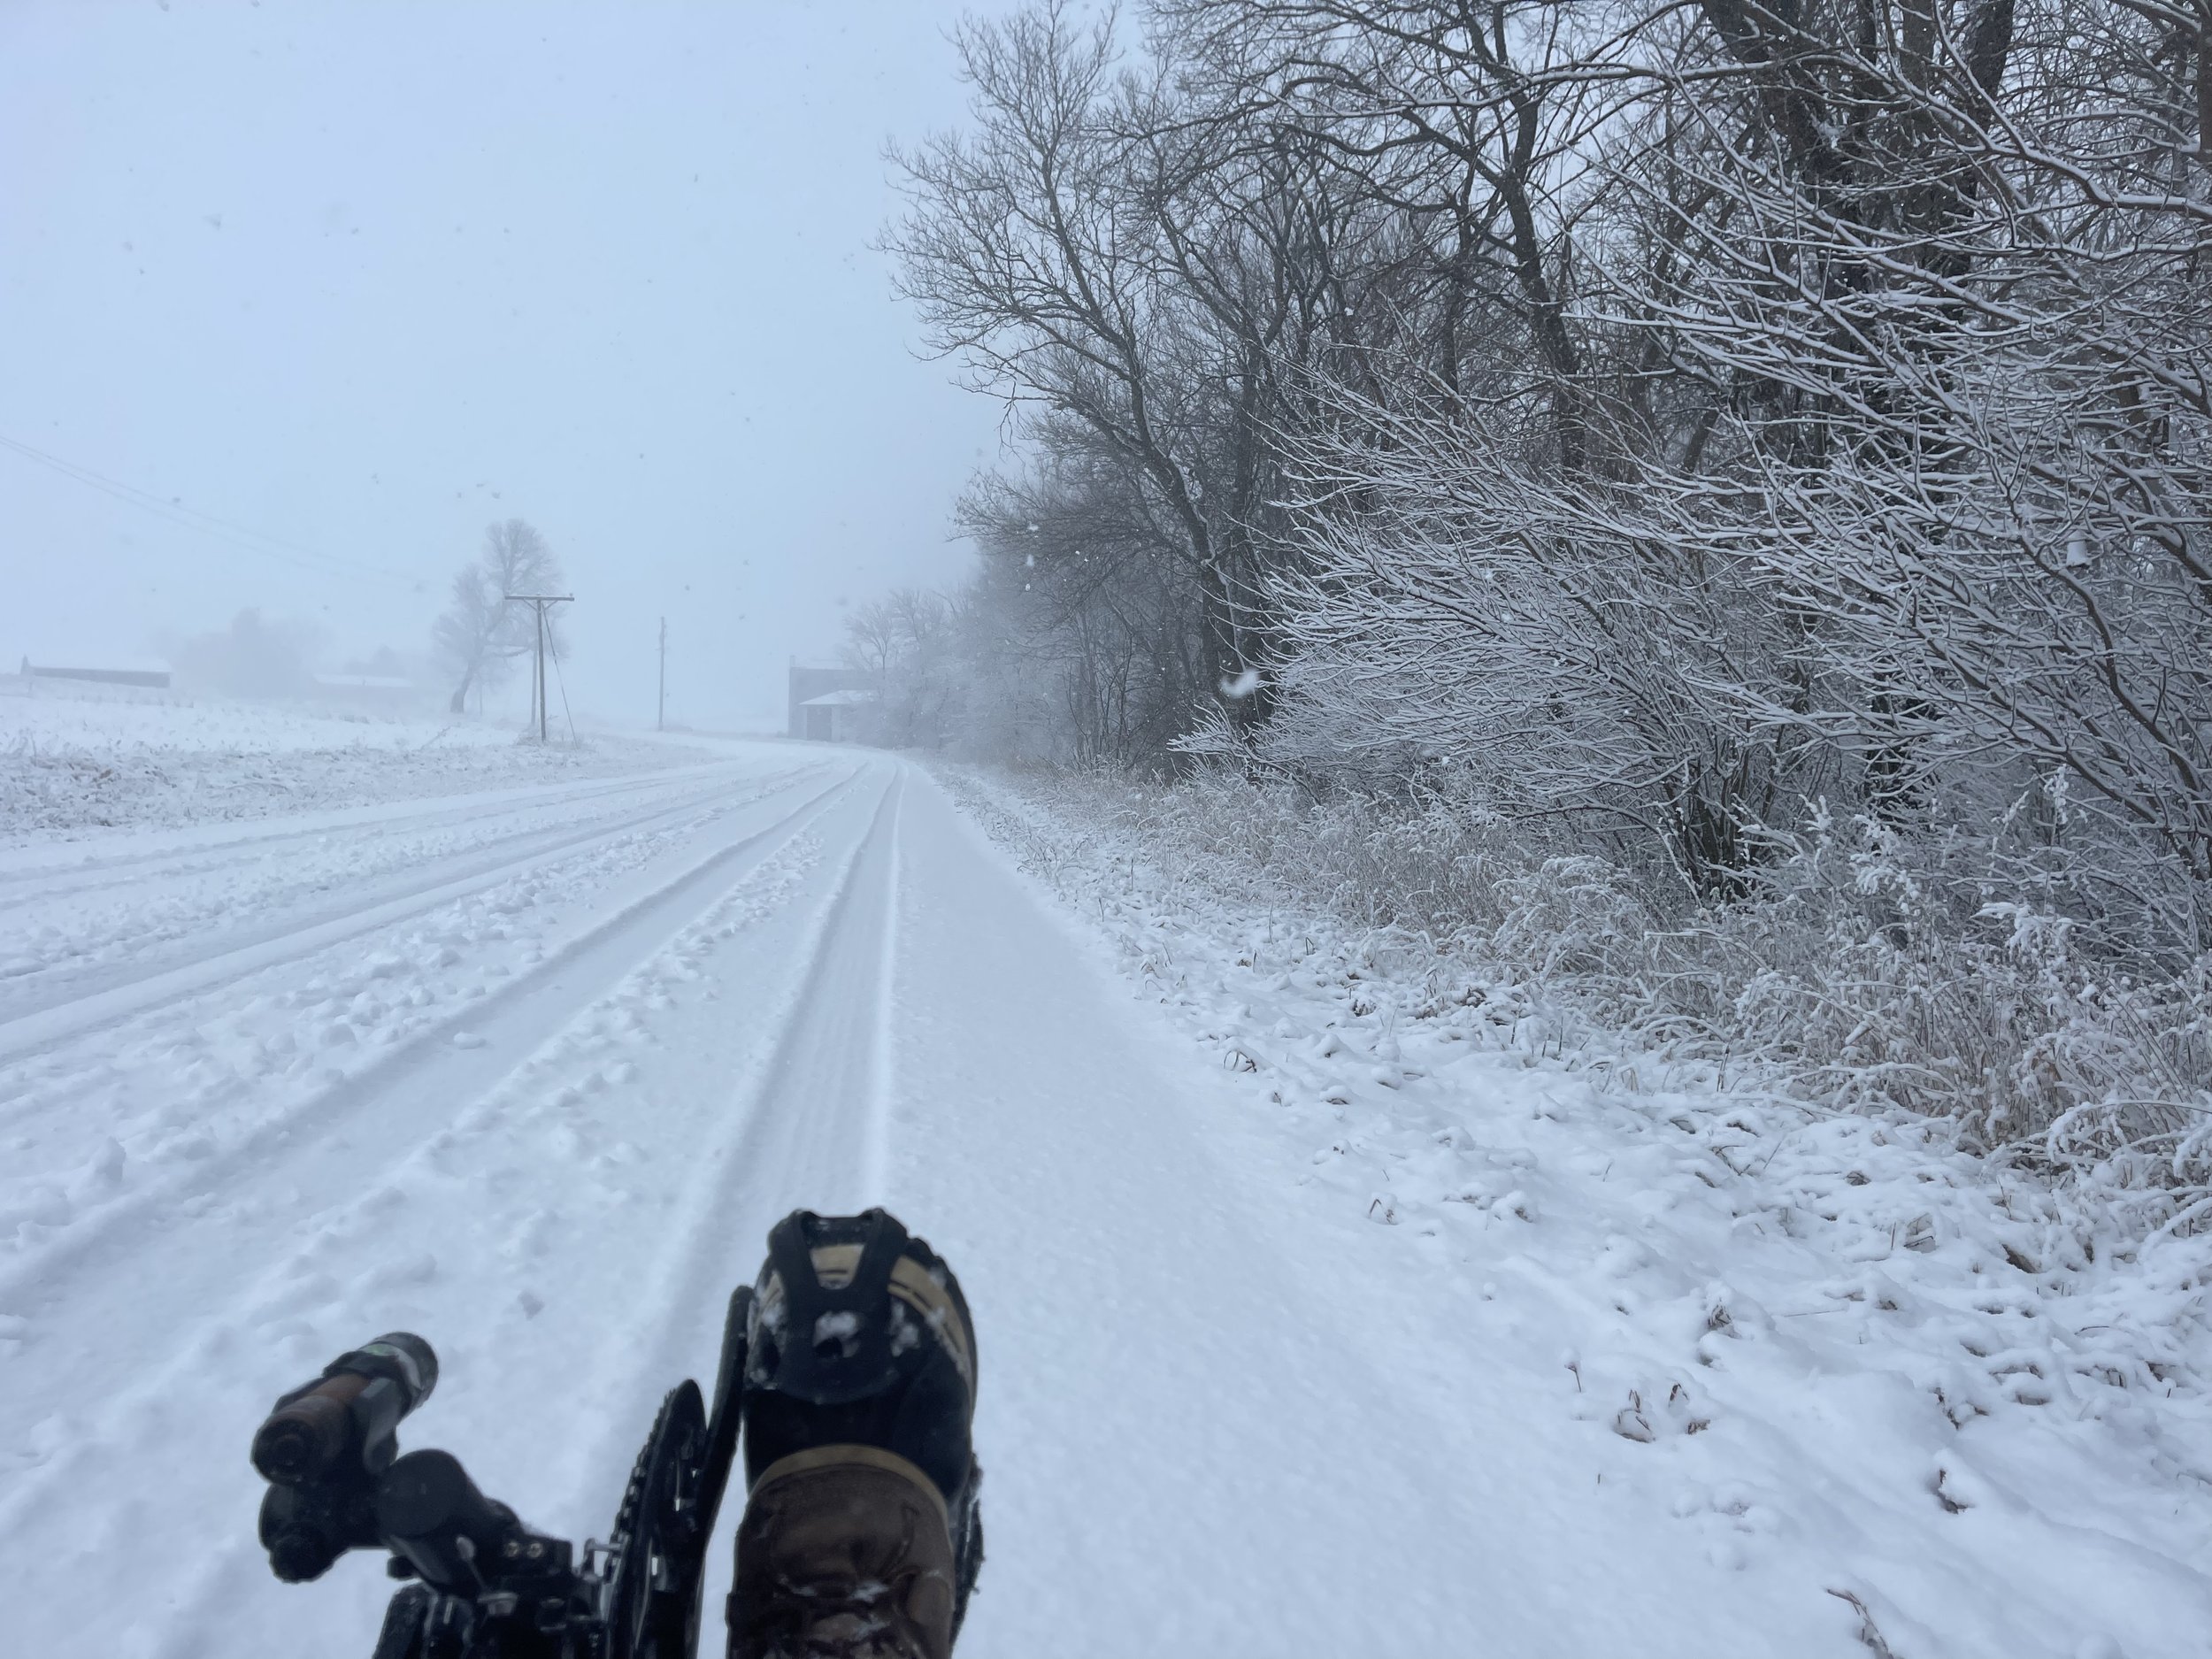
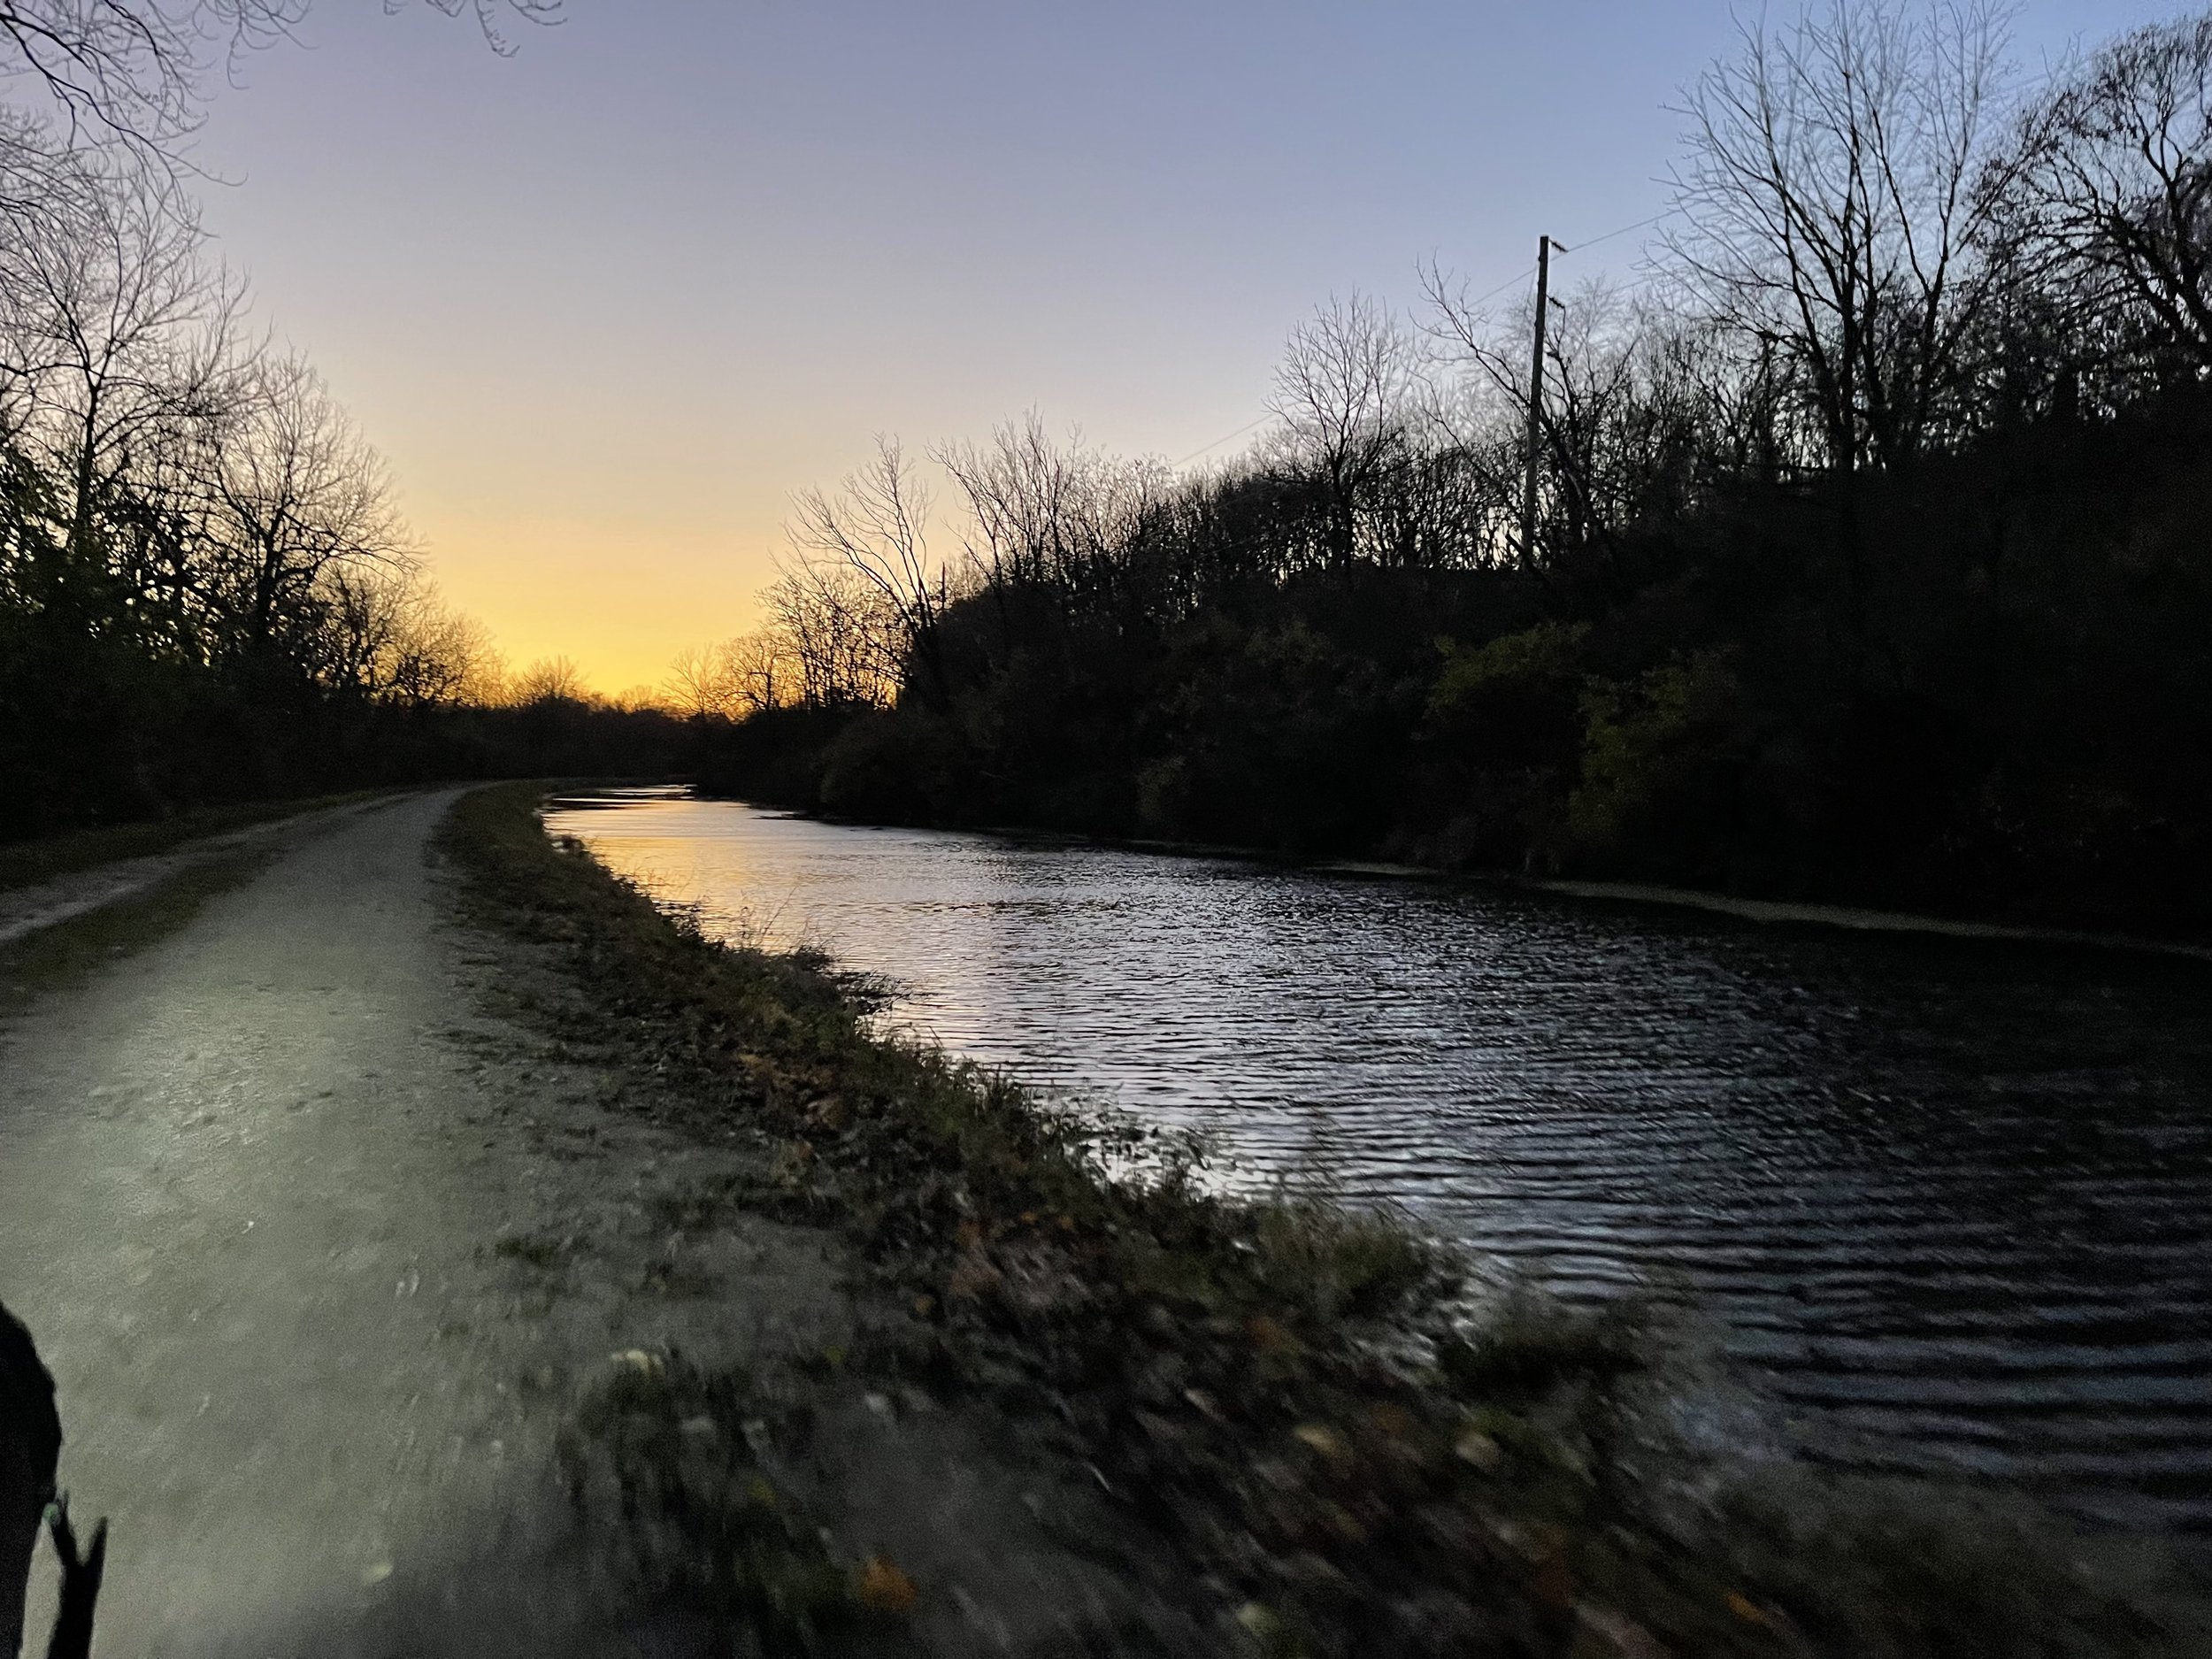
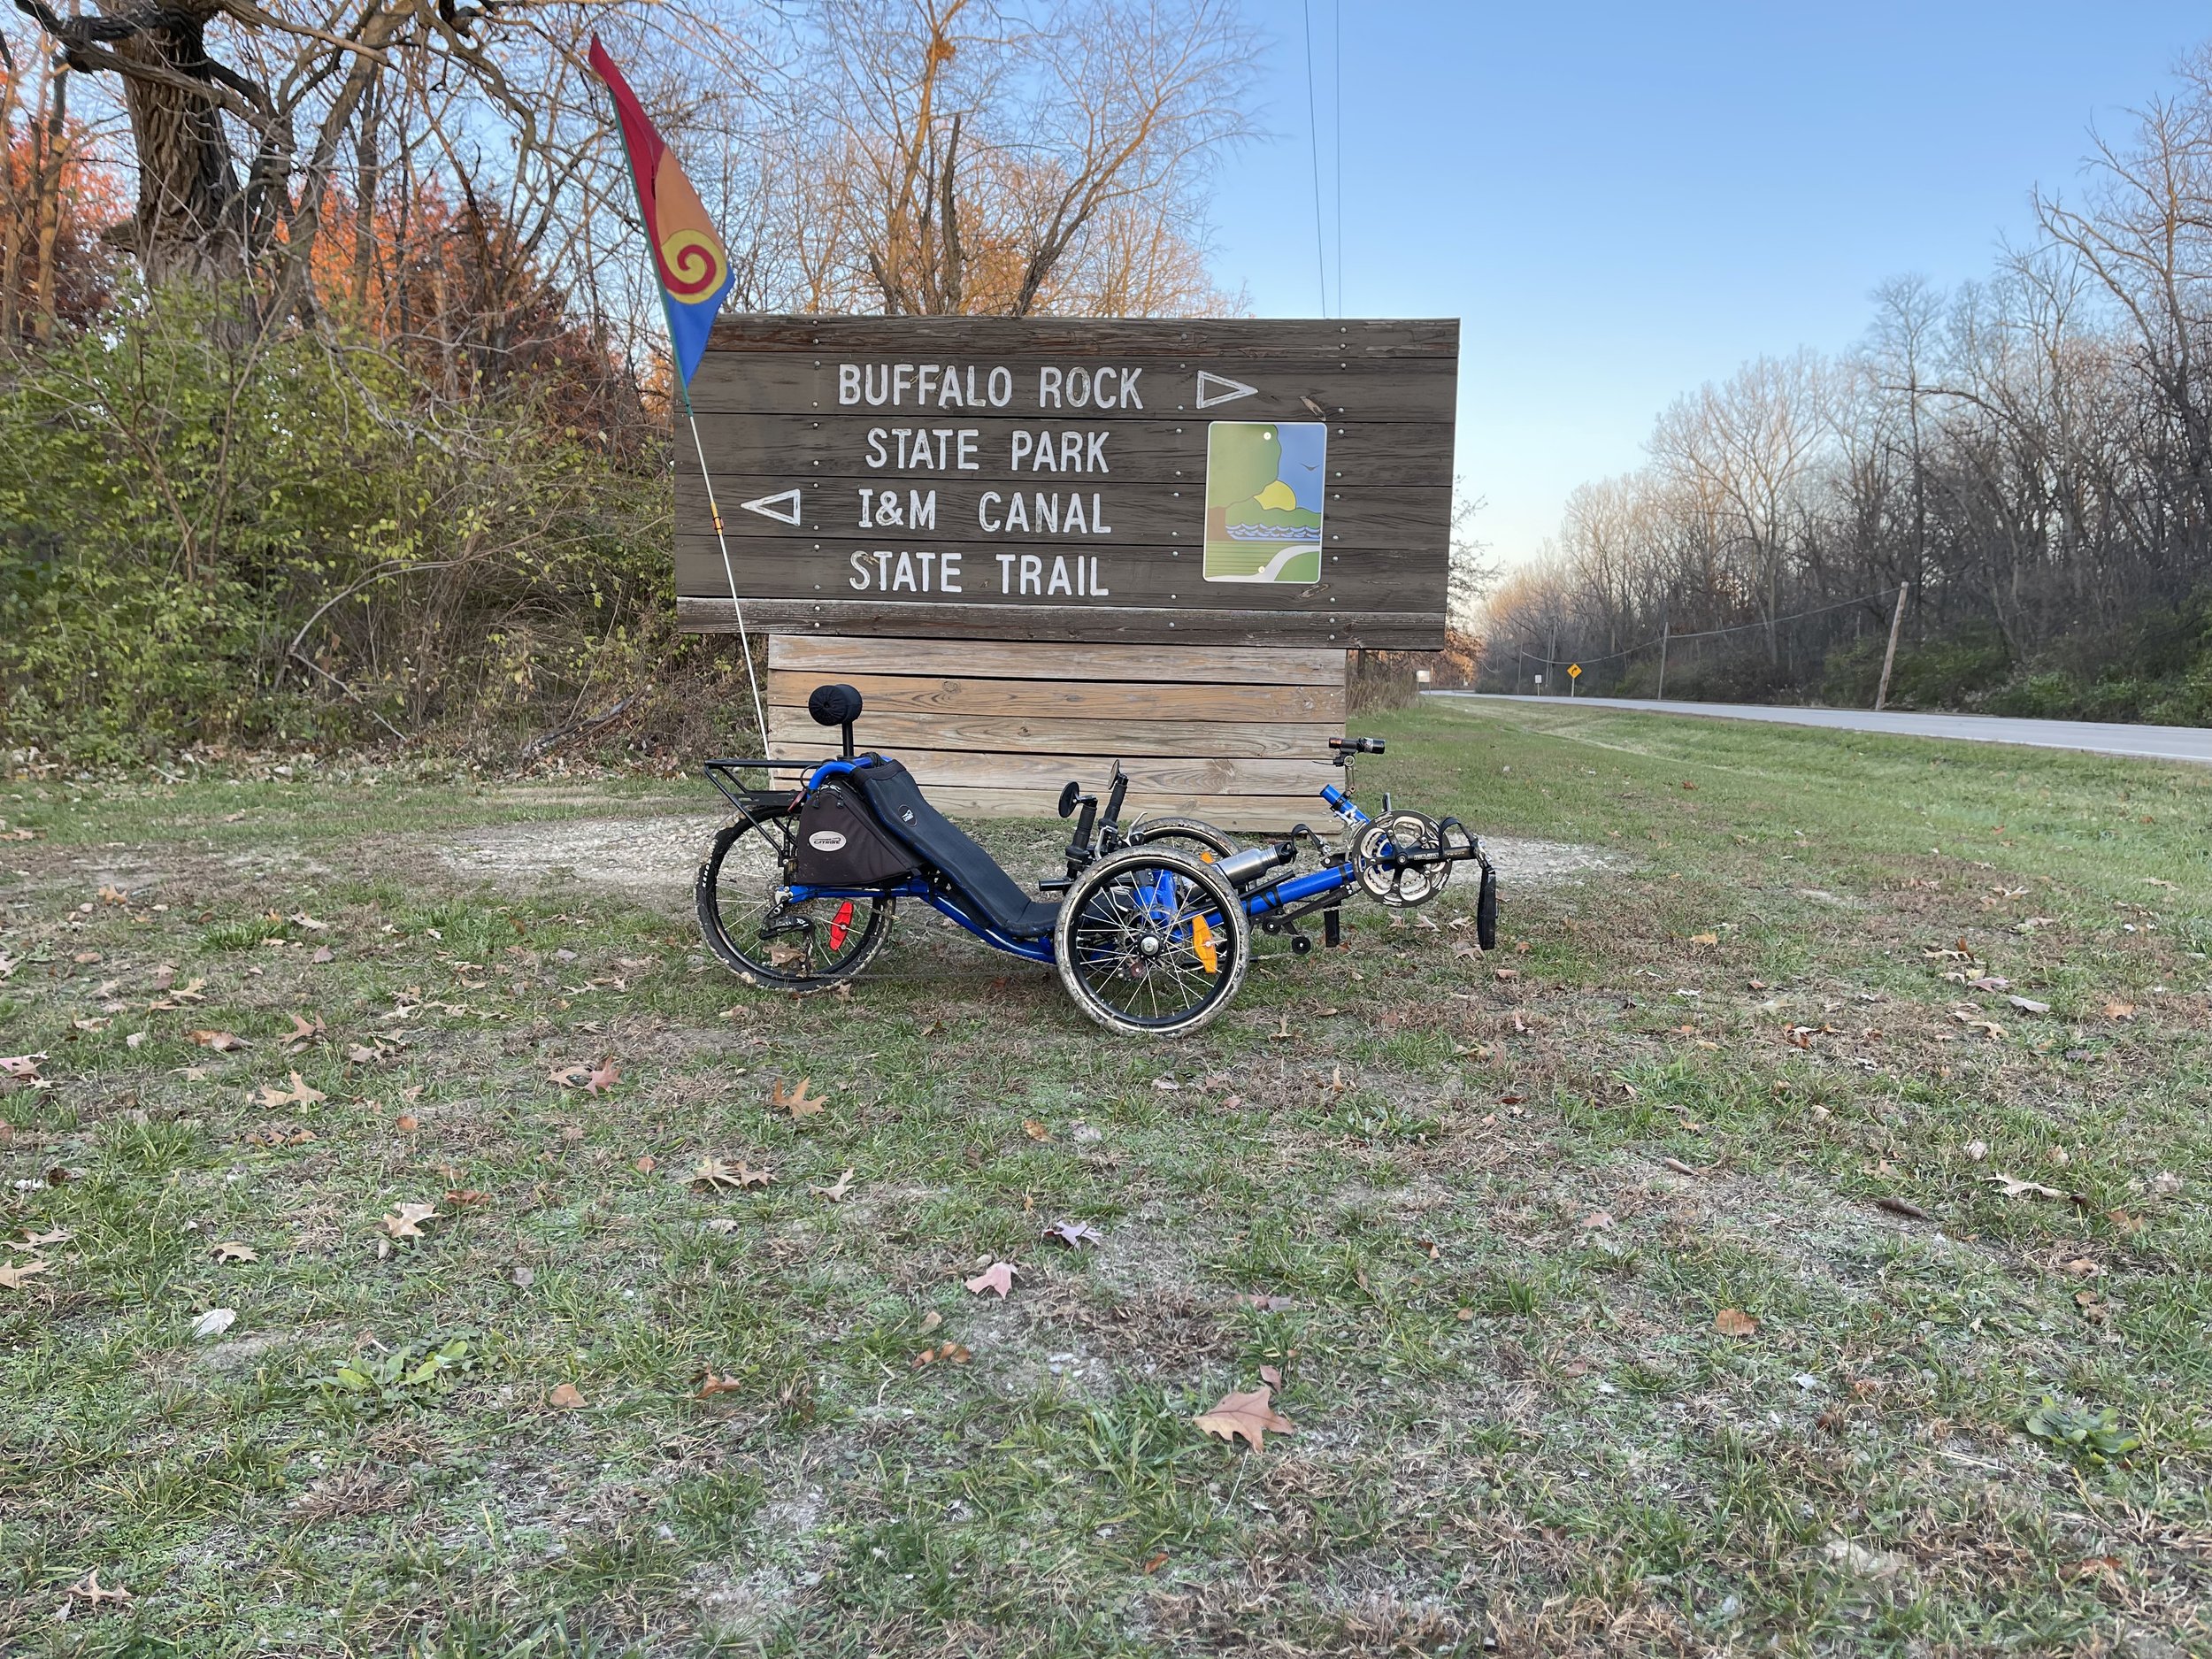
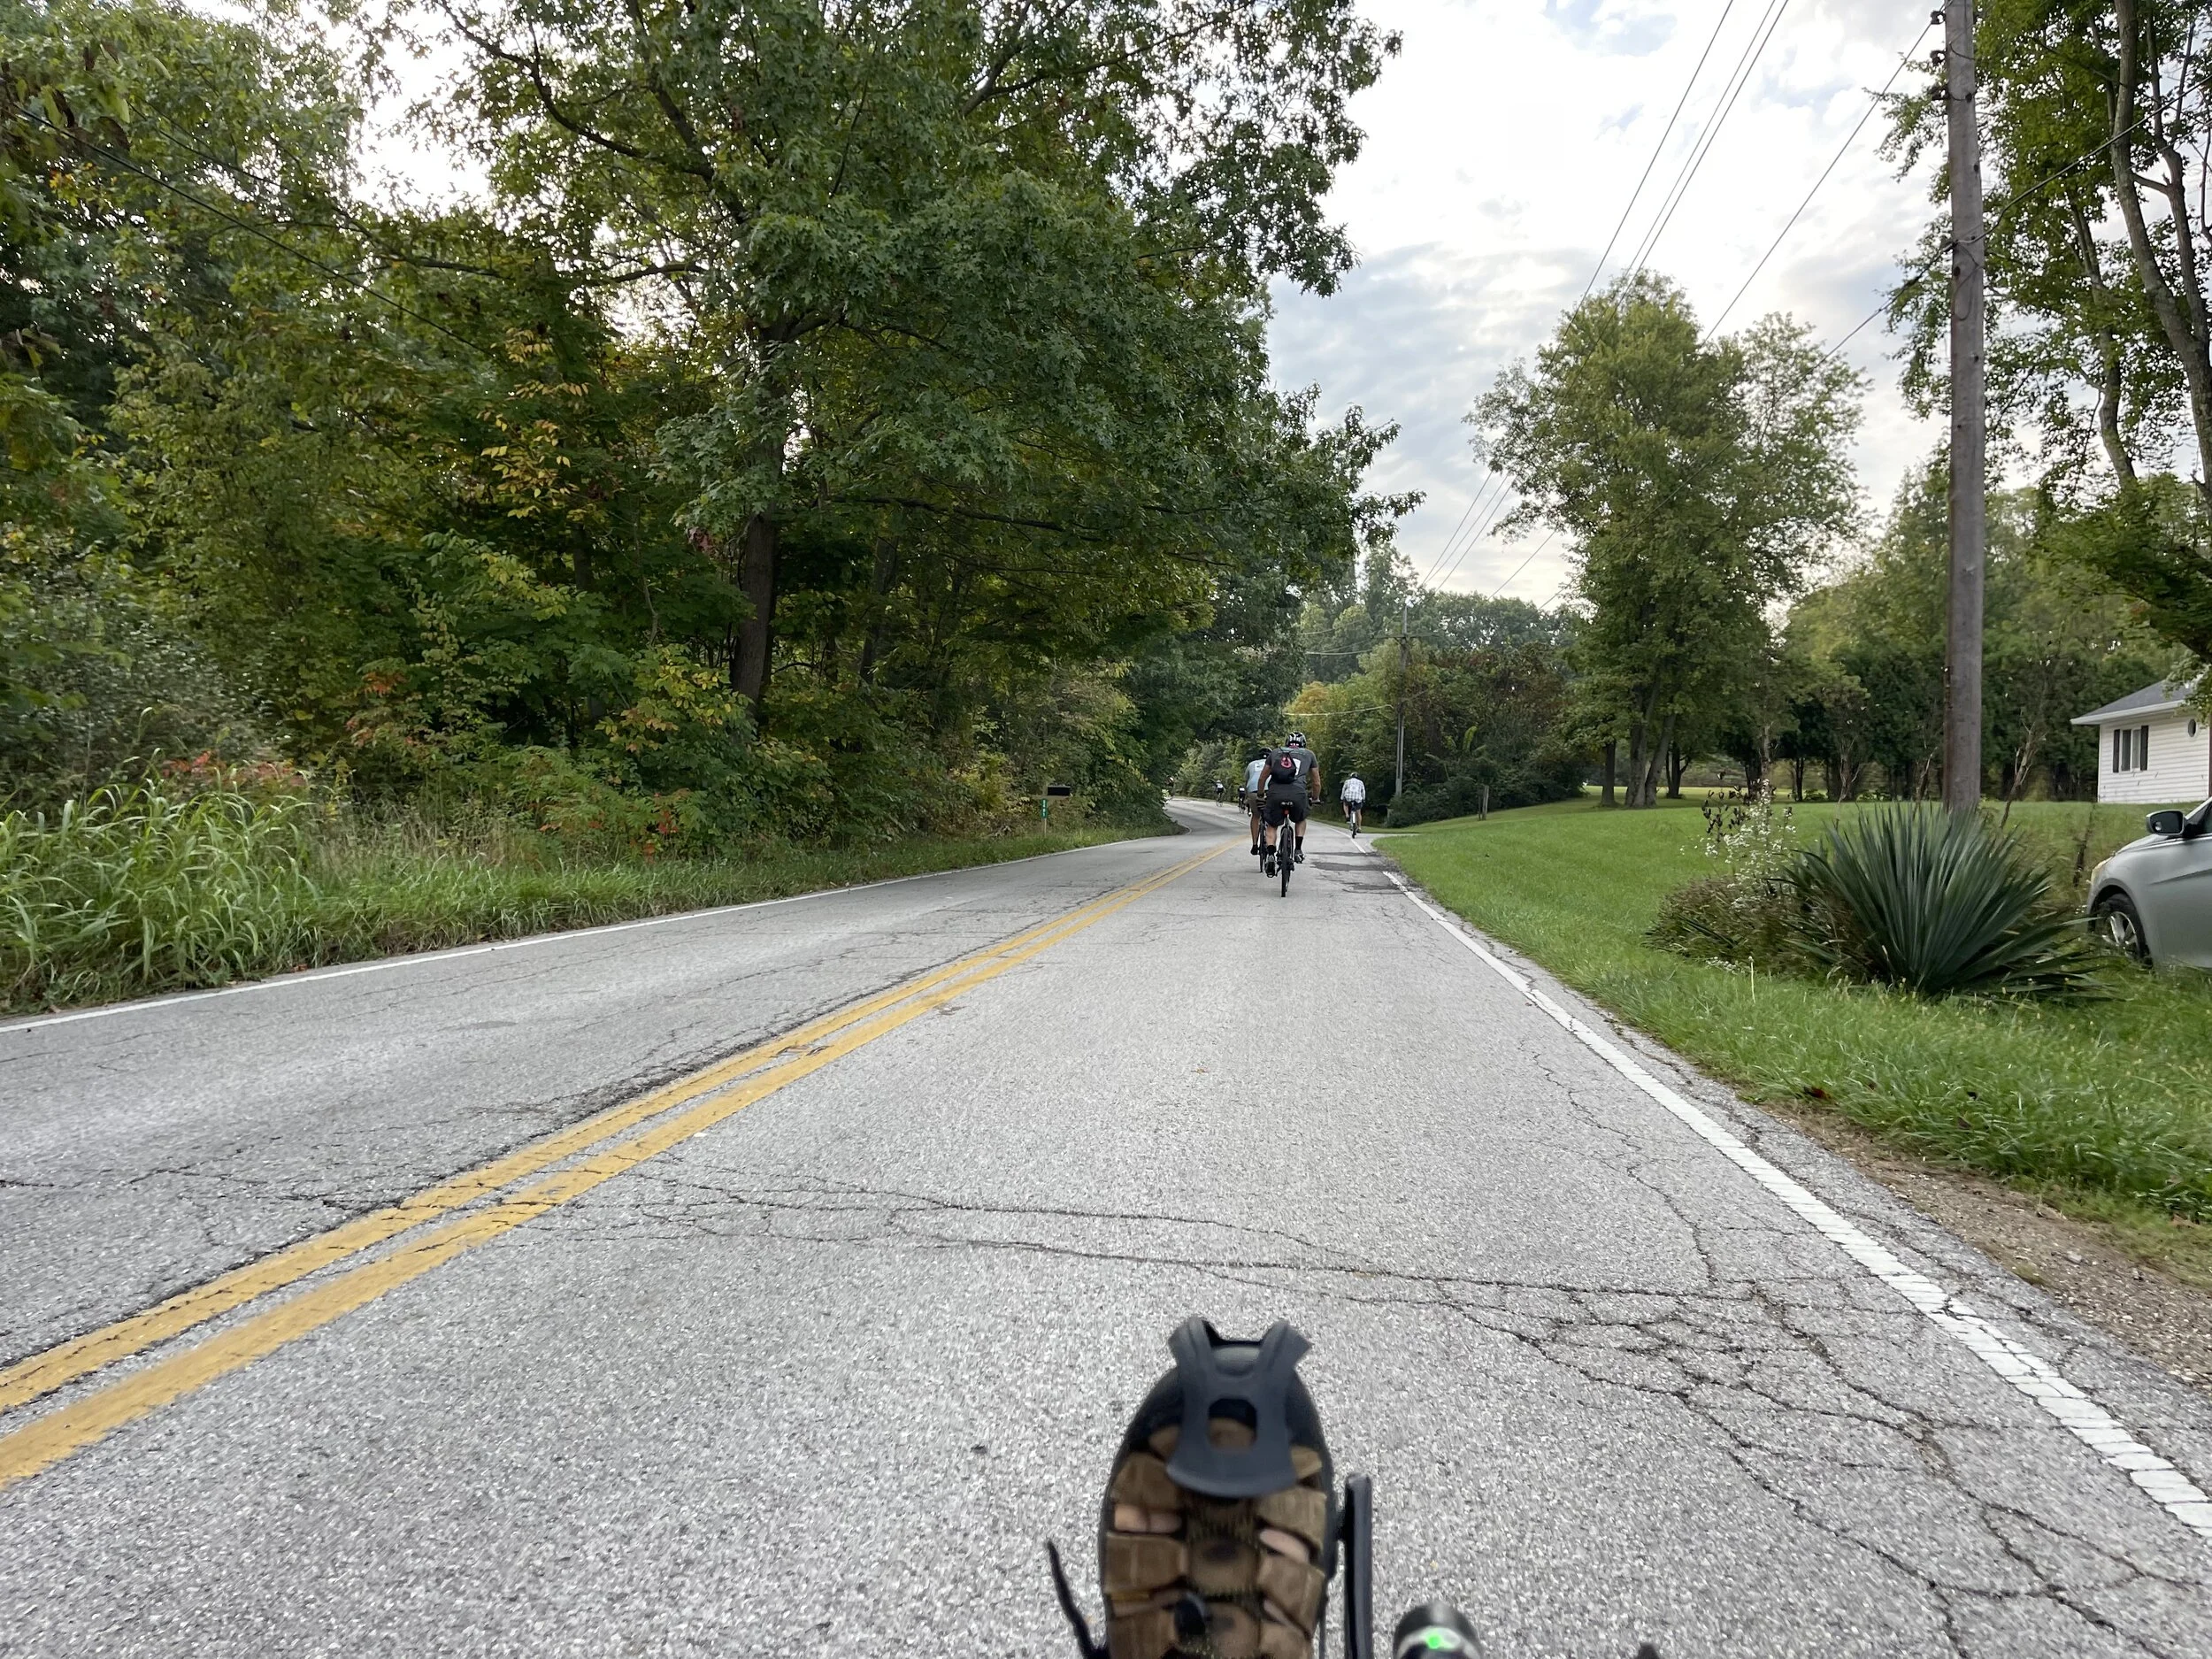
It’s a beautiful winter day - the sun is shining, the snow is glistening white, a resplendent blanket over the earth. You see all of this because you are riding your recumbent trike thru it, taking in the scenery.

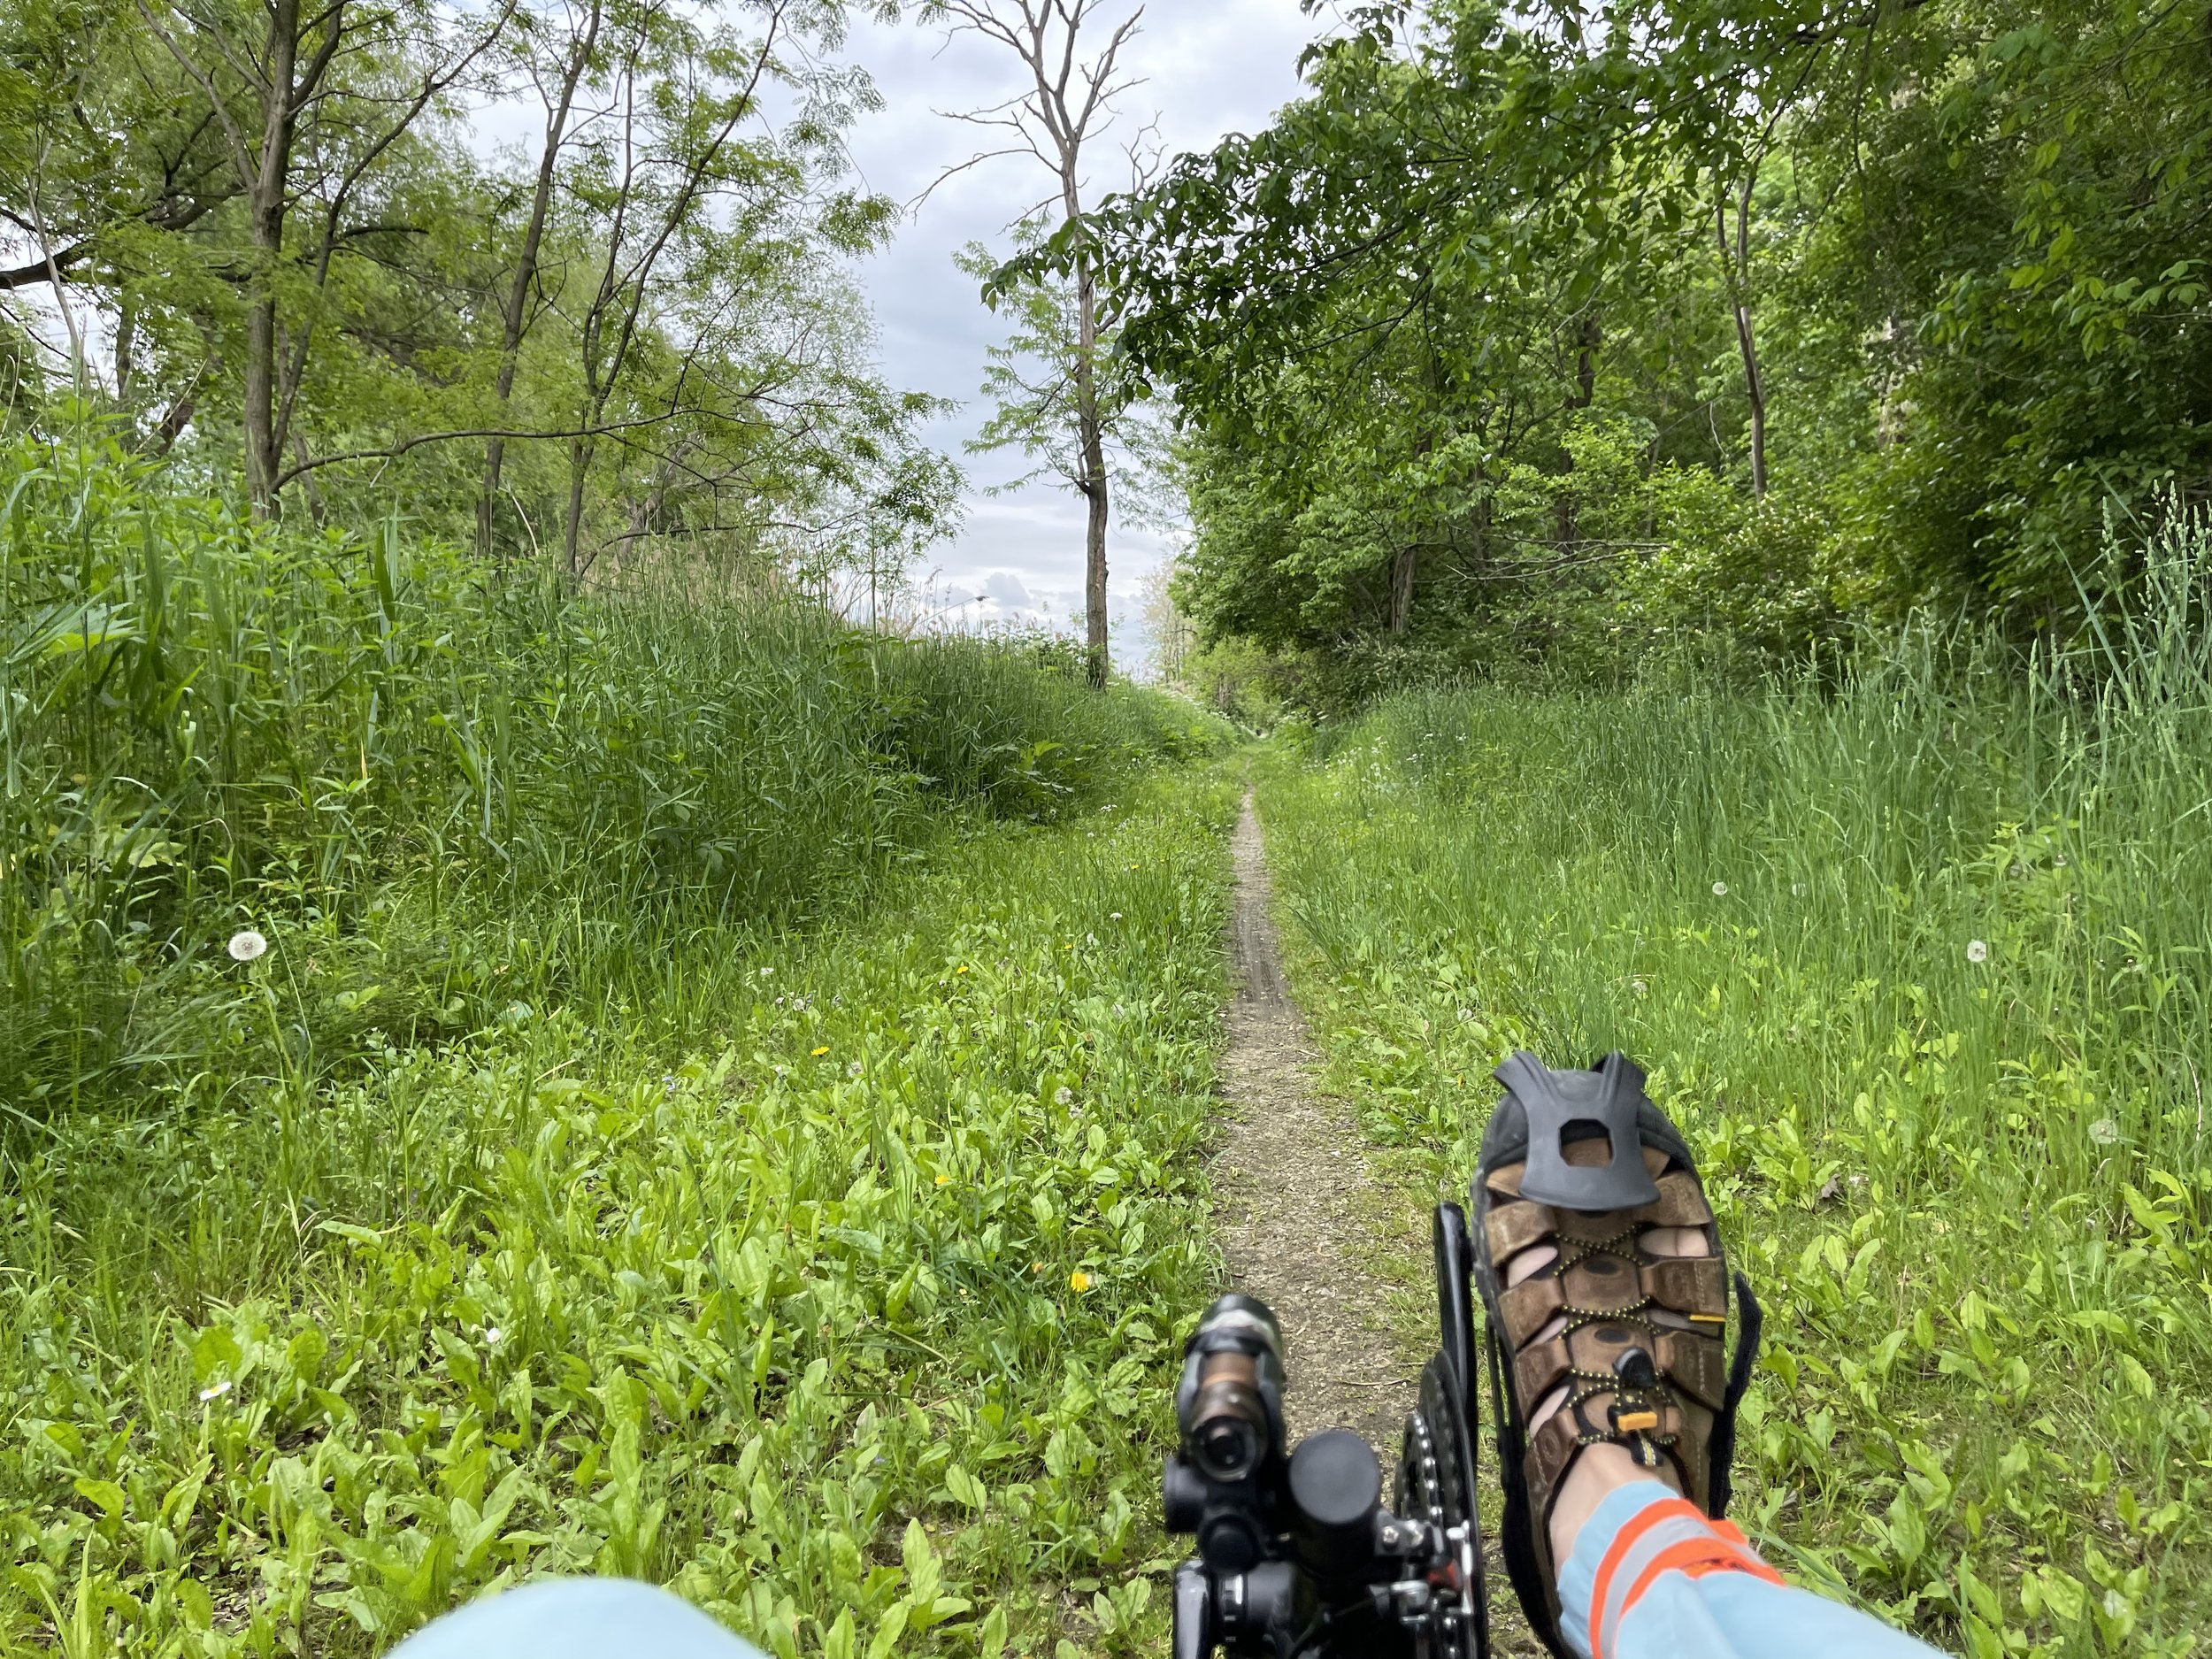
And it occurs to you that this moment would make a good picture. You take your hands off the handlebars to grab your camera. This should not be a problem because you are on a trike - three wheels on the ground, inherently providing stability.

But then it happens - perhaps a wheel hits a road imperfection - and the front end begins to tremble, the wheels shimmying back and forth, jostling you about. It stops when you put your hands back on the handlebars, but it returns the next time - and each time - you let go. Your trike has got the shakes.

I’d been dealing with this for the better part of four months, and it was getting progressively worse. What had been an occasional issue, just occurring on certain types of surfaces if my hands were off the handgrips, had progressed to the point where it would start to shake over every bump even with my fingers securely wrapped on the handles.

There are a number of things that this can be due to. Recumbent trikes are more complex than bicycles, especially at the front end, so in addition to the things you might think of on an upright - loose headset or bent wheel - there are things like tie rods, axles, and alignment to be considered (and a special “thank you” to the helpful folks in the Catrike Owners Group on FB for compiling that list).

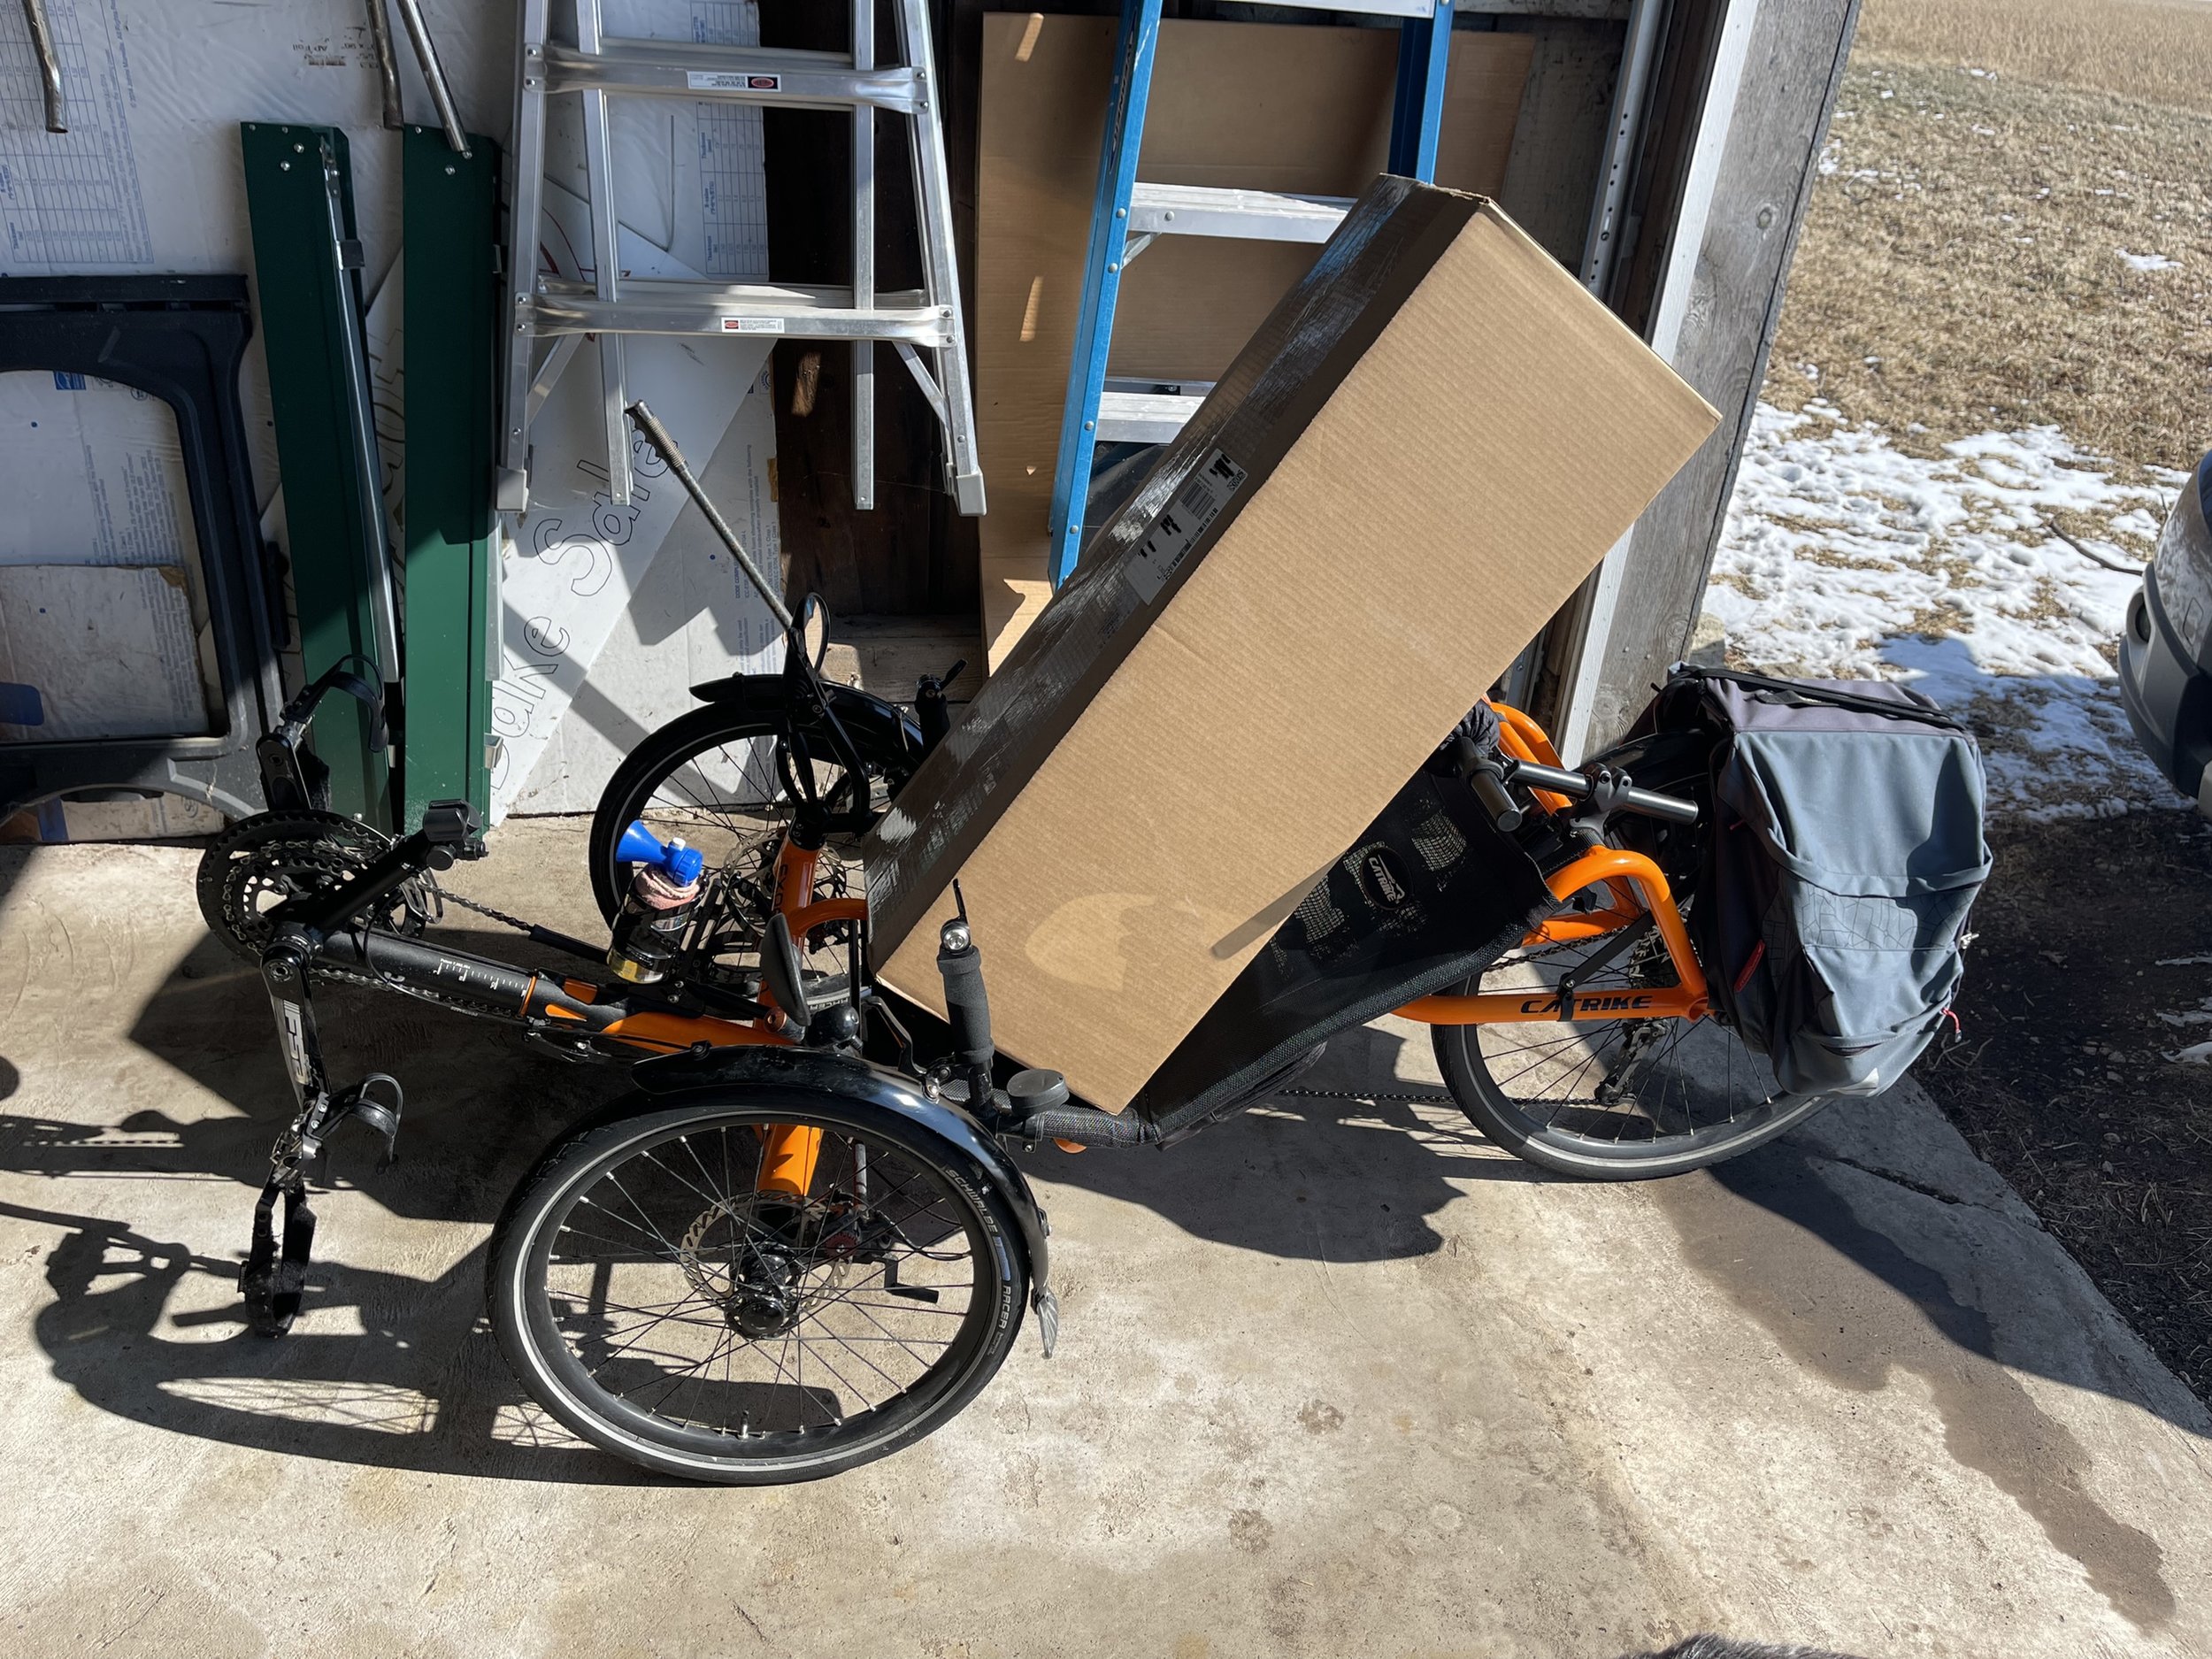
For my part I was pretty sure I had loose headsets (that’s plural because there are two of them on a trike, one on each front wheel). In part, this was because I’d been messing with them - back towards the end of September I’d ordered a second B&M mirror for my Catrike Expedition, and they mount directly on the top of the headset. And in part, it was because I could see and feel that the headset was loose. I could feel it move when I hit the brakes, which prompted me to pick up the trike and see if I could move it around. Sure enough, it jiggled in place.

Given this, I did what any red-blooded American would do when something is loose: I got a wrench and tightened it.

Which did… nothing? That couldn't be the case, I told myself, it probably did something, but I just hadn’t tightened it enough. So, of course, I tightened it some more. And then some more. And then…

Then I learned that what is inside the headset is called a “star fangled nut” (or just “star nut”). And I also learned, entirely coincidentally, you understand, that it has an upper limit to the torque it can withstand.


Enjoying this post? Check out our Cycling page for links to other cycling articles on Applied Life


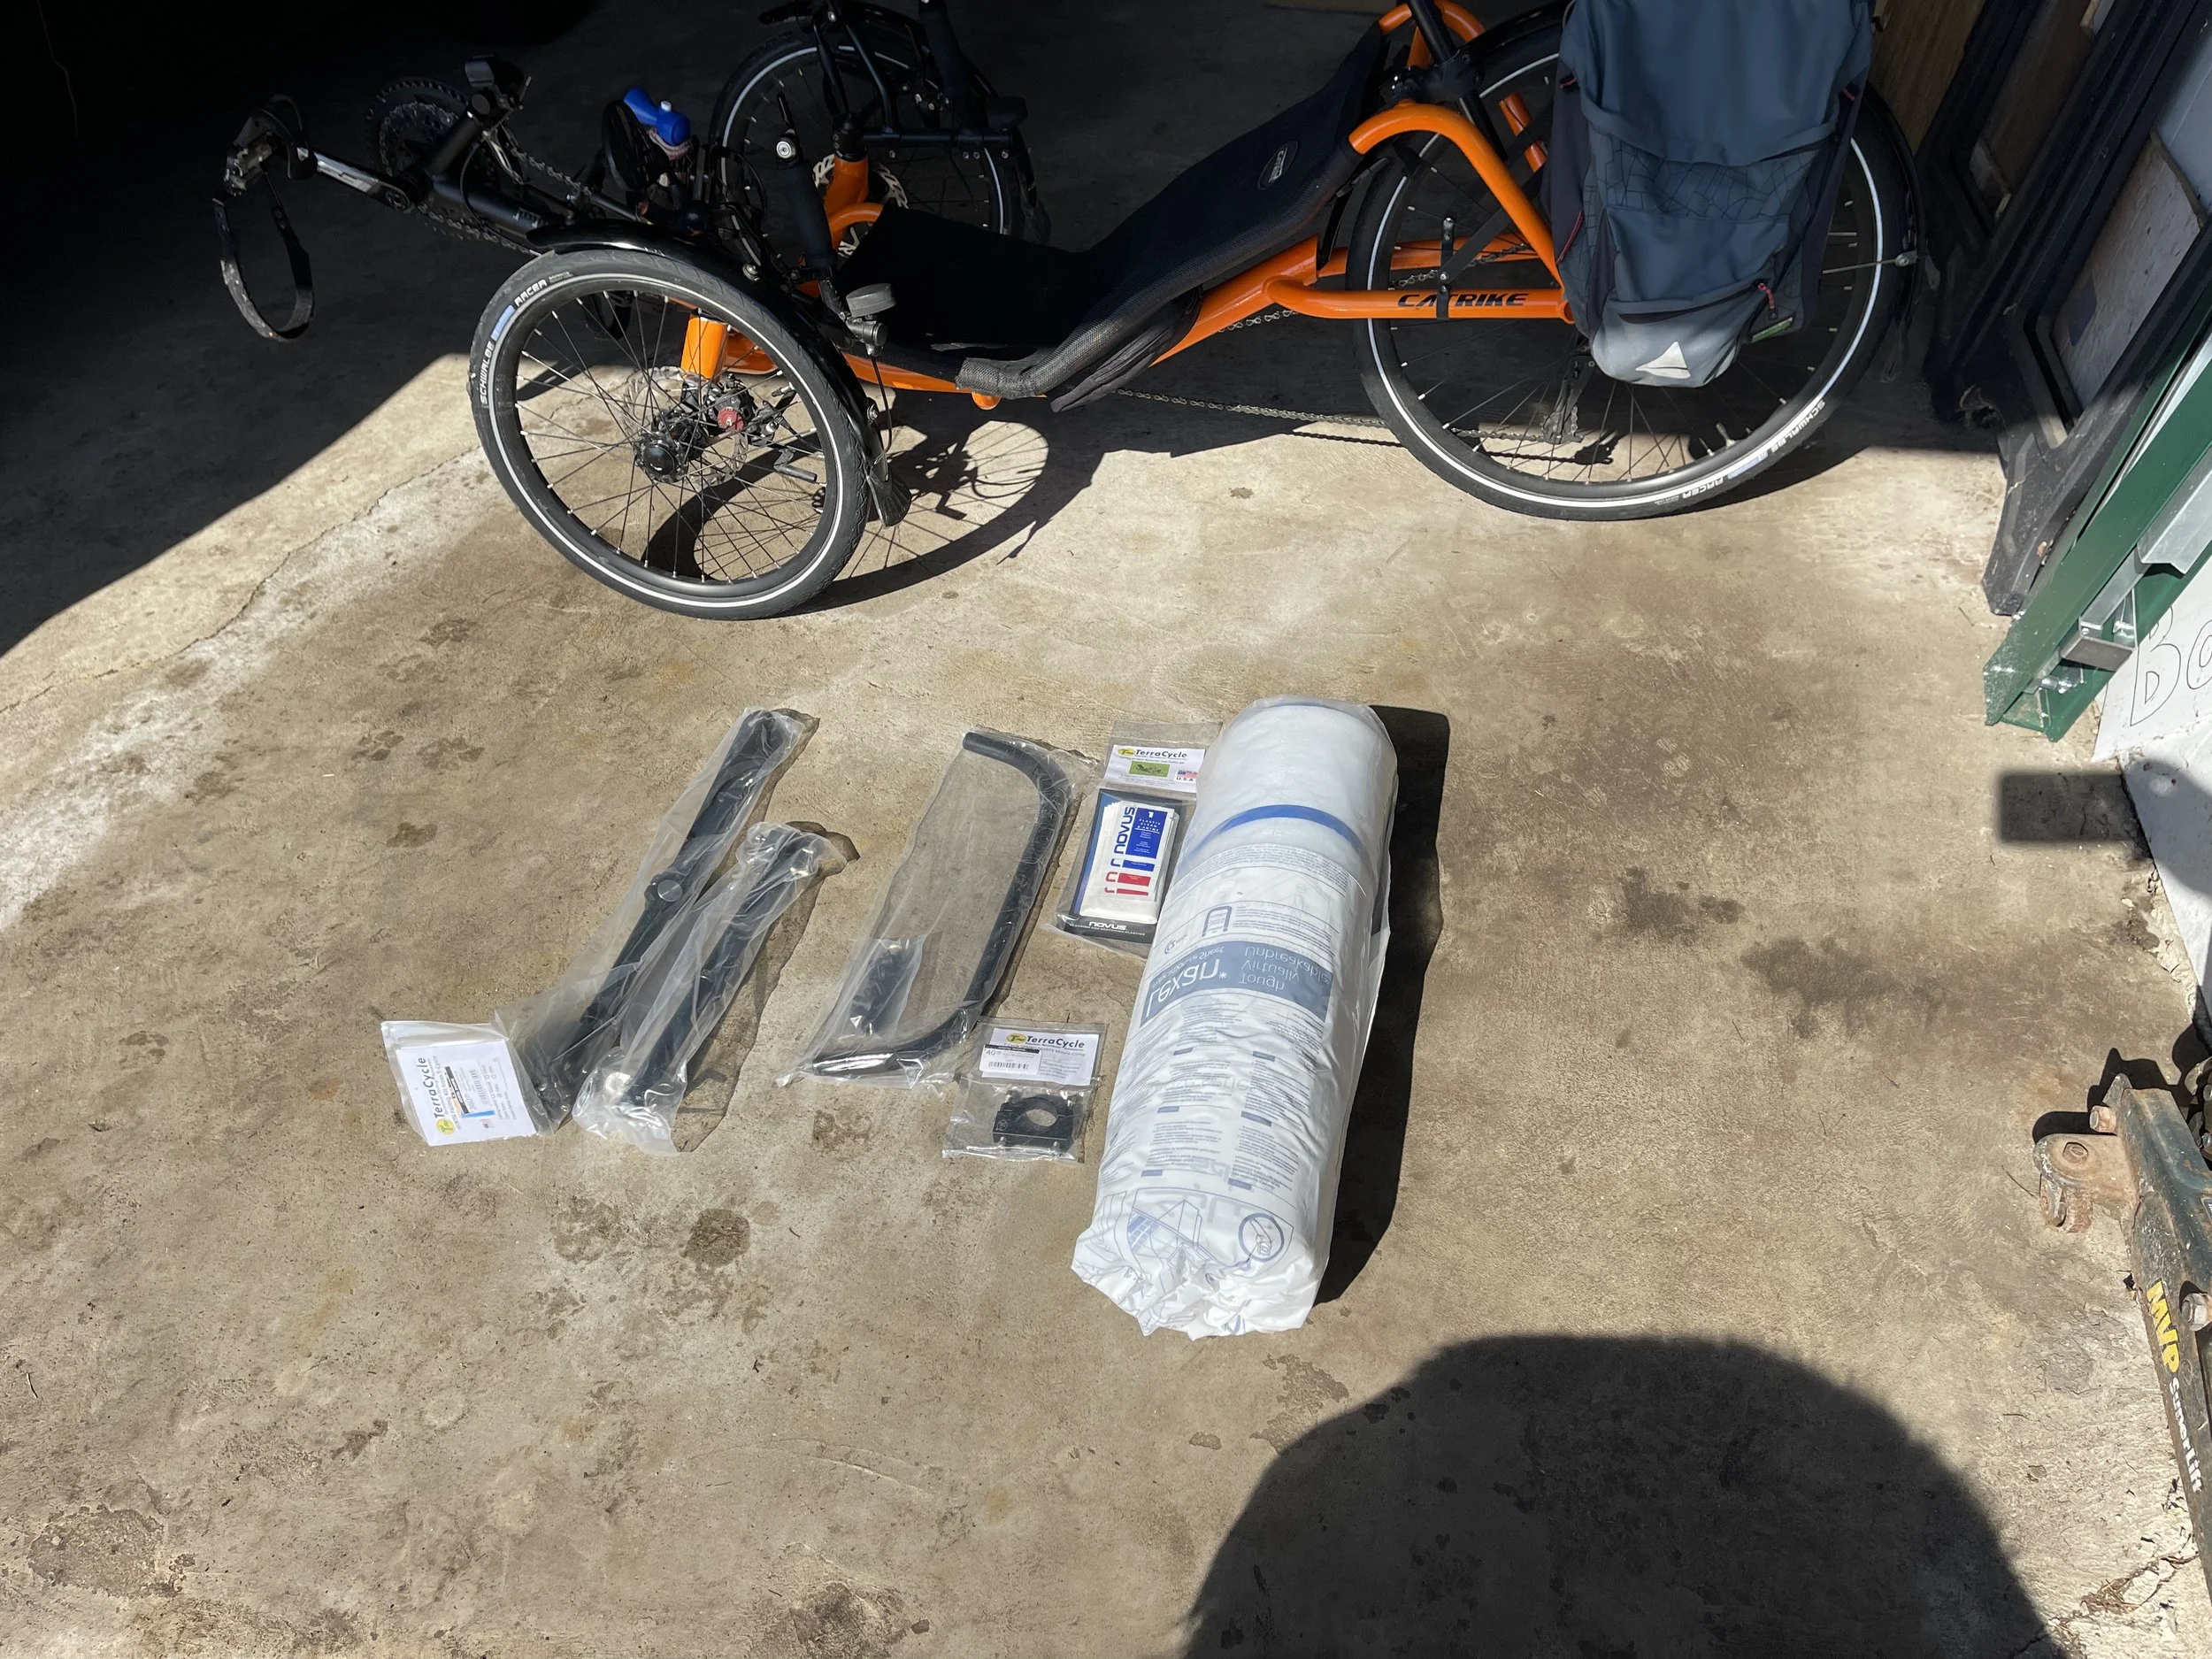
In a way one could consider this a good thing, because it did afford me an opportunity to learn new things about my trike, and an opportunity to buy a new tool. I’d never heard of star nuts before, never seen one in the wild. Now I’d not only become aware of them, but would get to learn how to replace one!

(These are the things I say in my head in order to get the swear words to stop coming out of my mouth. It’s only a moderately successful approach…)

So I ordered a tool (that was clearly made for upright bikes, but I got it to work), replaced it, learned about the torque rating that it’s supposed to be tightened to, dusted off my torque wrench, and… still shaky.

Over the subsequent weeks I continued to gently tighten it, trying to get some improvement without springing the star nut again. The result of this was:

A. It never got any tighter; and 2, I managed to pop the star nut on the other side.

It’s a dark, black hole…

I studied the diagrams in the Catrike Owner’s Manual, asked the folks at Utah Trikes how deep the star nut should be placed (thinking maybe I hadn’t put it down far enough). But nothing I tried helped, and it just kept getting worse, reaching the point I described above - getting shaky even with my hands on the grips. It started making me wonder if it wasn’t approaching the point where it was a little unsafe to ride.

So I broke down and did something I’m always reluctant to do: I asked for help. Specifically, I described my problem to the folks in the Catrike Owner’s Group on FB. I got the list of possibilities that I described above - all of which made sense, and included my loose headset. So I asked a second question: why can’t I get it to tighten?

I don’t know exactly why it always takes me so long to ask for help. It’s a congenital thing, and it happens across the board. I’ll spend an hour in a hardware store looking for the thing I want rather than ask an associate for assistance. I could charitably call it an independent streak, but in many cases - like this one - it’s an impediment.

Why? Because this was an issue of two bolts and about three minutes worth of work. As is invariably the case, when I ask for help I find that the solution is often simpler than I thought, and I feel like an idiot for not asking sooner.

It turns out, as was gently pointed out to me, that you cannot tighten the headset without first loosening the handlebar mount.

They seemed so simple and unassuming. I had no idea they had such power!

Two bolts and three minutes per side. One minute to loosen the two bolts on the handlebar, another to tighten the headset, and a third minute to tighten the handlebar back in place. Six minutes of work and my three year old Atomic Orange Expedition steers like the day it arrived.

I understand, in retrospect, that the handlebar keeps the headset from tightening because it cannot move - it’s held in place by the handlebar. But I’m quite certain that I could have looked at diagrams, and started at it on my garage floor, till the end of time and not seen that. In fact, I was well on my way to that outcome.

I had also begun to wonder whether the issue might actually be the mounting of the B&M mirrors on the headset. They are actually made for a different make - HP Velotechnik. I didn’t want to believe that, because they are so much better than the Mirrycle mirrors the trike came with, but I’d considered removing them to see if that made the difference. And now I know it wouldn't have, so I was able to skip that experiment.

So - back on the road, without the shakes! In fact, now that it’s tracking straight, I’m becoming aware that this has been a longer-term issue than I realized. It’s been a very long time since I was able to let go of the grips and not expect that the trike would at least wander aimlessly, following the curve of the road, if not shake me silly.

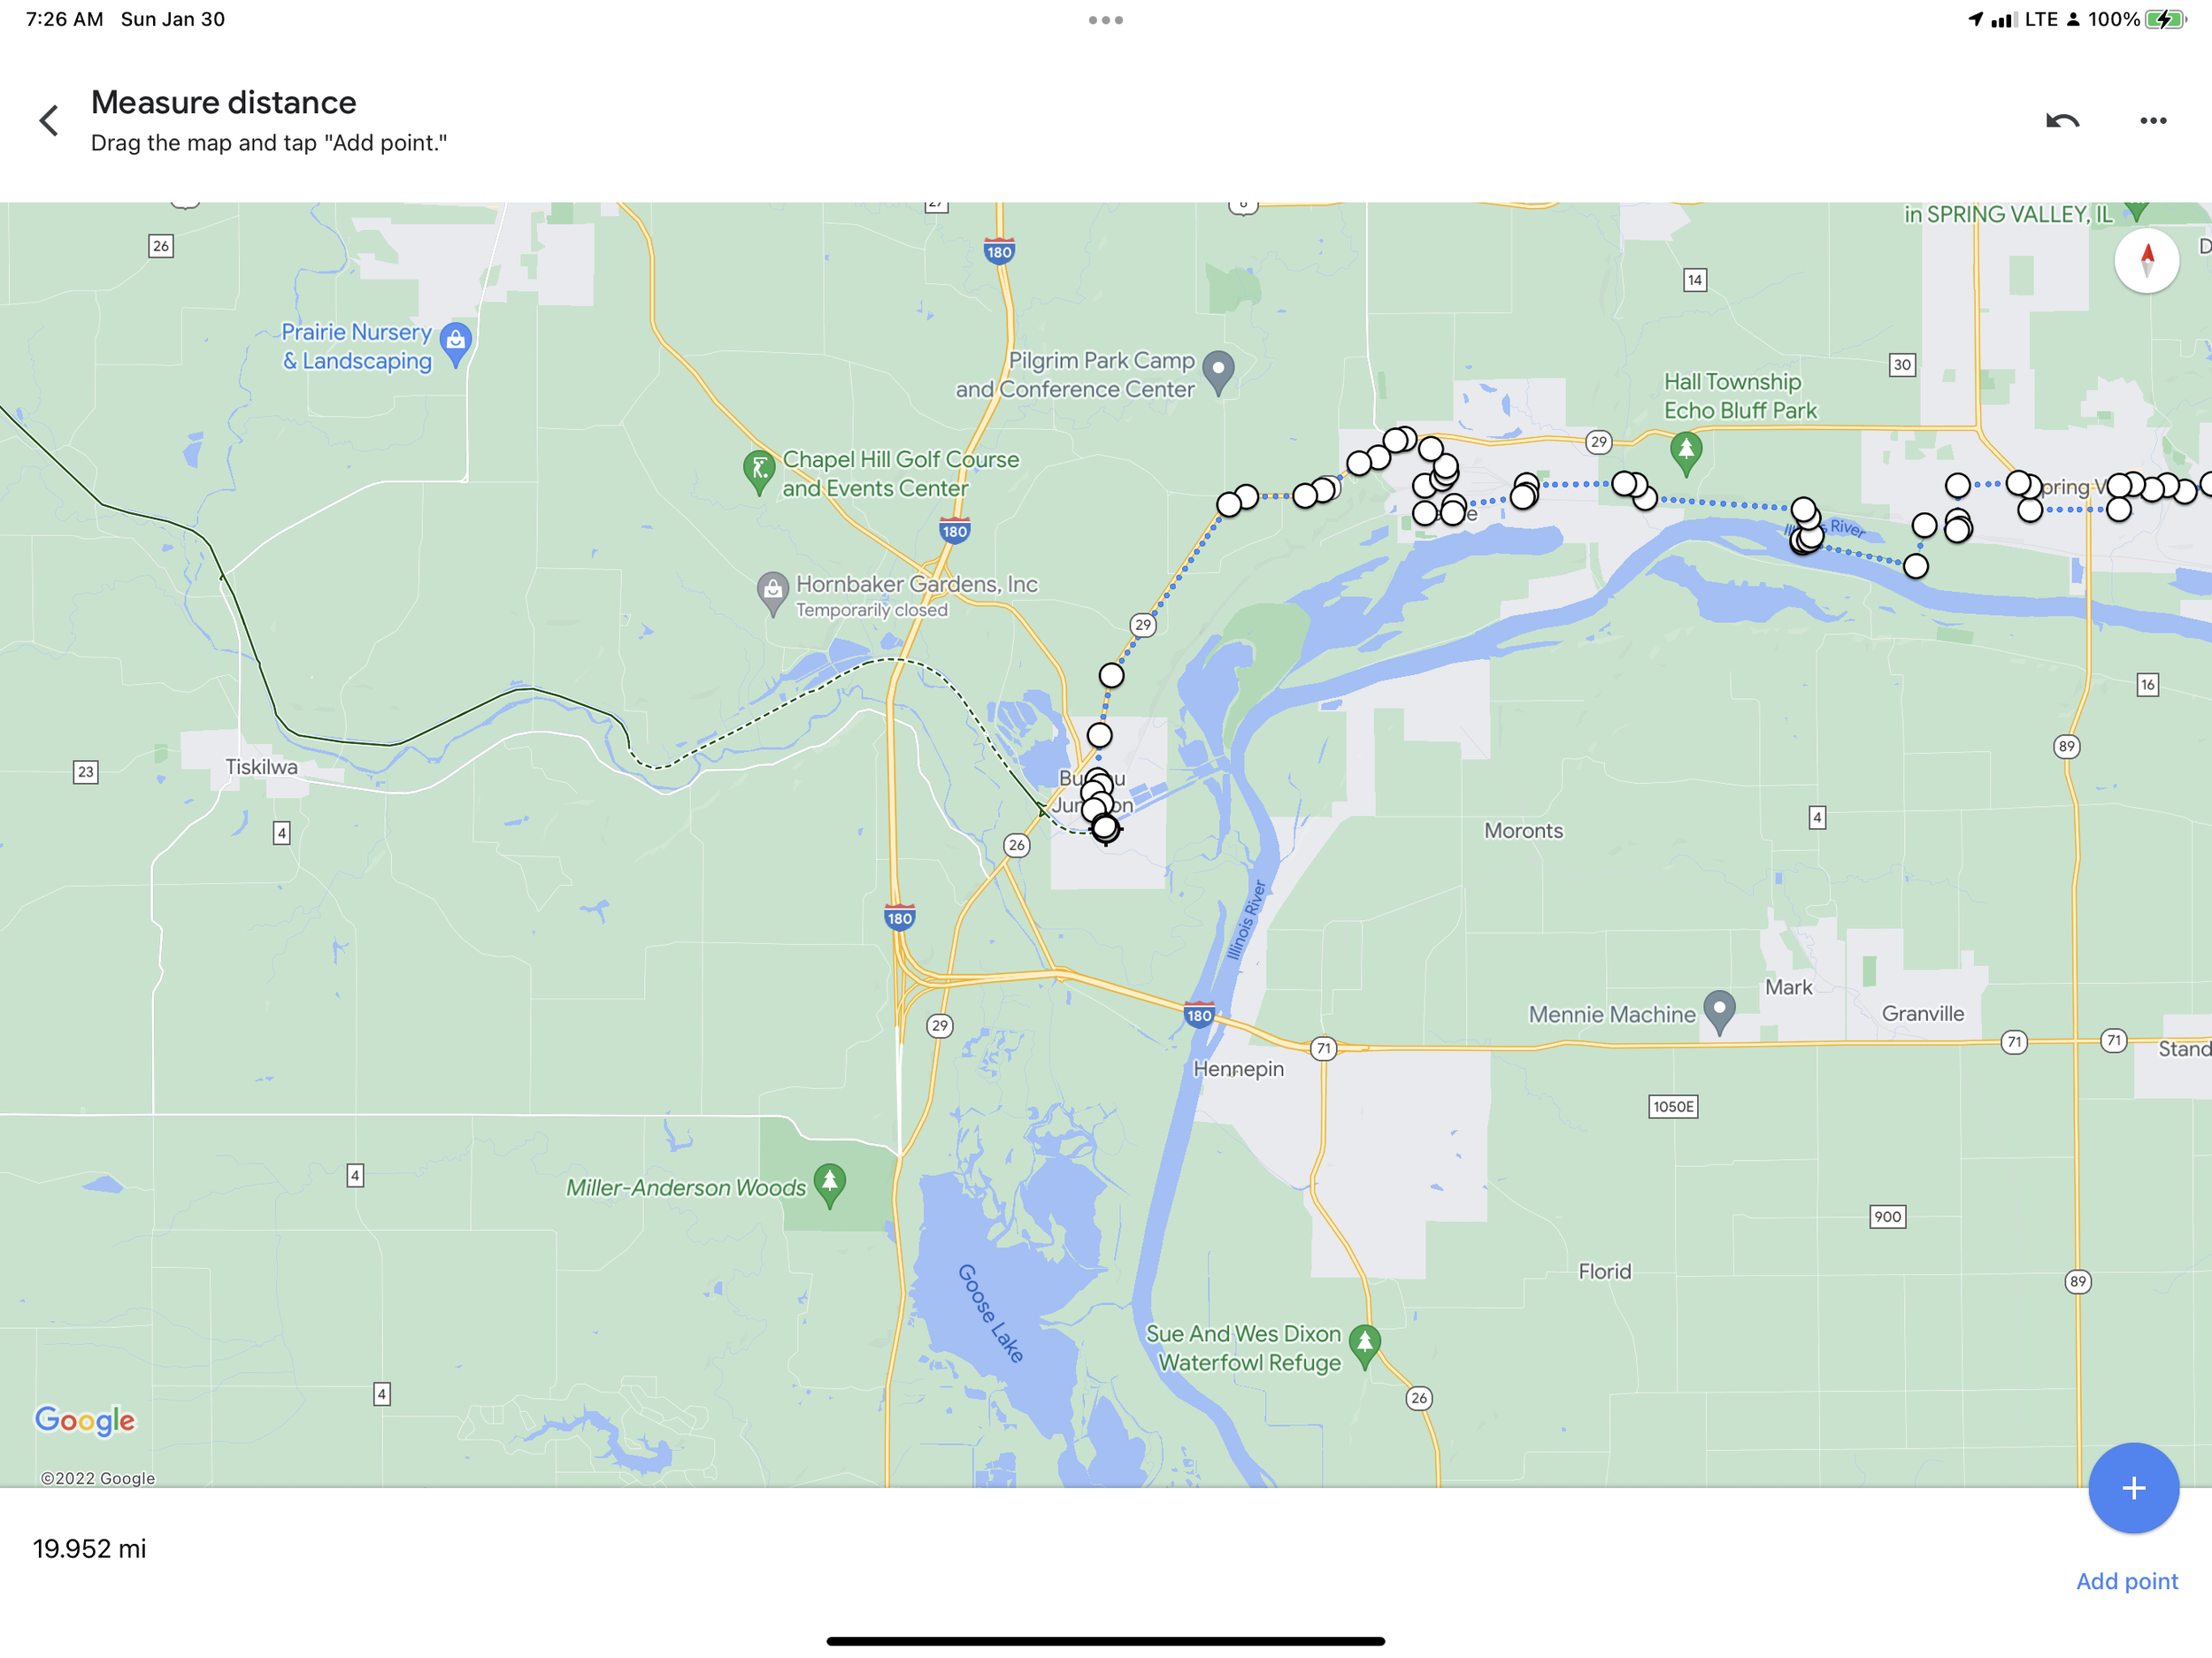
All in time for a high of 50° and sunshine here on the northern Illinois prairie!

My Faired Lady by Erin Wade

Regardless of what they are riding, every cyclist has a love-hate relationship with the wind. The gusting atmosphere can have a significant affect on your forward progress either to the positive or the negative, and often both across the course of a given ride. If you ride into the colder seasons, it can also provide a biting chill that you have to bundle against to keep your extremities safe. Out here on the northern Illinois open prairie we have that wind in abundance year round, but particularly in the winter and spring months.

One of the benefits a recumbent trike has over a standard upright is that it provides a more favorable profile to that wind. I realized fairly early on, when comparing my first trike - a Catrike Pocket - to riding our upright Schwinn Mountain Bike in the snow and cold, that when the wind was blowing and cold, it was just better to be lower down and out of the wind.

But while they are indisputably better in terms of aerodynamics, they are not perfect. A strong enough wind can still push a recumbent trike around, and in the winter your feet, for example, are out in front of you, right at the front end of the wind you are creating with your own movement. But there are ways to further enhance the aerodynamic profile of one’s Human Powered Vehicle.

Enter: The Fairing

In simplest terms, a fairing is essentially a windshield built to improve the aerodynamic profile of a machine - human powered or otherwise. You’ve probably seen them on motorcycles (but may have just thought of them as windshields - I know that I did), and they’ve been applied to all sorts of other machines, including recumbent bikes and trikes.

In addition to the potential aerodynamic benefits - improving speed, or at least decreasing the effort needed to work against the atmosphere - they also provide some weather protection. Moving the wind around you in the winter means less wind chill effect on your body, and in rain and snow, being at least partially covered means less moistening from the elements. All of which is to say that getting one for my Catrike Expedition has been on my mental list for some time.

I’d started looking for a fairing in earnest in the winter of 2020-2021, but it didn’t work out financially (this is not an impulse-buy level of accessory). This winter proved to be more amenable, and I decided to go ahead and pull the trigger.

…and what I quickly realized is that my decision to move forward wasn’t going to be the only factor in this scenario. The ongoing supply chain issues and the Great Resignation that we are experiencing appears to have had an affect on the availability of fairings in general. As best I can tell there are currently two main makers for these items for recumbent trikes in the US, and contact with both found that they were currently not available.

This past summer I ran into a similar issue when I wanted to get a chain gobbler for MLW’s Pocket - I had money in hand, but they were listed as out of stock on the manufacturer’s websites. Back then I put in a request to be notified when it came back into stock, and after waiting several weeks, it occurred to me to check with some of the bike shops that sell recumbent trikes to see if they might have them in stock. That worked - the Hostel Shoppe in Stevens Point Wisconsin did, in fact, have one. I ordered it up, and had it a few days later.

Given that success then, I decided to try it again, and found that both Utah Trikes and the Hostel Shoppe (again) had them in stock. I’ve had good luck with both companies, but I decided to go with the Hostel Shoppe simply due to proximity. Stevens Point is a few hours to my north, while Springville, UT, is half a country away - I was hoping it being closer would get it to me sooner.

Windwrap WINTR Fairing

There are a couple of different types of fairings. Some of them are small affairs that mount out on the front of the machine and direct wind away from your feet - which would provide some decreased chill in the winter. But I wanted a more full-body fairing, to provide a greater aerodynamic benefit and to get some additional weather protection. Both bike shops had only one option available that met this description, and that was the Windwrap WINTR fairing by TerraCycle.

Now, TerraCycle makes some great products, a couple of which I already own, including the aforementioned chain gobbler as well as their Adjustomatic Bottle Mount. So, while it would have been nice to have some additional options, being “stuck” with one of their products was hardly a hardship.

It arrived in a box that is a little smaller than I expected, and lighter than it looked:

Valencia checking out her new outfit

Getting it On

As is sometimes the case, it arrived a couple of days before I could find the time to actually install it. But once I did, things went relatively smoothly. I had my helper crew ready to go, and opening up the boxes found, among other things, more boxes and lots of packing paper:

The crew at the opening ceremonies

(You know, they always join me for these projects, but every time I actually try to get them to offer actual assistance they demure, offering up some lame excuse about not having thumbs…)


Enjoying this post? Check out our Cycling page for links to other cycling articles on Applied Life


One of the things that quickly became clear as I started pulling things out of the box is that you wanted to check the packing paper carefully - several of the parts were wrapped up in the paper. I actually have held on to the boxes and the paper for the short term to make sure I don’t discover a piece missing only to have inadvertently thrown it away.

Once it’s all out you see that there are multiple pieces, each nicely packaged:

A fairly nice job of packaging

The rolled up item you see is the fairing - it’s made of Lexan, and is quite flexible. The rest of it are the items that make up the frame and the mounting points.

Terracycle makes a very handy installation video for the Windwrap WINTR fairing. I watched this section by section as I installed it - which is to say that I watched them install the first piece on the video, then put that piece on, then repeated with each section. I will sometimes watch an installation video all the way thru first, but there were only a few pieces to work with, so this seemed a reasonable strategy.

Long story short, this essentially involves putting a mounting clamp on to the boom, and then mounting the different pieces of the frame to that clamp in a given order. This went relatively quick:

All framed up

In the video, when the put the frame together, they mention that you want to do your best to center the upper crossbar when you attach it. A very nice touch is that TerraCycle has explicitly identified the center point on the bar for you:

I am feeling very centered

From there the next step was to unroll the fairing itself and mount it to the frame.

Wrapped up in itself

Probably the single most challenging part of the process was getting the protective blue film off of the fairing:

I’m so blue…

The fairing attaches to the frame with rubber expanding nuts that “mushroom” around the opening they are inserted into in order to hold it tight. These are designed to be hand tightened and easily loosened for removing the fairing.

It’s a Wrap

With that it was all mounted on the trike:

My Faired Lady

And if you are (understandably) looking at this picture and wondering “how are you supposed to get into that thing?”…

It knows yoga

…it is designed to fold forward for just such an occasion.

There are multiple small adjustments to be made to ensure that your feet and knees clear the fairing when pedaling. I’ve found these to be a multiple step process - first measuring things out as described on the video, but then making a handful of adjustments out on the first ride as well. These were simple and required only the Allen wrenches on the multi-tool I always carry on the trike. I also had to move around my phone mount, as my (big-ass) iPhone was now in conflict with the edge of the fairing.

One of the other things I’ve wondered about is transporting the trike with the fairing. I typically both haul and store my Expedition in my Mobile Trike Garage (my Subaru Outback). To get it into the Outback I have to lower my neckrest already, and the trike pretty much fills the available length of the back of the car. The fairing adds both some height and some length to the trike, so I wasn’t sure how well it would fit.

And: it doesn’t.

This one is too big

Or, at least it doesn’t with the fairing on the frame. As noted above, the fairing is designed to be easily removable by hand, and with it off, the frame does fit under the roofline.

If I fits, I sits

The frame itself still adds length to the trike. I usually store the trike in the back of the car in a diagonal orientation, which allows me to have some view out of the inside rear-view mirror. It won’t fit that way with the frame on, but does fit with the rear wheel sitting dead center, between the front seats:

Dead center

This is workable, at least for the time being, tho it wouldn't be comfortable for longer trips. Fortunately, removing the frame is a two-bolt job with an Allen wrench, which I can do in those situations. I wouldn’t want to do it every time - removing and replacing both the frame and the fairing each time I go out for a ride would start to be more futzing than I want to engage in - but seems a fairly low effort set of tasks for traveling with the trike. And frankly, my day-to-day solution for the first week of having the fairing on the trike has simply been to leave the car outside, with the trike in its spot in the garage, fairing in place. This is actually a fairly common arrangement for me in general, particularly in the warmer months, as it lets me get out and ride at a moment’s notice.

I’ll be keeping track, over the next few weeks, of what the impact is from having the fairing in place, both in terms of comfort and speed. And I’m fortunate - in a way - that I was able to get it now, as we roll into spring, which is our windiest time of year here in northern Illinois.

So - more to come…

Strategerie Follow-Up by Erin Wade

I posted last time about my efforts to find a way to ride that wouldn’t put me out on the road in the deafening wind of late February. I had a primary plan of heading down to the I&M Canal Trailhead in LaSalle, with a backup plan of just going into town and riding around the all-too familiar streets of my childhood home.

I’d formulated the backup plan because I really didn’t have a clear idea of what the conditions would be like on the Canal Trail. This has been a struggle both with respect to finding out current conditions, and how the trail is managed for the winter and snow in general. Viz: do they clear the trail, do they groom it for skiing, do they let snowmobiles use it? What’s the story?

I’ve tried asking after this on social media in the past, but the extensive nature of the trail makes it difficult to sort out - it appears that different areas may manage their sections of the trail differently, so sorting out an answer for the area of one’s own specific interest can be challenging.

You know - unless you actually go and look at it. This has been on my list for some time - the last several years, to be honest. But the trailhead is a half-hour away, and there are usually other things to do (like riding out of my own driveway) to compete with the investigation.

I figured this was going to finally be my opportunity to find out.

Let’s get the good news out of the way: I didn’t have to resort to Plan B.

When I got the trailhead it was clear that the low-lying nature of the canal and the woodlands around it were helping to avoid or screen out most of the wind that I had been contending with on the open prairie. This was sort of a bonus - I thought that might be the case, but I wasn’t really sure it would turn out to be.

The trail itself turned out to be an interesting mix of surfaces. A couple of days of above-freezing temps had melted the snow away in the more open spots…

Open Asphalt

…while the shady areas retained more coverage.

Residual white stuff.

I also quickly got my answer to how the trail is managed for winter use:

I can see why you’d want to mark this as a danger spot…

In addition to the hazard marker there were also “curve ahead” signs on a couple of sections of the trail further down. I’m a little ashamed to admit that at first I found these a bit odd - I mean, what cyclist rides so fast on these trails that they need a curve warning? - before I realized that they were for the snowmobiles.

The snowy sections made it clear that, despite the signs for the powered sleds, there is quite a bit of mixed use of the trail. There were lots of footprints, dog tracks, and at least one extended section of cross-country ski markings. So: it would appear that this section of the trail, at least, is not cleared, nor is it groomed for skiing. All of which is well enough - I have no objection to snowmobiling, and in fact spent a fair portion of my youth sliding around the winter countryside on an Artic Cat Lynx my own darn self. But it means that you’d likely need a fat bike or trike to tackle it when there’s been a sizable deposit of the white stuff (and I do not currently have such a machine in my stable).

But none of that applied to this ride. The snow-covered sections were not so deep that they couldn’t be managed by my mostly stock Catrike Expedition with her road tires, so I was all good on that front.

I did become acutely aware of a couple of things as the ride progressed, however. First, I was thankful for the presence of my fenders for, oh, say, the thousandth time, as temperatures in the mid- to high-40°’s conspired with the snow to allow for a lot of standing water along the trail. I also found that, while my rear fender does prevent that telltale cycling mud-stripe from appearing on your back, it is still possible for your posterior to become soaked under the right circumstances.

It was also clear that I had hit the trail on perhaps exactly the right day. Where the snow had mostly melted away the ground was soft underneath. But, thankfully, the thaw had thus far only affected the first inch or so of topsoil. This meant that, while it was slow going in some spots, there was none of the deep mud suck that can happen after several days of spring warming. It took me a little bit to figure out, but it turned out it was a little better to ride thru the wetter sections of the trail. The standing water was perhaps acting as an insulator, or possibly was just a sign that the ground underneath hadn’t warmed enough to absorb the water, but either way it was typically more solid that the stuff free of moisture. I’m pretty sure it sections would be very challenging with another day or two of temperatures above the freezing mark.

Valencia at New Bridge (that’s my name for it - I don’t know if it has an official name…)

I decided to stop at the new bridge over the former rustic creek crossing. This spot is a little over seven miles in, and so made for about a 14-mile round trip. This fit nicely with the time I had allotted for the ride, and if I’m being honest, as wet as it was, I did not want to contend with the clay-soup sections that lie between the bridge and Buffalo Rock State Park.

As it was, my orange girl collected a fair amount of trail residue along the way…

Dirt from the expedition on my Expedition.

…but that’s a good thing in the grand scheme of things, because the dirt means I got to ride. And all in all, it was a good ride. A few more days of thaw and it would have been considerably less pleasant - soft, slow, and messy - but then that’s a reality of both the big canal trails here in northern Illinois. But I was able to luck in on a good moment this time around.

Soft

Winter Cycling Strategerie by Erin Wade

February is, hands down, the most challenging month for winter cycling here in northern Illinois.

You might think, as you read that sentence, that it’s the snow or the cold that makes it more challenging. If you are not from the region it’s an understandable thought, and that is a part of it. But there’s more to it.

The early portion of the month often is cold and snowy, But it gets warmer here as we move into the second half of the second month. Today’s high is projected to hit 49° (F), and we already have an ambient temperature of 35° at 9:30 this morning.

But with that increase in temperature comes the first vestiges of the winds of spring. While we have what many would consider a delightful forecast temperature-wise, the entire day is also projected for high winds:

Harbinger of the Winds of Spring

My weather app says that the current wind speed is sitting at 22mph. More importantly, I can hear that wind pounding against my window as I sit and write this. While the warmer temperatures remove any concerns about wind chill (which could otherwise be moderated by proper clothing), the higher wind levels make it very difficult to hear anything around you on the open road.

Motor vehicle traffic is very forgiving on the northern Illinois backroads - people here are very accustomed to sharing the road with slow-moving equipment. Even so, I’m reluctant to share those roads when I can’t hear things coming.

That combination of early February weather and late February wind is responsible for making it routinely my lowest month both for rides and for mileage. But I gotta get out and ride, so it seems like it’s time for some different strategies.


Enjoying this post? Check out our Cycling page for links to other cycling articles on Applied Life


I’ve decided to come at this from a couple of different directions. The longer-term strategy involves getting a fairing for my Catrike Expedition. For the uninitiated, a fairing is essentially a windshield for bikes and trikes. There are many advantages to having them, including weather protection in a variety of conditions - snow and rain, for example - and aerodynamic advantages on speed. And I’m hopeful that it will additionally decrease the ambient wind noise around me when I’m riding on the road.

Getting a faring has been on my mental list for quite some time, but they are not an inexpensive addition for the trike. However, I’m pleased to say we’ve reached a point where this addition is finally feasible.

Of course, now that it is, when I finally go out looking for one it turns out to be hard to find them in stock. I suspect that this is due in large part to that two-headed monster born of the 2020’s: supply-chain issues and the Great Resignation.

So I spent my morning following the strategy of seeking it out on websites for trike-friendly cycling shops. I’ve found this to be successful in the past - both when shopping for TerraTrike heel slings, and more recently when looking for the chain gobbler for MLW’s Pocket. The rationale here is that, while the manufacturer may not have any in stock, cycling shops may have some inventory on hand. This appears to have been successful, as both Utah Trikes and The Hostel Shoppe appear to have Windwrap Fairings on hand. I have ordered from both in the past, and had very good luck with both companies. I put in my order with the Hostel Shoppe this time around primarily because it’s more local - Steven’s Point, Wisconsin is sort of in my midwestern neighborhood. It’s nice to shop the “local” guy where possible, and if I’m being honest I also figured that it being closer would mean a shorter shipping time.

Of course, ordering a fairing doesn’t help for the 20+ mph winds today. In order to get my ride in today I’m going to head down to the I&M Canal Trail. The canal trail takes me off the road and largely removes the risk from vehicle traffic. It has the additional benefits of running east-west on a day where the wind is pounding in from the south, and being somewhat sheltered with tree cover on either side for much of that section.

There is an unknown to this strategy: I do not know what the condition of the trail is at the moment. I’ve seen recent pictures which suggest some light snow coverage, but they pre-date the most recent snowfall. And with the recent precipitation and higher temperatures today, it’s possible that sections of the trail will be muddy or flooded - the sheltered nature of it is due, in part, to being in a very low-lying area along the Illinois river.

For that potentiality I have a backup plan. If the trail isn’t cooperative, I’ll head back towards home and stop in Mendota - our nearest town, and my hometown - and lay out a ride there. It’s the least attractive option because it’s literally scenery I’ve been around my entire life, but the buildings in town will block the wind.

So that’s the strategy, both today, and for the longer term. We will see how today goes, and of course we’ll explore more when the fairing arrives. It’s time to ride!

Das Boots by Erin Wade

When it comes to winter cycling, one of the most challenging parts of the equation - coming just after “how do I keep my glasses from fogging up”, is keeping your extremities warm. People who have been doing this for a while have likely arrived at their own answers to this question (I would assume that anyone who isn’t able to sort out an answer to this has long since given up on the idea of riding in the winter).

This is true for myself as well. I’ve got different levels of weather gear lined up for different temperatures. Although it often takes me a couple of rides to sort out which level I need to be at when the temperature shifts, particularly when moving from my medium gear to full cold weather gear.

The reason for this struggle: the boots

For anything below about 30° F I typically shift gear to my nuclear option for warmth: a pair of heavy-duty, wool felt-lined, waterproof Sorrel’s. These boots are warm, pretty much impervious to any moisture, and they are at least a size and a half over my regular shoes, which allows for plenty of room for thick socks, even in layers. I even have room for chemical warmers in there when I need them.

These are them, on the left, along with the middle-tier hiking boots:

Das Boots


Enjoying this post? Check out our Cycling page for links to other cycling articles on Applied Life


Sounds great, right? And from a warmth and weatherproofness standard it is. The difficulty is that those Sorrels weigh approximately one metric ton (Seriously, they do weigh a lot - I don’t have a scale, but REI lists the weight for the modern version of these boots at 5lbs for the pair, with a fully synthetic liner. My boots are older, with a liner that is a wool blend, so I’ll bet they are slightly heavier). I’ve convinced myself over the years that this is okay - I am out there on the trike for exercise, right? A little heavy lifting on the pedals is just a bonus, right?

Right?

But if I’m being honest, the reality is that I sort of dread transitioning to the Sorrels. To avoid it, I tend to push myself out to colder temperatures in my hiking boots, trying to convince myself that toes being a little numb is good for the soul. More recently I’ve begun adding chemical warmers to the hiking boots to make them functional down to lower temperatures. This works to a degree, but it also starts to add-up costwise.

Which, ultimately, gets to the heart of the matter. Some of you, at this very moment (or possibly sooner) have already said to yourselves “why not just get warmer boots? You know, ones that don’t weight a metric ton…”.

I’m not completely dim - this has occurred to me as well. But I have an ongoing problem with my Cheapness Gene firing up at any point that I start to consider buying something that I already own a solution for. The Sorrels work, and I already have them, so I really shouldn't be out there shopping for other boots. Or at least that’s what the Gene says to me.

Thing is, once I’m at the point of applying a non-reusable item that also has a cost for every ride, the calculation starts to work out differently. A 40-count box of toe-warmers comes in at about $23 on Amazon. Depending upon the weather, these usually last about a season and a half for me. But when I realized it was time to order up some more of them a few weeks ago, my Cheapness Gene started to relent a bit.

I spent a little time on an obscure shopping website) from a company based in Seattle and, with a little bit of back and forth, landed on a pair of Rockmark Men’s Winter Snow Boots.

My key criteria for this was that they be warm, but also lightweight. The Amazon page indicated that they were good to either -25° or -30° F (both claims are made on the same page, so…), and multiple reviews referred to them as being lightweight. Of course, when they arrived I found that I’d ordered the wrong size, so I had to then go and order a second pair and prepare to send the first ones back. But once the second pair came in it was time to try them out:

Boots on Pedals

My initial impressions are very good so far. The pair of the Rockmarks are lighter than even one of the Sorrel boots (Amazon lists the pair at 2.43lbs) - in fact, they are comparable to, and maybe lighter than my hiking boots. They are fairly rigid, but give enough to allow for comfortable pedaling. And they are warm.

In fact, they are warmer than the Sorrels are. This was unexpected - I sort of thought that I’d have to keep the Sorrels in the cycling rotation for the very coldest of rides, but that’s not the case. I started out for the first couple of rides with the new boots outfitting them with the same types of socks I would have worn with the heavier boots, and my feet were actually a bit too warm. I’ve since started to dial back the socks, and with relatively thin (tho still wool - always wool) socks I’m finding myself perfectly comfortable in temperatures that would have previously required the thickest of stockings. All without the use of chemical warmers.

The weight difference is enough that I’m also seeing a real-world difference in performance. I don’t expect winter riding to be fast - it is always slower than the rest of the year. But in my first outing with the Rockmarks I managed to pull my best time ever on my Rocks 8 route:

It’s about time

(For reference, this is a route that is half-gravel and which, as a result, I only ride in the winter ).

So now I’m finding myself wondering why this all took me so long (stoopid Cheapness Gene). And all of these are initial impressions of course. It hasn’t been super-cold here yet since I got the new boots - in fact, it’s ranged from the low 20’s to the mid 40’s (F) for the rides I’ve taken over the week or so that I’ve had them. This morning, however, we have the mercury sitting at a solid 10°, with a projected high of 16°, so today’s ride should provide a bit more of a test.

An additional note to add here: I’m aware that there are other options to consider for one’s feet. In particular, I know a lot of folks like to use heated socks. I did look at these, but most of the decent options - e.g. rechargeable, etc - appeared to come in at a cost level not that far below the boots I ended up buying. And at the risk of an over share, my feet have a tendency to run on the… moist side. I’d likely need to wash them after every ride, so I’d be concerned that I’d wear them out relatively quickly. Hence: boots.

The Hennepin Gap by Erin Wade

Several years ago the Rails to Trails organization announced a grand vision of a single bike trail that would cross the United States - The Great American Rail Trail.

To do this, they (understandably) identified existing trail systems in each state along the proposed route that could ultimately be connected into a longer, contiguous route. In Illinois, it made sense that the two primary trails they identify would be the trails along the I&M Canal and Hennepin Canal routes. Taken together, these two trails by themselves cross a large portion of the northern part of the state.

A large portion, but not all of it. The organization’s website for Illinois identifies other trails in the region (at least one of which - Thorn Creek Trail - I spent some time on this past fall, not realizing at the time that it was part of the GART) to make up for the open spaces in-between identified routes. In several areas planning appears to be underway for additional segments to close those spaces. But there is one area, in the middle of the proposed Illinois trail, that is less connected.

The Hennepin Gap

This seems to be a common issue when trying to put together grand thoroughfares such as this trail. There is a somewhat grander still road system that runs vertically across the Americas - The Pan-American Highway - making it possible to drive from Canada to the southern tip of South America.

Well - almost. Almost because travelers along this roadway will encounter The Darien Gap. This is a section of forest, mountains, and watershed at the border between Panama and Columbia that has essentially been determined to be too challenging, too expensive, and too environmentally damaging to build a road thru. It’s discussed in delightful detail in this episode of the Omnibus Podcast for those who are interested.

It’s with that phenomenon in mind that I’ve come to think of this (admittedly smaller) section of missing trail as The Hennepin Gap.

The Hennepin Gap is the territory between the trail head of the I&M Canal Trail in LaSalle, IL, and he Hennepin Canal Trail Head in Bureau Junction. As the crow flies the distance between the two points is almost exactly 14 miles. But the territory this cuts through is river country, complicated by the meanderings of the mighty Illinois River and the many, many tributaries that feed it. As a result, roads in this area describe winding paths through the countryside - there is no way to travel it in a straight line.

Since Rails to Trails first announced the GART, I’ve been curious about this section, and it’s been in the back of my mind to find some time to pedal my way between the two points and get a feeling for how challenging it would be to connect the two. So far, tho, that’s just been an idle thought, so to gain some movement on it I put it down as one of my goals for the coming year in my year in review post a few weeks ago.

Part of working up to that is to do a bit of planning. While I’ve lived in this area off and on throughout my life, that part of the region is not one I’ve spent a great deal of time in, comparatively speaking. When I have been there over recent years, it’s been either for the occasional high school sporting event for my child, or for my rides along the Hennepin Canal Trail itself, and all of those have involved direct trips to the sites, not involving travel along the same route.

An early stage of that planning then - something that situates itself well with a 15° January morning - is to start working with Google maps to take a look at route options. (Apple Maps has also recently added cycling directions, but according to them, there are no directions available for this route yet).

Google’s map program can readily lay out a course between the two trailheads, simply by entering each into the program:

Google’s Route

The route that Google proposes comes in at about 17 miles, and actually lands at the large parking lot at Lock 3 along the Canal. I prefer to start at Bureau Junction, but that’s fairly easily handled by taking a left turn just a little earlier and riding down the hill (and it is a downhill section) to the trailhead at Lock 2.

The challenge with Google’s route is that, once one gets to the western end of Peru, it follows almost entirely along Route 6 and then Route 29. These are relatively busy thoroughfares for the area, and the complicated landscape of river country virtually guarantees that one must spend some time on them. But the map itself does show cycling routes appearing in areas along the way that don’t hew to the highways:

Cycling route thru Spring Valley

Cycling route thru DePue

(The dotted green lines are the cycling routes)

It wasn’t clear to me then why, since they appear along the routes, Google maps didn’t plan the bike route with those in mind. So I laid it out using the measure distance feature:

Minding the gap

Following the cycling routes instead of the highways comes out at nearly 20 miles - three miles longer than Google’s route. I suspect this is why the map’s algorithm doesn’t use them. Still, that additional distance isn’t necessarily a disqualification, especially if it allows for a safer route, and perhaps a more scenic one, as it typically follows along closer to the river. I think I’m going to prefer that option when the time comes, all things considered.

And so this is the first step towards putting this together, I think: Laying out a route. There are some other things to consider between now and making a go at riding it. One of those things is when to go, which at this point I’m thinking would be in late spring or early summer. This is when the rains and winds of spring start to drop off, but it’s usually not yet oppressively hot.

Another is exactly how to do it. I’ve laid out a twenty-mile route, but this realistically means it’s probably a 40-mile ride - there and back. I could consider setting things up where I drop off a car at the Bureau Junction end and travel back to LaSalle to begin, but that requires multiple cars and multiple people, which makes things more challenging to coordinate. Besides, 40 miles is an eminently manageable distance.

And lastly, at this point, is whether or not I find a time to head out in my Mobile Trike Garage and drive the potential route first. The cautious-minded part of me suggests that this would be a potentially wise thing to do. However, it would significantly reduce the experience of discovery that comes with riding a route for the first time if I’ve already driven it first. I will have literally seen everything before I ever hit it on my trike if I drive the route ahead of time. So I’ll have to mull that - and it occurs that there may be a compromise here, where perhaps I drive the highway portion ahead of time to look for potential trouble spots, but leave the secondary roads - which is most of the route - for discovery.

And, all-in-all, I do find that beginning planning now, in the depths of the winter season which does not necessarily prevent riding, but does alter it in terms of time and distance, helps with looking forward to the coming season.

The Ghost (of Winter) in the Machine by Erin Wade

When one thinks about the challenges of engaging in winter cycling the first thing that comes to mind is how to keep oneself warm. This is a reasonable enough thought, of course, particularly as you are just starting out. I suspect most folks, if they decide they are going to stick with it, figure out what works for them on that front fairly early on, and then stick with what works. I know that that is the case for me.

The variable that seems less predictable - and thus to present ongoing challenges - is the machine itself. I’ve done winter cycling on multiple machines. Early on I primarily rode my Cannondale SR400 in the winter months - the same machine that I rode in the summer. I would very occasionally alternate this with the Schwinn mountain bike that we also have in the stable. But since getting my Catrike Pocket in 2017, all of my winter riding has been on three wheels, first on that machine and now, since the winter of 2019-20, on my Catrike Expedition.

With the switch from two wheels to three my cold weather riding has increased considerably. I’d originally looked at winter riding as a replacement for cross country skiing. I really enjoyed cross country skiing, but it was becoming increasingly rare for us to get enough snow in our area to get out, and when we did it always seemed to melt before I had a day free to enjoy it. Given that, when I switched I rode in the winter, but not a lot, really. Looking back through Cyclemeter, between the four winters of 2013-14 and 2016-17 I clocked a total of 18 rides.

In my first winter with the trike I clocked in 26 rides - more than the four years prior combined - and it’s gone up every year since. The trike offers multiple benefits over uprights for winter riding, not the least of which is not suddenly disappearing out from under you when you hit a patch of ice (I’d never gotten to the point of investing in studded tires for my upright bikes).

With that increased activity, though, comes the realization that winter isn’t just challenging for your own body, but that the cold also takes its toll on your machine. Anyone who has hopped in the car to head to work on a January morning only to turn the key and hear that heart rending slow churn that tells you the battery has decided to take a powder knows this to be true. But it is also true for cycling machines.

Last year I ran into struggles with my left brake freezing up - and doing so, unfortunately, in the locked position. This led to the only time as an adult that I’ve had to call for a pickup (well, so far, anyway).

This year it’s issues with shifting. As I noted a few weeks ago, my trip up to Wisconsin for Thanksgiving seems to have gotten moisture into the cable line for my rear derailleur. This has been mostly fixed with liberal applications of WD-40. I say “mostly”, because down below about 15° F the problem re-emerges, and I’m then stuck with the three gears to which the front derailleur continues to give me access.

And that front derailleur apparently isn’t super pleased about its increased workload, and is showing some issues with wanting to stay in place, leaving me at times to ride with my left hand on top of the handlebar to keep it still. This is an oddly intermittent problem - I can, at times, reset it and get a couple of miles out of it, and then have it recur and I cannot get it to stay put. So far it’s not clear to me that it’s temperature related - I’ll likely investigate that further today.

If all of this sounds like complaining, I don’t intend it that way. While I may get a bit frustrated with it at times - suddenly, unexpectedly dropping from the middle to the small ring can be a bit jarring - mostly I think of it as representing part of the challenge to winter riding. With the increased cold-weather riding, I’m encountering - and learning about - how the cold affects the machinery, and what needs to be done to address those issues. It’s part of the challenge of winter riding.

This is, after all, part of what winter sports offer. It’s not just the opportunity to get exercise and enjoy nature, tho that is certainly a part of it. Winter sports presents with that additional challenge of contending with, facing, and (hopefully) succeeding at beating down what Old Man Winter presents us with.

Winter Wontderland by Erin Wade

I’d like to file a formal complaint.

I think I’m pretty clearly on record with loving winter cycling. I love the brisk, cold air, the ever-changing nature of the snowy landscape. I enjoy the challenge and, yes, occasional struggle of sorting out what the correct level of clothing is for perpetually changing situations.

But the month of January, thus far, keeps handing out days that are unsuitable for winter riding.

When I say unsuitable, it’s not that they are too cold - I am convinced at this point that there isn’t such a thing. As the saying goes, there no bad weather, just bad clothing. But for most of the days of this recalcitrant month other factors in the weather have been working against me.

I am predominantly a road rider and we have the benefit of living in rural northern Illinois. That combination of factors means that the overwhelming majority of my riding starts and ends at my driveway. This is usually a wonderful thing, because it means that when the urge and opportunity present I can simply hop on my trike and go. And, to be clear, I have had that opportunity on a handful of days this year:

Riding in the snow

Three tracks are better than one. Or none.

Aside from those few opportunities, what January 2021 has decided to offer up so far is mostly day after day of high winds, low visibility, and - today - freezing rain.

What each of these factors represent for road riding is not necessarily an impediment to cycling in and of itself. Wind, for example, mostly just adds to the exercise gain, the calorie burn of the ride. But all of them put the road cyclist at a much larger than usual disadvantage with motor vehicle traffic.

Above a given threshold - say about 25 mph - persistent wind makes it essentially impossible to hear vehicles when they approach from behind. Yes, I do have mirrors, and check them regularly, but I also rely on being able to hear vehicles approaching in the intervals between glances at those mirrors.

Drifting snow - facilitated by that self-same wind - significantly reduces visibility, making it harder for me to see those vehicles and, perhaps more importantly, harder for them to see me. Drifting like that will occur at slightly lower wind speeds, which means a somewhat calmer day - with, say, 18-20 mph winds - may still result in drifting and poor visibility.

Now today we have those high winds - though they are a little below that 25 mph threshold - but despite the fact that we have a fairly substantial snow cover, there isn’t really any drifting. The sun is shining and, looking out the window, I can see for miles across the prairie. And so you might think, as I initially do: perfect - let’s get geared up for a ride!

But the reason nothing is drifting is because all of that snow - and the roads I’d be riding on - are covered in a sheet of ice from overnight rains. This means any approaching vehicle from either direction is going to be struggling with traction. Not a good situation for sharing the road with 2-4000 pound compatriots.

So for the moment I’m stuck at home, looking out the window and feeling sorry for myself. But I’ve put out feelers to both of the canal sites in the region - the I&M Canal Trail and the Hennepin Canal Trail - to see if I can get some idea of what the condition of the trails are. I’m not certain yet whether it would be safe to try to get to them - icy roads may prevent that - but it would be good to have an alternative for when the weather simply will not cooperate.

2021 Cycling Year in Review by Erin Wade

It’s become a bit of a tradition for me to review my past year in cycling here, and it’s that time of year again. As usual, let me qualify things by noting that this is a review of my personal year in cycling. If you are looking for a review of the year for the cycling industry, sports, etc, you will need to look elsewhere (and I’m certain there are multiple options out there).

We all went into 2021 with great hopes that it would signal the end of the metaphorical train wreck that was 2020. The reality in that respect was underwhelming, to say the least, but it did see the return of some events and activities that had been taken off the board the year before. And the seeming continuation of 2020 into 2021 did mean that outdoor activities - like cycling - were still the best choice for exercise and entertainment. All of which reflects 2021 being another lemons-into-lemonade year.

Distance

While many things were decidedly not great about 2020, the decrease in travel and social engagement resulting from the pandemic did offer an increase in cycling opportunities. With that unusual benefit of an otherwise hateful year I’d managed to tip just over the 3000-mile line for the year. Usually my goal for the upcoming year is to increase miles ridden. In this case, however, I ended up deciding that I was going to try to match that distance again for 2021.

There were a couple of factors that went into that decision. First, for a person who continues to work full-time (and then some), there are practical limitations on how much time is available to be in the saddle. I felt like the riding I had managed the year before was bumping up against that limit. In fact, pushing myself up to that 3000 mile limit required a December riding push that was unusual for me and largely made possible by an unusually mild onset to our usual northern Illinois winters.

Second, at least early on it seemed like 2021 held the promise of the world opening up. If it had happened in earnest, it would have made the prospect of meeting that goal very challenging. It didn’t turn out that way, of course, but we didn’t know that at the end of last year.


Enjoying this post? Check out our Cycling page for links to other cycling articles on Applied Life


All of which is to say that I was able to hit that goal. In fact, I was able to pull it in a little early, hitting the mark on November 10th of 2021. This owes in part to setting up longer rides to build distance in preparation for multiple group events occurring in the late summer and early fall (see Trips, below) and, for better or worse, the unrelenting nature of the pandemic keeping the world somewhat closed down.

I’ve obviously continued to ride since that point, so I ultimately landed at 3239.37 for 2021.

So: goal met for 2021.

The other numbers surrounding it tell the rest of the tale:

  • Number of Rides: 201 - Up from 184 in 2021
  • Average distance per ride: 16.12 - down slightly from 16.33 in 2021
  • Total ride time: 240:31 - up from 226:07
  • Average time per ride: 1:11:48 - down from 1:13:44 last year

The decrease in average distance and average ride time may seem a little surprising. This owes in part to a reliance upon slightly shorter rides more frequently through much of the year. I had thought that the longer rides on the weekends while I was training for the group rides might balance that out - I had some of my longest rides ever this summer - but this turned out not to be the case. Given the overall picture, I’m happy with the results, and content with the trade-off this represents.

Machines

My Catrike Expedition was once again my primary machine for 2021.

Catrike Expedition

She has been a reliable and faithful companion. Well, reliable for the most part. In the depths of winter this past January I did have one event where she stranded me on the roadside. This was due to a brake frozen in the locked position. And then over the thanksgiving holiday I had a similar issue, but this time due to a frozen shifter. In both cases this appears to have been due to moisture getting into a cable and freezing. In the first case, that may have been abetted by decreased fender clearance following a a repair. In both cases, the magic potion that is WD-40 (applied for its actual purpose) seems to have addressed the issue.

Aside from those minor, time-limited issues, the Expedition has been solid as a tank.

That said, the Catrike Pocket is still in the stable as well. It has been sized for My Lovely Wife, but she has, on occasion, let me borrow it when the need arises. To facilitate that this year I did, as planned, get a chain gobbler installed on the Pocket to better facilitate those opportunities. This removes the need to resize the chain each time I borrow it.

It works great - exactly as advertised - and means that, when the Expedition is down for repairs, or if there is a riding situation for which the Pocket is better suited, it’s just a matter of sliding that boom out, locking it down, and pedaling away.

I’ve had both of those examples occur since putting the gobbler on. In the fall I had a moment where I had to replace the star-spangled nut in the head-tube of the Expedition (those torque ratings aren’t just for looks, folks) and it took a couple of days for Amazon to get the parts to me. For that reason the Pocket is featured in my most recent I&M Canal ride, where I went to see if they’d really repaired the rustic creek crossing between Utica and Ottawa. I didn’t want to wait for a ride, and having the chain gobbler on the Pocket made putting the old girl back into play a simple task.

As for the other scenario, one might ask under which circumstances the Pocket is the better-suited machine. The answer, in my case, is any situation where a smaller trike is more convenient. And this is the other situation where the Pocket came in. I had to take our old Honda Fit in to the shop, and while I can stuff the Expedition into that car, it overtakes pretty much the entire vehicle except for the driver’s seat. The Pocket, on the other hand, fits nicely into the back, making it better suited for that purpose.

All told, however, those were the only rides I took on the old girl - two for the car (one to get home after dropping it off, and one back to pick it up), and one for the ride on the canal trail, for a total of three. Everything else was on the Expedition.

Of course, in years past my annual review also at least briefly touched on my use of my Cannondale SR400, my beloved road bike, lingering progressively more unused since the arrival of the trikes. With the addition of the chain gobbler that progression appears to be complete - the SR400 is still in the stable, but her tires did not touch road in 2021.

Trips

2021, for all its failings, was a better year for group rides than the year prior. Events that had been canceled or held virtually last year were up and running again this year in one form or another.

I am not someone who frequently seeks out group events, and in past years have really only participated in one or two. The one I most regularly have participated in is The Farmondo, a group event put on by Tempo Velo cycling club and Meads Bike Shop, both located in Sterling, Illinois. As noted, 2020 saw this event canceled. 2021 saw it re-emerge in a somewhat different form, as the Freemondo - a stripped down, smaller event that nonetheless still wound its way through some of the loveliest portions of northern Illinois river country. One of the key differences for the event this year was the distance. The prior versions have laid out 43 and 80 mile road routes, while this year offered one route that split the difference at about 63 miles.

Another event that I’ve taken up is TŌSOC (the Tour Of Scenic Ogle County). This event did happen, sort of, last year. The organizers addressed the limitations of 2020 by proclaiming it a virtual ride, and I did decide to tackle it then - the challenge of the 62-mile distance seeming a little less daunting without others around to compare myself with. But this year it was a full-fledged group event, so I found myself riding with the crowd. This ride moves through a slightly different area of the same river country as the Freemondo, above, and supports a very good cause.

I also decided, this year, to take on the Hilly Hundred, an event with two fifty-mile days of riding set in the hills of central Indiana.

Hilly Hundred

In a way this was a bit of a whim at first - I’d seen it mentioned by someone in a Facebook group, having never heard of it before. But as time went on I began to see it as a challenge to really suss out the realities of hill climbing on a recumbent trike. Plus, it gave me an excuse to try out car camping in my Outback, which was a thing I’d always been interested in.

This year also offered an opportunity to complete a ride that I’d been trying to get done for some time: a complete ride from LaSalle to Ottawa along the I&M Canal Trail, with a little side-trip off the trail to stop at Tangled Roots Brewery. I’d made attempts at this in the past, but been stymied by trail conditions.

I also had an opportunity to briefly explore a section of the I&M trail a little further in to the suburbs, with a ride along the section starting at Brandon Road Lock & Dam. And the little bit of traveling I did do afforded an opportunity to pedal for a short period of time along the Rock Island Trail just a little north of Peoria, and on the Thorne Creek Trail in the southwestern Chicago suburbs. I also took a little spare time to reconsider a path in my old stomping grounds, and to my pleasure found the ride along the Perryville Bike Path from Rockford Bicycle Company to Rock Cut State Park much improved.

Outside of these sorts of events, as usual, most of my cycling started and ended at my driveway. The distinction this year was that multiple longer-distance events I signed up for - especially the Hilly Hundred - had me concerned about my conditioning being up to the task. This led me to spend a considerable amount of time with Google Maps laying out longer and longer routes to build distance in preparation. Most of these rides were in the ~50-60 mile range, trying to match the length and duration of the group rides. In the process of this I did manage one 75-mile ride, which mostly showed me that, despite all the training to that point, I wasn’t quite ready for a full century - somewhere in the last 5-8 miles of that route my legs turned into jelly. Fortunately, it turned out that a day of rest between rides made all the difference in the world for the Hilly Hundred.

Miscellaneous

All of the time riding did reveal the fact that the lumbar support built into my Expedition’s mesh seat does have a finite life span. This led me to briefly consider purchasing a new seat - a not-inexpensive task in an era fraught with supply chain delays - until some helpful folk in a Catrike group offered up an extremely low-cost alternative that worked perfectly.

It also afforded me the opportunity to determine how well the battery in my iPhone 12 Pro Max - which I use as my cycling computer, entertainment source, and safety lifeline - would handle extended distance rides without a battery assist. Specifically, I wanted to know how long it would last in its usual setup with the screen fully-lit and providing feedback, and how much time I would gain if I used the option of running with the screen dark and using my Apple Watch and the audio alerts for the feedback.

Next Year

A big part of the purpose of going through this annual exercise is to sort out what I want my goals to be for next year. The starting point for that, for me, is always to consider what I should target for mileage the coming year.

At the risk of being redundant, of repeating myself, of saying the same thing over and over again, I do think I’m up against the practical limit of mileage I can manage in a year with my work schedule. 2021 saw that come out to 3239, so I believe it is reasonable to look at a goal of hitting 3250 for 2022. In fact, I had hoped to bring things up to that number this year - ending on a round number being somewhat of a need for me - but the weather simply refused to cooperate over the last few days of the year.

In terms of rides and routes, I will plan to sign up for whatever version of The Farmondo occurs for 2022, and I think I will ride TŌSOC again. I’m on the fence for the Hilly Hundred. I enjoyed the ride, and the event was well organized - I can definitely recommend it if this type of event appeals to you - but the travel and overnight stay makes it a big commitment for me. Plus, in a lot of ways I feel like the questions I entered the event to resolve have been answered. I may, instead, look for something else more local if I feel like I want to add a third group event in 2022.

Outside of that I’m realizing that, while I managed at least three separate rides along the I&M Canal trail this past year, I never made it back to the Hennepin Canal. I’d like to rectify that, and maybe take a stab at an overnight ride, camping along the trail. In addition, I think I’d like to see if I can’t ride the open road section between the I&M and Hennepin trailheads in LaSalle and Bureau Junction respectively. These two trails are supposed to make up most of the Illinois portion of the Great American Rail-Trail (somewhat ironic, given that neither is a rail-trail, per se), so it would be good to see how challenging it is to connect the two.

In terms of machines, I’m pretty happy with my Catrike Expedition as my primary machine, but I have been thinking pretty hard about the idea of getting a fairing for contending with the chilly and windy seasons out here on the prairie. There’s a fair chance (no pun intended… ok, that’s not true) that I’ll find a way to make that happen this coming year. Hopefully that will come about sooner rather than later, since the year starts in the chilly season.

So - good riddance to 2021, and a happy new year to you!

Feeling Shiftless by Erin Wade

It started on my Black Friday ride. I was rolling down the street to the trailhead, picking up a bit of speed, so I shifted up. And… nothing.

Feet spinning on the pedals just as quickly as they were a moment before, no additional effort, no additional speed. I clicked forward another notch and was rewarded with exactly the same I amount of nothing for my attempt.

When I reached the trailhead I stepped up off the trike, lifted the rear wheel off the ground a bit, and cycled thru the gears. Or, perhaps I should say, I attempted to cycle thru them. With each click the rear derailleur simply refused to move, as if to say “you know, it’s a national holiday - I want the day off”.

I was having this conversation with my derailleur - which speaks, of course, in a French accent, and periodically injects expressions like “mon dieu!” and “omelette du fromage” into the conversation - on the Ridgeway entry point to the Military Ridge Trail in Southwestern Wisconsin. After a year off due to the pandemic, we had returned to our tradition of gathering at my sister-in-law’s for the holiday. That tradition, for the past few years, has included bringing along my trike to ride this particular trail.

Looking more closely at what was going on, I could see that the shifter cable was not moving with the lever - it was, in fact, unseating and remaining behind when I moved it forward, sticking out the back side of the lever. And I was stuck on the lowest gear.

I looked back over the drive up to Ridgeway - a two and a quarter hour drive northwards from our Homestead - and remembered that, for much of it, we were driving thru varying levels of fine snowfall. For this trip, the trike had traveled on the roof of the Outback, the inside of what is usually the mobile trike garage being selfishly taken up by my wife and child and our personal paraphernalia (they are obstinately unwilling to ride on the roof).

Now, the trike has been snowed on while on the roof before - most notably on our last holiday trip up to Ridgeway in 2019. But in that case, it was overnight, while the trike was stationary, and it was a real snowfall - actual flakes, not the fine, misty-ish stuff we were encountering on the ride up this time. So, it seemed that the combination of the snow type, and the fact that we were driving thru it, conspired to drive moisture into the shifter line and freeze it up.

Having limited resources in the moment to do anything about it, I played with the front shifter and found that I could, in fact, move between the three front rings. So I resolved to proceed with a much more limited gear set - initially three, well spaced gears, but I also found that if I massaged the exposed portion of the rear shifter cable a bit at the lever I could sometimes get a single gear change out of it. So technically I was riding an occasional six-speed trike.

Military Ridge is a slow trail anyway - the surface is nominally crushed limestone, but one has to use one’s imagination to see where or when that limestone might have been placed. Sand is mostly the order of the day on this trail, solidified a bit by the freezing temperatures, but still very soft. Given that, lower gears are where I would have been in any case, so I decided to ride on.

I managed to make it from Ridgeway to the Blue Mound State Park entrance with this approach - a little over 9 miles in one direction, and of course I had to ride back. In fact, I had my highest average trike speed ever on this trail despite the gearing handicap. This owed to below-freezing temperatures hardening up the trail - on my previous adventures it was above that line on the thermometer, softening the trail and impacting progress. And it was those temperatures, and not the gearing issue, that actually got me to turn around at Blue Mound. I’d packed my cold weather gear based on my prior experiences here, and as a result my hands and feet were getting uncomfortably chilly.

When I got home I put the trike into the mobile trike garage and let the car run a little while to warm it up, and then stored both in the garage. Ahead of my next ride I got it out and ran thru the gears to test this, and it all shifted just fine. I figured the problem was resolved, and sure enough everything was fine for the next three rides.

Then, on ride four, the problem showed back up. As I tooled out of my driveway I shifted up and - you guessed it - nothing.

And looking back at those three prior rides, the ones that had assured me all was well? All of them were above freezing (seriously: 55° (F) in December in Northern Illinois? - I’m not complaining, but it is weird).

I popped on to the Winter Cycling group on Facebook, figuring that if any group of people would have encountered this issue, this would be it. Indeed, my request resulted in a number of suggestions, ranging from warming it up to using WD-40 to replacing the cable and housing to one gentleman’s tongue-in-cheek suggestion that I switch to wireless shifters.

I’d already tried warming it up, of course (which I did not mention in the post), and any glance through the maintenance-related posts herein will demonstrate that I’m always going to err towards the fix that gets me back on the road the quickest. And I always have WD-40 in the garage, so…

Thing is, it worked! I’ve had one below-freezing ride since (it’s still a weird December, and we are almost two-thirds of the way thru), and had access to all of my gears. I will probably eventually replace the cable - either take a shot at it myself or have the LBS do it at the next tune-up. But that’s a ways out yet. In the interim, I may consider bringing the can of WD-40 along with me for rides in case the problem recurs.

Taking the Temperature of the Moment by Erin Wade

We’ve reached that time of year here in Northern Illinois where late autumn just cannot decide whether it wants to hang on and work through the end of the season, or give it up and cede to winter already. As such, high temps are ranging between the low 20’s to the mid 50’s (F) from one day to the next. For cycling, this can make it especially challenging to determine what to wear for a given ride.

Once you get into the heart of winter here you know that, for the most part, it’s just going to be cold. This allows you to get into an easy pattern of dressing in more or less the same multi-layered approach from one ride to the next. But when one day is 55° and on your next ride it’s 23°, that just isn’t the case. In these cases, it’s not just about knowing what to wear, but more about knowing which level of it to wear today.

Inevitably, for me, this leads to miscalculations. Mostly this involves the extremities, as one might expect. I can generally keep my core warm enough (though too warm is a definite possibility), but I will find myself realizing, in the middle of a ride, as I begin to feel that characteristic spreading, borderline painful chill in my digits, that I’ve chosen the wrong gloves or shoes for the temperature.

For my hands this is an easy enough fix. Gloves are a lightweight, low volume item, so it’s easy enough to pack along different weights of hand protection in the pannier bags. Often I will simply start out with more than I need - I like to put mittens over insulated gloves, for example, and if I reach the point where my hands get too warm (and yes, that does happen) I can simply pull off the mittens and tuck them into the front of my jacket. This location is handy also because sometimes that changes. Out here on the prairie one might find that one’s hands are too warm when one is riding with the wind, but that they cool right back down when the wind is striking from the side or head-on. Then I can pull the mittens back out of the jacket and slip them back on.

It’s the feet where things get more challenging. In part, this is because I resist the transition to heavier shoes. I’m a sandal person for nearly 3/4 of the year. I break the Keens out in March, and try to keep them in service into November if at all possible. To do this requires committing the fashion crime of wearing socks with the sandals, of course, but enforcement of that particular ordinance is relatively low in my jurisdiction, so it’s worth the risk.


Enjoying this post? Check out our Cycling page for links to other cycling articles on Applied Life


Even with my hot feet and wool socks, sandals stop being comfortable on the trike somewhere a little south of 60°. At that point I move to hiking boots (these are also my regular daily footwear through the late fall and winter) with varying levels of wool sock. If the sandals are Level 1 for foot gear, I suppose the hiking boots would be Level 2. And that Level 2 covers that space between, say 55° and ~30-35° pretty nicely.

It’s the transition between Level 2 and Level 3 where I really begin to struggle. Level 3, for me, is a set of heavy winter boots. These are an affair with a leather upper, rubber lower, lined in wool felt. They are everything you need in a winter boot. All that said, it is somewhat challenging to get myself to want to move from the hiking boots into the these items, particularly early in the season, when I am mostly not wearing them at any other time. They are heavy and require adjustments to the sizing on my foot retention system (this can result in an extra 1-2 minutes of setup time before I ride - excruciating!). This means that, on a 25° day I find myself looking over at them and debating putting them on, before then putting a second layer of socks on and just wearing the hiking boots anyway.

Ultimately what this means is that I then find myself halfway through a ride realizing, as the spreading chill once again emerges, I should have worn the heavier boots. But unlike the mittens, the boots won’t fit easily into the panniers. And then an idea occurred to me:

Strapped on

This was my solution for the past couple of rides where the temperatures dipped below that 35° mark. While they won’t fit in the bag, they can be strapped to the top of the rack. It’s not nearly as quick and efficient as pulling the mittens on and off, but I have them with me if I need them. And from an exercise standpoint this is good too, because the boots add approximately 50 lbs* to the weight of the trike.

But this is an interim solution. I realized, as I was working through this, that part of the difficulty is that I while I’ve sorted out cold weather gear in general, I don’t really have a clear idea of specifically when to move from one level to the next. I think that I get to the point, towards the end of the winter, where I’ve just got it down, but in the long months between, say March and December, I forget, and have to learn it all over again.

So - over the last few rides I have started to collect data on what I’m wearing on my extremities, and how they work. I had considered putting together a spreadsheet for this (I do love a good spreadsheet), but for the moment I’ve just been keeping it in the notes section for the ride on Cyclemeter. This is handy because the subscription version of Cyclemeter also keeps track of weather information for the ride - temperature, humidity, wind speed, and level of sun (e.g. partly cloudy, etc). And, conveniently enough, you can export that information - including the weather data, separated out each into its own cell - into a spreadsheet. This should help me not have to relearn this over and over again each winter.

I think I am also going to consider using chemical warmers with the hiking boots. These are always an available part of my kit, and I keep extras in the panniers throughout the winter riding season in case of emergency, but I don’t usually break them out until it gets cold enough that the winter boots aren’t enough by themselves. It might be that I can extend Level 2 - maybe we could call it a Level 2.5 of sorts - further into the season with a bit of help.

*This may be a slight exaggeration.

I & M Canal Trail - Rusticness Revised by Erin Wade

The I&M Canal Trail runs from LaSalle, Illinois up towards Lake Michigan covering much of the northeastern area of the state in fits and starts. The trail head in LaSalle is relatively close by for me, and as such I’ve ridden it several times, with my longest outing thus far taking me from LaSalle to Ottawa and back, in part to obtain libations from Tangled Roots brewery.

Long sections of the trail on this route could euphemistically be described as rustic - while there are a few paved sections of the trail over this distance, most of it is dirt, and it can be challenging in places during the wetter seasons. But by far the most rustic portion of the trail has been this section:

Ford the mighty river

What you see in this picture is an honest-to-goodness water crossing. There is no formal bridge - someone has been kind enough to provide a narrow wooden causeway that simply lays across the stream bed, with ropes tethering it to trees to keep the current from simply carrying it away. In my experience with this section the causeway was in a different position each time. And, crucial for my purposes, it isn’t wide enough for all three wheels of the trike.

Not sure it’s gonna fit…

I’ve always had to carry the trike across. From my perspective this has always just been a part of the deal, but I am sure there are people who have arrived at this point and just decided that is the end of the trail for them. Understandably so.

However, the Canal Organization had put up a post indicating that the “washout between Utica and Ottawa” had been repaired. I assumed this was referring to the same spot. It was difficult to tell, however, because the picture that accompanied the post bore little resemblance to my recollection of how the area looked. Also, the word “washout” implied that there had been some sort of bridge (or maybe a culvert?) there before, and there was little about the appearance of the place that suggested it had ever been anything but open water.

In short: I wanted to see for myself if it was fixed.

I set out for a ride from the LaSalle trailhead to Buffalo Rock State Park, a route I’ve taken several times before. Life sometimes has a way of otherwise intruding on my riding opportunities, so I got started a little later in the day than I’d hoped. I arrived at the trailhead a little before three in the afternoon. With the sun setting around 4:30 this time of year, I knew that it would be getting dark on my way back.

Pro tip: if you are going to be riding at the end of the day, either leave the sunglasses behind, or at least bring along your regular glasses for when it starts to get dark. I myself would never forget to do this, and realize, hypothetically speaking, about four miles in that I had left my regular specs in the car.

Never…

Ahem. Anyway, I soldiered on, reasoning that the time lost riding back would only further ensure that I would be riding in the dark on the way back.

This being mid-November, I largely had even the more popular sections of the trail to myself. I headed out from LaSalle, dodged the potholes on the early portion of the trail, passed through Utica where they now have a bike rental station:

Bicycles for sale or rent… ok - just for rent.

And from there into the more rustic portions of the trail. The Canal National Heritage Area website says that the trail surface between LaSalle and Ottawa is “Part Crushed Limestone, Part Paved”. However, the interested rider should be aware that, in portions of this section, if there was ever crushed limestone laid down it has long since crumbled such that it is both microscopic, and been completely overgrown. Much of the trail between Utica and Buffalo Rock is grass with a single track dirt paths down it - sometimes just one, sometimes one on either side. The shot below is an example of this from May of this year:

Single track - May 2021

This isn’t bad for riding, per se, (though it can get soupy in spots when wet), but it’s likely not what people would expect given the description on the website.

And then I arrived at the crossing:

A bridge not too far

The bridge work completely transforms the area. I know it’s in the same spot, but it’s hard to reconcile the current presentation with what was there before. It takes what was literally a considerable obstacle to overcome and makes it a non-issue. People who are new to the trail will come to this point and likely give no thought to what the bridge is doing for them as they ride across. In fact, it seems likely that I will reach that perspective myself at some point in the future. It does make one appreciate what our ancestors had to contend with - many of the towns and cities in this region are located in part because they were good shipping points for river traffic and crossing points for ferries. All of that went to the wayside once the bridges were built.

The rest of the ride was largely uneventful. I made it to Buffalo Rock State Park - the sometimes treacherous clay soup sections were a little soft, but easily passable.

Of course, the last few miles of the ride were largely in dark, although this offered some views if its own:

Sunset on the canal

The interesting part of that shot to me is that it’s much lighter than what I was seeing. I knew, when I would look over top my sunglasses, that it wasn’t quite as dark as it seemed. Still, relative degree of light is just about all I can see without my glasses, so the sunglasses stayed on. But with lights in place and some careful riding, I was able to make it back to the LaSalle trail head without issue.

With the new bridge in place the trip along this section of trail will be much easier and more accessible to riders. And it makes the I&M Canal portion of the Rails to Trails coast-coast trail seem one step closer to being more feasible. It’s a win all around.

Thorn Creek Trail: Sauk Trail Lake Section - Trail Review by Erin Wade

This past week I found myself in the south-suburban area of Chicago, and that afforded an opportunity to explore a small portion of the Thorn Creek Trail.

Thorn Creek Trail Map

The overall trail is a 17.2 mile that winds it’s way through through multiple nature preserves in and around Park Forest and Chicago Heights. I did not have time on this outing to explore the entire trail, so I focused on a small loop set in Schubert’s Woods that goes around Sauk Trail Lake.

This is a three and a half mile loop that is almost entirely ensconced in trees, although you do periodically glimpse the roadways and buildings through the woods, and there is a brief section that runs alongside the road at the north end of the lake. But in other portions it is possible to feel like you are entirely out in the woods:

The trail is there somewhere…

Given that this is a woodland trail and that we are now entering the last third of Autumn, the trail was often partially - and sometimes entirely - covered with leaves. They appeared to be mostly oak leaves, which gave a pleasant and satisfying crackle and crunch under the wheels. The only caveat here is that, at times, it was a little challenging to know exactly where the sides of the path were.

The trail itself is asphalt, and (where I could see it) appeared to be very well maintained. It offered a smooth and comfortable riding surface throughout this section. In most areas it winds its way through the woods, leaving straight sections only for the portions that parallel roadways. Because it circles a small lake, fed by the eponymous Thorn Creek, there are some portions of rise and fall to it, particularly on the western side of the lake where the creek enters it. This is nothing dramatic - Cyclemeter registered no ascent or descent at all, but it seems to always underestimate on those measures[^1] - but it is there. This is not a perfectly flat trail.

As you get around to the western side of the lake you get some nice views of the water as well:

The trail was not in heavy use this autumn afternoon. I did encounter a handful of walkers - a couple of whom seemed a little surprised to encounter someone cycling on the path, perhaps not expecting it because of it being late in the season. But most of the time I was alone.

My time for riding was limited on this day, hence the relatively brief adventure. I viewed this mostly as an opportunity to get a sample of this trail system. If this short section is a reasonable representation of the rest of the trail, however, it seems like it could offer a pretty decent experience for a person looking for a riding opportunity in the area. The map shows it largely winding through forest preserves - and at one point along a golf course opposite the woods - with occasional roadway crossings. And at 17.2 miles it would offer a nearly 35-mile round trip end to end.

Probably the most challenging thing about using it was finding the right spot to join it. For example, the trail maps show the trail beginning, at the south end, at S Western Avenue and Steger Road. But while the trail does run to that point, there appears to be no practical location to park near that point - it’s just a fairly busy intersection. In fact, the trail at that point looks like something that isn’t finished yet - like they were planning to go further, but haven’t gotten to it yet.

All-in-all, a pleasant ride. If an opportunity presents in the future I’d like to explore the rest of the trail.

[^1]: This is one of the few downsides to Cyclemeter. It appears to me that it relies upon the altimeter in the phone to determine ascent and descent, while some other mapping programs, like Ride with GPS, appear to use topographical map data. Probably the most dramatic variance on this for me was on the Hilly Hundred. During that event I ran both Cyclemeter and Ride with GPS at the same time - Cyclemeter to track my ride, and Ride with GPS for the turn-by-turn directions (I had the phone hooked up to a battery pack - this is a battery-burning activity). On day two of that event, Ride with GPS tracked ascent at 3,262 feet, which is more or less consistent with what the event organizers indicate. Cyclemeter, on the other hand, recorded ascent at 1787 feet. It’s a difference 1475 feet, 45% less than the actual ascent. Not a big deal in the grand scheme of things - better to have a consistent measure over time for comparisons. But following an event focused on hill climbing it did leave me feeling a little like it was trying to cheat me…

Rockford Bicycle Company to Rock Cut State Park - Trail Review by Erin Wade

Happenstances of life put me in the Rockford area this past weekend on an unusually nice November day. Prior to moving back out to our Homestead we had lived in Rockford for a solid 17 years. In many ways the area, with its prominent park and bike trail system, as well as the presence of Rock Cut State Park at the north end of the city, reinvigorated my enjoyment of cycling after leaving college.

When we moved our engagement with the city continued due to family, work, and our child’s engagement in competitive gymnastics with a program situated there. And given those factors, I would continue to periodically bring along my machine. In these latter events, I would typically ride the path from Rockford Bicycle Company into Rock Cut State Park, around the park, and back again. This is a 12-mile loop that offers a bit of hill climbing both up into the park, and along the park road, as well as both urban, woodland, and lake views. In many ways, Rock Cut is a jewel.

Still, it had been several years since I’d ridden the trail. It’s become derigeur to blame such things on the pandemic, but that’s not the case here. Looking into Cyclemeter, my last foray on it was in August of 2018, well before any restrictions went into place; and the time before that had been nearly an entire year before - August 2017. As soon as I started looking up those dates I remembered why - in my notes for the 2017 ride on the trail I wrote, simply: “the condition of both the trail and the road around Rock Cut really, really sucks”. The asphalt trail itself was punctuated by a multitude of frost heaves and cracks, and the ring road around the park itself was full of potholes. It had reached the point where traversing the trail delivered a substantial beating to the rider.

But all of that was over three years ago, so it seemed reasonable to investigate whether there had been any improvements. And besides, I’d never ridden the trail on my Expedition - my last attempt was nearly a year before getting my Atomic Orange machine.

Valencia @ RBC

Valencia @ RBC

I’m glad I did. As soon as I pulled up to the parking lot at Rockford Bicycle Company I could see that the path itself looked to have a relatively fresh layer of asphalt on it. A quick Google Search suggests that this is a very recent change, with the work apparently having been done last month. It certainly looks very new:

Fresh Asphalt

Fresh Asphalt

And it rides much, much better. The new layer of surface also included improvements where the path connected to the couple of bridges along the way - this was often a jarring transition in the past. And this gave me optimism for the route overall, but I kept that optimism guarded - the Perryville path and the state park are governed by different entities. The improvements here did not necessarily mean that things would be better once I got into the park itself.

I mulled this as I rode along Perryville Road. This first 2 1/2 miles of the trail is the urban portion. It is situated alongside, and mirrors, Perryville road, which is a heavily traveled four lane roadway. This section involves crossing four separate intersections (in each direction), three of which are fairly busy and governed by traffic lights. This has always been my least favorite part of the ride, and is probably the biggest downside to the path itself: The crossing are situated at the intersections, which is probably not ideal, but the path was added after the roadways were built. One wants to be alert to the traffic patterns during these crossings.

Getting past that, however, rewards with entry into the winding, tree covered section of the path that parallels Willow Creek up into Rock Cut.

Winding through the trees

Winding through the trees

Winding thru the trees

Winding thru the trees

This is a hill climb - you are riding up the path as Willow Creek falls. How much of a climb depends upon your experience, of course. It gets steeper as you go, and there is no real way to build up speed going into it - it’s all climb on this part - so it’s a challenge for the newer or less experienced hill rider. But getting to the top yields the entrance into Rock Cut:

Valencia @ Rock Cut

Valencia @ Rock Cut

Once crested the hill and could see into the park I could see that there had been improvements. Immediately it was clear that the bridge across the spillway had been replaced (you can see it in the background in the picture above). The old bridge had a wooden roadway with steel bands for vehicle wheel support stretched across it - the new one is an entirely concrete affair. I could also see to the north that some sort of sidewalk had been added along the roadway.

I started across the bridge to follow the road loop around Pierce Lake. The road here has been re-surfaced, and is much improved. I could see also that there is a new, paved bike path off the road that circles closer to the lake. I was interested in following my old route, so I didn’t explore that path, though I would later see that it came out near the concessions and boat ramp.

What I found about the roadway itself was a somewhat …mixed bag. The road was new following the bridge, but seemed less so shortly afterward. Then, as I came down the hill towards the concessions and boat ramp, I discovered another new section of roadway onto which a bike lane had been added! It just sort of appeared there, following that downward section.

Sudden Bike Lane

Sudden Bike Lane

I shifted over to the bike land and proceeded, only to find another 3/4 of a mile or so later (I am estimating) that it just disappeared as the road returned to older surfacing.

Not everything old is new again

Not everything old is new again

The bike lane reappeared again on the south side of the lake.

It’s back!

It’s back!

It doesn’t take much extrapolation to figure out that the park is getting its improvements piecemeal (these done in 2019, according to these plans) . What is notable is that they clearly did focus their initial efforts on what were the absolute worst parts of the roadway around the park. While not all of the surfaces were new, and I did have to steer around some cracks in the older surfaces, I did not have to engage in the rampant dodging of potholes that I recall from my rides in 2017 and 2018. And, while it was very nice to have that dedicated bike lane where it appeared, traffic around the park is governed at a very slow limit (20 mph, I believe), and even with the hills and curves, most sight lines are fairly clear. If you are comfortable riding on the road in general, you will be comfortable here, with or without the dedicated lane.

The hills around the park road do mostly have lead-ins to the uphill sections, so you will mostly have an opportunity to gather speed going into them. The loop around the park itself is a little over four miles, bringing you back to the top of Willow Creek.

From Willow Creek it’s downhill all the way back to Perryville Road. It isn’t a downhill free-for-all though. The path is fairly heavily used, and the winding and twisting nature of it through the trees means that suddenly encountering others is an imminent event - you have to moderate your speed here (my fastest speeds were on the downhill road sections within the park). But given the woodland scenery, it’s hardly a sacrifice to set aside a bit of the downhill speed.

The rest, is, of course, just a reverse of the beginning of the ride. For my part, I found that the Expedition handled the route quite well. I was able to maintain speeds here above my prior rides on my Catrike Pocket, which I wasn’t sure would be the case, as the 20” rear wheel on the Pocket might have given it the advantage. In the end, I was on par with my times on my old Cannondale, tho this might simply owe to the fact that I’m riding a lot more than I was back then.

I had put off writing about this route back in 2017 and 2018 because I really did not feel I could recommend it back then - the poor road surfaces really made it an unpleasant ride. That has changed, now, with the improvements noted here. The new surfaces are wonderful, and within the park itself they appear to have made good choices about where to put their efforts - the older surfaces, where they remain, are good enough to allow for a decent ride.

I can’t recommend this ride as a destination, per se. It’s too short, and too much of it involves paralleling a major roadway to suggest that anyone travel just to ride on it. But if you are traveling out towards Rockford anyway, and are looking for a place to ride, I think this route offers a good reason to bring your cycling machine along.

I’ll note also that it appears that there are plans underway to extend the Perryville path up into the town of Roscoe and connect it to the Stone Bridge Trail. It looks like that’s likely a couple of years out yet, but if/when finished would connect it to a couple of the rail-trail systems in the area, heading out into more rural areas. For folks who are interested, it may be worth it to check back on that.

The Hilly Hundred by Erin Wade

TL:DR

I wanted to see whether my Catrike Expedition and I could successfully manage a two-day, extended event oriented specifically towards hill climbing. Everyone knows recumbent trikes aren’t great at going uphill, right?

This is a long one - scroll on down to “Wrapping Up” if you want to skip to the answer…

It’s all about the hills

It’s all about the hills

Why?:

Despite the fact that this year’s Hilly Hundred was the 53rd occurrence of the event, I only just learned about it this summer when someone mentioned it on Facebook. I looked it up - the event has a pretty informative website, which gave a pretty clear idea of how it was set up.

I was intrigued. I can’t say why exactly - group events are not really my thing - but this one drew me in a bit. I think a large part of it was the challenge that the event represented. I’d never ridden 100 miles over a two day period - in building distance this summer the closest I’ve gotten is 88 miles, with an extremely uneven distribution of 75 miles on one day, and 13 the following - not similar at all. And that 75 was and is my longest single distance ride to date.

And - of course - none of that is through hill country. In training I’ve tried to find routes that aren’t entirely flat. I’ve said here many times that Illinois isn’t the pancake-shaped land that everyone not from here pictures, and that is true, as far as it goes. But it’s certainly not a paragon of elevation changes either. My other two events of the season - the Freemondo and TŌSOC - did offer more climbing, both occurring in different parts of the Rock River valley. But for the most part, here in northern Illinois, even the river valley roads primarily have rolling hills - you may travel upwards for a while, and you can definitely feel it, but the word “steep” doesn’t generally apply.

Plus there is the phrase that you see over and over again: “Trikes aren’t good for climbing”. I’ve read it many times in online discussions, and been known to provide variations of it myself - things like “faster downhill, slower up” when being asked about how they compare to upright machines. It’s said so often that it has become, for me, an uncontested - but also untested - “fact”. And when I first started to ride the trike it seemed completely correct. It felt harder to climb on the trike than it had on my Cannondale SR400. Certainly on the trike you lack the ability to stand up on the pedals and climb. But then again, when I first moved to the trike I was also using my leg muscles differently, and was riding a heavier machine - the Cannondale weighs in at 22lbs, while my first trike, a Catrike Pocket, comes in 11lbs heavier. And there is a somewhat different technique to dealing with hills on the trike - since you really don’t have to worry about cross-chaining, there’s no need to select your gear going into the hill. Instead, whenever possible, you want to go into the rise as fast as you can, and then downshift all the way up to keep spinning. Of course, you can’t always count on going into a hill at speed - sometimes you are starting at the bottom. But in those cases, at least you have the benefit of low gearing, and there’s no expense of energy or effort towards maintaining balance at slow speeds.

All of which is to say that while I’ve continued to agree with the idea of trikes not being good for climbing, I haven’t really felt that way in practice for a while - hills are just a part of the ride. I think of my Catrike Expedition as being a great all around touring machine. But what if that tour actually included some real hill climbing? So it seemed like riding in this event would actually put that to the test.


Enjoying this post? Check out our Cycling page for links to other cycling articles on Applied Life


The Event

As noted above, this is a two day ride over the Saturday and Sunday of a weekend. But it’s really a three-day event, depending upon how you approach it. Ellettsville Indiana is about four and a half hours away for me, so I traveled down for the event the afternoon before. They have accommodations for tent and RV camping at the event site (which is the town’s high school and junior high complex), and also have an area in the junior high school for people to sleep in sleeping bags. Understanding that people will travel in ahead of time, all of that is open and available the Friday before.

There are several nice features that go with the accommodations. When you register you can sign up for breakfast at the high school on both days, as well as supper on Saturday. They have showers available - I’d actually never seen a shower trailer before:

Shower trailer

This is something!

This is something!

This was an awesome option to make available for anyone who is camping, particularly given that you are likely to get very sweaty at least couple of times into this experience. And - to their credit - the shower trailer is available late into the second day, which meant I could shower before driving the 4+ hours back home.

And one of the nicest items in terms of accommodation is that they have a secure bike storage area. This gives you a safe, indoor location to keep your machine when you aren’t riding. I hadn’t caught this on the website at first, and because I’d decided I was going to car camp, I was debating about whether I should bring along the roof rails to put my trike on the Outback’s roof for the overnights. That would have worked, of course, but it would have been additional work, and it would have left my machine out in the elements, and it did rain overnight on Saturday.

All-in-all, this was a well organized and supported event. There were many volunteers, all pleasant and helpful when you needed them. The routes - there are long and short routes set up for each day, 38.4 and 50.6 miles on day one, and 38.7 and 53 miles on day two - each have three rest stops built in. And to say “rest stop” is really to undersell them. Each stop has fruit and carbs available…

Fruit!

Fruit!

And carbs!

And carbs!

…and a water truck. I actually left behind one of my spare water bottles on day two to save a little weight because I knew I’d be able to re-fill. There are bathroom facilities (porta-potties) at each area. The second stop on both days, which I heard several veterans of the ride refer to as the “lunch” stop, had Schwann’s ice cream available. And each of them had both a medical station and a bike repair crew. And all but the last one on day two had live music playing:

Music!

Music!

The music was in a variety of formats - some folk, some New Orleans style jazz, some 50’s rock. And the rest stops gave an opportunity to see the huge variety of bike types that were in the event. Obviously there was an abundance of the high-end road bikes that you would expect, but there was quite a bit more variety than I would have anticipated.

7085D252-5939-404E-A481-BAD248748F5C.jpeg

I saw at least two or three tandem bikes in the event:

Riding in tandem.

Riding in tandem.

And there were a number of folks with e-bikes of different types. This wasn’t surprising in and of itself, but I was a little surprised to see a couple of folks riding electric cargo bikes with the long, low-slung cargo area on the back. I unfortunately didn’t catch a picture of them, but they were there. And - to my surprise - there was a tiny handful of trikes:

Trike!

Trike!

Yup! Trike!

Yup! Trike!

I actually saw three in addition to my own - I ran into one person the morning of the first day prepping his orange TerraTrike, and saw it later in the storage area, but I never encountered him on the ride itself. I saw the other two on day two, though the owner of one said that she was there for the first day as well. The ride has a casual start - they just ask that you begin no later than 10AM so you can be done at a reasonable time for the volunteers to get a break - so it’s quite possible to miss someone if they start at a different time than you.

But given that I usually see none at these events, it was very cool to encounter some this time around. And it suggested that I wasn’t the only person thinking a trike was a perfectly acceptable machine to take along.

The Ride

This is a well laid out course. The organizers provide you with paper maps of the route, it’s pretty well marked out with the typical symbols at intersections, and it’s available through Ride with GPS so that you can have turn by turn directions.

Though Ellettsville is just northwest of Bloomington Indiana, and not terribly far from Indianapolis, the routes are mostly rural. And a fair portion of the route takes you through the Morgan-Monroe State Forest, which provides for some awesome views:

Trees

Trees

Angels on bikes…

Angels on bikes…

And even when you weren’t in the forest, the route often alternated between open agricultural regions - corn and soybeans are the name of the game here, as they are back home for me - and tree-covered byways. And sometimes there’s a mix:

Woods on the left, beans on the right.

Woods on the left, beans on the right.

Probably due to the hilly nature of the region, this part of Indiana did not succumb to the square-mile grid system that we have in much of northern Illinois. This means that you get to ride on roads that wind and twist their way through the countryside even as they rise and fall.

Twisted, sister…

Twisted, sister…

Curving right…

Curving right…

Because it rained overnight ahead of day two, there were sections within the state forest where the roads were still wet. On the downhill sections I had a few occasions where I could feel the rear wheel step out a little sideways as I navigated through the curves. This is mostly fun, but I did find that I needed to remind myself that I had no earthly idea what I’d encounter around the next curve, and I slowed myself down a bit.

On the first day, the long route takes you past kind of an informal additional rest stop - a little shop for the Musgrave Orchard.

Cidery

Cidery

They had fresh cider and water for those who were interested (it’s also served at the formal rest stops). I always bring a little cash along on the trike for just these sorts of opportunities, so I stopped and picked up a pint of cider for the ride.

Getting juiced up

Getting juiced up

This was about 2/3’s of the way through day one, which meant I was at a point where that cold cider was especially refreshing.

Probably one of the more challenging things for me to adjust to was the size of the event in terms of number of people. You can see from the rest stop pictures that this is a very well attended event (and I heard rumblings from some that enrollment was down this year - probably an effect of the pandemic, which had cancelled it last year). I’d anticipated that - it’s clearly noted on the website. But since I don’t often do group rides, and never have done one this big, I found there were some new challenges for me based on that.

People

People

More people

More people

For example, it’s a different riding style on the road. When I ride on my own out in the country, I generally take my lane and I find this works well. In a group, understandably, you want to ride to the right and pass on the left, ideally with that passing occurring in the same lane. Because of the volume of people, I was rarely, and maybe never, in a spot where I didn’t have other bikes at least in view, and often was mixed into a group. This meant that, at times, those other people were an obstacle to contend with. So, for example, there were downhill sections from time to time where I could not get up to top speed heading into the next rise because I couldn't get around the people in front of me; and similarly there were uphill components where I wasn’t able to maintain the speed I entered the hill with because of people in my way. It’s a simple reality of the event, to be sure, but it was one I hadn’t considered going into it.

And of course, because of the large variety of people there, not everyone really understood the rules that go with a group ride, so you got a variety of levels of compliance. And to be completely fair and honest, I do groups very rarely, so I’m sure my application of the rules was less than perfect as well.

The Hills

Of course, ultimately this thing is all about the hills - it’s right there in the name. The entire course on both days largely consists of at least rolling hills - very little of the course is on the type of flat territory that I commonly see when I ride out my driveway. Mixed into that rolling landscape are a few significant rises and falls. This is the elevation graph from Ride with GPS for day one…

…and the one for day two:

0749AFA0-65AE-454F-9C60-7503A23428A5.jpeg

But while most of it is rolling, there are some significant hill climbs in the mix, with grades reportedly ranging from 10% to 20%. Some of the hills are recognized with their own names - I specifically recall three - Camel Back, Bean Blossom, and Mount Tabor - though there are probably others.

Ups and downs

Ups and downs

Camel Back appears on day one, towards the end of the ride. Just ahead of it were two consecutive hills that I don’t believe had names, but were quite steep with no real downhill lead-in. I crawled up the first one, entering it in first gear and grinding my way up the hill, pressing against the back of the seat for leverage. Reaching the top of the first had my thighs burning towards the end, but I felt a sense of accomplishment. When I reached the second, I was stuck with the same approach, and when I hit the top I had to stop and rest.

That rest stop took place in someone’s driveway. I would have felt bad about that, but I was neither the first nor the only person to make that choice. The house was for sale, and chatting with a couple of the other folks there while recovering we wondered if they weren’t moving to get away from all of these damn cyclists in their driveway…

I’d guess that I paused there for at least 15 minutes, which absolutely sounds like, and is, a long break. But I’d skipped the third rest station, reasoning that it was only 9 miles from the end of the ride, so I wouldn’t need it. I wonder, though, if I’d have had an easier time with those two hills if I’d taken that break.

In any event, the top of the second hill also provided a considerable drop that led into Camel Back, so I was able - after some rest - to apply the better hill-climbing strategy: I entered it going fast, and shifted down all the way up.

The other two climbs are on day two, again towards the end of the ride. Bean Blossom came up first. I didn’t catch a picture of the sign, but I believe it said it was 1.4 miles (I see pictures from prior versions of the event that put it at two miles, but I think the route may have been a little different) with a maximum 17% grade. This is right in the state forest, and what little I could look at of the scenery while riding it was beautiful. But climbing this took most of my attention, as (I’m sure on purpose) there was absolutely no downhill on the approach. It was a grind all the way up. Once you get to the top tho, you get to appreciate the view:

At the top

At the top

Time for a break

Time for a break

I - and many others - rested there for a bit. The reward of the long climb is that there is also a long, sweeping and curving downhill sweeping through the state forest.

And then - at almost 50 miles in - you encounter what they call Mount Tabor. I’d heard several people reference this, particularly at the second rest stop on day two, because it follows a few miles after that stop. I spent some time at that stop talking with Jim and Sherry - Sherry was one of the handful of other trikers on the ride, and Jim was her husband. They were a delightful couple, and they helped me mentally prepare for this particular challenge. And everything they said about it turned out to be true.

Mount Tabor is not long - 0.2-0.3 miles or so. But it’s at a 20.2% grade. And you enter it coming around a corner with absolutely no downhill lead-in. It is absolutely the steepest thing I’ve ever ridden up on any human-powered machine - upright or recumbent.

I shifted all the way down, and started in.

The Question

Being in an event with only a tiny smattering of trikes I did have people periodically ask me questions about my machine. Now one soul - who I’m pretty sure thought he was being very clever - asked me how many cases of beer I could carry on my trike (at least two if I hook up the trailer). But this being a hill climbing event, you can imagine what the primary question was:

How is that thing at climbing hills?

I’d expected the question, and typically gave the standard answer first - “slower on the way up, faster on the way down”. For folks who were interested in more detail, I talked about the difference in strategy from an upright as well.

But of course, I was also at this event to provide a more detailed answer to that very question for myself. And what I found was a more nuanced outcome that surprised and pleased me.

Was I slower on the way up? I think the real answer is: it depends.

It depends on what you are comparing yourself to. I was absolutely being passed on the uphills by people on high-end road bikes, which is, at this point, a familiar experience for me. But the thing is, the Expedition isn’t the trike equivalent of a high-end road bike. I would say that it is far more consistent with the idea of a long-distance touring bike. As such, it definitely weighs more - 15-20lbs more dry, and a little more still with my gear on it. As such, I don’t expect to be faster than those machines. By the same token, I wouldn't expect someone to run out and get an LP tank for the grill on their 18lb Trek Madone either.

But: When I was climbing most of those hills, even without a chance to enter them at speed, I was often passing people. I passed people on mountain bikes, steel touring bikes - I swear I even passed a few people on e-bikes on a couple of uphill sections. It’s hard to check speed when you are focused on climbing, but when I could I was usually moving along at around 4mph in first gear on the uphill slogs. Slow? Absolutely. But faster than some, and still moving uphill.

And when I could enter at speed, the technique I’ve described - which will almost certainly be familiar to veteran recumbent riders - worked marvelously. It always gets harder towards the top, of course, but I’d put the experience of spinning and shifting down up against any upright climb, standing in the pedals in low gear any day.

Which takes me back to…

Mount Tabor

I entered Mount Tabor in first gear, and barely moving. Thanks to Jim and Sherry I was mentally prepared for it. I was also prepared for the possibility that I’d have to get off and walk the trike. I had not had to do that up to this point, but it seemed a possibility here.

I braced against the seat and pushed against the pedals. I could barely hear anything over the sound of my own breathing. My legs were burning, I was drenched in fresh sweat, and my speed up the hill seemed glacial - I could not let go of the grips to look at my watch, but I’m sure I was not maintaining that 4mph speed from earlier hills.

And? The pattern stayed true, even at the exaggerated angle that this hill presented. The trike was slow, and hard to get up the hill. But I was passing people on the way up - some walking, and others struggling to stay upright, standing in the pedals. The ability of the trike to remain stable at very slow speeds was absolutely an advantage on this climb, and often on the ride overall.

I made it to the top on pedal power alone - no stopping, no walking.

I did, however, take a break at the top. I was happy to get there, but I still needed a rest.

The Other Way

The part that I’ve mostly left out of all of this so far is the additional bonus that goes with taking a trike out for this event: The downhills.

I did mention that there was a downhill section following Bean Blossom Hill that took a sweeping course through the state forest. And there were several others like that. I think, at this point, that I’m questioning the absolute truth of the idea that trikes are slower uphill (at least with comparable machines and riders), but that they are fast downhill is absolutely the case.

My hands down favorite example of this was a section on day two early into the ride. This was a long downhill curving to the left, just ahead of a turn into Cascades Golf Course. I hit my top speed for the day - about 38mph - going down and around that curve. It was a beautiful human-powered go-kart moment, leaning against the curve and passing, well, tons of people. That moment by itself may have made the whole event for me.

Wrapping Up

I wanted to see if I and my trike could manage an event focused on hill climbing, and I wanted to test the common, received wisdom that recumbents aren’t good at climbing hills.

I feel like I got the answers I was looking for on both counts. The Expedition and I managed to come through the entire event together - I never had to get off the trike and walk. And the relative disadvantage of not being able to stand up in the pedals appeared to be balanced by the advantages of the high speed lead in on many hills, and not needing to work to stay upright when going slow. There is a real-world benefit to having the option of just crawling up a hill.

When I look up things online about the event, in different forums, I find people talking about which machine they would take to the event and/or changing out their gear sets to different ranges to manage the hills. And if I’m being honest, I had considered asking MLW if I could take the Pocket for this event instead of the Expedition specifically because of the lower gear ratio the 20” wheel would give me over the 26” wheel on Expedition.

I didn’t, because in the end I wanted to see what my touring machine would do - to answer that question about whether it would still be useful if my “tour” took me into hilly country. The answer, I’m pleased to say, was a resounding “yes”.

Would I recommend this event to others? Absolutely! It’s well run and well supported. If challenging yourself to a long-distance hill climb group ride through beautiful countryside sounds good to you, this would absolutely be the way to go.

For myself, I’m not sure whether I’ll return. I enjoyed myself a great deal, but I also found the answers I came for. It’s a very long weekend away otherwise.

But then when I think about that long, curving downhill sweep… Maybe…

Got Your Back by Erin Wade

Comfort is one of the hallmark features of riding a recumbent trike. When one moves from an upright, or Diamond Frame (DF) bike to a recumbent trike, one of the things one realizes fairly quickly is all of the things that don’t hurt anymore when riding. Your hands aren’t numb from resting on the handlebars, your neck and shoulders aren’t sore from being hunched over on the road bike, and the idea of chamois butter never occurs to you any more.

For this reason I was rather surprised this summer when I started to experience pain in my lower back on a ride. I was on what is, for me, an extended ride of about 50 miles, but the pain started about 25 miles in. I took a couple of breaks on the ride to get off and move around, which did help, but the issue kept recurring. As I thought through it while riding it finally occurred to me to consider that the seat mesh might need to be tightened. So I found a spot to pull off to the side of the road and I gave them a yank, and sure enough, I was able to tighten them and regain the lumbar support that the mesh seat had lost. The seat instantly felt better, and I was comfortable for the remaining 8-10 miles of that ride.

3A4DB915-4E4A-4576-ABAD-821EEE7D4236.jpeg

Seat straps

But while I initially thought all was better, what I found was that it was now a recurring - and seemingly worsening issue. Over subsequent rides I found myself stopping at least once or twice per ride to adjust it, and during the Freemondo I had to stop and adjust it at least four times over the 63-mile course. Given that I had other extended rides coming up, I wanted to find a way to address the issue.

My Catrike Expedition is only three years old - I received delivery of it in July of 2019 - but I have put over 6000 miles on it since it arrived. It seemed that I’d perhaps reached the lifespan of the original seat. Before I made that assumption - and dropped the $200 or so for such an item - I decided to take the question to the Catrike Owners Group on Facebook. I got several suggestions for addressing the issue - means for repairing rather than replacing the seat, and multiple suggestions for a product that I’ve seen referenced before - the Ventisit.

But one suggestion (thanks John!) struck both my curiosity, and my simplicity and cheapness genes all at the same time. The idea was to take bits of pool noodle and cut them to size to put inside the seat in the general lumbar region. This idea was not only inexpensive and easily obtained (e.g. Amazon or swing by your local big box store), but actually, for me, free and at hand as my offspring had brought home a batch of them a couple of years ago. They’ve been occupying space on the back porch for a while now - I figured I might as well put one of them to work.

This was a simple operation - I got a noodle and a utility knife, eyeballed the size of the space between the space frame bars on either side of the seat, marked it with my thumb, and cut it (yes - you should probably measure twice before you cut once, but I was rich with pool noodles, so I threw caution to the wind). In eyeballing I did make it a little long, figuring it was going to need to press against the bars to stay in place.

B733E544-FB47-4A7C-B42D-1750C488A2B9.jpeg

Eyeballing things

Once I got it cut I inserted it into the space between the front and back of the seat. I had to loosen the straps just a bit to do this. I positioned it in the general lumbar region by feel, getting on and off the trike a couple of times. Once it was in place I tightened the straps back up and took it out for a ride.

1EDB0401-A306-4984-9F5C-110C5AD35590.jpeg

Noodling it into place

That first ride was a bit of a revelation - it felt much better! But over the next couple of outings I began to notice that, after a few miles, the noodle was acting as a pressure point. Now instead of a dull ache I had a sharp pain in that spot, which was not a reasonable trade-off. I tried moving it up and down a bit, which helped, but only temporarily. And stopping periodically to move the noodle wasn’t really any better than stopping periodically to tighten the straps.

What I reasoned, though, was that it was becoming a pressure point because it was too small - a bulge in a single, small vertical area. So I went back and cut a second section of noodle to put in with the first one. This made for a larger lumbar area, and reduced the amount of pressure on any single point in my back.

You can see where it falls for me on the seat - the noodle is where you can’t see thru the mesh:

FFD7B024-91ED-47AC-89BC-333B454A8A45.jpeg

The non-see-thru part is where the noodle is at.

All of this experimenting happened between the Freemondo and TŌSOC, so that second extended ride through scenic Ogle County was the testing ground for this approach.

The long and short of it: It works!

I got through the 62-miles of TŌSOC without any significant back pain, and without needing to adjust the seat. The noodles seem to stay in place without issue, so once you have them positioned where they work for you it seems to be essentially a set it and forget it arrangement. And it’s far less expensive than alternative solutions.

TL/DR:

In sum: If you are finding that you are experiencing lower back pain while riding your recumbent trike, you may be able to address the issue quickly and inexpensively by cutting pool noodles to size and inserting them in the space between the front and back sides of the seat. Some things to be aware of with this:

  • There are different sizes and shapes of pool noodle. I used ones with a sort of clover shape to them because those were what I had at home already. You may find that a different size or shape works better for you.
  • You may need to insert one or more of them into the space depending upon your height and how the noodle impacts your back.
  • Expect to spend a bit of time adjusting the location between and during rides while you dial-in the correct position for you.
  • The trike I did this with is my Catrike Expedition. It’s clear to me that it would work nicely with other trikes of a similar frame and mesh seat design - for example, I can easily see using this on my Catrike Pocket if I needed to, as it’s a very similar design. Your mileage may vary depending on how your machine is designed.

TŌSOC 2021 by Erin Wade

Yesterday - Saturday, September 26th - was the Tour of Scenic Ogle County, or TŌSOC. This is an annual event put on as a fundraiser for the Village of Progress, a sheltered workshop in Oregon Illinois.

I rode this event last year (and took an abundance of pictures along the way, so follow the link for those details - it really is scenic) but it was a virtual activity owing to the pandemic.

This year the event was on for real, and fully supported. This is a relatively casual event - No timing chips, no one tracking and later posting your times. There are start times for each of the routes - 10, 32, and 62 miles - but this appears to be simply to ensure that the supports are available and that the supporters can be done within a reasonable period of time.

For my part, to get there by the 7:30 AM registration time I had to get up in the wee hours of darkness to have time for breakfast and to pack things up. This schedule had me enjoying the sunrise and the morning mist of the Midwest on my way to the event. The experience reminded me of early mornings with my Dad going fishing - the hushed tones of activity in the early hours, the quiet ride there… good feelings all around.

I actually managed to get there a little too early - registration was at 7:30, but in my head it was at 7, and I didn’t re-check before I left, so I arrived accordingly. Still, better to be a little early than to be late, and they did start registration a little early as well, so it all worked out.

It’s a beautiful course, riding through multiple types of territory, from the small-town settings of Sterling, Grand Detour, and Mount Morris, through river country and the hills those waterways cut into the landscape…

Yup - Hills in Illinois

Yup - Hills in Illinois

To the Nachusa Grasslands and the opportunity to see Bison (though I’m at a zero for success on that front now two years running). There are multiple other preserves along the way, including the Bald Hill Prairie Preserve (though I think nowadays we’d say Follicularly challenged hill) and the Silver Creek Biodiversity Preserve.

What all of this means is that you have an array of scenery to ride through instead of the swaths of corn and soybeans that people sometimes think is all of Illinois.

You also spend part of your time within view of the Byron Nuclear Power Plant, which I cannot help but take pictures of every time I ride past it…

Byron in the distance

Byron in the distance

Byron again - it’s everywhere!

Byron again - it’s everywhere!

I’m not attracted to the plant itself, per se, but I think that it looks so incongruous against the rural backdrop that it draws my attention. There you are, riding along seeing barns and corn and trees and then BAM! Cooling towers. And you see it a lot during the first third of the ride, because it’s visible from quite a distance. Heck - I live 32 miles away from it, as the crow flies, and I can see the steam the towers put off from my house.

And the old computer game fan in me cannot refrain from including this shot:

Will I survive it???

Will I survive it???

I’m pleased to say that I tackled it successfully and not even once did I contract dysentery). To be fair, tho, I was only on it for about about a mile, so…

The wind picked up towards midday, coming straight out of the west. This made about half of the last 12 miles or so especially challenging - pushing against you just as your legs are at their weakest. But then again, that’s life on the prairie - as fall comes in, the wind kicks up like it’s just been waiting it’s turn.

This was a well-supported event, with multiple rest stations along the way, all with water and snacks freely available at reasonable intervals. At least a couple of these also offered restroom stops, which is much handier than the alternative of looking for a relatively private area of cornfield (which I would certainly never do).

And there’s food at the end - an old-fashioned midwestern-style potluck - to let you fuel back up for the ride home.

The ride is definitely set up as a road-touring event, even for the 62-mile course, so it attracts cyclists at all skill levels and ages. This means that wherever you are at, you are encountering people at a similar level of capability. I was, however, still the only person I saw on a recumbent trike. I’m content to be different (which happens regardless of whether I choose it), but I’m still waiting to see our machines catch on here outside of the more populated areas.

If this sounds like your sort of thing, I can recommend it - the ride is always set for the last Saturday in September, and the funds go towards a very good cause. Check it out!

Freemondo 2021 by Erin Wade

Last Sunday I rode in the Freemondo, a group cycling event put on by Mead’s Bike Shop in Sterling, Illinois.

In 2017, 2018, and 2019, I’d ridden in a similar event - the Farmondo, of which this is essentially a variation. There was no Farmondo in 2020, for obvious reasons, and this year’s event was different. In some ways it was scaled back - there were no official timers, for example - but also just different. The previous event offered three distances - 20, 43, and 80 miles - all on pavement. This year offered three distances, one at 25, one at ~40 on mixed surfaces (I assume that meant gravel, so I stayed far, far away), and one at 63 miles. I went with the 63 mile loop.

The ride was originally listed as unsupported, so I spend a bit of time the day before prepping my trike. However, I was pleasantly surprised to find that there were a couple of break stations along the way, one at about the halfway point, and one closer to the end. I availed myself of the first, but not the second (turns out that Mead’s announced this on Facebook, but due to the vagaries of their newsfeed algorithm I saw it after the ride…). So: Mead’s went above and beyond for the event.

One of the things I knew would be the case from the prior events was that this would take me through hill country - Sterling, Illinois, where the ride starts, is on the Rock River, and the course itself takes you within four miles of the mighty Mississippi at its westernmost point - this gives them many, many stream and creek (pronounced “crick”, thank you very much) tributary valleys to take you up and down. Of course, this time around it was an additional 20 miles of hills, but it is what I expected. Ultimately this meant 790 feet of ascent, which is more than 200 foot more than I’ve been able to find on my longest ride in the relatively flat territory around home.

The other thing this means is that you get to ride through some of the most beautiful territory northern Illinois has to offer. Looking for old barns?

Old girl with a new roof

Old girl with a new roof

Fading away

Fading away

almost gone

almost gone

Of course, as you can see, most are in a state of progressive decline, which is typical for our area as it’s largely moved away from animal husbandry. But sometimes you see something a little different, like this old salt box style barn:

Salt box

Salt box

A couple of old windmills in fairly good repair were in evidence as well:

What did she power, I wonder?

What did she power, I wonder?

Old, but intact.

Old, but intact.

And being in river country means that the grid pattern of central northern Illinois has to be abandoned, lending itself to twisting and winding roads.

It’s a long and winding…

It’s a long and winding…

Undulations

Undulations

But maybe my favorite new treat for this ride was this:

Is that a…?

Is that a…?

I could see as I rode up on it that it was a covered bridge. I am aware of a couple of these in our broad region, but not this one. The encounter was brief, of course, but added an additional bit of novelty to the ride.

Yup - covered bridge

Yup - covered bridge

Partway thru

Partway thru

And it appears, from the plaque on the front of it, that this is a relatively new structure.

Plaque

Plaque

That I think something built twenty years ago is new probably says more about me than the bridge, but we don’t need to discuss that…

Overall, they do a wonderful job of laying out the courses for these events. After all, part of the reason that many of us go out riding in the first place is to be in nature and enjoy the scenery - and this route did not disappoint.

One of the things that seemed to be be case is that, because it was a smaller event, the participants were a more concentrated group. In prior events, you’d see a variety of bike types. This time around I passed one person on an e-bike, and otherwise everyone I saw was on one type or another of upright road bike. This meant that I was (as I knew I would be) at a competitive disadvantage on my trike. My Catrike Expedition comes from the factory weighing in at 35 lbs, and I’ve got at least another five pounds of gear in or on it. So - I’m probably 15-20 lbs heavier than everyone else I’m riding with, and I’m also on a machine with the greater rolling resistance of a third wheel. Plus, while trikes are great downhill, they are more challenging to ride on the way back up - you don’t have the option of standing up on the pedals to add your weight to the downstroke.

These are, of course, all the things I’m reminding myself of as I am passed by one person or another while I am crawling my way to the top of yet another rise. I’ll admit that it’s a little hard to keep from getting disheartened when that occurs - though to the credit of the other folks on the ride, everyone was kind and encouraging as they went by. But I’d be lying if I didn’t admit that there was a moment or two in there where I thought “now if I was on a lightweight road bike like that…”

But then I realize that I already own a lightweight road bike. There, in my garage, hangs a 1987 Cannondale SR400 - this is an aluminum road bike weighing in at about 22 lbs. It was my primary ride before the first trike - the Catrike Pocket - entered our stable. It was there and I didn’t even consider using it, in part because since I got that first trike, I find that I don’t really enjoy riding the Cannondale any longer.

There is an argument to make for looking at your cycling machines as tools, and having different ones for different purposes. The Expedition is essentially the trike equivalent to a touring machine - relatively fast, as trikes go, but built to be able to carry equipment comfortably over extended distances. It is probably not the ideal machine for the type of ride I was engaged in - and a lightweight road bike almost certainly is. But I look at these events as a way to challenge myself. When I look back and see how I did comparatively speaking, if I switch to a road bike for this event and I’m much faster than usual, the faster is going to be largely due to the different machine rather than to any accomplishment of my own.

So how did I compare to myself? Well, I’ve ridden similar distance routes on 2 occasions - the Tour of Scenic Ogle County (TOSOC) virtual ride last year, which came in at 62.27 miles, and a 61.59 mile ride in Lee county last month as part of my training for these rides. I finished TOSOC in 4:46:39 with 27:34 of stopped time, for an actual ride time of 4:19:05. My ride last month came in at 4:23:07 with 45:02 of stopped time, so functionally 4:01:05. (Times are hours:minutes:seconds)

On the Freemondo, which registered at 63.05 miles for me on Cyclemeter, I came in at 4:44:30 with 29:14 of stopped time, for an actual riding time of 4:15:16. So - at least consistent across the distances.

Looking back across the three rides, I was surprised to find that TOSOC actually had more climbing to it than the Freemondo - 1062 feet vs 790 feet, respectively. I recall the hills for that event as well - it’s also through river country, though a different area. But I don’t recall them as feeling quite so challenging. It’s possible that they have a less significant grade to them, so didn’t seem as challenging. It’s also possible that my perception of them was that they were less significant because, it being a virtual ride, I wasn’t being passed while climbing them.

So, overall, when comparing myself to myself, I think I my results turned out to be respectable enough. It was a great ride through beautiful country, and I’m thankful for the crew at Meads for putting it on. And let me offer a thanks to Pete who caught up to me in the last five miles or so of the ride, and who could have easily left me behind based on his very nice machine and on how quickly he caught up with me, but chose to join me for that last section. I’m a solitary rider by nature, but the company was appreciated as I eked out those last few miles.

Preparations by Erin Wade

As I’ve mentioned here recently, I’ve been working my way up to a series of (for me) extended distance rides over the past month. The first of those rides - the Freemondo - is running tomorrow.

The Freemondo is a scaled back pandemic-era variation on the Farmondo event sponsored by Meads Bike Shop. I’ve ridden in the Farmondo in the past, in 2017, 2018, and 2019. I’d have ridden it in 2020 if that had been an option, but like so many things in 2020, it didn’t happen.

When I say “scaled back”, I mean that this time around it’s an unsupported ride - e.g. no trucks bringing up the rear to help stragglers or people in distress and, I presume, no formal break stations. In other ways its a different event than in the past, with the longest loop being considerably longer - 62 vs 43 miles - than in prior events, and they are also offering up a mixed surface loop. I, of course, have no truck with gravel , so I’ll be riding the 62-mile, all asphalt option.

That distance is towards the outer edge of what I usually ride, but I’ve hit similar distances over the past few weekends, so my conditioning should be up to the ride. I say should because my experience in the prior events by this group suggest that, if there is a hill in the region, the organizers will find it… but then, that’s part of the challenge.

Because the ride is unsupported, it seemed reasonable to go over the trike and go thru my bags and make sure I was ready to deal with any breakdowns, etc. This meant being sure that I had tools to change a tube, and being sure that I had a tube to change in the first place. Looking in, I found that I did have my tire levers, as well as my Kool Stop Tire Bead Jack (if you don’t have one of these, I highly recommend it - makes short work of the task of re-seating a tire on a tight, small diameter wheel). But I found that while I had two rear tubes, I only had two front tubes. Given that I have only one rear, and two front wheels, it seemed reasonable to add a third front just in case. This was particularly the case because I don’t have any patches to bring along (tho those are now on my shopping list).

I also spend some time at grocery store picking up fresh fruit - Apples and Peaches for me - to eat along the way. As I’ve been working out to longer distances, I’ve found the sugar and water content in the fruit to be helpful support (and frankly extra delicious) for longer rides. I also pack along a couple granola bars and extra water.

And as I was looking at the trike and going thru the equipment, I decided that things were looking a little shabby. I ride a lot, and the trike was dusty and dirty. I’m guilty here - often when I consider cleaning it up, it’s an activity which competes with riding, and I usually just choose to ride. But now other people will see it, so I broke out the bucket and wash mitt…

Bathing Beauty

Bathing Beauty

…And the wash also provided the opportunity to do a once-over on the trike and all its systems. This is something that I do in a general way ahead of longer rides, but not in this detail. Turns out that was a good idea, because I found this…

I’m feeling a little disconnected…

I’m feeling a little disconnected…

I don’t know how long that mounting bolt has been missing. I had noticed that the rack was making noise, but then it always makes some noise - I (apparently) didn’t register it as being noisier than in the past.

I combed thru my bins of parts and was able to find one (and only one) bolt to fit that spot. That, along with a washer and a little Loctite…

So much better!

So much better!

…hopefully will keep this from being an issue going forward.

If I’ve been regularly riding these longer distances, why the need for this preparation ahead of time? It’s a combination of location, and that unsupported ride status. When I ride an extended distance ride that starts from my driveway, I’m never really more than 15-20 miles from home at any given time. This means that help, if it’s really needed, is just a phone call away. That won’t be the case on this ride.

So - preparation. I’m confident it will go well, but as they say: fortuna favet paratus (Fortune favors the prepared - but it’s so much fancier in Latin).

Follow-Up - iPhone 12 Pro Max & Cyclemeter - Screen Dark by Erin Wade

Last time I spent some virtual ink on how an iPhone 12 Pro Max handles when placed in the role cycling computer. This is the largest of Apple’s phone options and, as such, also has the largest battery. This makes the phone a bit heavier, but with the upside of it being able to hit the end of a 3 1/2 hour-plus ride, running Cyclemeter with the screen lit the entire time and playing an audiobook, with a 50% charge.

Cyclemeter does provide an option to use audio alerts and has an Apple Watch app which can provide most of the visual feedback that the phone does. These can be used in place of the display on the iPhone, which gives you the option of turning the screen off and further extending the battery life of the device. I’ve used this option multiple times in the past, particularly on longer rides using earlier models of the iPhone, where the battery life wasn’t quite up to an 3+ hour trip with everything running.

After doing and writing up the testing for that post I found I was curious to see just how much of a difference it would make if I ran an extended ride with the screen dark, relying on the audio alerts and the watch for feedback. So this past weekend I decided to give it a try.

Setup was similar to the prior test: Phone started out fully charged, using Cyclemeter to track the ride, with the Apple Watch app serving as a remote control. And it played an audiobook throughout the ride (Quicksilver - the first book of The Baroque Cycle by Neal Stephenson. It’s also what I was listening to last week. He writes them long…). The only significant change in setup was that I left the screen off - dark - for the ride.


Enjoying this post? Check out our Cycling page for links to other cycling articles on Applied Life


Now I should qualify that and say that I did take some pictures along the way, so the screen wasn’t always off, but this was the only time I activated it, and it’s pretty typical of me to take some pictures on a ride, so this also represented usual use.

The ride itself was longer - both in distance and time - as part of my effort to build distance ahead of fall riding events. It came in at 61.59 miles, and took me 4 hours, 23 minutes of riding time, as well as an additional cumulative 45 minutes of stopped time (two snack breaks and some picture opportunities). Cyclemeter ran throughout.

All told that’s 5 hours, 8 minutes of activity. So where was the battery at when I rolled back into the driveway? Well:

Battery @ ~ 60%

Battery @ ~ 60%

We came in right around 60% left on the charge at the end. This compares favorably to the 50% I was at after about 4 hours in the prior test with the screen on (tho both outcomes are pretty good). If the charge percentage indicated on the device can be trusted, it suggests that you can get about 8 hours of continuous use at this combination of tasks with the screen on, and about 10 hours with the screen off. That’s a 20% improvement just by turning the screen off. And combined with the audio alerts and the watch, it is still possible to get regular feedback for the ride - you aren’t really giving much up.

This means that a fully charged iPhone 12 Pro Max is going to be capable of functioning as a bike computer even for long-distance rides without the need for additional backup battery support. To be clear, I’d never suggest buying one explicitly for that purpose alone - if you are just looking for cycling computer there are far cheaper options. But most of us at this point have phones, and I’d bet that the majority of us take them along when we ride, for emergency support at minimum. So, when you are deciding on which phone to buy, this might be a consideration to keep in mind.

Ok - time to ride! But I think I’m gonna leave that backup battery behind…